Rescue Wulbren
Rescue Wulbren is a quest completable in Act Two of Baldur's Gate 3. It can initially be started in Act One after completing the quest Save the Grymforge Gnomes and discovering that the other gnomes were taken to Moonrise Towers. Otherwise, it can be started when encountering Wulbren in the Moonrise Towers Prison.
Spoiler warning: The following content contains unhidden spoilers. Read at your own risk. |
Objectives[edit | edit source]
Objectives and journal entries may vary pending player decisions and outcomes.
- We freed the deep gnomes in Grymforge, but more of their kin were taken to Moonrise Towers - including their leader Wulbren. We need to find and rescue them.
- We learned from Barcus that his friend Wulbren is being held captive in Moonrise Towers. If we free him, Barcus has offered to make us something remarkable.
- We agreed to save Barcus' friend, Wulbren, and the Ironhand gnomes he leads, from Moonrise Towers.
- We found Wulbren and his fellow gnomes. They won't last long in Moonrise Towers without our help.
- Wulbren has plans to break out, but he needs our help. The Warden confiscated their weapons, but anything that can break rock will do. Whatever we find, we need to pass it to him - discreetly.
- The gnomes have broken free and are on their way to rescue the tieflings. We should watch their backs.
- The gnomes are making their escape through the tunnels, but they're not safe yet. We need to watch their backs.
- The gnomes are making their escape through Moonrise Towers itself. Without our help, they'll surely die.
- Wulbren fled Moonrise Towers on foot - hopefully he'll find refuge somewhere.
- Wulbren fled Moonrise Towers by boat - hopefully he'll find refuge somewhere.
- Wulbren fled Moonrise Towers - hopefully he'll find refuge in Last Light Inn. Barcus will be thrilled. We should check up on them.
- We found Last Light - a safe haven in the darkness. Perhaps Wulbren is here.
- Wulbren has arrived safely in Last Light. We should let Barcus know.
- We told Barcus the good news. He ran to find Wulbren immediately.
- Wulbren is dead. We should tell Barcus.
- We've defeated Ketheric. Wulbren has some thoughts. We should speak to him at Moonrise Towers.
- Wulbren treated us coldly after his rescue, but rewarded us anyway.
- Relieved that Wulbren is safe, Barcus rewarded us.
- Wulbren is dead.
- We never found the prisoners in Moonrise Towers.
- We abandoned the gnomes to their fate.
- Last Light was destroyed. Hopefully Wulbren escaped.
- We left the shadow-cursed lands without telling Barcus about Wulbren. He will likely assume his friend is dead.
- Wulbren apologised for how he acted at Last Light. He told us the Ironhand Gnomes plan to save Baldur's Gate, and he wants us to be part of it.
Walkthrough[edit | edit source]
If Save the Grymforge Gnomes was completed, then the party knows about Wulbren due to the Ironhand Gnomes explaining that he was kidnapped and sent to Moonrise Towers due to his knowledge of runepowder. The tieflings are also present if Save the Refugees was completed with the tiefling refugees and the Druid Grove protected. Otherwise, the party can simply learn about Wulbren by exploring Moonrise Towers Prison. If the tieflings in the prison are spoken to first, they explain that the gnomes are up to something, but they don't know what.
Finding Wulbren[edit | edit source]
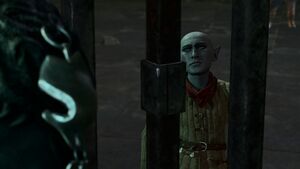
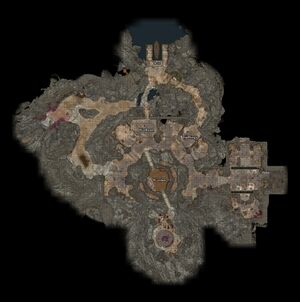
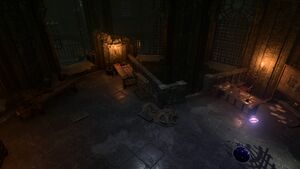
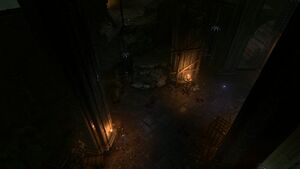
To find Wulbren’s location, the party must go downstairs into the Moonrise Towers Prison (X:-173, Y:-194). The entrance to the prison is east to the audience chamber, or it can be accessed outside by the docks. From the stairs entrance to the prison, go west and there is a hallway with prison cells. Move northwest and Wulbren is in the fourth cell to the right (X:569, Y:-626).
If the party attempts to speak to Wulbren, they are initially confronted by a guard, who says that no one is allowed to talk to the prisoners, who are property of Balthazar. The party has three options to respond with:
- [DECEPTION] I have permission from Balthazar. Ask him. (DC 14)
- [PERSUASION] What are the prisoners going to do? Talk me to death? (DC 14)
- My apologies- won't happen again.
Additionally, if the party slips into the cells by Misty Step, Gaseous Form, or other means, the guards don't confront the party.
Wulbren is initially suspicious of the party and why someone who walks around the prison like they own the place would want to help him. If Barcus was saved in Rescue the Gnome and subsequently rescued with the Grymforge gnomes, the party has the option to say Barcus sent them. Wulbren is persuaded without any checks needed. Otherwise, Wulbren can be persuaded by saying that they know the tieflings in the prison (DC 10), that the Absolute has no control over them (DC 6), or that they're a Flaming Fist secret agent (Deception DC 6).
Fleeing the Towers[edit | edit source]
Leaving by Boat[edit | edit source]
The party can choose to follow Wulbren's plan to escape, which involves giving him an object that can smash rocks. This can be any item that causes bludgeoning damage, such as a generic Mace; it has to be a weapon, though, and bringing him a regular Hammer will not advance the quest. Wulbren's Hammer (X:574, Y:-646) can be found by climbing up the iron ladder in The Warden's office. This area is guarded by a scrying eye and is considered trespassing, so the party has to either sneak or deceive/bribe their way out of being sent to jail. If the party gets Wulbren's hammer specifically, he's extremely gratefully and assumed he'd never see it again.
Once a bludgeoning weapon has been acquired, go back to Wulbren and talk to him. This initiates a trade screen where the item can be "donated" to Wulbren. Alternatively, the weapon can be thrown into Wulbren's cell and he will pick it up. Speak with Wulbren and either tell him to start the escape attempt now or to wait until the party is ready. If a long rest or fast travel occurs at this point, the gnomes begin the escape without the party. If the party is simply standing around when Wulbren breaks the wall, the guards become hostile and combat starts.
One strategy to avoid combat is to climb up (or Misty Step/Fly/etc to) the rocky ledge to the west of the cells. Climbing the ledge leads to the back area of the cells, for both the gnomes (X:568, Y:-612) and the tieflings (X:600, Y:-617). Have two characters who can break the walls down with Force damage and one who can cast Darkness. Split the party up so that two characters are by the boat (X:575, Y:-576) and ready to attack the brittle chains, one is by the tiefling wall, and one is by the gnome wall. Attack both walls until they're nearly destroyed. Attack the gnome's wall and when Wulbren yells "RUN!" walk into the cell and cast Darkness. Then run to the boat to aid the characters breaking the chains while the character at the tiefling wall breaks it down and runs to the boat as well. When all the prisoners are at the boat, speak to Wulbren and accompany him to his next destination.
The party can suggest going to Last Light Inn if they've already been there. If the party has not, then selecting "I don't - but I'll join you on the boat. We'll see where we end up." sends the prisoners to the Last Light and the party gets a scene similar to what they'd get from entering Last Light for the first time.
Leaving by Foot[edit | edit source]
The prisoners can be forced to abandon Wulbren's plan and go through the Towers on foot by using a lever in the Warden's office. There are multiple levers behind the warden and each one opens the door to a specific cell, and the large lever on the floor starts an alarm and opens all of them. If the levers are used, the prisoners flee and combat starts, forcing the party to fight their way through or let the prisoners die. Fight all of the enemies, then follow the prisoners to the docks, where another fight breaks out. After this battle, the prisoners move to the north and towards the Toll House, disappearing. They safely reappear at Last Light.
Cleaning Out the Prison[edit | edit source]
As always, the party can resort to murder. If the prison guards are murdered, the rest of the Tower does not become hostile. As such, the party can safely clear out the prison before dealing with the gnomes to safely ensure everyone survives the escape. An easy way to do this is to murder the Warden in her office, then wait. Enemies patrolling nearby will intermittently walk in and can be slowly picked off. Once they're all dead and the Scrying Eyes killed, give Wulbren his hammer and the prisoners can safely escape without a worry of enemies.
Returning to Last Light[edit | edit source]
Once the prisoners have escaped, either go with them to Last Light Inn or fast travel there. Speak to Barcus to resolve the quest, or Wulbren if Barcus is dead.
Time Limit[edit | edit source]
While this quest is not limited by long rests, it is worth noting there is a story limitation on the quest. If Find Ketheric Thorm's Relic is completed, then once the party returns from the Shadowfell, this quest automatically ends. When this happens, the quest says that the other prisoners were never found.
Rewards[edit | edit source]
- given by Barcus Wroot.
Notes[edit | edit source]
- As of Hotfix 6, taking the gnomes through Moonrise Towers has a number of odd glitches. Once the prisoners exit the prison to the docks, if any of the prisoners are left in the prison before the party leaves, even if the prison has been cleared of enemies, then they remain in the prison and cannot be moved or talked to. If the party fast travels or long rests, then they show up as dead.


