Modding:Texture formatting
| This page is a modding page, and follows its own rules and standards separate from the rest of the wiki. |
This tutorial is from atmosfur
This guide has several sections related to the texture formats that BG3 uses, and how to export and prepare them in several programs. This guide is mainly about maps baked from custom 3D models and does not include skin textures currently.
The texture maps this guide covers are:
- _BM (Basecolor Map)
- _NM (Normal Map) How to bake a normal map in Blender
- _MSK (Mask Map)
- _PM (Physical Map)
Additionally, to create a PM you will need:
- AO (Ambient Occlusion Map)
- Roughness Map
- Metallic Map
This guide also includes a section on setting up maps by hand in GIMP if you do not have Substance Painter, or edited your textures by hand.
Substance Painter Export Preset[edit section | visual editor]
In case the BG3 export presets for Substance Painter do not work for you, or you have a pre-Adobe version of Substance Painter, here's how you can set up your own export presets in Substance Painter. I personally divided these into two separate presets due to my Basecolor and Mask map both pulling from different layers of basecolor information.
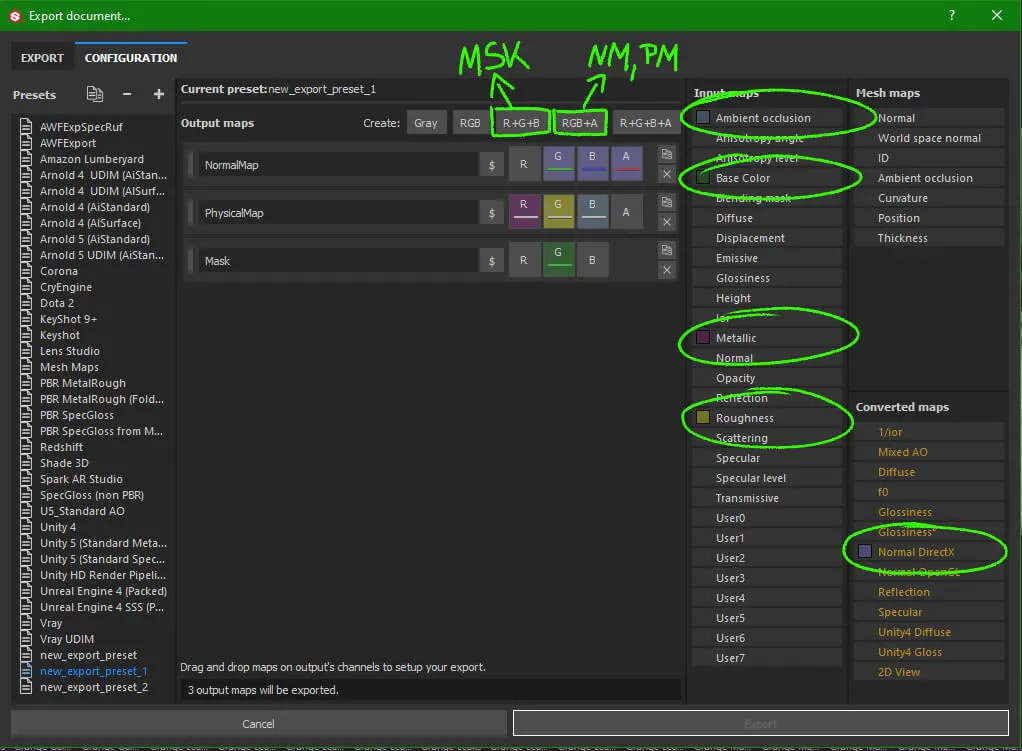
1. In the File -> Export Textures window, select the Configuration tab.
2. Click the small + icon next to "Presets" on the left side to create a new preset.
3. Create two R+G+B+A Output maps and one R+G+B Output map for the NM, PM and MSK map respectively.
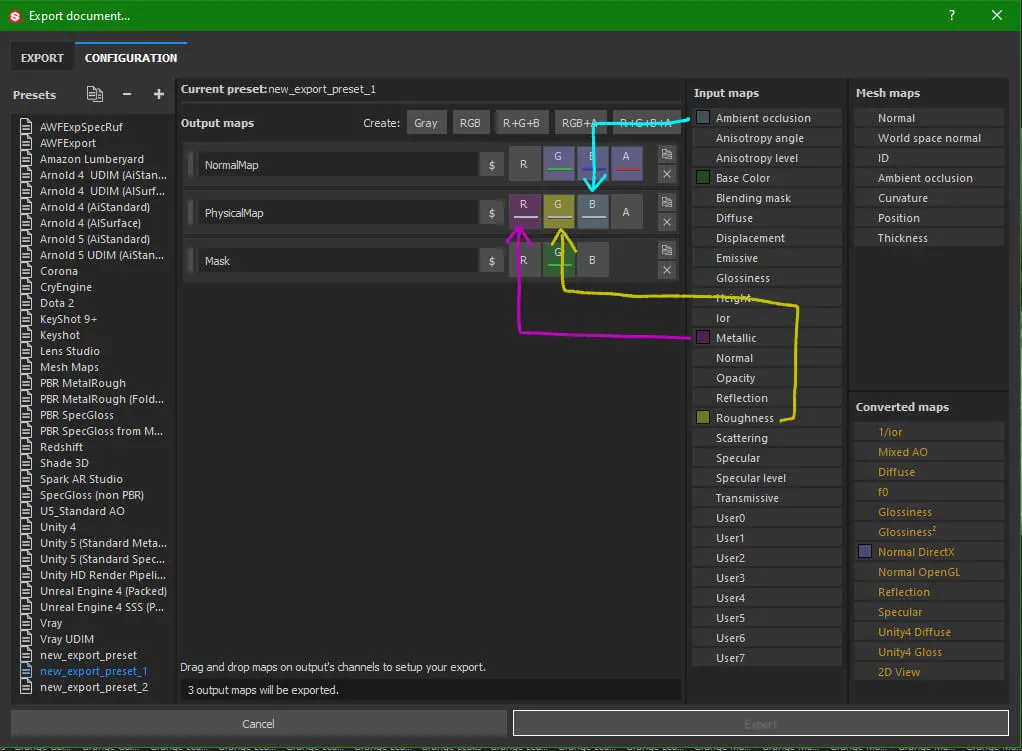
4. On the right, you will see which Input maps you will need to drag and drop onto the Output maps R,G,B and A slots.


5. Drag and drop the Input maps onto the corresponding slots in the Output maps tab:
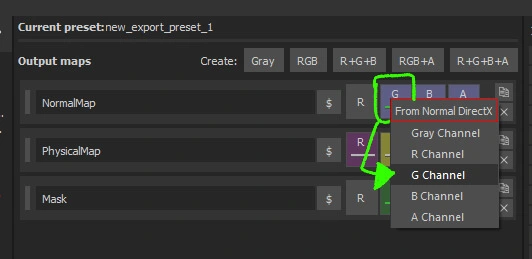
Normal Map (Make sure to use the Converted maps - NormalDirectX):
R: Leave this empty
G: NormalDirectX, select Green channel
B: NormalDirectX, select Blue channel
A: NormalDirectX, select Red channel

Physical Map:
R: Metallic, select Gray channel
G: Roughness, select Gray channel
B: Ambient occlusion, select Gray channel
A: Leave this empty

Mask Map:
This is specifically for horn textures, you will need to check a vanilla mask of whatever you are texturing to see which channel has the mask for customizing color. In this case, horns only use the Green channel for that.
R: Leave this empty for horns
G: Base Color, select Green channel
B: Leave this empty for horns
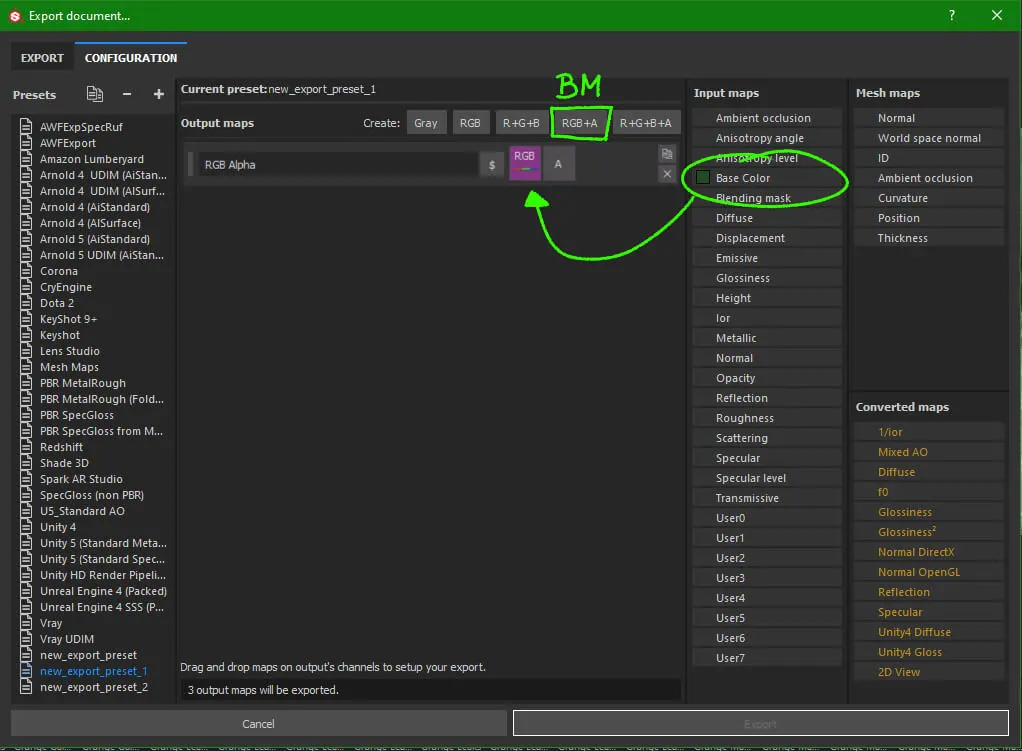
6. As mentioned, for the Basecolor Map I create a new export preset. For this you just need one RGB+A Output map, and drag the Base Color Input map onto the RGB slot.

7. Go back to the "Export" tab of the window and select your newly created export presets from the drop down at the top, then just hit export. Double check your created textures in a program that lets you view channels (such as GIMP or Photoshop) to make sure they all got assigned correctly. You will still need to convert your textures to DDS now.
Creating the DDS files[edit section | visual editor]
Simple Conversion with Paint.NET[edit section | visual editor]
If your textures have all their channels set up correctly already, you just need to export them with the correct DDS compression in the editing program of your choice. I'm using Paint.NET as an example.
Basecolor Map Settings:
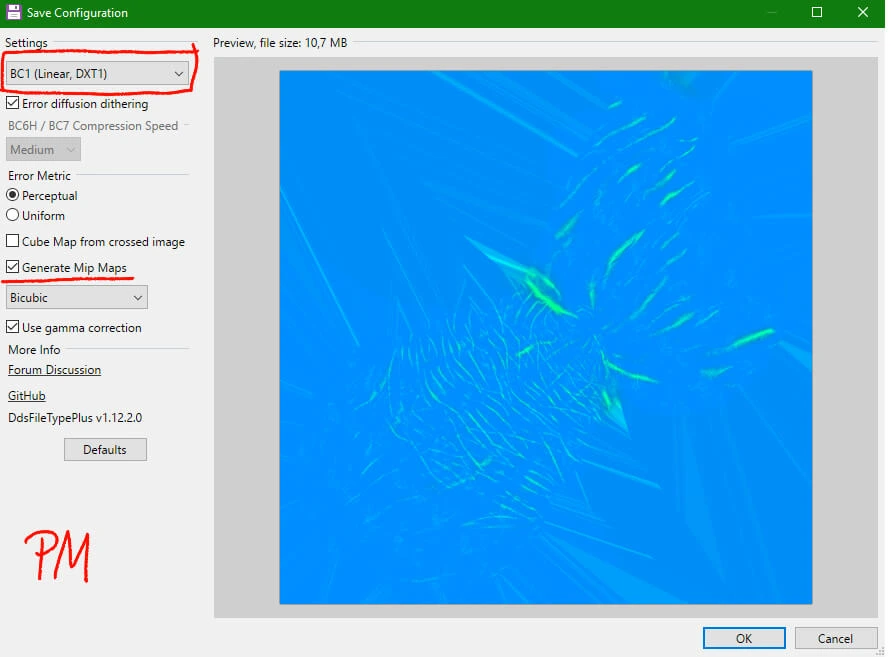
Choose BC1 (Linear,DTX1), make sure Generate Mip Maps is checked

Mask Map Settings:
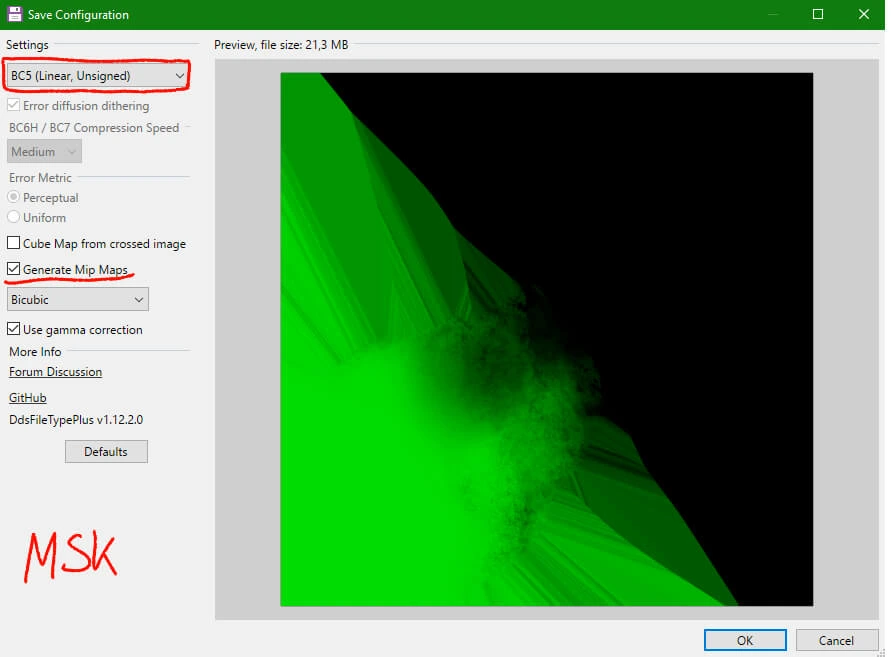
Choose BC5 (Linear, Unsigned), make sure Generate Mip Maps is checked

Normal Map Settings:
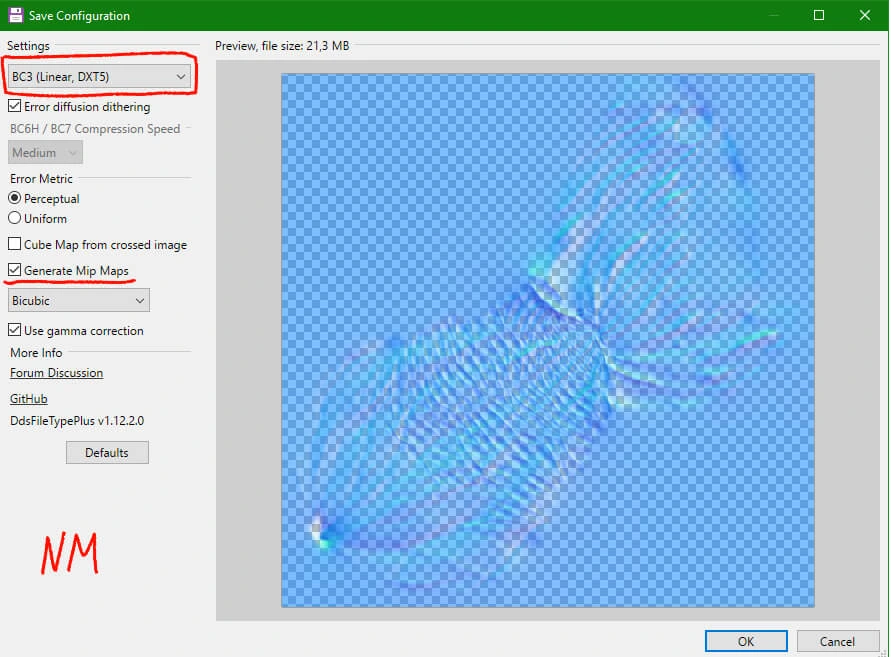
Choose BC3 (Linear, DTX5), make sure Generate Mip Maps is checked

Physical Map Settings:
Choose BC1 (Linear,DTX1), make sure Generate Mip Maps is checked

Manually Assign Channels with GIMP[edit section | visual editor]
If you've created your textures in a program other than Substance Painter, you might need to manually assign the correct channels to your maps. Your best choice for doing this is probably GIMP, and I tried to make this part of the guide as beginner friendly as possible if you've never used the program before.
I recommend working on one map type at a time if you're following along with this guide. Again, this uses a horns texture as an example, the way other textures are set up in the game might be different, and it does not touch on the way skin textures are set up.
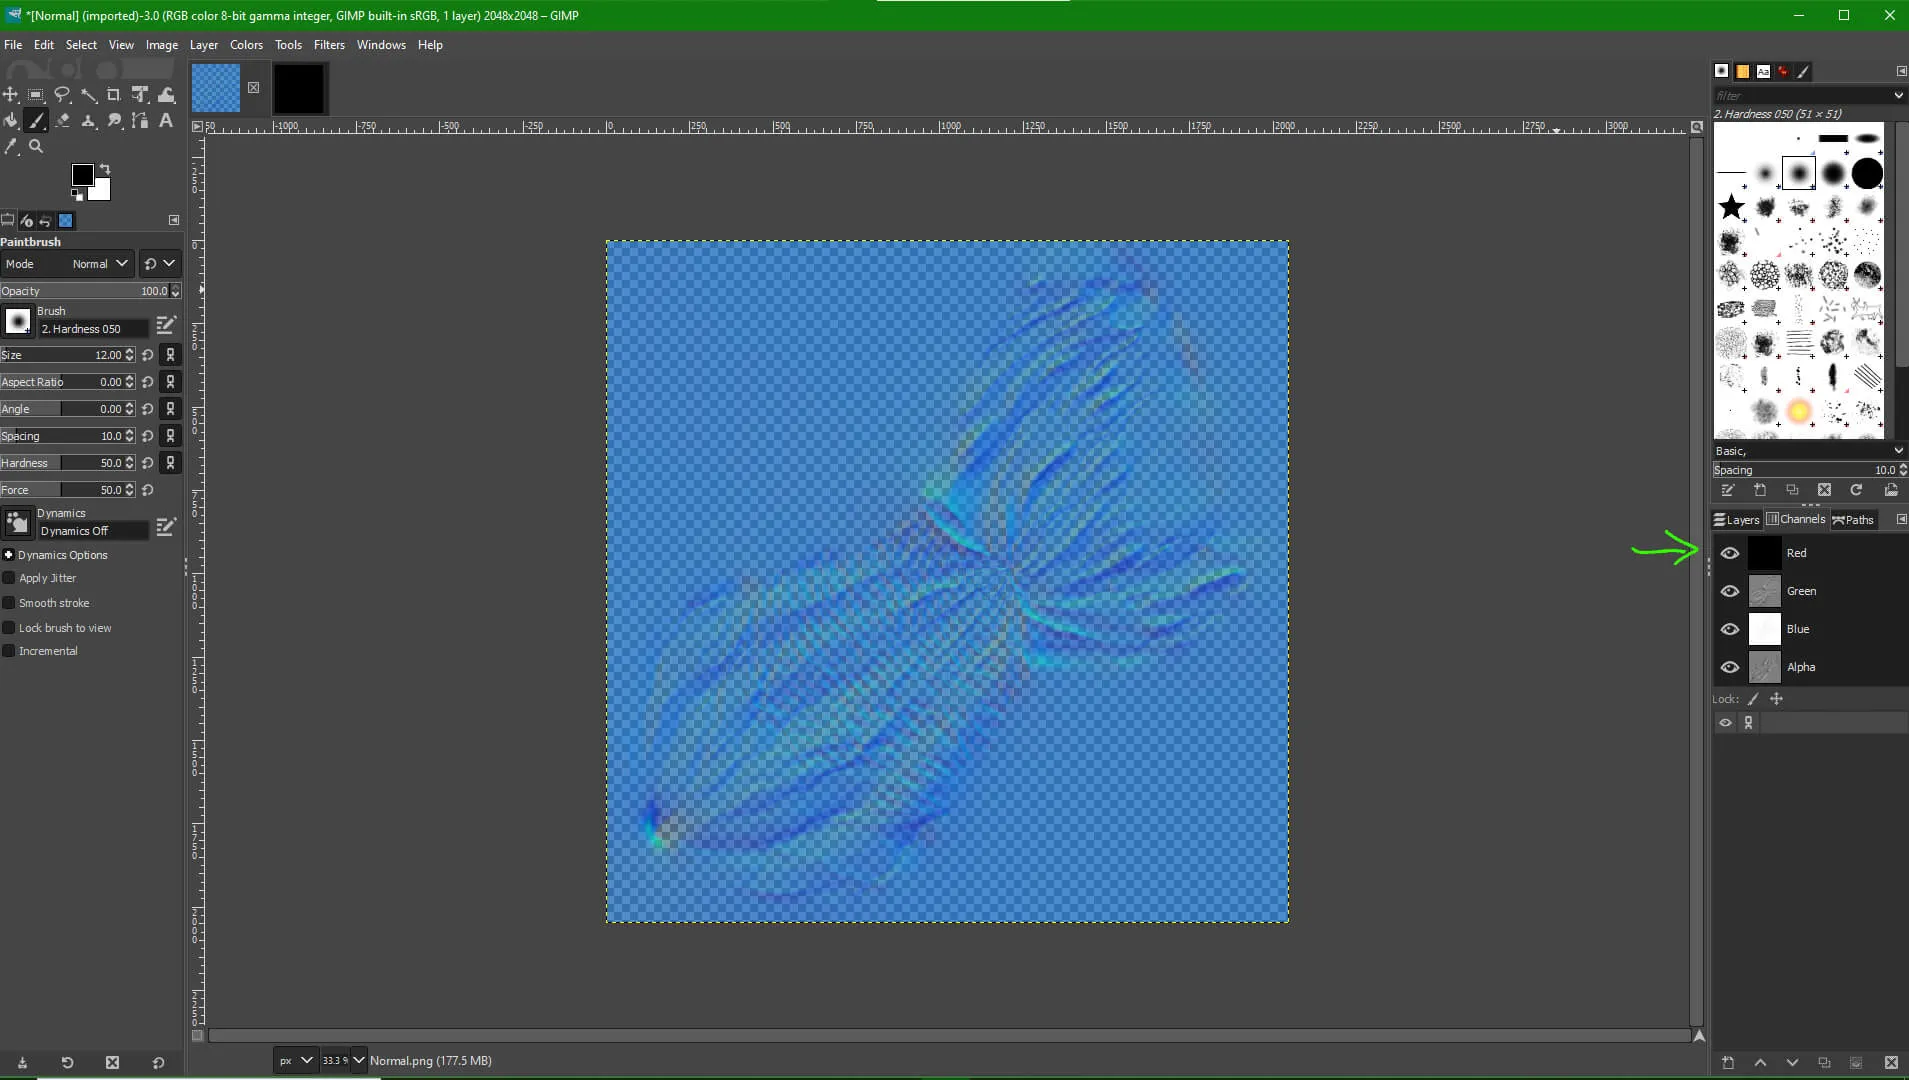
Normal Map[edit section | visual editor]
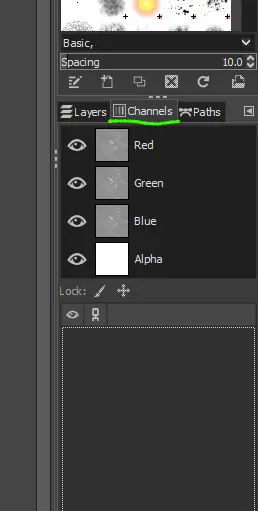
1. Open your Normal Map in GIMP, and click on the Channels tab to view the channels of your map. Depending on the program you created your normal map with, you might or might not have an Alpha channel already.

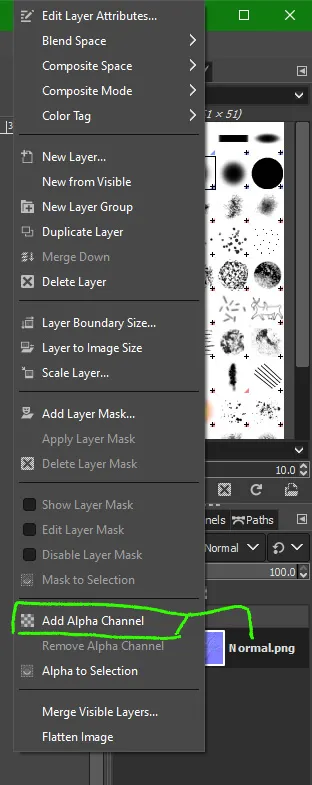
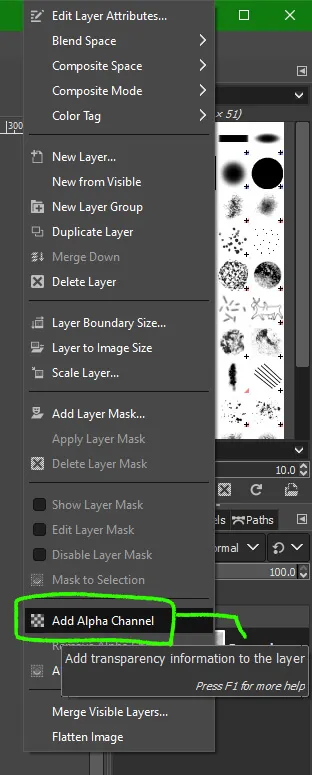
2. If you do not see an Alpha channel in your channels, switch back over to the Layers tab, right-click on your layer and select "Add Alpha Channel". This will add an empty Alpha channel.


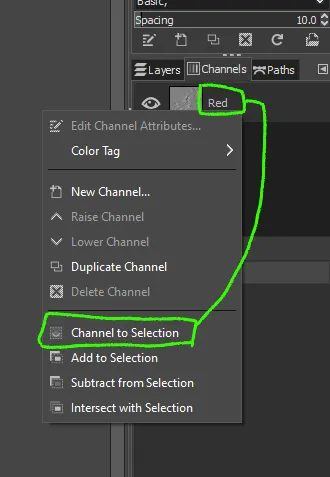
3. Back in your Channels tab, right-click on the "Red" channel and select "Channel to Selection".

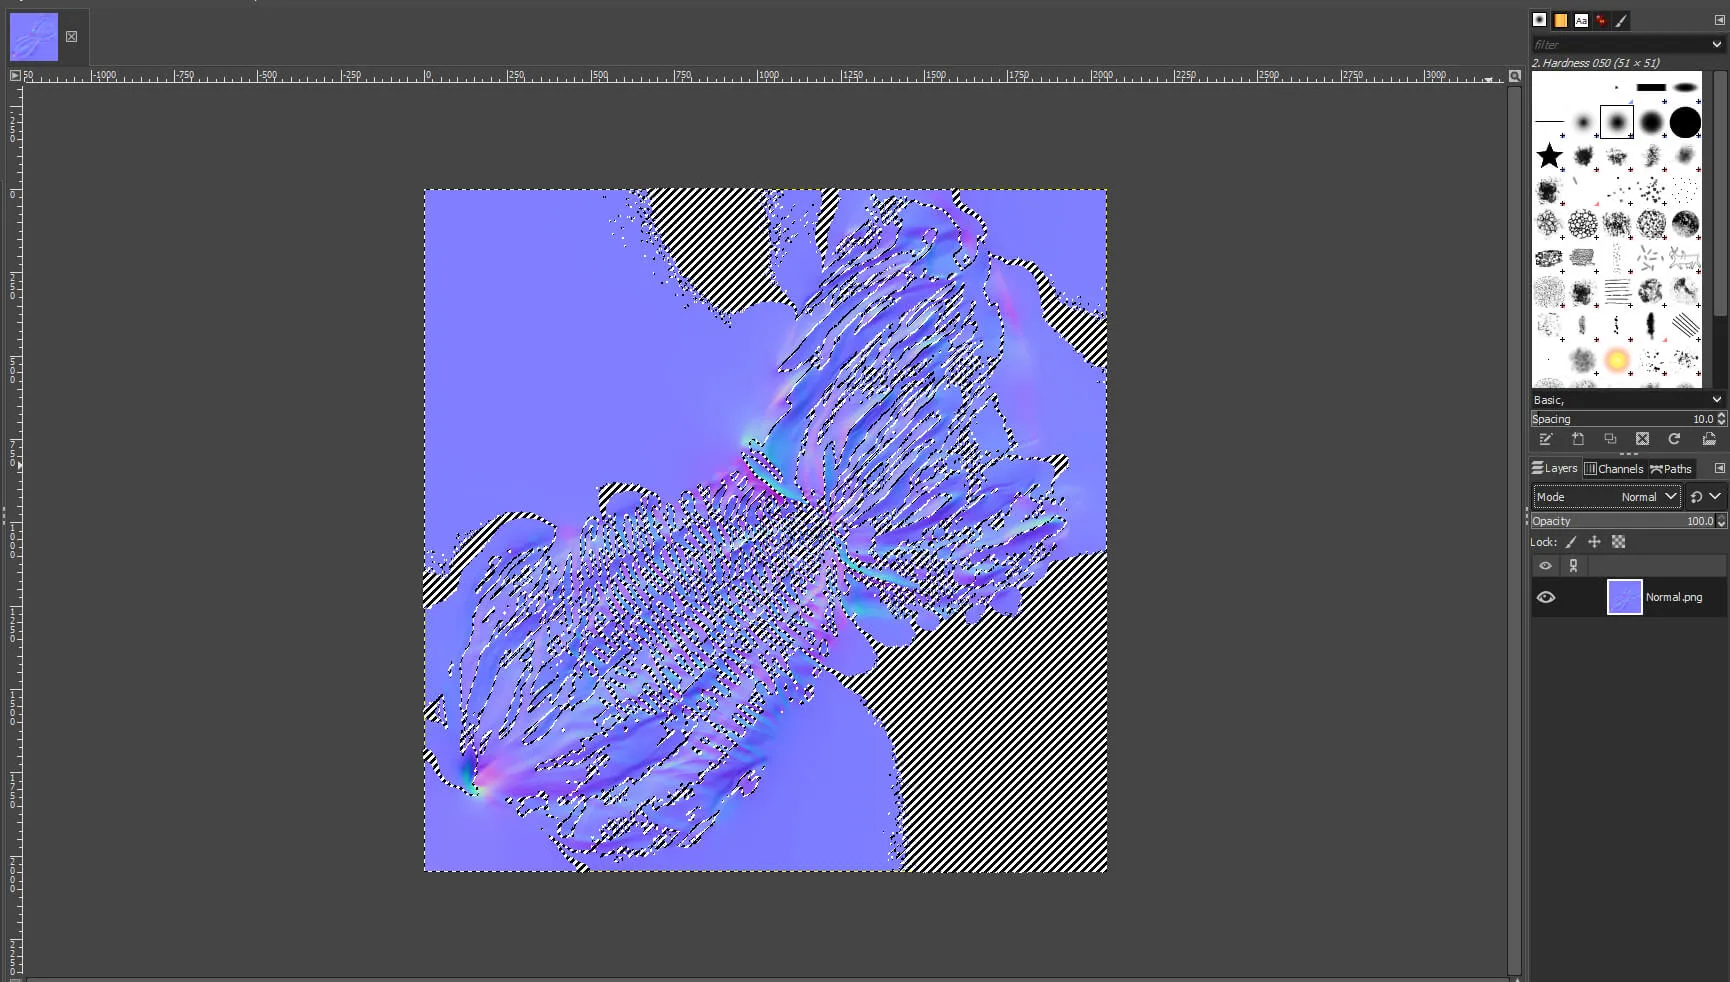
4. Swap back to your Layer tab, then in your menu bar go to "Edit -> Clear" to delete the selected areas. This basically copies the contents of the Red channel to the Alpha channel.

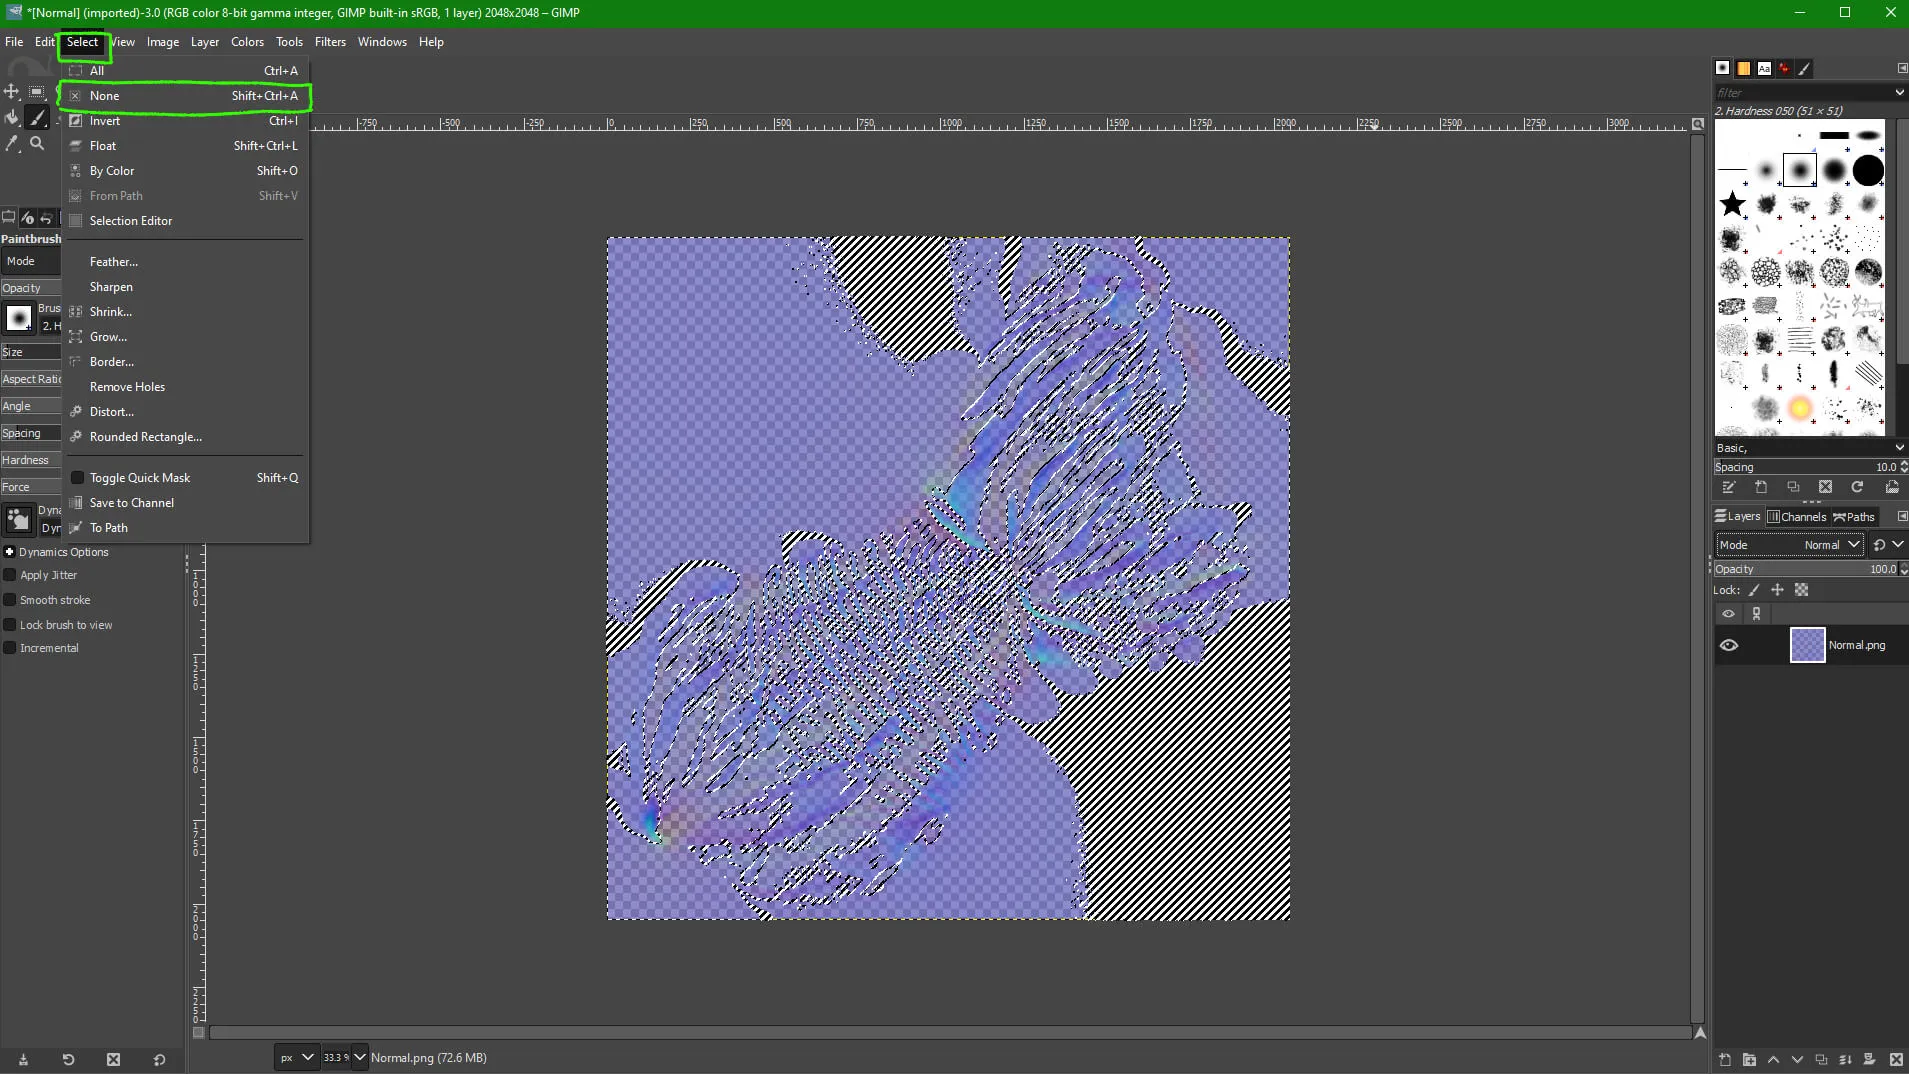
5. Deselect your image by going to "Select -> None" in the menu bar.

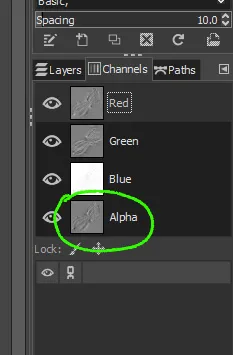
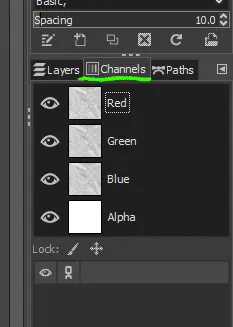
6. Check your Channels tab, your Alpha channel should now look like your Red channel.

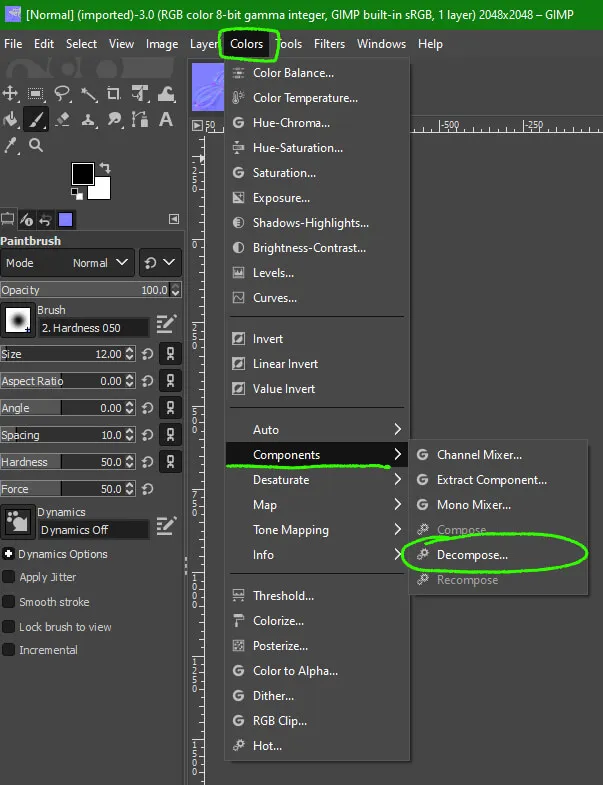
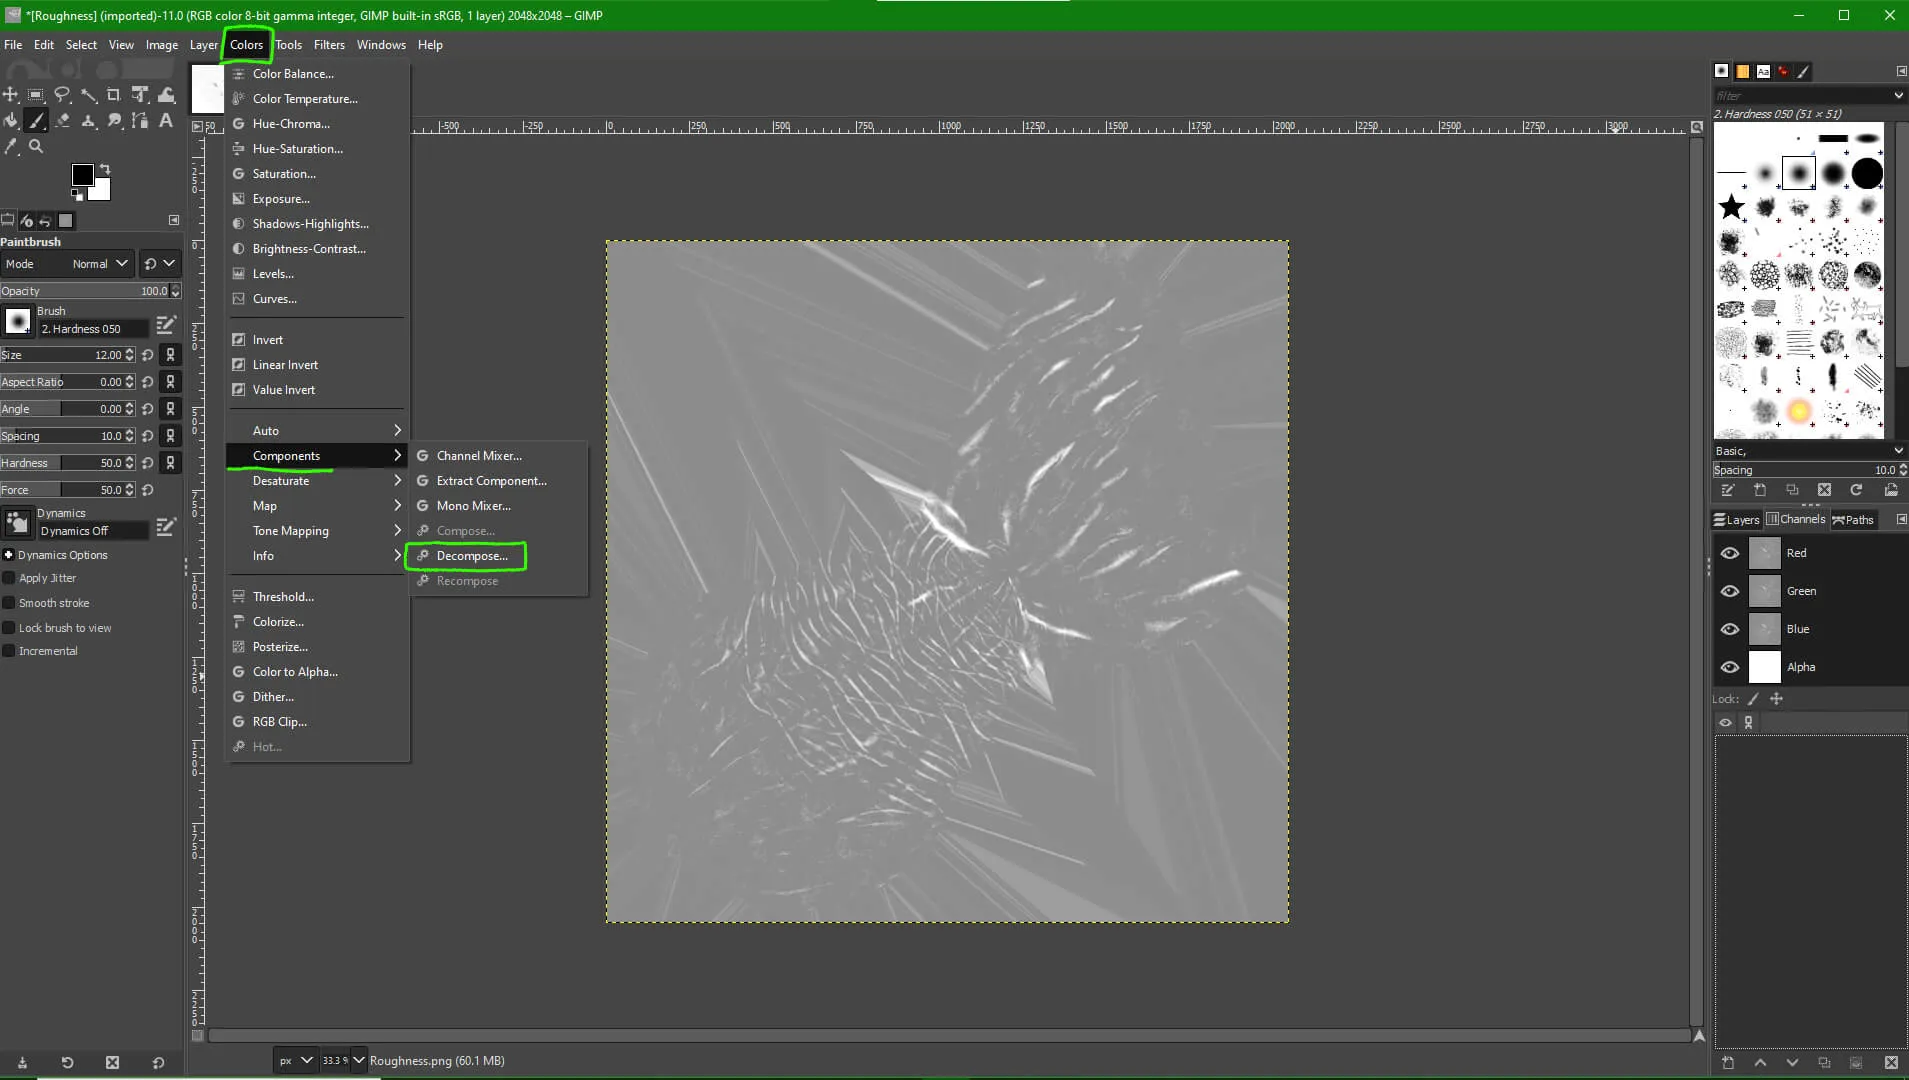
7. In the menu bar, go to "Colors -> Components -> Decompose". This is going to create and open a new version of your file, with all the channels separated into individual layers.

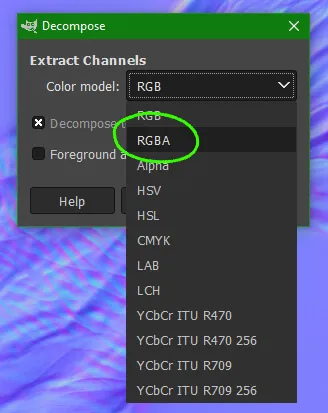
8. In the pop-up window select RGBA as the Color mode, then hit OK.

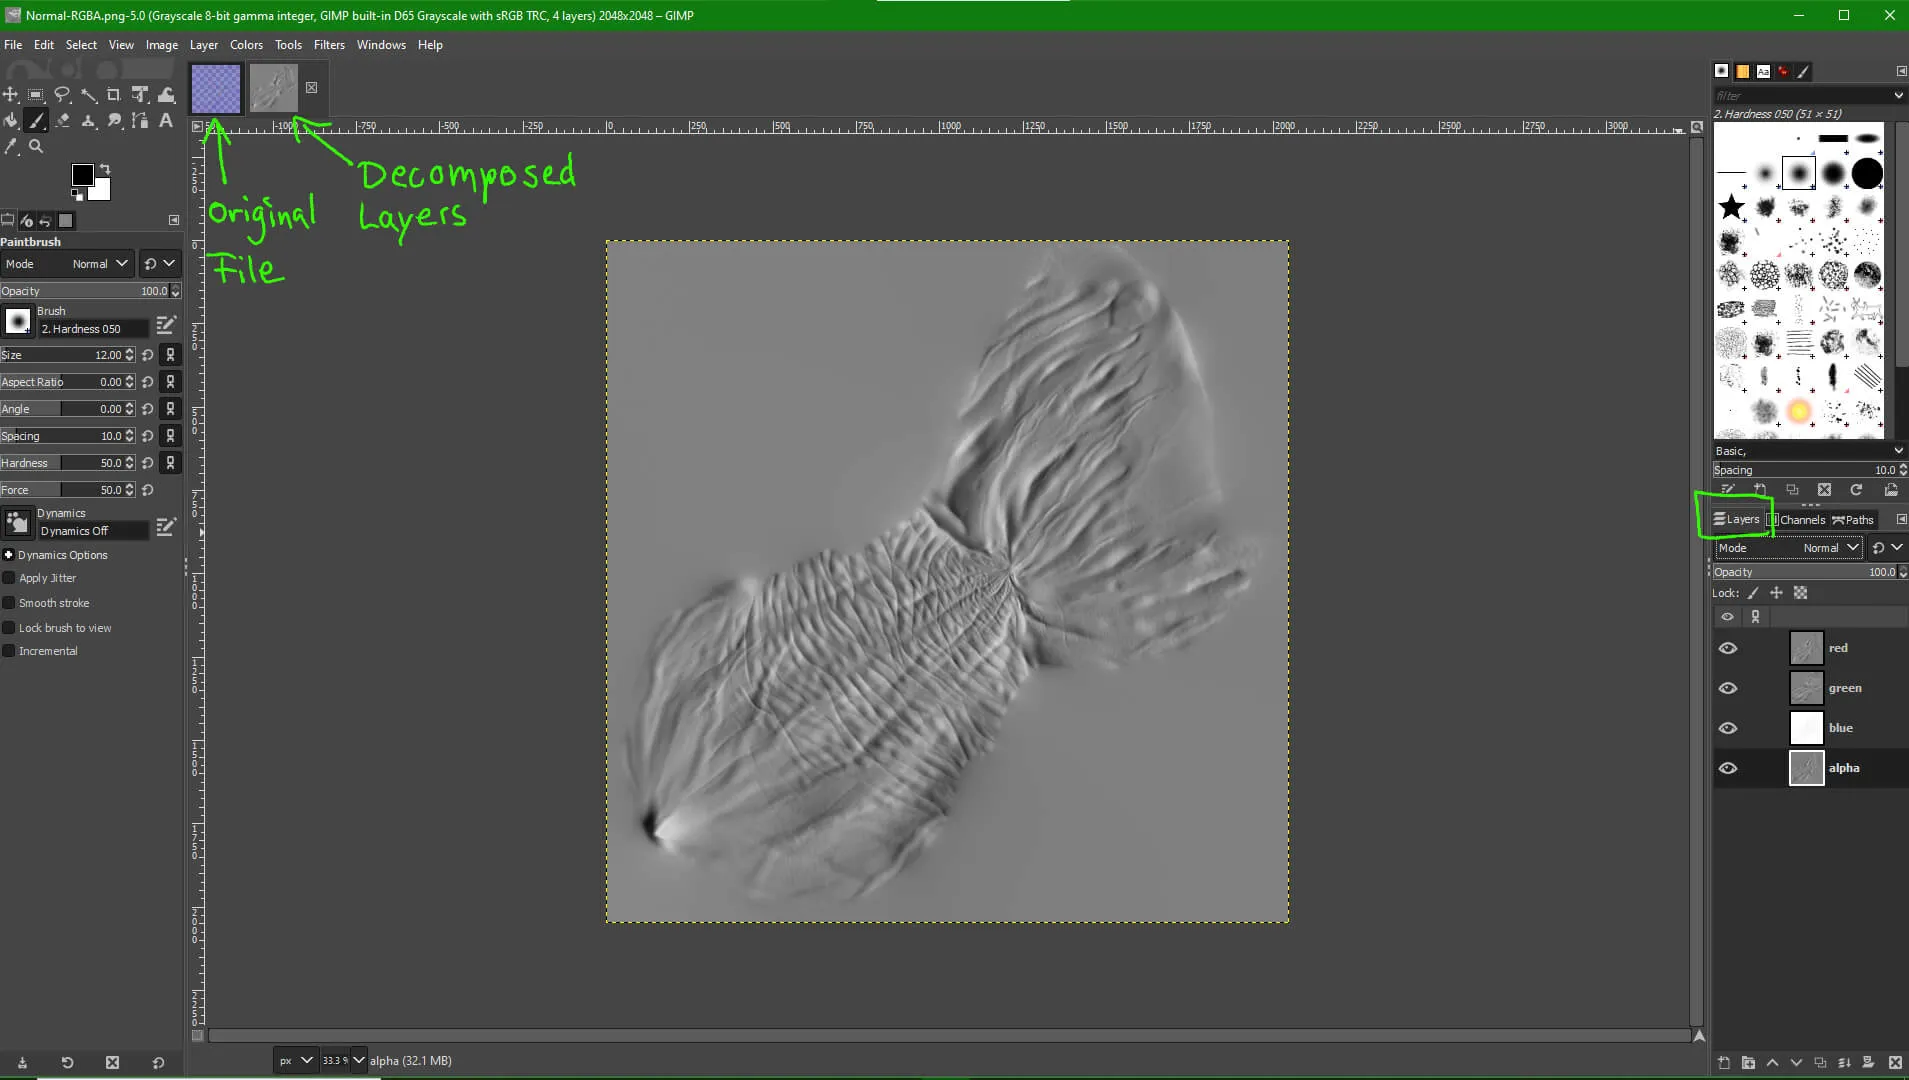
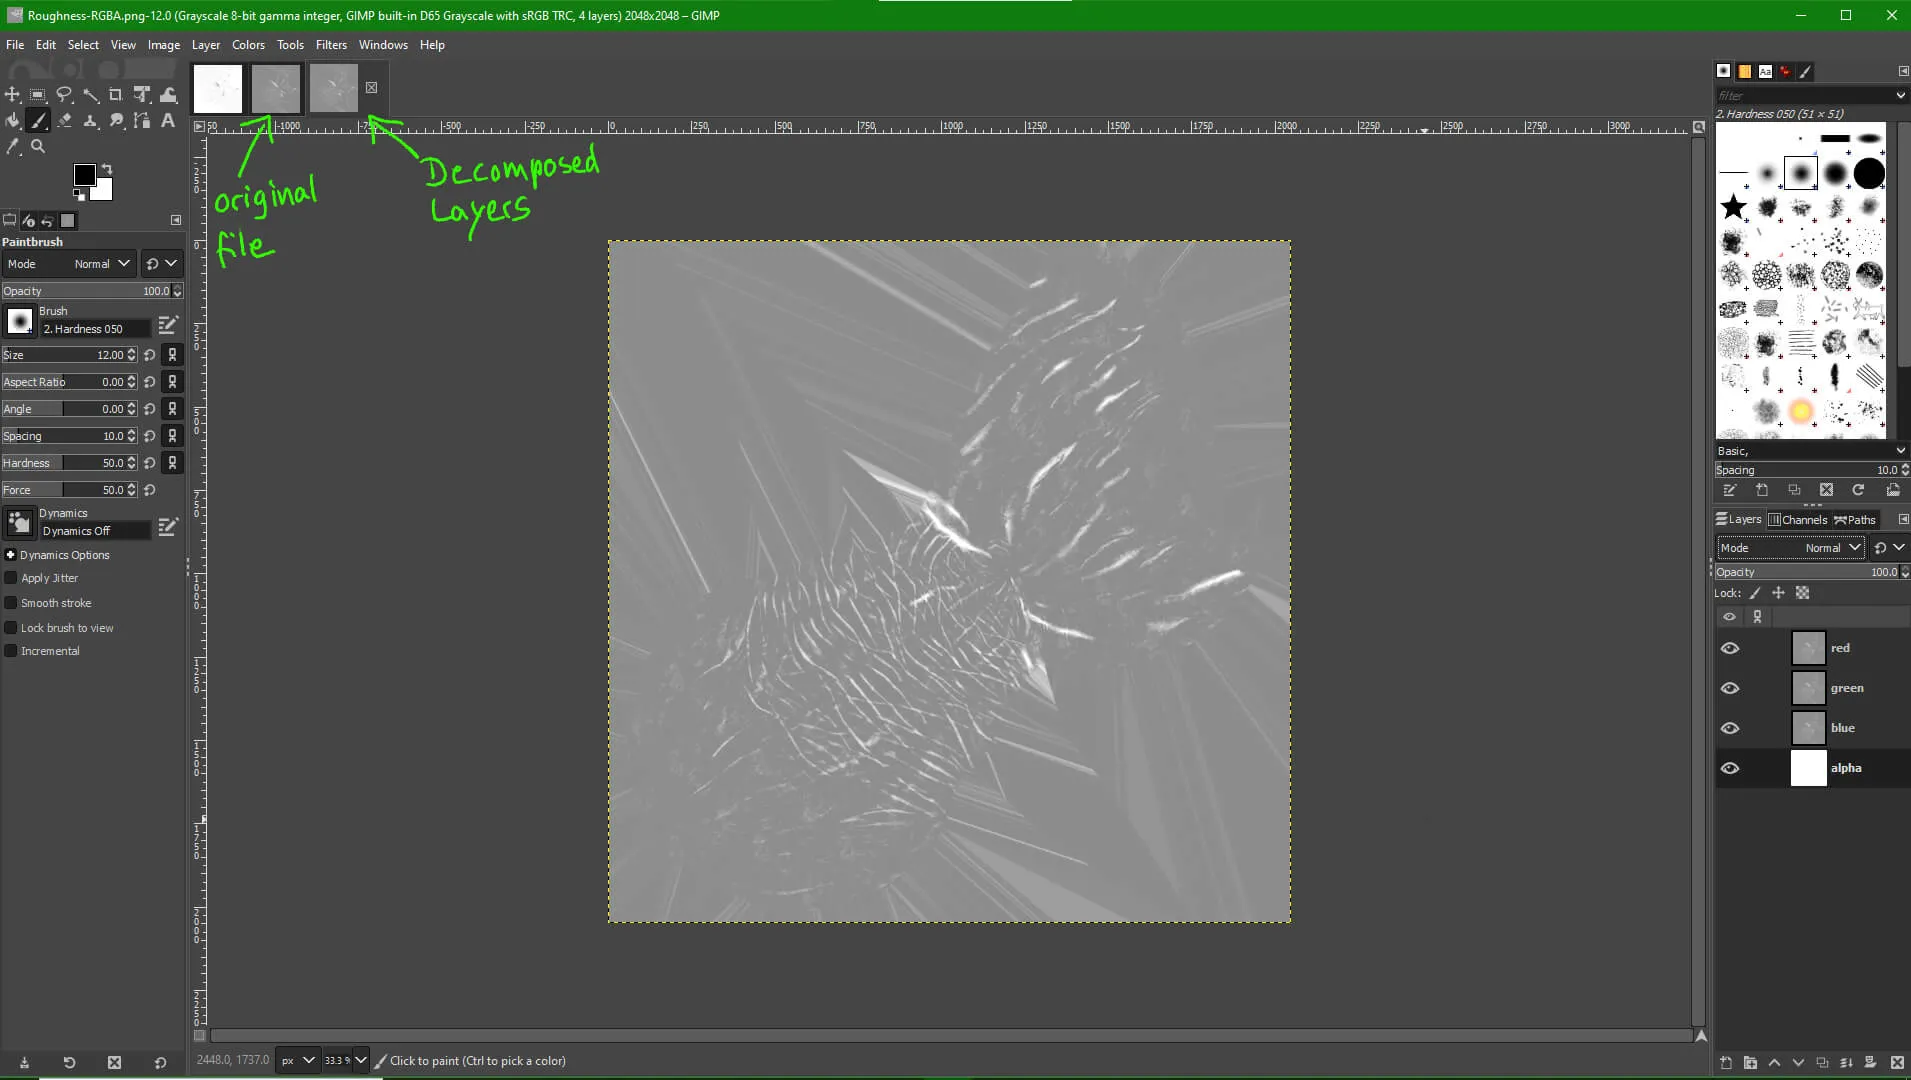
9. You should now see a file that looks like your normal map, but in greyscale. In the layers tab you will see that each channel has its own layer now.

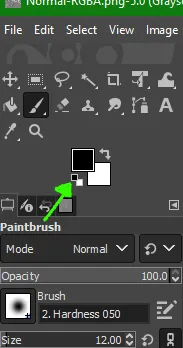
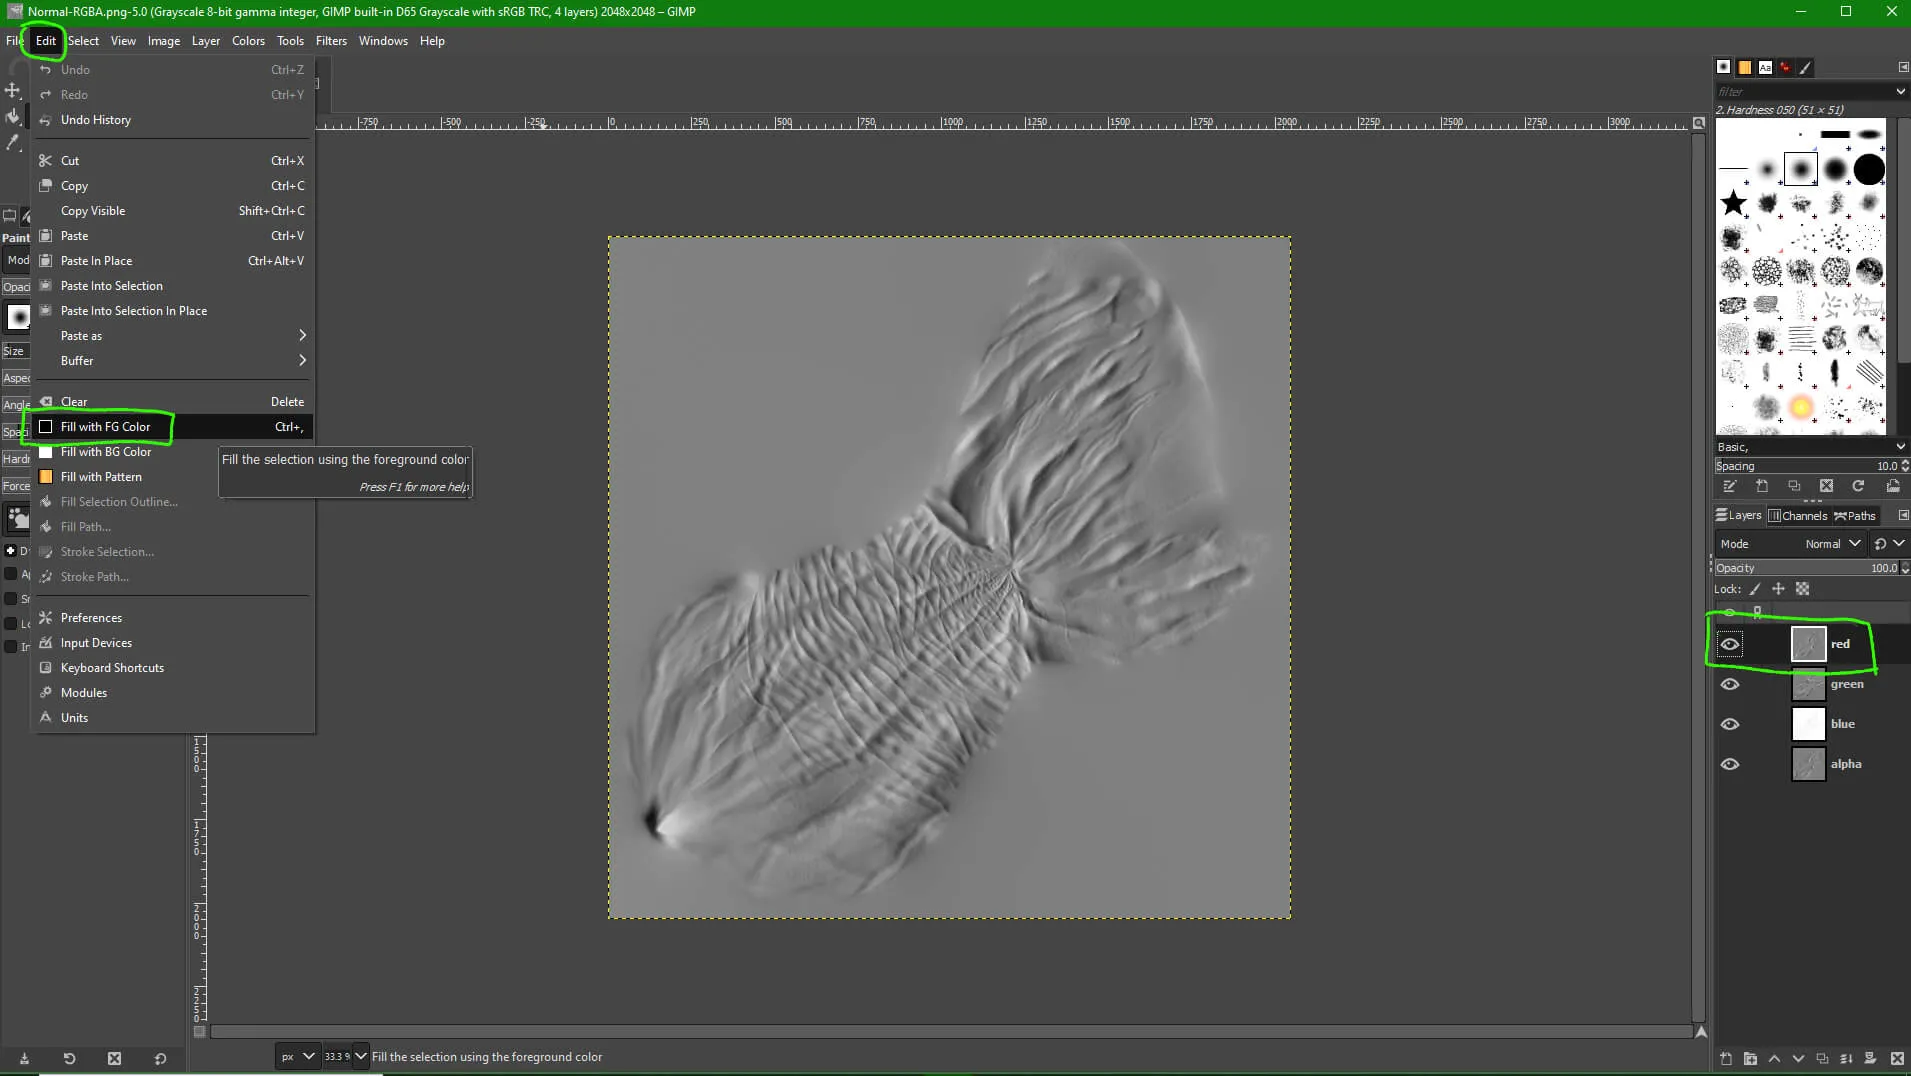
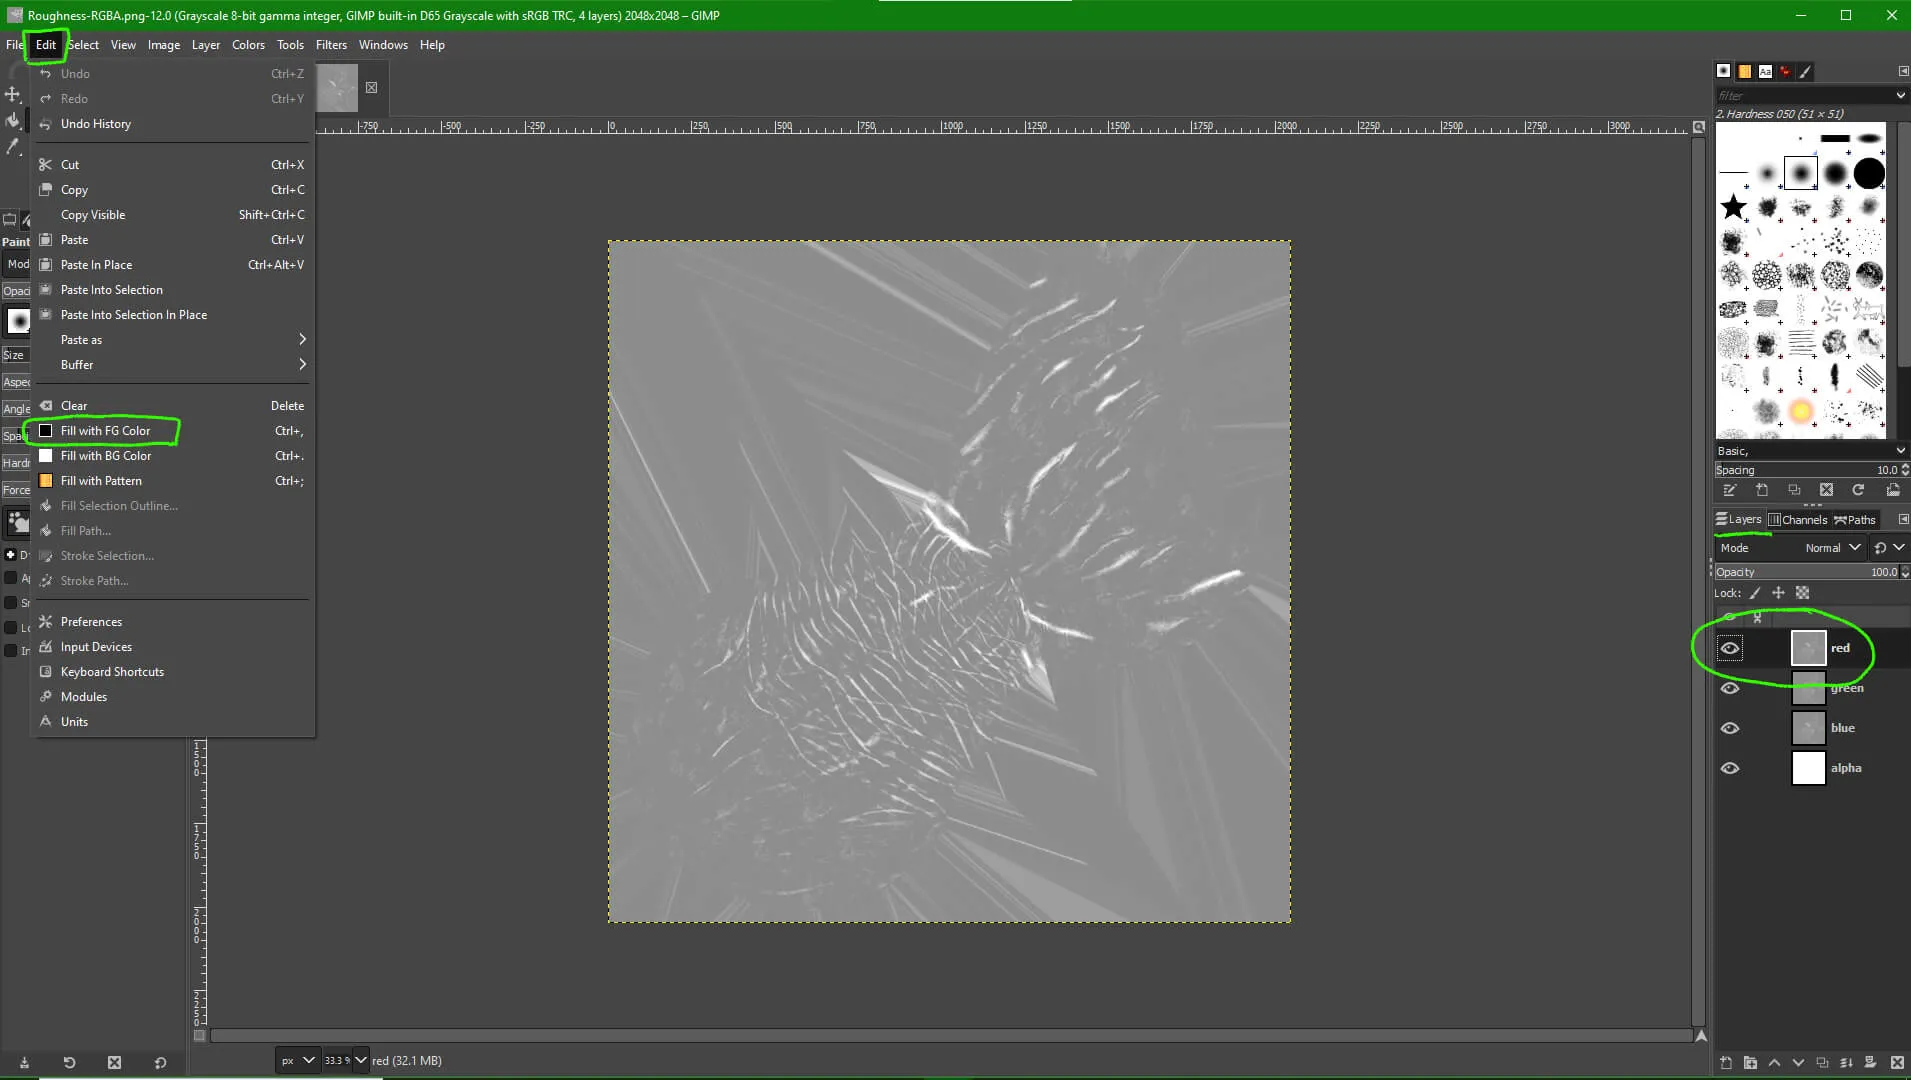
10. Before the next step, make sure that your Foreground color is set to black. If it is not, you can click the small icon of a black and white square underneath the color selector to reset it.

11. Click on the "red" layer to set it to your active layer, then in the menu bar go to "Edit -> Fill with FG Color" to fill the layer with black.


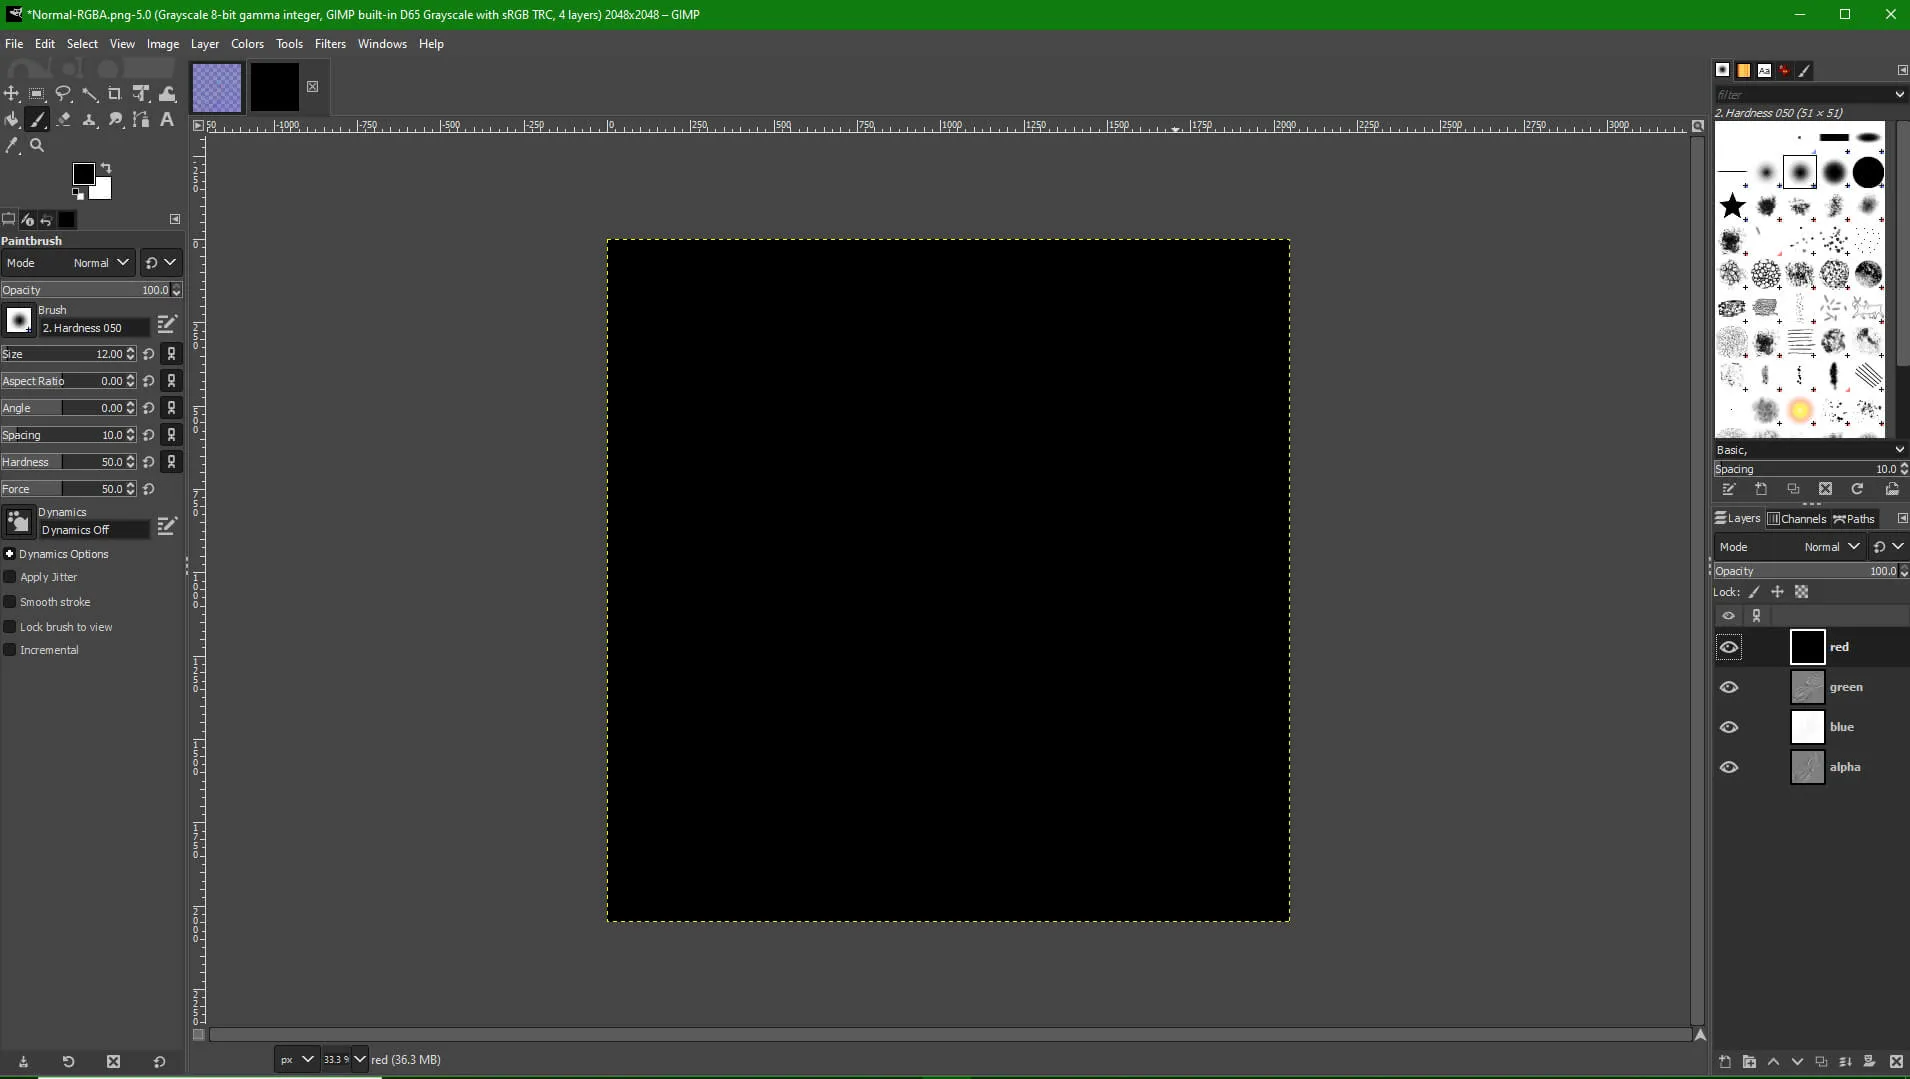
12. Go to "Colors -> Components -> Recompose" in the menu bar to recompose the layers back into channels in your original file.

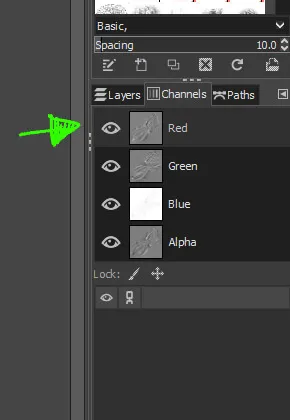
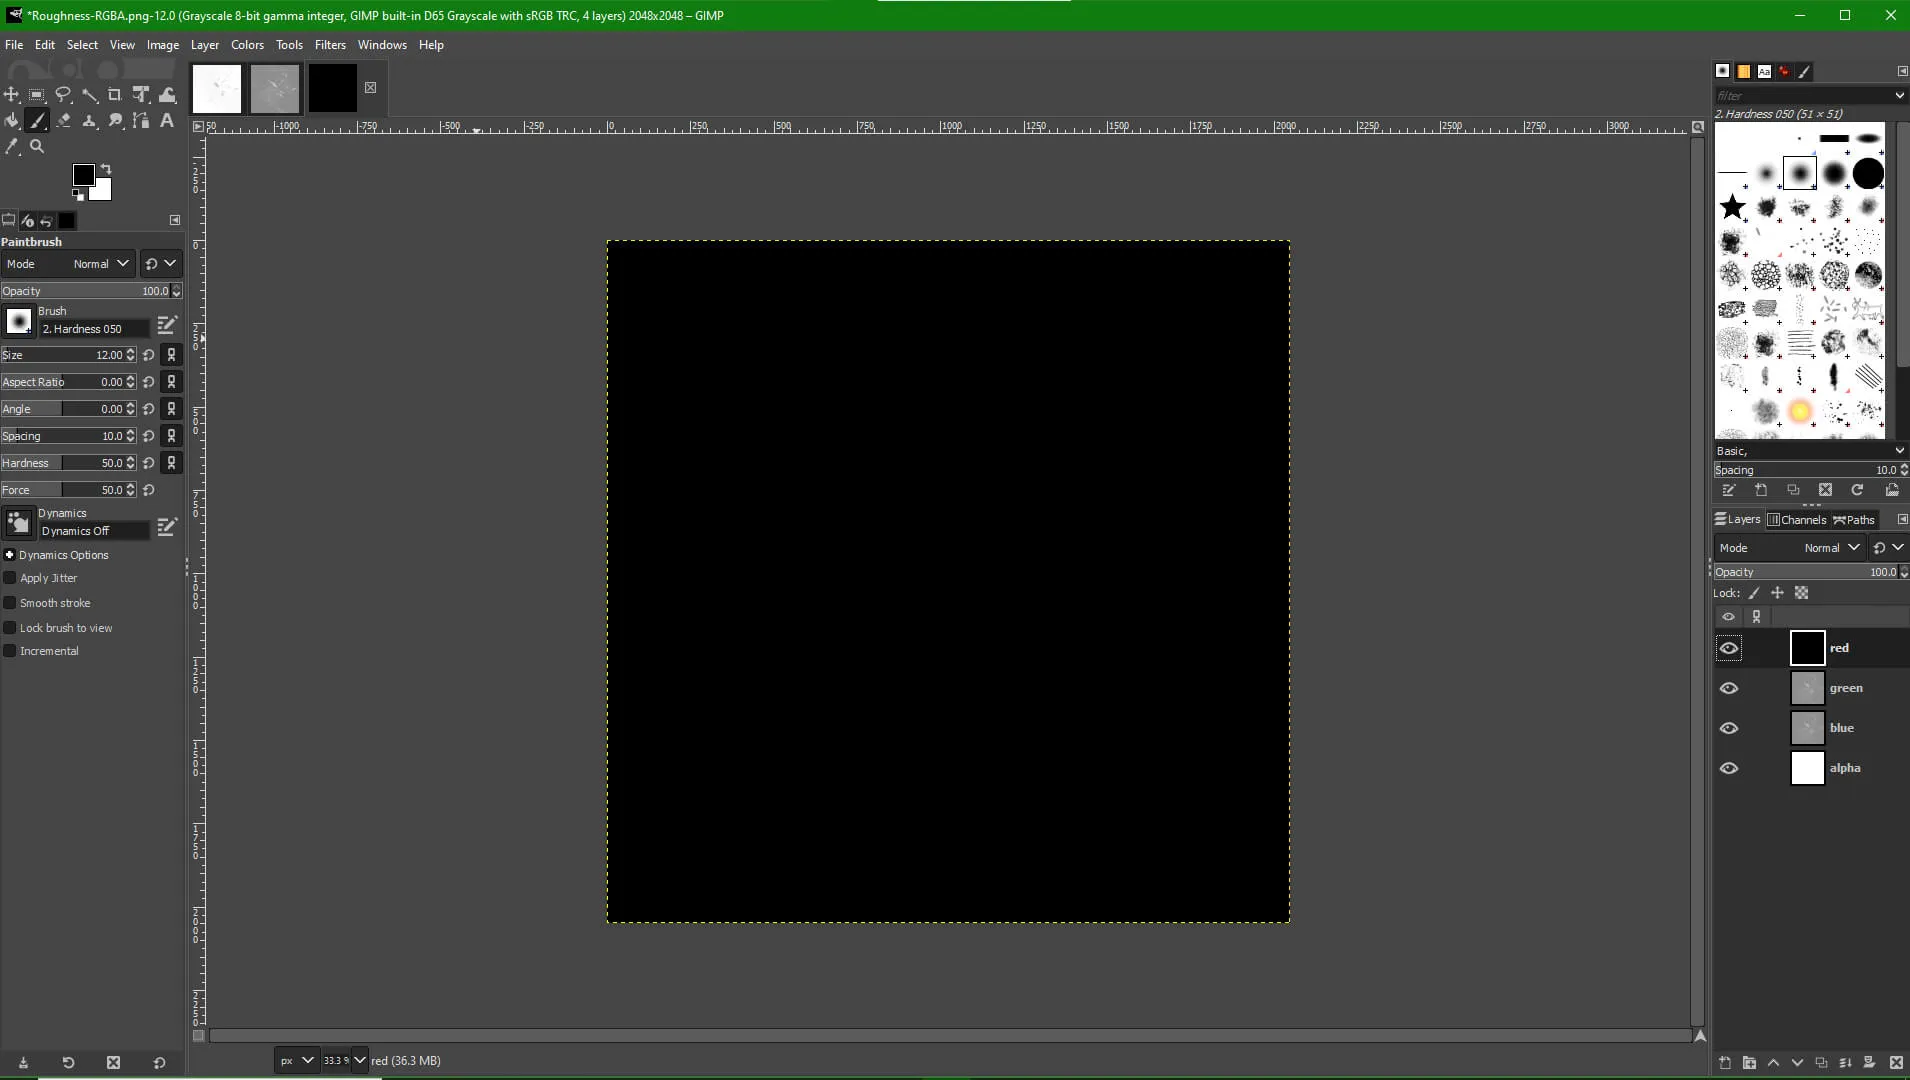
13. Go back to the original file and check the Channels tab to make sure the red channel is just black (empty) now.

14. If your original file seems to still be the same as before, make sure that in the channels tab none of the channels are selected/highlighted. If any of them are, just click on them again to de-select them, then go back to the Decomposed Layers file and repeat step 12 to recompose it.


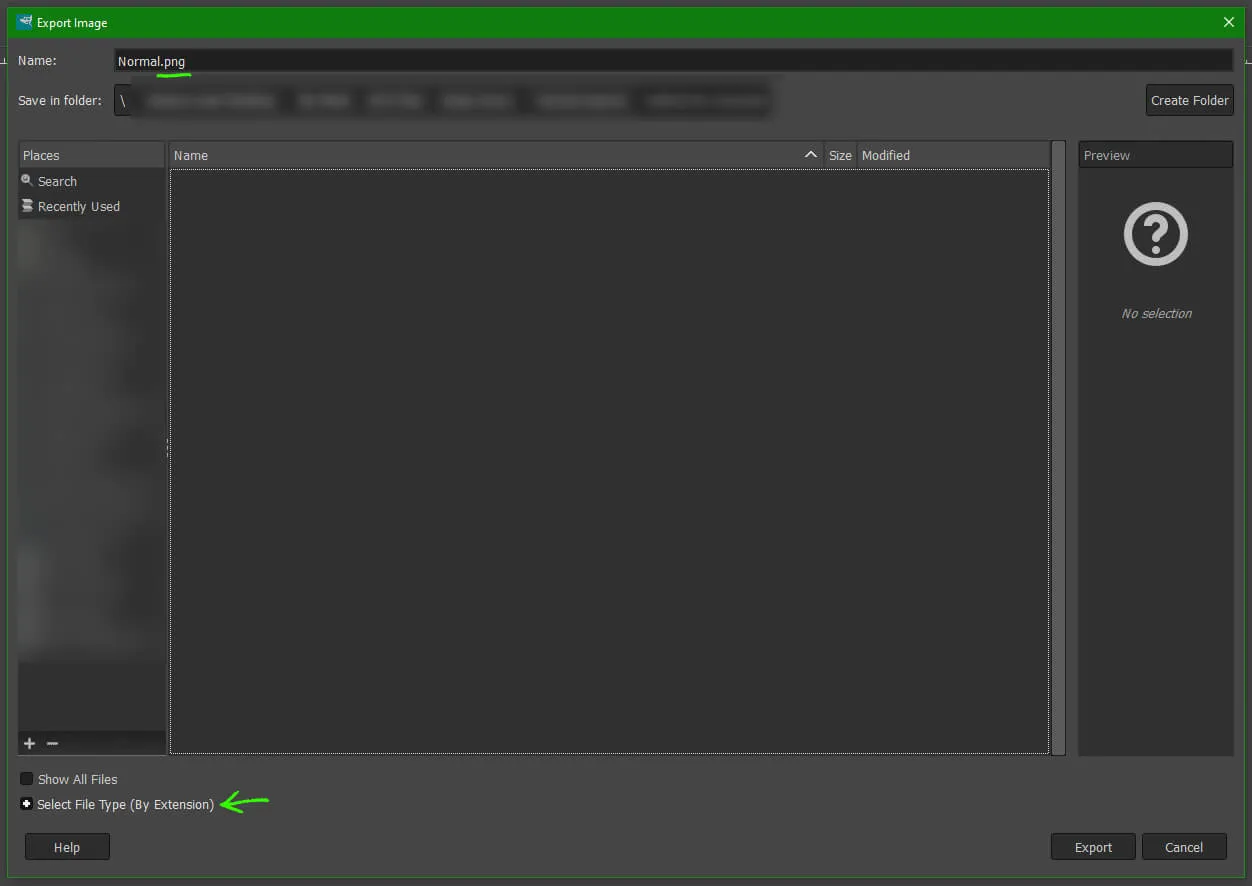
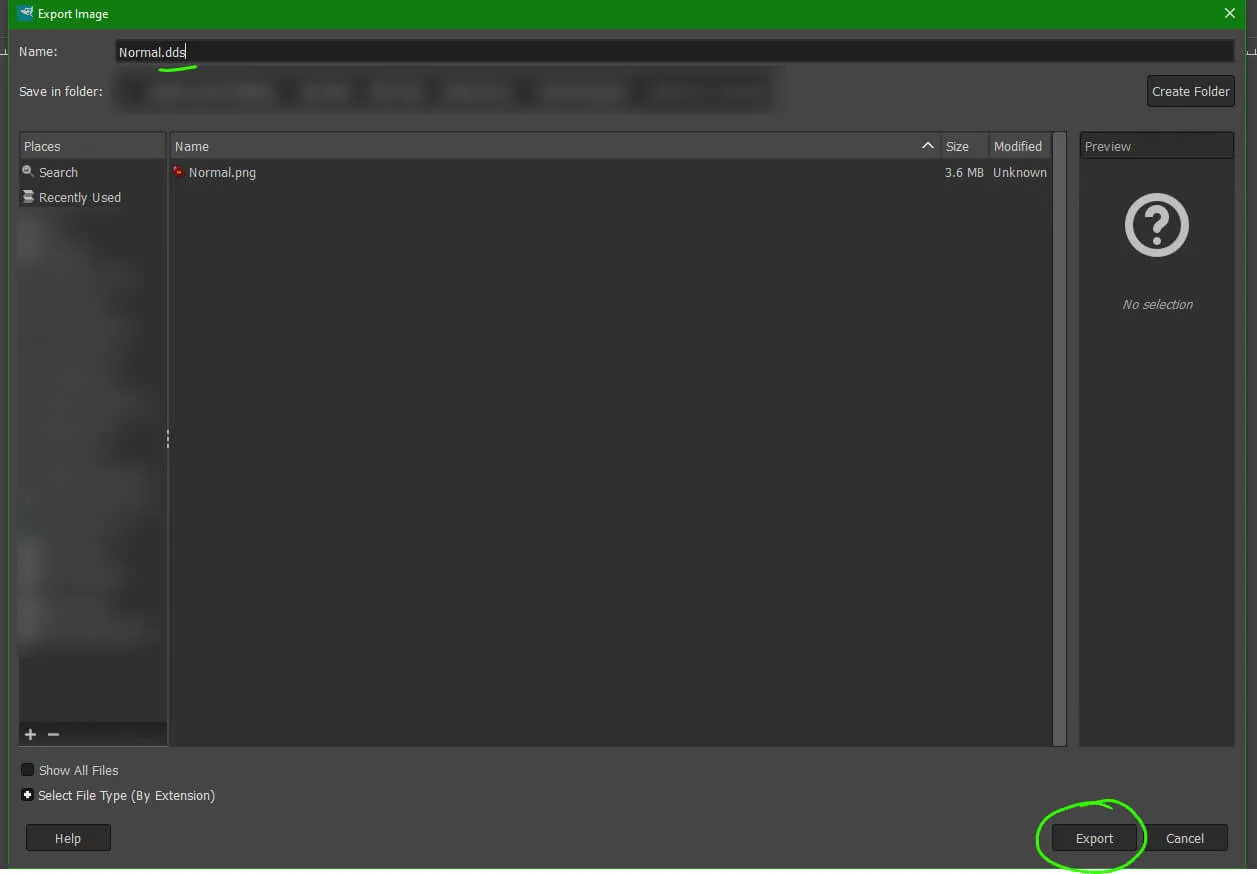
15. Your recomposed file is now ready to export. Go to "File -> Export As..."

16. Select a save location for your file, and name it to whatever you choose. Check the vanilla game textures to see what naming conventions are used for the files the textures are for. I personally also export a .png version to keep as a backup, but you will need a .dds file for the game. You can either rename your file with the .dds extension, or click "Select File Type (By Extension)" at the bottom to select the .dds file type. Once ready, just click "Export" to save your texture. A window will pop-up with export options. For .png, just leave everything at default.


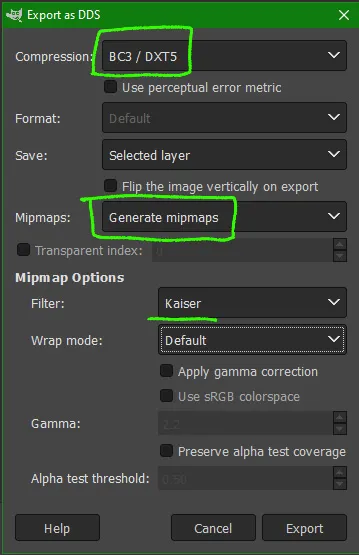
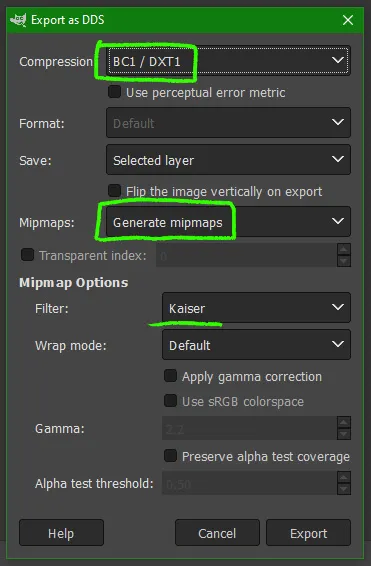
17. To correctly export your Normal map as a .dds file, make sure to select "BC3/DTX5" for Compression, and "Generate mipmaps" for Mipmaps. Set the Filter under Mipmap Options to "Kaiser".

Physical Map[edit section | visual editor]
To create the Physical Map, you will need to have these three maps:
- AO Map
- Roughness Map
- Metallic Map
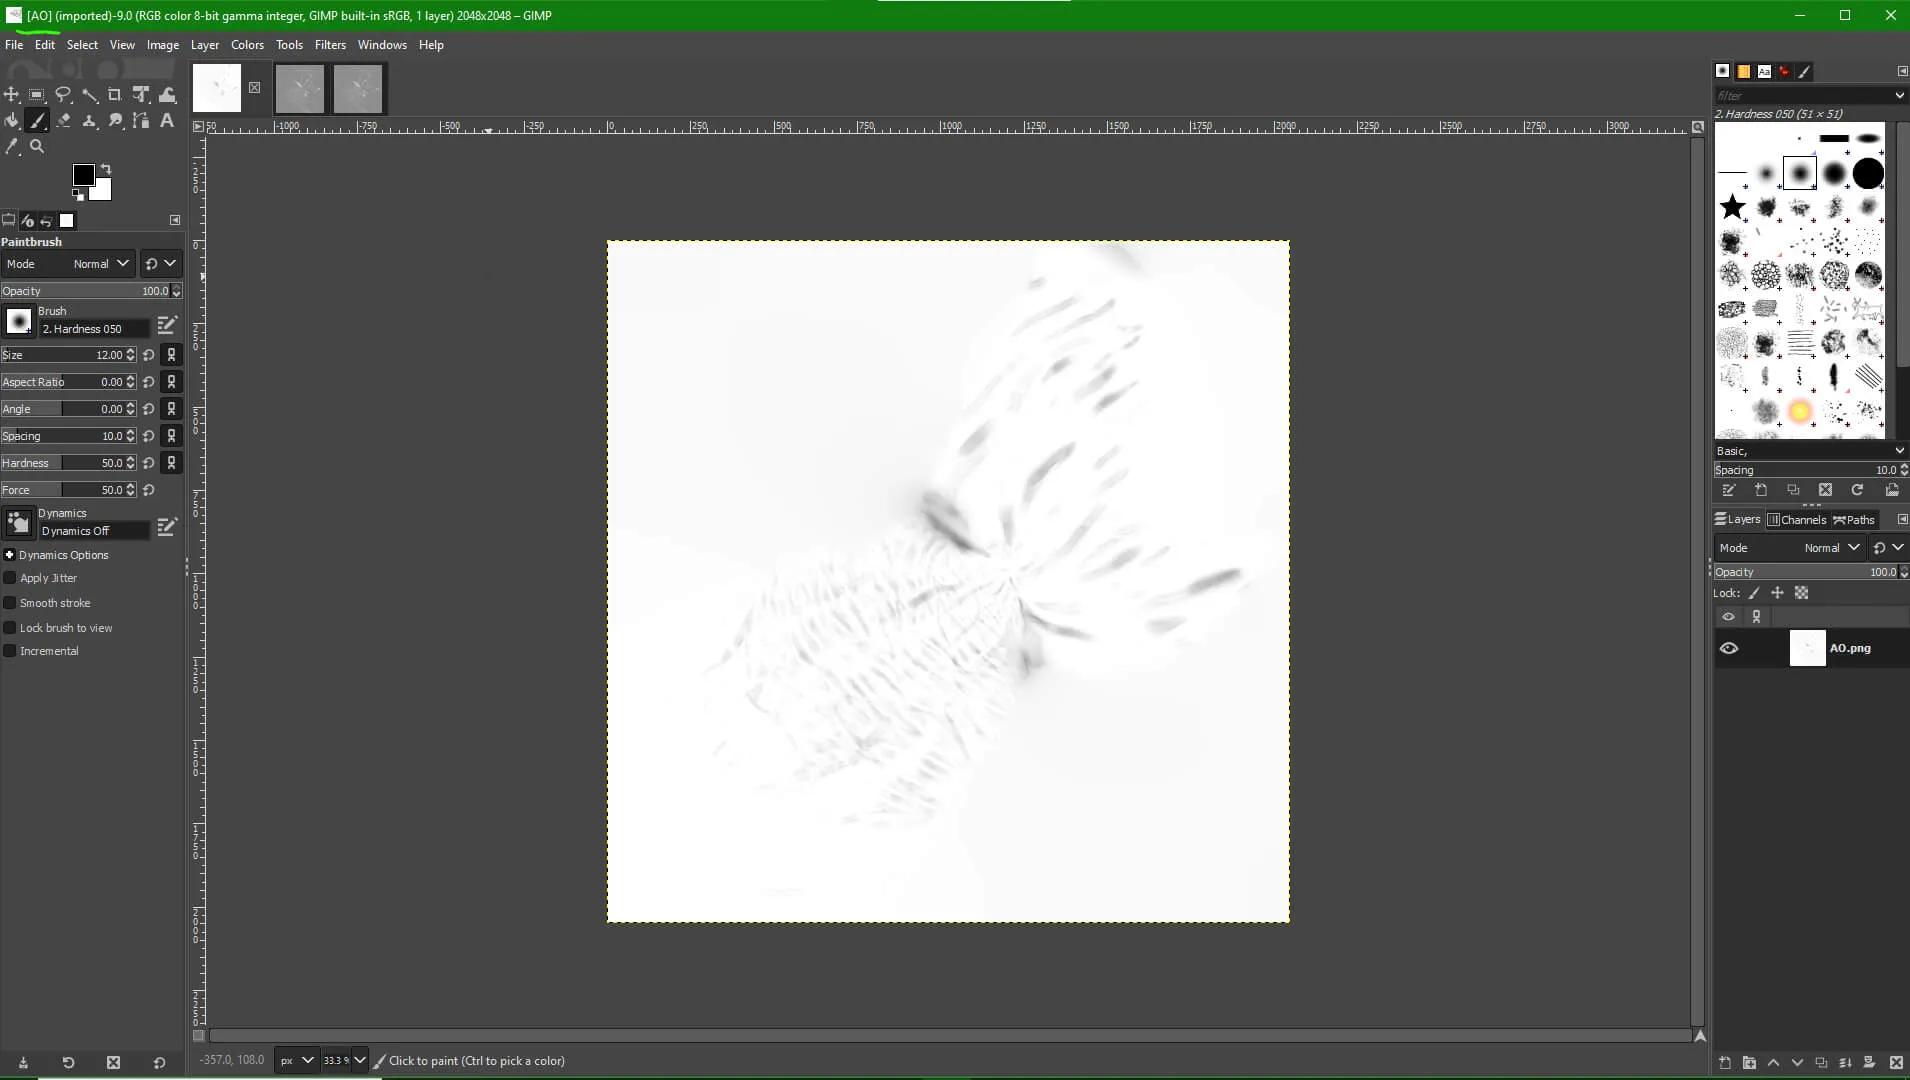
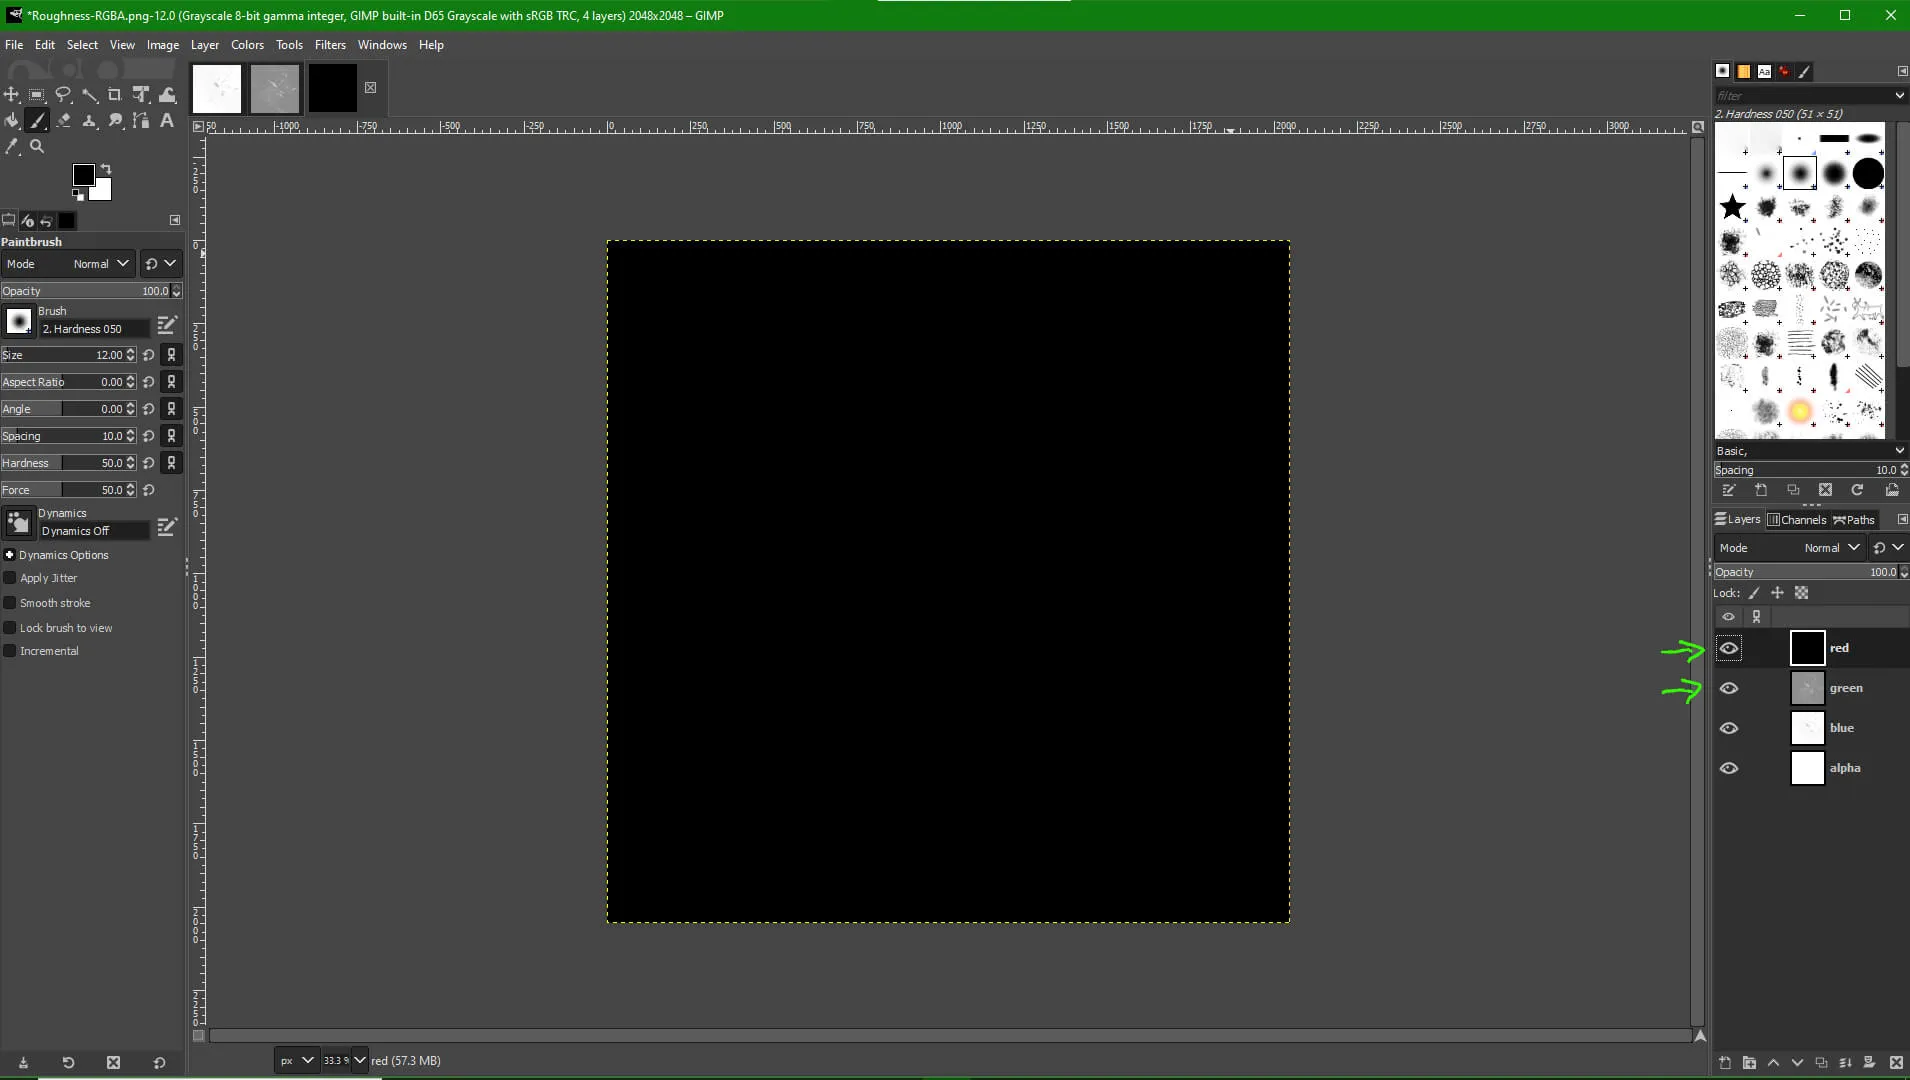
1. Open all three maps in GIMP. (If your Metallic Map is just black just skip opening it)

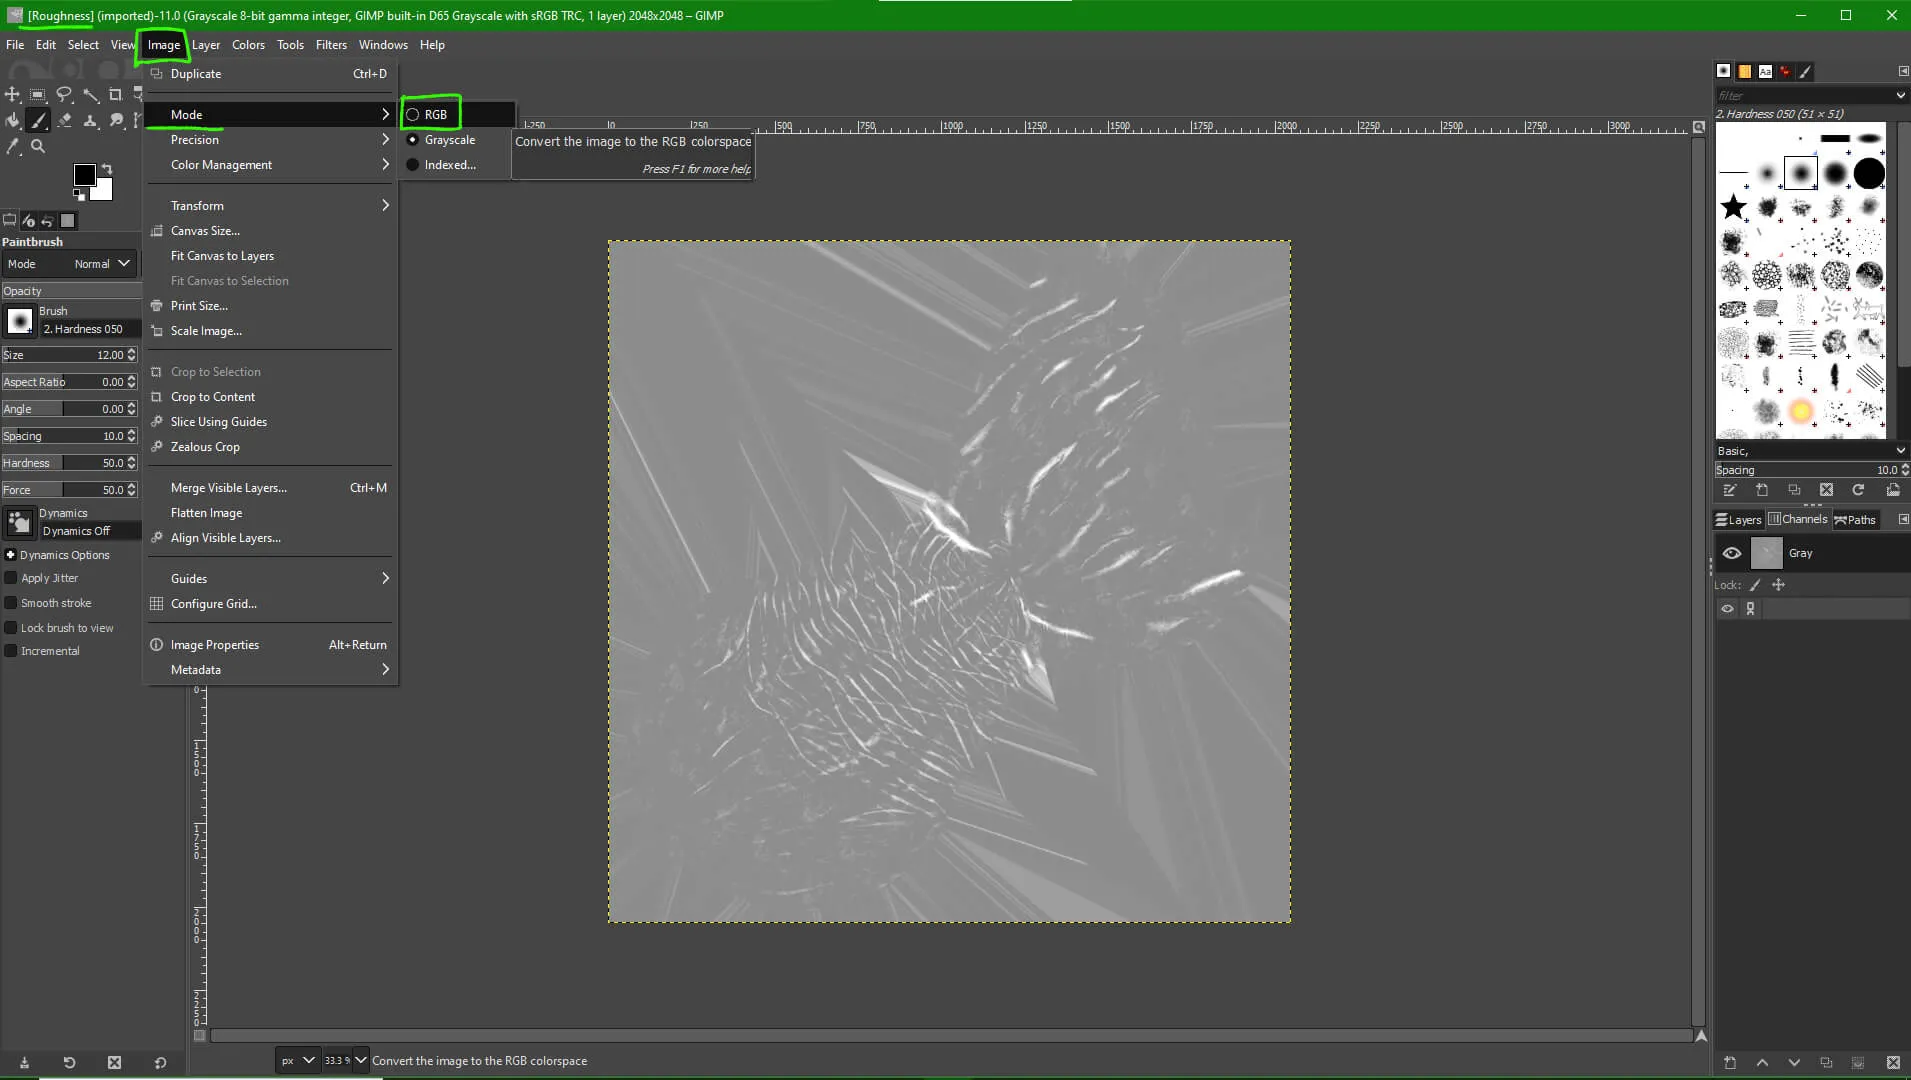
2. Go to your Roughness Map and in the menu bar, go to "Image -> Mode -> RGB" to convert your image from Grayscale mode to RGB mode. This creates the RGB channels needed.

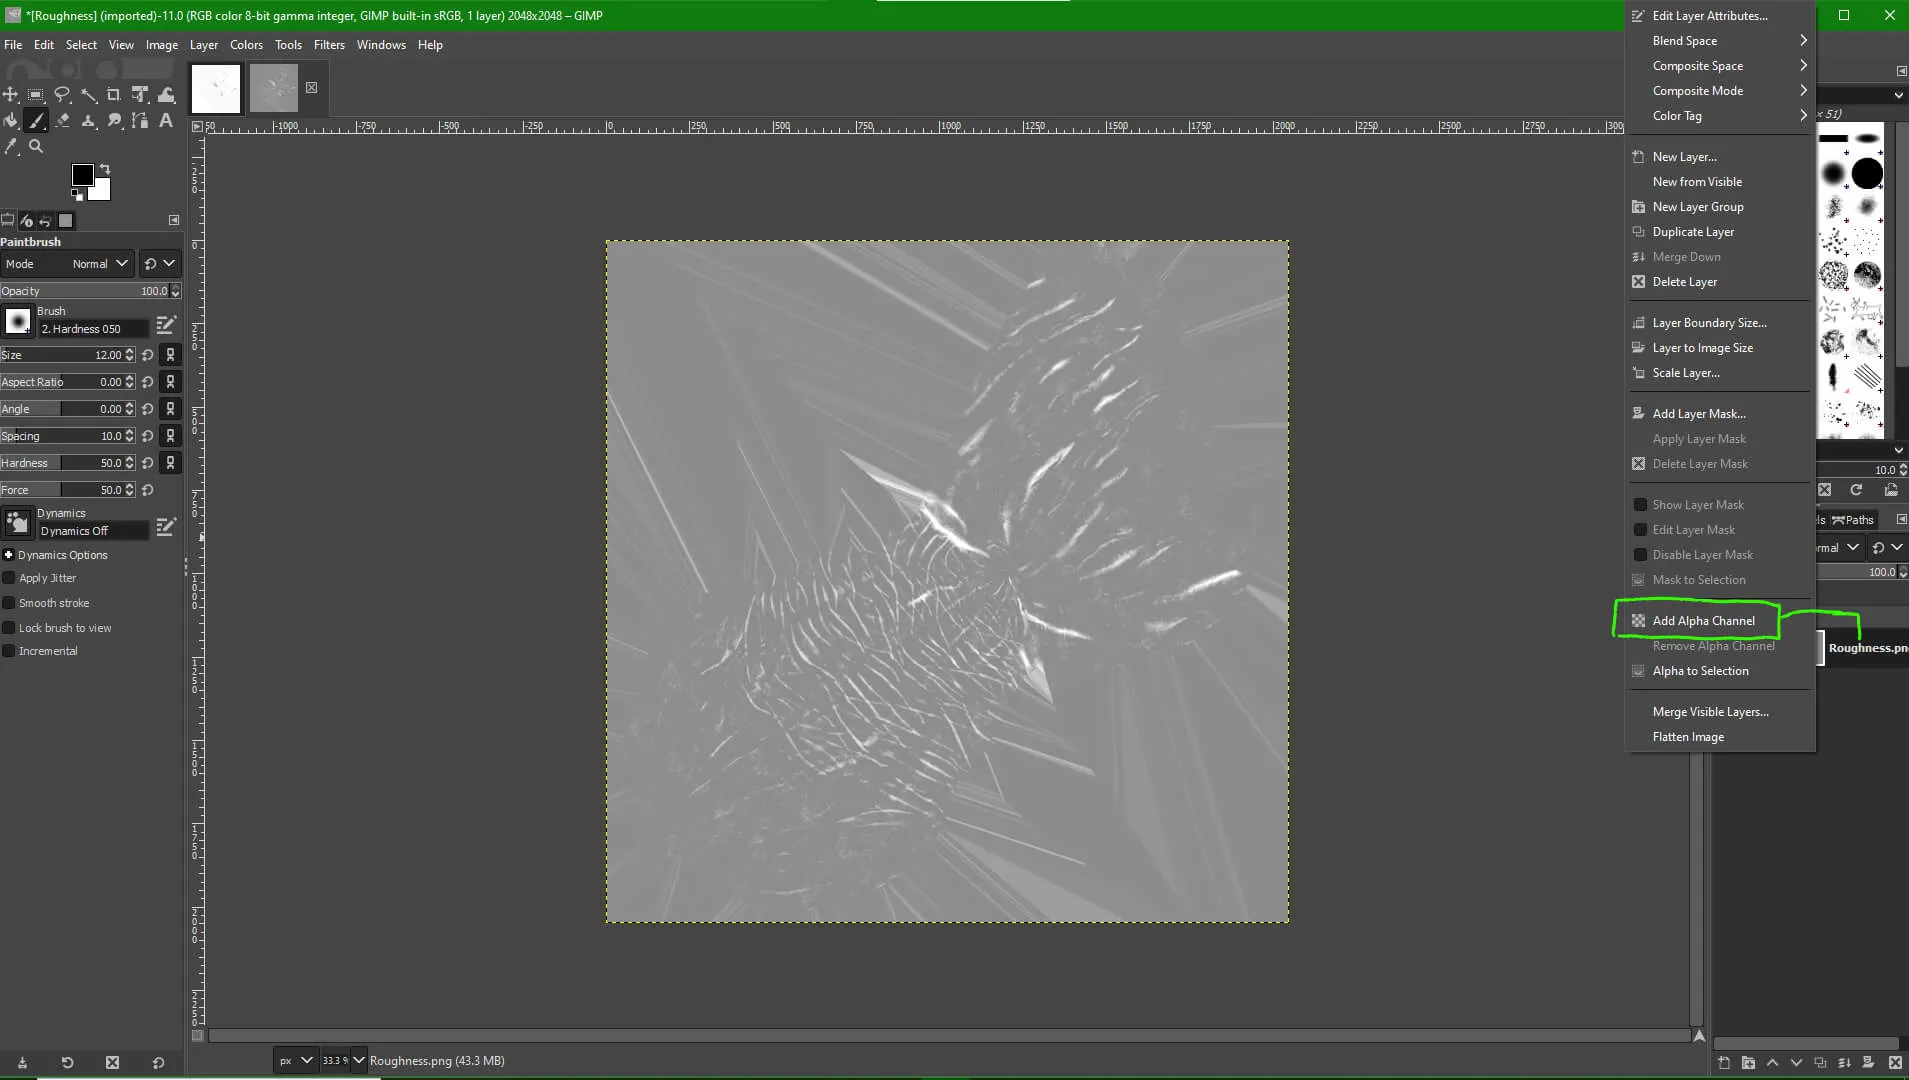
3. Right-click on your layer and select "Add Alpha Channel". This will add a blank Alpha channel.


4. In the menu bar, go to "Colors -> Components -> Decompose". This is going to create and open a new version of your file, with all the channels separated into individual layers.

5. In the window that pops up, select "RGBA" as the Color mode, then hit OK.

6. You should now see a second file that looks like your roughness map, with each channel as a separate layer.

7. If your Metalness map was just black, you can simply fill the "red" layer with black. If your Metalness map has information in it, follow the steps for the AO map instead to insert the Metalness map into the "red" layer.
To fill the layer with black, click on the "red" layer to set it to active, then go to "Edit -> Fill with FG Color" in the menu bar, making sure that your foreground color is set to black.


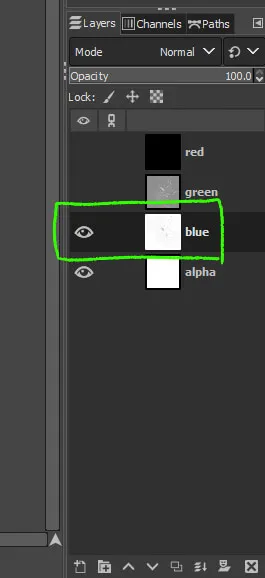
8. Now it's time to insert the AO map. To make things easier, hide both the "red" and "green" layer by clicking the little eye shaped icon next to them.

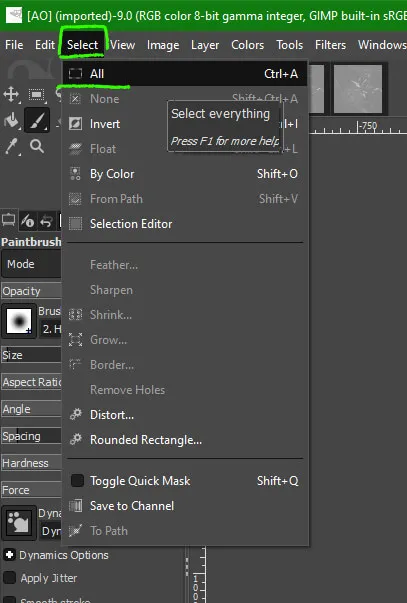
9. Now swap over to your AO map file and in the menu bar go to "Select -> Select All" to select the entire image.


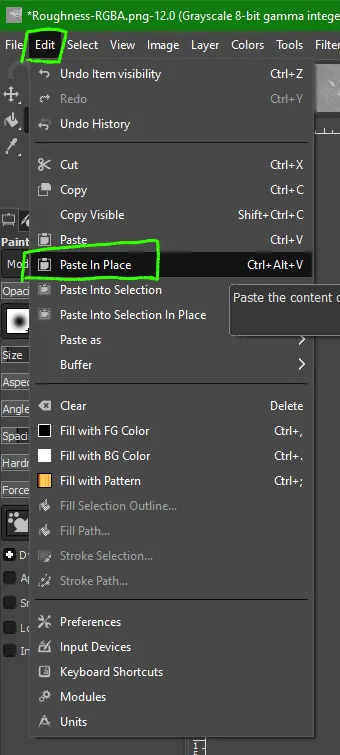
10. In the menu bar, go to "Edit -> Copy" (or hit Ctrl+C) to copy your AO map image.

11. Swap back over the Decomposed Layers file and click on the "blue" layer to set it to the active layer.

12. In the menu bar, go to "Edit -> Paste In Place" to paste your copied AO map.

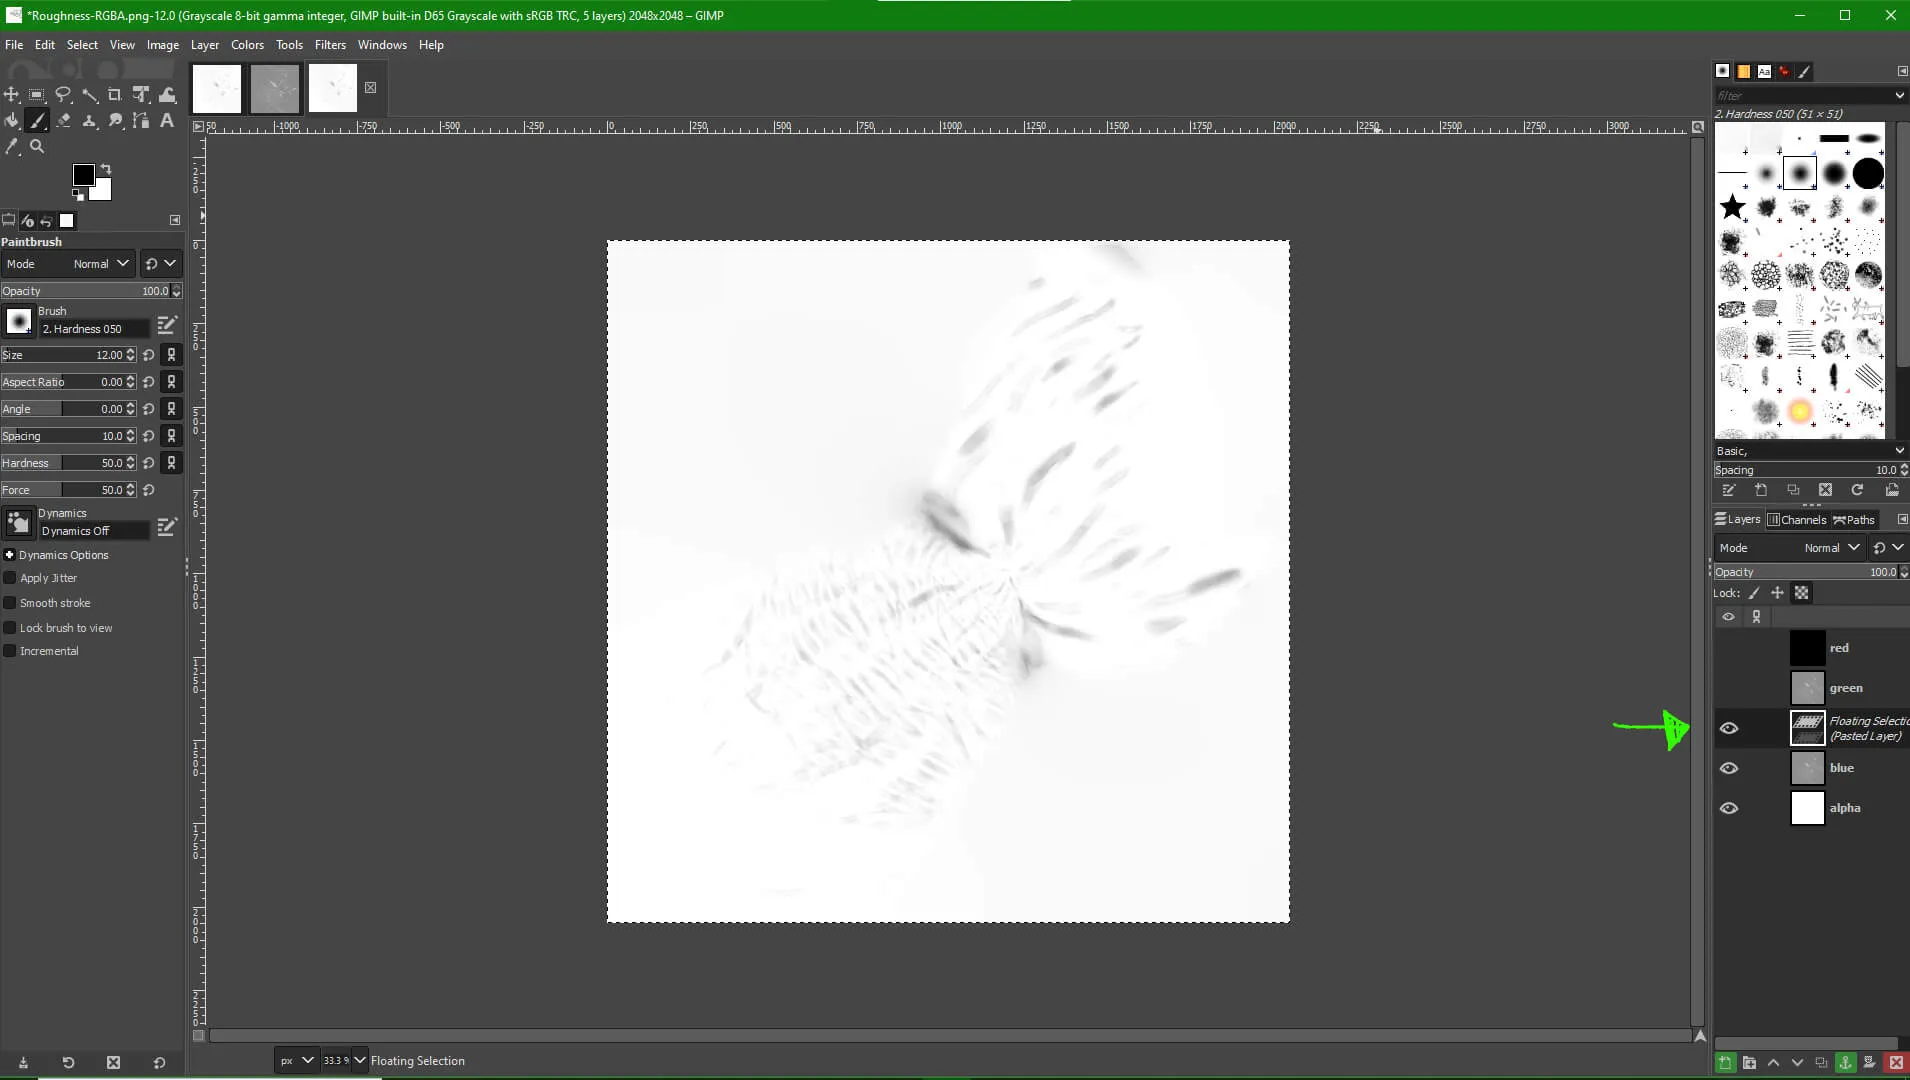
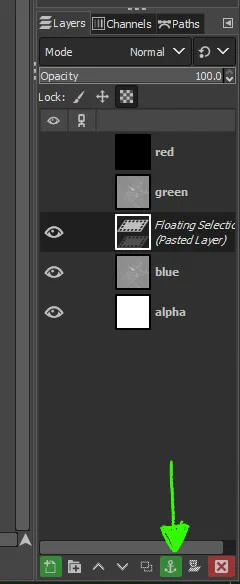
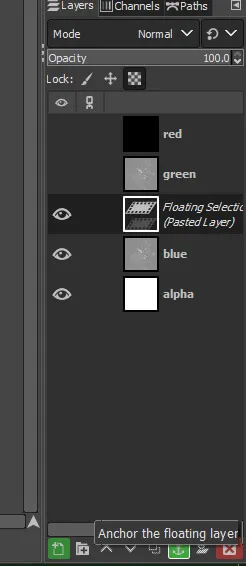
13. You should see your AO map pasted in the file now as a "Floating Selection".

14. In the layer tab, click the small anchor icon at the bottom to anchor the pasted layer onto the one below it.


15. Your "blue" layer should now have merged with the pasted image. Merging the layers together this way ensures that they will Recompose properly in the end. If your Metalness map has information in it, paste it into the "red" layer the same way as the AO map.

16. Click on the small eye icons next to the layers you hid before to make them visible again.

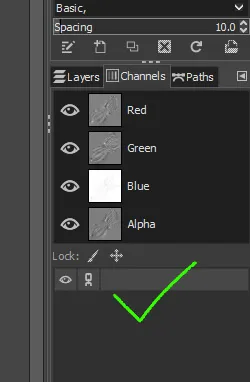
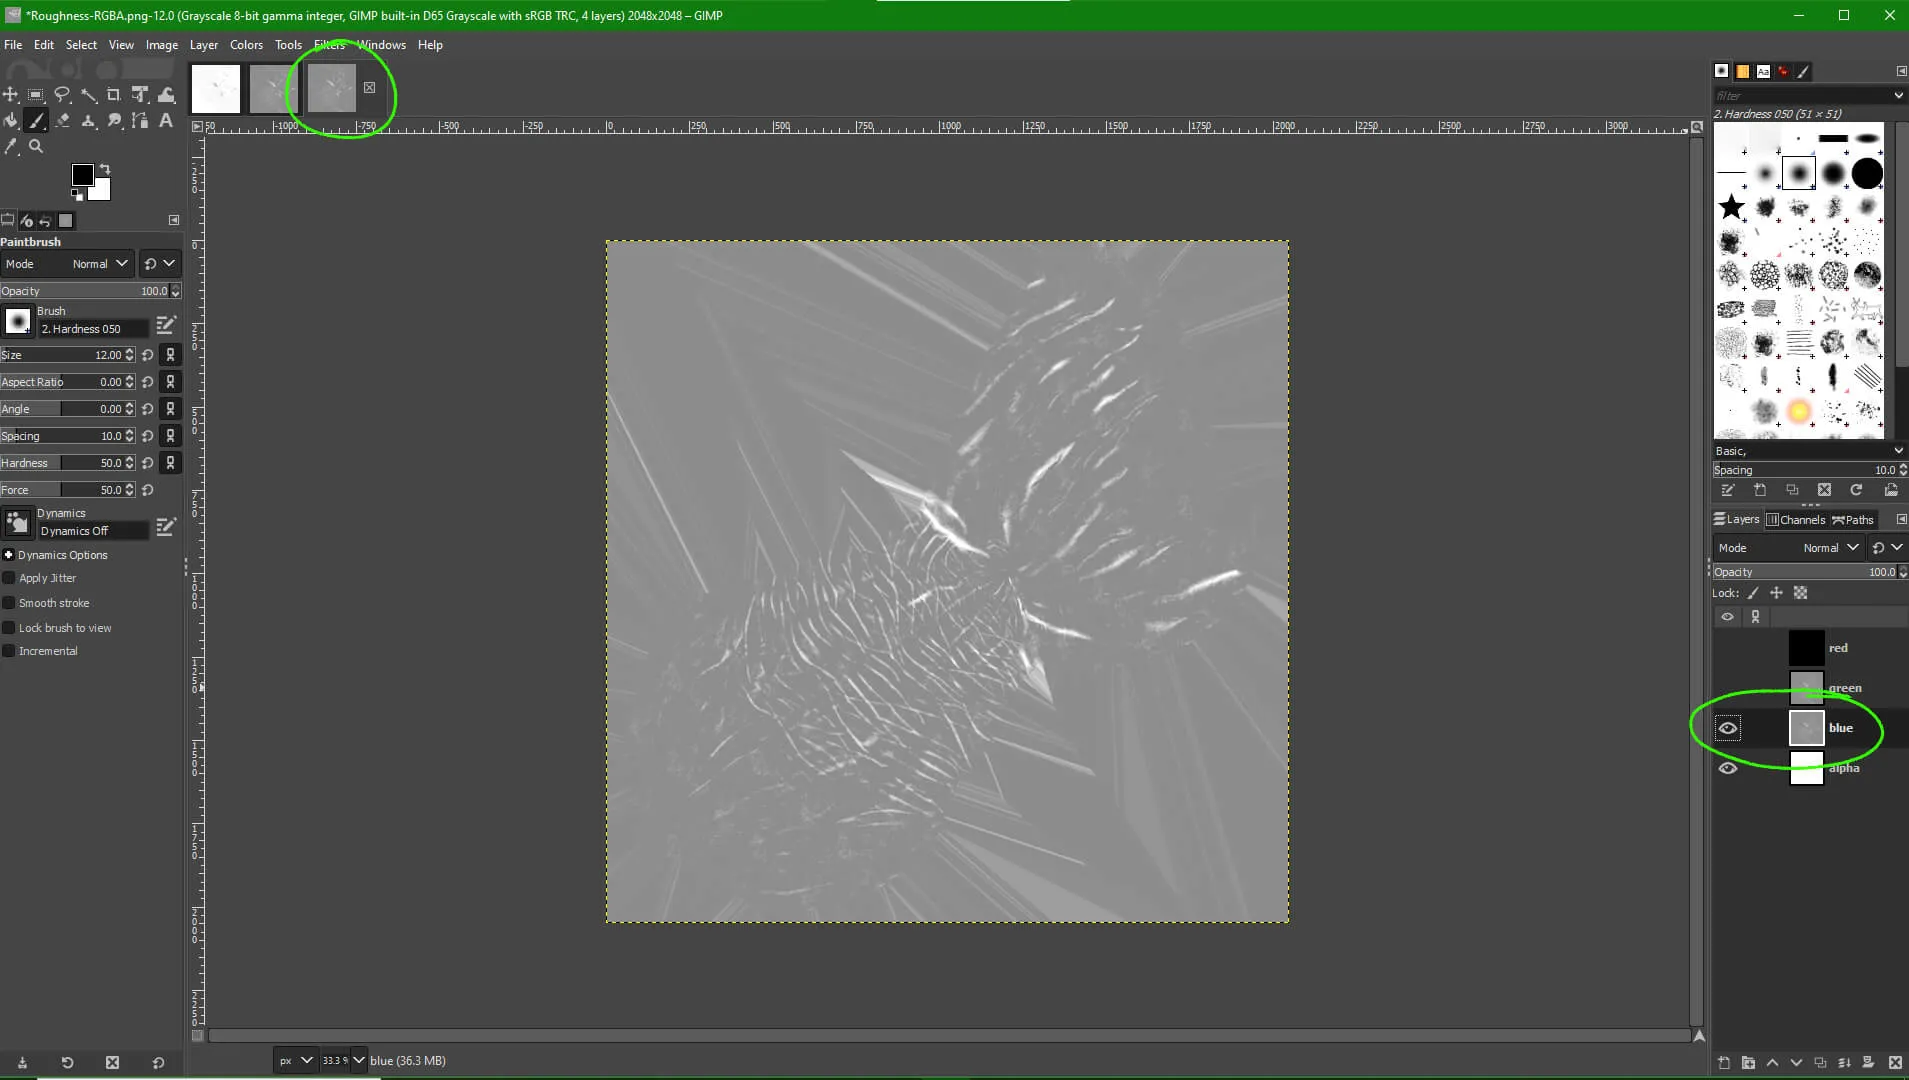
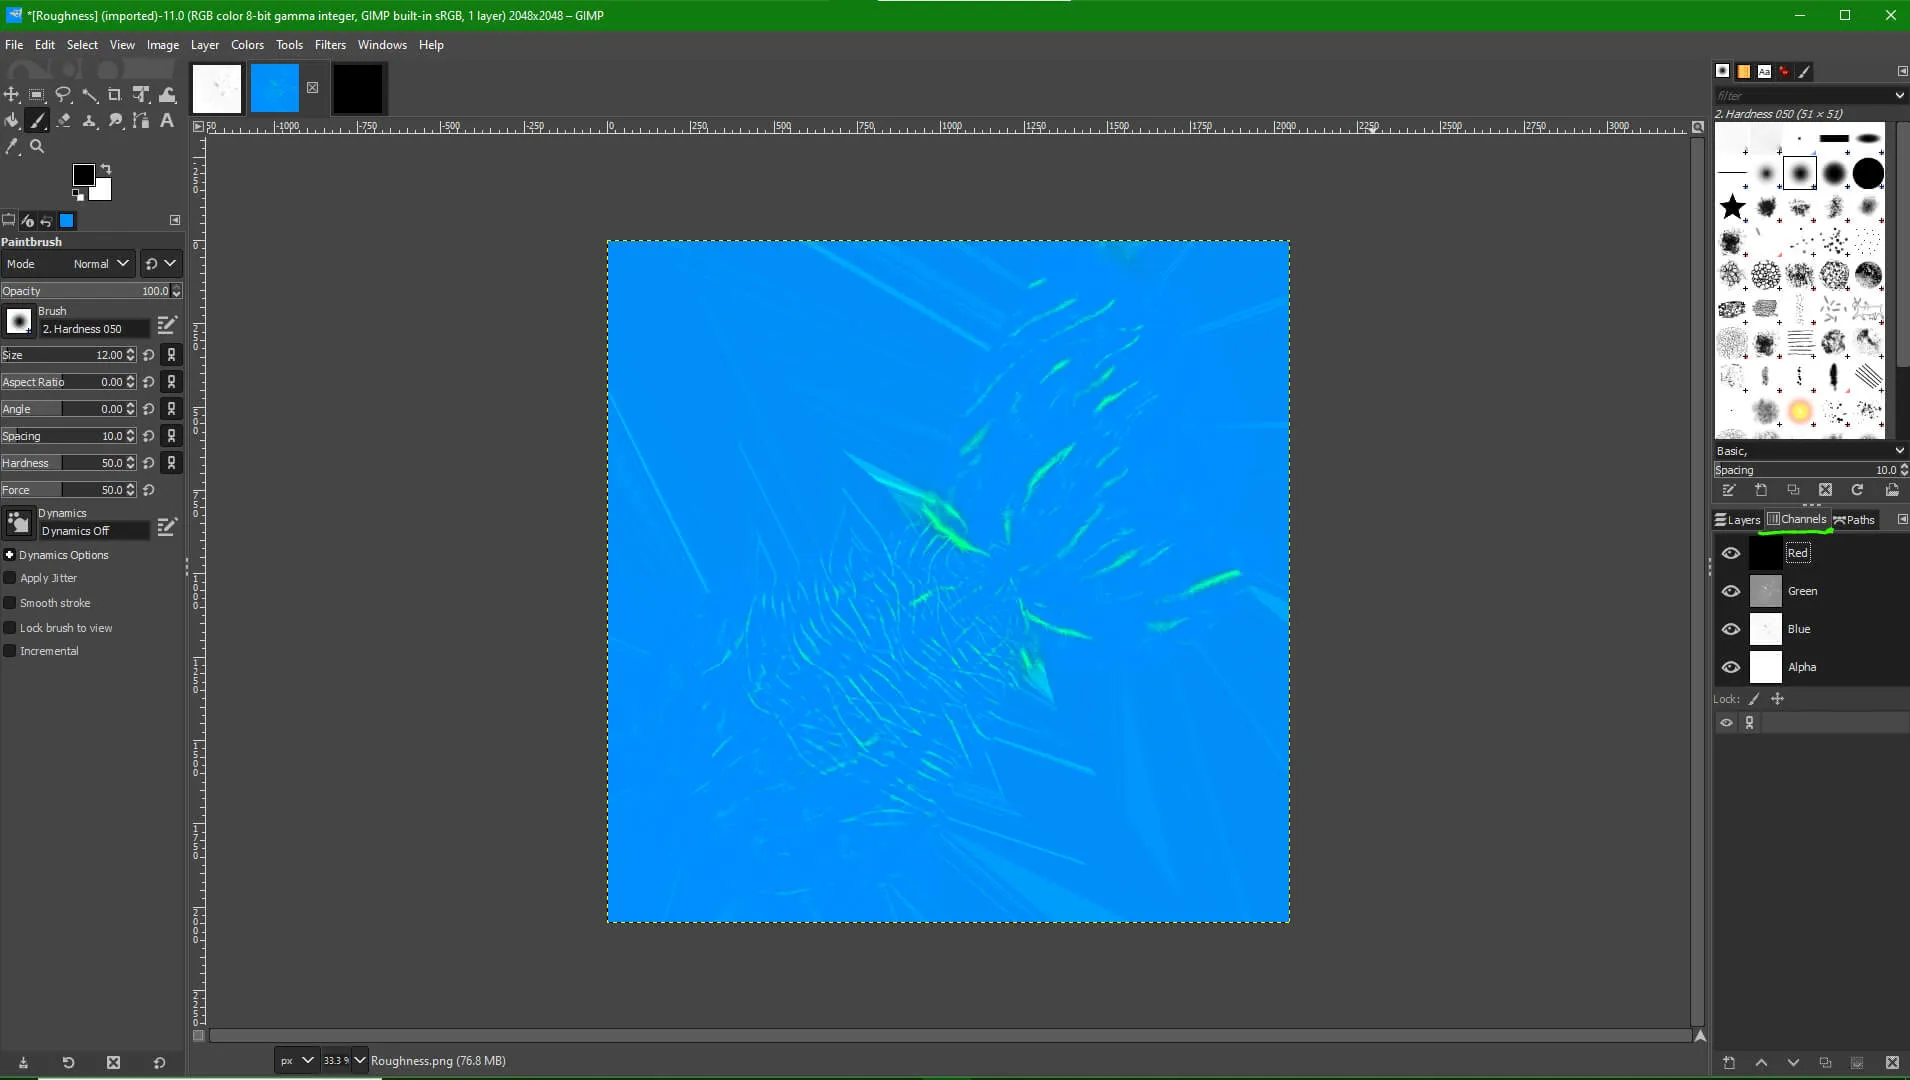
17. Go to "Colors -> Components -> Recompose" in the menu bar to recompose the layers back into channels in your original file.
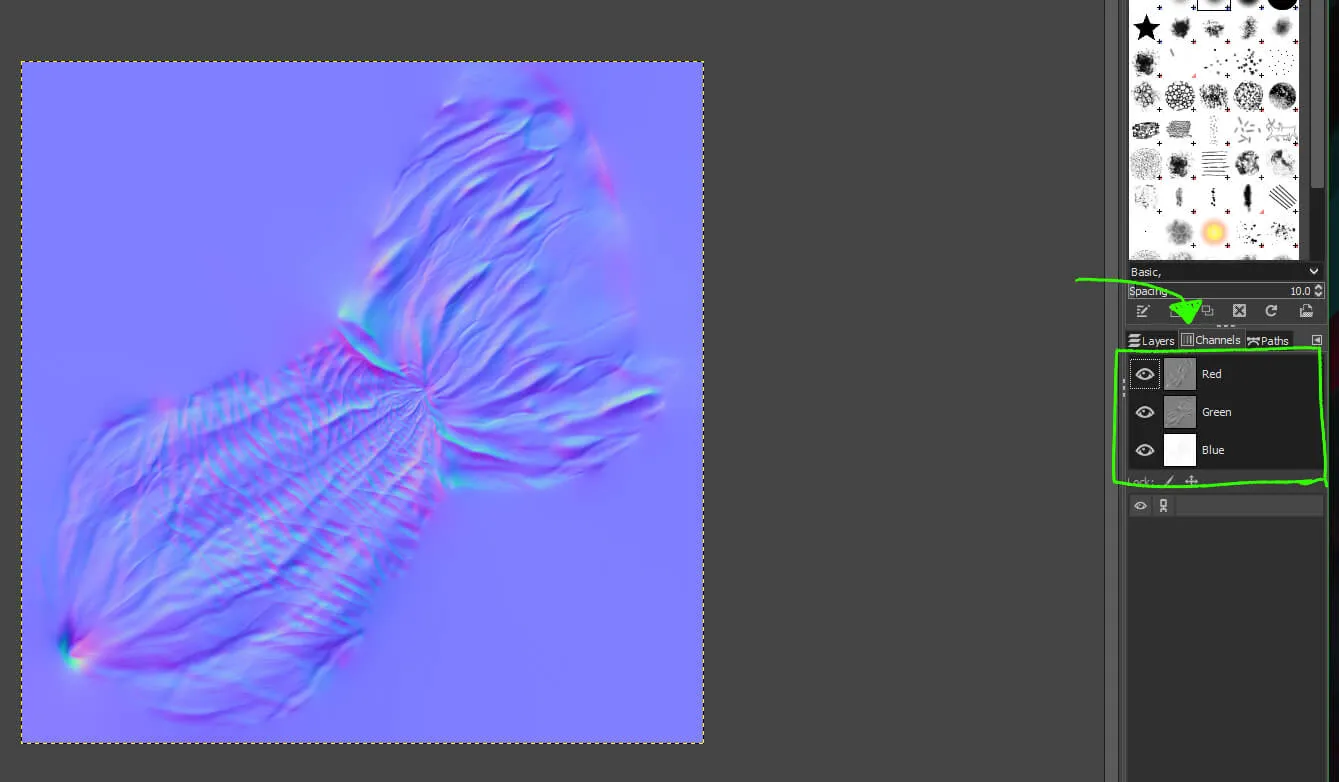
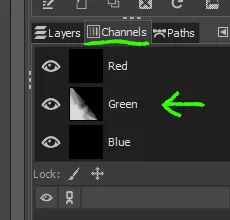
18. Go back to the original file and check the Channels tab to make sure it recomposed properly - your PM map should now also look something like this.

19. If your original file seems to still be the same as before, make sure that in the channels tab none of the channels are selected/highlighted. If any of them are, just click on them again to de-select them, then go back to the Decomposed Layers file and repeat step 17 to recompose it.
20. Your channel order for the finished PM should be Metalness in Red, Roughness in Green, AO in Blue, and nothing in Alpha.

21. Your recomposed file is now ready to export. Go to "File -> Export As..."
22. Select a save location for your file, and name it to whatever you choose. Check the vanilla game textures to see what naming conventions are used for the files the textures are for. I personally also export a .png version to keep as a backup, but you will need a .dds file for the game. You can either rename your file with the .dds extension, or click "Select File Type (By Extension)" at the bottom to select the .dds file type. Once ready, just click "Export" to save your texture. A window will pop-up with export options. For .png, just leave everything at default.
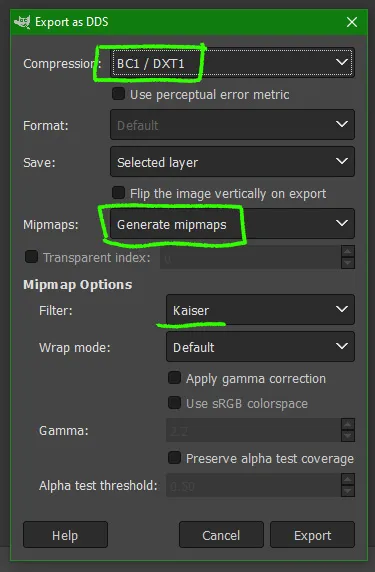
23. To correctly export your Physical map as a .dds file, make sure to select "BC1/DTX1" for Compression, and "Generate mipmaps" for Mipmaps. Set the Filter under Mipmap Options to "Kaiser".

Basecolor Map[edit section | visual editor]
1. Open your Basecolor Map in GIMP. Right-click on the layer and select "Add Alpha Channel". This will add an empty Alpha channel.


2. Your file is now ready to export. Go to "File -> Export As..."
3. Select a save location for your file, and name it to whatever you choose. Check the vanilla game textures to see what naming conventions are used for the files the textures are for. I personally also export a .png version to keep as a backup, but you will need a .dds file for the game. You can either rename your file with the .dds extension, or click "Select File Type (By Extension)" at the bottom to select the .dds file type. Once ready, just click "Export" to save your texture. A window will pop-up with export options. For .png, just leave everything at default.
4. To correctly export your Basecolor map as a .dds file, make sure to select "BC1/DTX1" for Compression, and "Generate mipmaps" for Mipmaps. Set the Filter under Mipmap Options to "Kaiser".

Mask Map[edit section | visual editor]
The channels that mask maps use in the game vary depending on what the mask is used for. This example is just for horn textures, so check the vanilla game textures first to find out what channels you need. In any case, mask maps do not need an Alpha channel, so all you have to do for them is export as a .dds file.
Either way, it doesn't hurt to check the Channels tab to make sure you've only got information in the channels that are supposed to have it, i.e. just the "green" channel for horn mask maps.

1. Your file is now ready to export. Go to "File -> Export As..."
2. Select a save location for your file, and name it to whatever you choose. Check the vanilla game textures to see what naming conventions are used for the files the textures are for. I personally also export a .png version to keep as a backup, but you will need a .dds file for the game. You can either rename your file with the .dds extension, or click "Select File Type (By Extension)" at the bottom to select the .dds file type. Once ready, just click "Export" to save your texture. A window will pop-up with export options. For .png, just leave everything at default.
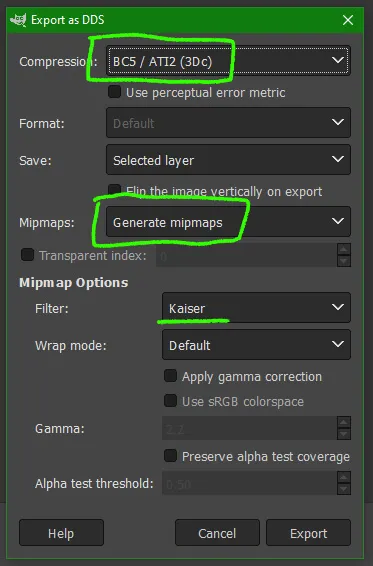
3. To correctly export your Mask map as a .dds file, make sure to select "BC5/ATI2 (3Dc)" for Compression, and "Generate mipmaps" for Mipmaps. Set the Filter under Mipmap Options to "Kaiser".

Export Settings TL;DR[edit section | visual editor]
If you already know how to do all the channel editing and just need a quick reference on how these maps are set up and exported.
Normal Map Channels:
- Red - Nothing
- Green - Green
- Blue - Blue
- Alpha - Red
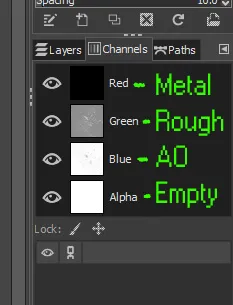
Physical Map Channels:
- Red - Metalness
- Green - Roughness
- Blue - AO
- Alpha - Nothing
Basecolor Map Channels:
- Red - Red
- Green - Green
- Blue - Blue
- Alpha - Nothing
Mask Map Channels:
- Check vanilla textures for whatever you're masking. These usually don't need an Alpha channel.
DDS Export Settings:
- Normal Map:
- BC3 DTX5
- Physical Map:
- BC1 DTX1
- Basecolor Map:
- BC1 DTX1
- Mask Map:
- These again depend on the type of mask you're creating. I'll be collecting as much info for different mask maps here as I find.
- BC5 Unsigned (Paint.NET) / BC5 ATI2 (GIMP) for Horn masks
- BC7 RGBA 8bpp | Explicit alpha (Photoshop) / BC7 sRGB or BC7 Linear (Paint.NET) for Shared Scars MSK (thanks to aurebuen for the info)
Icon/Atlas Export Settings[edit section | visual editor]
If using Paint.net and your icon atlas ends up invisible in game when using DXT1/DXT5 try using the below:
- First make sure your uuids are unique and are not clashing with another mod
- if that doesn't work use this format
