Ad placeholder
Rescue the Gnome: Difference between revisions
(Wyll's connection to the goblins was removed in the final release.) |
No edit summary |
||
| Line 1: | Line 1: | ||
{{ up to date | 2023-09-03 }} <!-- Date format is YEAR-MONTH-DAY, like 2023-08-07. --> | |||
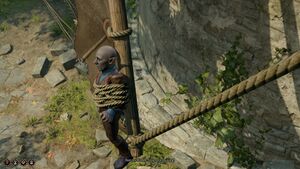
[[File:Barcus on Windmill Quest.jpg|thumb|Barcus is tormented by goblins.]] | |||
'''Rescue the Gnome''' is a [[quest]] in the [[Blighted Village]]. It is initiated by discovering a group of goblins laughing at having tied [[Barcus Wroot]] to the blade of a windmill. {{SpoilerWarning}} | '''Rescue the Gnome''' is a [[quest]] in the [[Blighted Village]]. It is initiated by discovering a group of goblins laughing at having tied [[Barcus Wroot]] to the blade of a windmill. {{SpoilerWarning}} | ||
==Objectives== | ==Objectives== | ||
''Objectives and journal entries may vary pending player decisions and outcomes.'' | ''Objectives and journal entries may vary pending player decisions and outcomes.'' | ||
<div class="toccolours mw-collapsible mw-collapsed"> | |||
<div style="font-weight: bold; line-height: 1.6;">Approach the goblins.</div> | |||
<div class="mw-collapsible-content"> | |||
* We spotted a deep gnome tied to the blades of a windmill. He's being tormented by a group of goblins. | |||
</div></div> | |||
<div class="toccolours mw-collapsible mw-collapsed" style="border-top: none;"> | |||
*Untie the gnome. | <div style="font-weight: bold; line-height: 1.6;">Defeat the goblins.</div> | ||
<div class="mw-collapsible-content"> | |||
* The goblins attacked us. | |||
</div></div> | |||
<div class="toccolours mw-collapsible mw-collapsed" style="border-top: none;"> | |||
<div style="font-weight: bold; line-height: 1.6;">Stop the windmill.</div> | |||
<div class="mw-collapsible-content"> | |||
* We've defeated the goblins. If we want to help the gnome, we'll have to stop the windmill. | |||
* It took some convincing, but the goblins left. If we want to help the gnome, we'll have to stop the windmill. | |||
</div></div> | |||
<div class="toccolours mw-collapsible mw-collapsed" style="border-top: none;"> | |||
<div style="font-weight: bold; line-height: 1.6;">Untie the gnome.</div> | |||
<div class="mw-collapsible-content"> | |||
* Now that the windmill has stopped spinning, we should be able to untie the gnome. | |||
</div></div> | |||
<div class="toccolours mw-collapsible mw-collapsed" style="border-top: none;"> | |||
<div style="font-weight: bold; line-height: 1.6;">Quest Complete</div> | |||
<div class="mw-collapsible-content"> | |||
* After rescuing Barcus Wroot, we parted ways with him. | |||
* We invited Barcus Wroot to our camp. | |||
* The deep gnome was killed. | |||
* We left without helping the deep gnome. | |||
</div></div> | |||
== Walkthrough == | == Walkthrough == | ||
The objectives of this quest | The objectives of this quest are relatively simple - free Barcus. Approaching the Windmill (X:13, Y:418) automatically initiates a conversation with [[Fezzerk]] the goblin leader of the group. From there, the player has multiple ways to resolve the situation. | ||
* Convince Fezzerk to leave through diplomacy or Illithid Persuasion. | * Convince Fezzerk to leave through diplomacy or Illithid Persuasion. | ||
* The player can also choose to violence. | * The player can also choose to use violence. | ||
* The player is also free to do nothing and leave Barcus spinning. | * The player is also free to do nothing and leave Barcus spinning. | ||
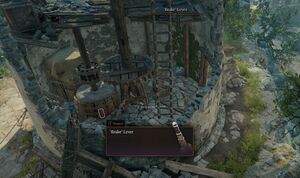
[[File:Brake Lever.jpg|thumb|The brake lever that will safely stop the windmill. ]] | [[File:Brake Lever.jpg|thumb|The brake lever that will safely stop the windmill. ]] | ||
Should the player choose the violent approach, they only need to damage Fezzerk to near death to force the entire group to surrender. Killing Fezzerk | Should the player choose the violent approach, they only need to damage Fezzerk to near death to force the entire group to surrender. Killing Fezzerk similarly forces the rest of his group to flee. | ||
Once the Goblins have been dealt with, the player | Once the Goblins have been dealt with, the player needs to go to the interior of the windmill to stop it from spinning, and allowing them to free Barcus. It is important to note that there are two levers inside the Windmill, and that the player must choose the "'''Brake'''" lever to safely stop the Windmill. | ||
Choosing to use the "'''Release Brake'''" lever instead | Choosing to use the "'''Release Brake'''" lever instead forces the windmill to an abrupt, violent stop, leading to Barcus being launched into the sky by inertia, and subsequently dying. | ||
If the windmill is stopped properly, the player can then free Barcus by interacting with him. Barcus | If the windmill is stopped properly, the player can then free Barcus by interacting with him. Barcus offers the player his luggage (which contains various goods, including a [[Smokepowder Satchel]]) in the basement of the windmill, reasoning that lugging around the extra weight was what got him caught in the first place. Note - actually saving Barcus is not required to obtain this quest reward, as his luggage will be in the basement regardless. | ||
== Quest Rewards == | == Quest Rewards == | ||
* {{SmallIcon|Throwable Smokepowder Satchel Icon.png}} [[Smokepowder Satchel]] | |||
* {{SmallIcon|The Speedy Lightfeet Icon.png}} [[The Speedy Lightfeet]] in the heavy chest next to Barcus' satchel | |||
== Consequences == | |||
Saving Barcus has far reaching consequences for many quests, including [[Save the Grymforge Gnomes]], [[Rescue Wulbren]], and [[Avenge the Ironhands]]. He can be seen throughout Acts Two and Three if he is rescued. | |||
[[Category:Quests]] | [[Category:Quests]] | ||
Revision as of 01:54, 3 September 2023
Spoiler warning: The following content contains unhidden spoilers. Read at your own risk. |
Objectives
Objectives and journal entries may vary pending player decisions and outcomes.
- We spotted a deep gnome tied to the blades of a windmill. He's being tormented by a group of goblins.
- The goblins attacked us.
- We've defeated the goblins. If we want to help the gnome, we'll have to stop the windmill.
- It took some convincing, but the goblins left. If we want to help the gnome, we'll have to stop the windmill.
- Now that the windmill has stopped spinning, we should be able to untie the gnome.
- After rescuing Barcus Wroot, we parted ways with him.
- We invited Barcus Wroot to our camp.
- The deep gnome was killed.
- We left without helping the deep gnome.
Walkthrough
The objectives of this quest are relatively simple - free Barcus. Approaching the Windmill (X:13, Y:418) automatically initiates a conversation with Fezzerk the goblin leader of the group. From there, the player has multiple ways to resolve the situation.
- Convince Fezzerk to leave through diplomacy or Illithid Persuasion.
- The player can also choose to use violence.
- The player is also free to do nothing and leave Barcus spinning.
Should the player choose the violent approach, they only need to damage Fezzerk to near death to force the entire group to surrender. Killing Fezzerk similarly forces the rest of his group to flee.
Once the Goblins have been dealt with, the player needs to go to the interior of the windmill to stop it from spinning, and allowing them to free Barcus. It is important to note that there are two levers inside the Windmill, and that the player must choose the "Brake" lever to safely stop the Windmill.
Choosing to use the "Release Brake" lever instead forces the windmill to an abrupt, violent stop, leading to Barcus being launched into the sky by inertia, and subsequently dying.
If the windmill is stopped properly, the player can then free Barcus by interacting with him. Barcus offers the player his luggage (which contains various goods, including a Smokepowder Satchel) in the basement of the windmill, reasoning that lugging around the extra weight was what got him caught in the first place. Note - actually saving Barcus is not required to obtain this quest reward, as his luggage will be in the basement regardless.
Quest Rewards
 Smokepowder Satchel
 The Speedy Lightfeet in the heavy chest next to Barcus' satchel
Consequences
Saving Barcus has far reaching consequences for many quests, including Save the Grymforge Gnomes, Rescue Wulbren, and Avenge the Ironhands. He can be seen throughout Acts Two and Three if he is rescued.

