(Made page) |
|||
| (34 intermediate revisions by 13 users not shown) | |||
| Line 1: | Line 1: | ||
{{Location page | |||
The | | prefix = The | ||
== | | name = Defiled Temple | ||
* | | alt name prefix = the | ||
*[[ | | alt name = Temple of Selûne | ||
== | | image = Defiled Temple.jpg | ||
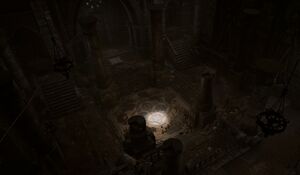
* | | image description = The Selûnite puzzle in the Defiled Temple. | ||
* | | act = one | ||
* | | summary = It serves as one of the entrances to the [[Underdark]]. | ||
* | | region prefix = the | ||
== | | region = Shattered Sanctum | ||
| north = | |||
| west = | |||
| east = | |||
| south = | |||
}} | |||
== Overview == | |||
The Defiled Temple is an old {{CharLink|Selûne|Selûnite}} temple that has long been abandoned. It can be accessed through its main door in Priestess Gut's quarters in the {{Coords|253|-7|Shattered Sanctum}}, through a cave mouth in the spider pen, or through a small hole in the [[Zhentarim|Zhentarim's]] stock room. | |||
=== Gut's room === | |||
Gut's room is guarded by {{CharLink|Polma}} (and {{CharLink|Gut}} if she knocked out the party). The gilded chest near the bed contains an {{SmRarityItem|Amulet of Misty Step}} at {{Coords|386|8}}. The {{SmRarityItem|Selûnite Journal}} is nearby, which provides information on the moon tile puzzle farther in the temple. | |||
=== Moon tile puzzle === | |||
In the north-eastern section of the temple is a room with four tiles in the centre. The puzzle is solved by rotating the tiles such that the new moon icons (black circles) are all on the southern-most ring. Upon completion, a door opens to reveal a long descent into the [[Underdark]]. | |||
* The puzzle can be solved by interacting with the tiles in the following sequence: ''(note that this is only one of many possible solutions)'' | |||
# North | |||
# North | |||
# East | |||
# West | |||
# South | |||
# South | |||
# East | |||
* Alternatively, there is a hidden lever in the north part of this room, near a set of stairs, that can be revealed with a [[Perception]] check at {{Coords|442|64}}. This lever can be [[Sleight of Hand|lockpicked]] to bypass the puzzle and open the way. | |||
=== Points of interest === | |||
* Four Stone Discs {{Coords|436|55}} | |||
=== Connected locations === | |||
* {{Loc|Shattered Sanctum}} | |||
* {{Loc|Underdark}} (via [[Selûnite Outpost]]) at {{Coords|441|98}} | |||
== Notable characters == | |||
* {{MdCharLink|Gut}} (conditional) | |||
* {{MdCharLink|Polma}} | |||
== Loot == | |||
* {{MdRarityItem|Amulet of Misty Step}} in a gilded chest at {{coords|386|8}} | |||
* {{MdRarityItem|Recipe of Elixir of Arcane Cultivation}} near the gilded chest | |||
* {{MdRarityItem|Selûnite Journal}} in a cabinet at {{coords|386|8}} | |||
== Related quests == | |||
* {{Quest|Find the Nightsong}} | |||
* {{Quest|Reach Moonrise Towers}} | |||
{{Goblin Camp}} | |||
[[Category:Locations]] | |||
[[Category:Act One Locations]] | |||
Latest revision as of 21:51, 17 February 2025
Overview[edit | edit source]
The Defiled Temple is an old Selûnite temple that has long been abandoned. It can be accessed through its main door in Priestess Gut's quarters in the Shattered Sanctum X: 253 Y: -7, through a cave mouth in the spider pen, or through a small hole in the Zhentarim's stock room.
Gut's room[edit | edit source]
Gut's room is guarded by Polma (and Gut if she knocked out the party). The gilded chest near the bed contains an ![]() Amulet of Misty Step at X: 386 Y: 8. The
Amulet of Misty Step at X: 386 Y: 8. The ![]() Selûnite Journal is nearby, which provides information on the moon tile puzzle farther in the temple.
Selûnite Journal is nearby, which provides information on the moon tile puzzle farther in the temple.
Moon tile puzzle[edit | edit source]
In the north-eastern section of the temple is a room with four tiles in the centre. The puzzle is solved by rotating the tiles such that the new moon icons (black circles) are all on the southern-most ring. Upon completion, a door opens to reveal a long descent into the Underdark.
- The puzzle can be solved by interacting with the tiles in the following sequence: (note that this is only one of many possible solutions)
- North
- North
- East
- West
- South
- South
- East
- Alternatively, there is a hidden lever in the north part of this room, near a set of stairs, that can be revealed with a Perception check at X: 442 Y: 64. This lever can be lockpicked to bypass the puzzle and open the way.
Points of interest[edit | edit source]
- Four Stone Discs X: 436 Y: 55
Connected locations[edit | edit source]
- (via Selûnite Outpost) at X: 441 Y: 98
Notable characters[edit | edit source]
Loot[edit | edit source]
 Amulet of Misty Step in a gilded chest at X: 386 Y: 8
 Recipe of Elixir of Arcane Cultivation near the gilded chest
 Selûnite Journal in a cabinet at X: 386 Y: 8

