More actions
Kill Raphael's Old Enemy is a quest in Act Two of Baldur's Gate 3. It can be started by speaking with Raphael near the entrance to the Thorm Mausoleum.
Spoiler warning: The following content contains unhidden spoilers. Read at your own risk. |
Objectives
Objectives and journal entries may vary pending player decisions and outcomes.
- Raphael told us of a nemesis of his who lurks in the depths beneath the mausoleum. Evidently we should try to deal with this old enemy.
- We discovered signs of destruction throughout the temple. We can likely follow the trail of carnage to Raphael's old acquaintance.
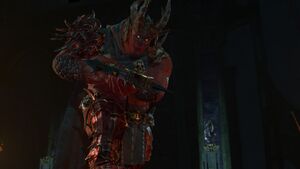
- We encountered Raphael's old enemy - an orthon named Yurgir.
- The orthon revealed the details of his contract with Raphael - he can only leave the temple once he has killed the last Sharran in residence.
- We slew the orthon.
- We convinced the orthon of another way to escape the temple - by killing himself and returning to the Nine Hells.
- We moved on before meeting Raphael's old enemy.
- We helped the orthon break free from his contract - but it seems that Raphael had already planned for the outcome.
Walkthrough
Raphael is waiting for the party near the entrance to the Thorm Mausoleum (X:-191, Y:112). The Mausoleum is northeast of the House of Healing. He immediately strikes up a conversation, explaining that a dangerous creature lurks below the Mausoleum. Raphael couches his words in poetics, but eventually spits out that the creature is an enemy of his and he wants him dead. If Astarion is in the party when Raphael appears, then he will make a deal with Raphael to tell him about his scars in exchange for killing the demon. This occurs regardless of if Astarion has confided in the party about his scars. Raphael impresses upon the party how dangerous the creature is and, if Karlach is in the party, confirms the creature is an orthon. Then he disappears, leaving the party to move forward into the Mausoleum.
Finding the Orthon
Enter the Mausoleum after being accosted by Raphael and there is a small puzzle to proceed forward. There are three paintings with buttons underneath them, press them in the following order to open the way: Moonrise Towers, Grief, General. Move north using the traversal gem to enter the Gauntlet of Shar.
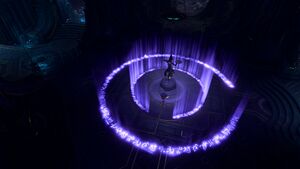
Once inside, Shar speaks to the party, inviting them to take on her trials and prove themselves worthy. The first task is to access an Umbral Gem at a statue. To do this, the party must snuff out eight Mystic Thuribles around the room. There are two levels to the north and south of each side of the room. The rooms are protected by pressure plates, which can be disarmed (DC 10) as well as vents that activate with the plates. Hit the levers to lower the Thuribles, then interact with them to snuff out their lights. Getting too close to the statue before the Thuribles are snuffed out causes it to magically repel the party. Any Moonlanterns must also be unequipped, as they emit light. Once the room is shrouded in darkness, purple glyphs are revealed around the statue. Follow the gaps in the glyphs to touch the Umbral Gem. This opens the way north.
Follow the path forward and the party eventually encounters a group of Reconstituted Duelists. They try to warn the party away, but are interrupted by tremors. A group of undead Justiciars attack the party and Umbral Tremors appear. The Umbral Tremors can summor more Justiciars until they disappear.
Dealing with Yurgir
The orthon, Yurgir, is on the eastern end of the Gauntlet (X:-658, Y:-754). Yurgir is prepared to take the party down, smelling Raphael on them, and the party can attack in response or try to make a deal with him.
Choose "Put that thing down. I'm here to talk" to start negotiations. Then choose "Wait - you know Raphael?" when Yurgir mention's Raphael's scent being on them. Choose "I've had dealings with that devil. Maybe we can help each other." to have Yurgir explains that he isn't physically trapped by the Gauntlet, but trapped by Raphael's contract. Then choose "Let's share our experiences about Raphael. Perhaps we can help each other." Yurgir shares his contract, a song:
Spill all the blood sworn to the night. Silence all prayers; smother each rite
Wander Shar's halls; hungry to slay; Leave no Justiciar alive to obey.
Leave none to hear it, then be set free; This song is your oath, swear, swear it to me.
From here, the party can genuinely try to help him and start Break Yurgir's Contract or trick Yurgir into killing his minions and himself.
- The party can Persuade (DC 16) Yurgir to stand down by choosing "There must be something you missed. Let me search this place for you." or "Wait - there's one last Dark Justiciar. I met him." if the party has already met Lyrthindor.
- The party can try to trick Yurgir into killing his minions by selecting "The lyrics are a trick. You've always had an audience - your followers. Get rid of them" (Persuasion DC 16). Then, he can be Persuaded (DC 21) to kill his displacer beast. To finish the killings, Persuade Yurgir (DC 21) to kill himself to be free of the song.
- Warlocks with a Fiend patron have a unique opportunity to suggest Yurgir kill himself right off the bat, with a Persuasion check of 21.
If Yurgir is attacked outright, he's joined by many Merregons and a Displacer Beast. Persuading him to start Break Yurgir's Contract makes it possible to persuade the Displacer Beast to take our party's side in case the fight breaks out later.
If Astarion is in the party, he disapproves of doing anything beyond immediately attacking Yurgir, even if the party intends to trick him into killing his minions and himself.
Quest Rewards
Consequences
Killing Yurgir progresses Astarion's companion quest, The Pale Elf. Aiding him deeply upsets Astarion, and he must be Persuaded or Deceived (DC 14) into staying with the party.
If Yurgir is convinced to kill himself, he cannot be recruited as part of Gather Your Allies.
In this particular dialogue, eliminating the enemies via Persuasion grants significantly less XP than killing them normally.


