More actions
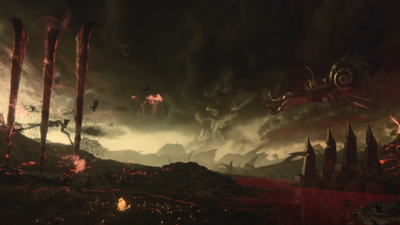
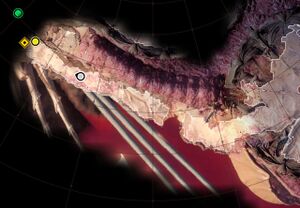
The first major quest of Baldur's Gate 3, Escape the Nautiloid, takes place immediately after the opening cinematic. The main character, now infected with a Mind Flayer tadpole, is aboard the ship the Nautiloid when it is attacked by Githyanki warriors. While trying to escape the attacking githyanki, the mind flayer controlling the ship warps it through different planes of existence, ending up in Avernus, the first of the Nine Hells. The objective of the Prologue is to find a way out of the Nautiloid, ideally not by dropping down into Hell.
Objectives
- Find a way off the Nautiloid.
- We've been abducted by mind flayers and infected with some kind of parasite. We need to find a way off this ship.
- Reach the Helm.
- Connect the nerves of the transponder.
- The mind flayer told us we need to connect the nerves of the transponder to escape Hell.
- We escaped Hell on the Nautiloid.
Walkthrough
Hint: This walkthrough makes extensive use of compass directions (north, south, east, west). Disabling the option Rotating minimap under the User Interface settings may make it easier to follow these directions.
Nursery room
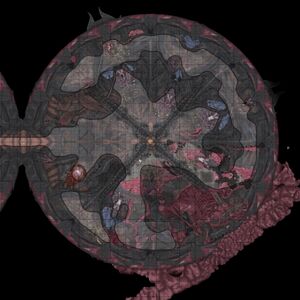
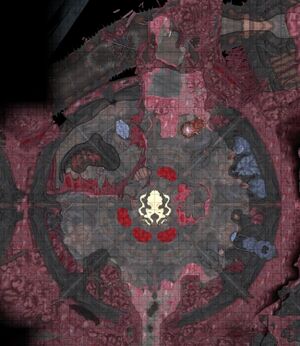
This is the room in which the game begins. The main character has broken free from a Mind Flayer Pod and is standing alone in the room. Around the room there are various empty mind flayer pods indicating that there might be other survivors.
1. In the middle of the room there is a mind flayer "nursery" i.e. a pool filled with larvae. Upon interacting with it, you can Investigate it to determine that it's about to break apart. If you try to touch it, it explodes and causes a small amount of damage to your character. To the south of the nursery there is a dead mind flayer you can loot for a random gem.
2. Further south you can climb up to a small elevation in the room, where a Cartilaginous Chest can be looted for some random loot including gold.
3. To the east of the room, slightly southward, you can go up to a larger elevated area, circling around all the way to the northwest of the room. Along this elevated area you can find:
- An Onyx and a Rune Slate lying on a table. Interacting the slate confers visions of the nautiloid ship.
- A Cartilaginous Chest containing some gold.
On the west side of the room you will find an illithid restoration device that fully heals you upon interaction, and a door to the next room.
Brain room
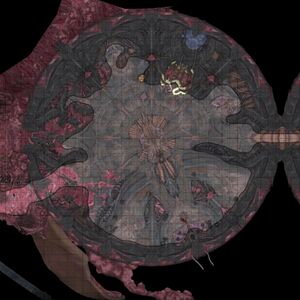
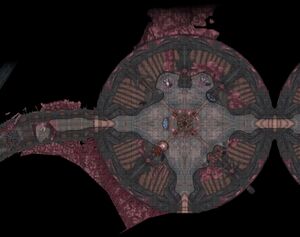
1. In the northeast there is a table with an Illithid Record and a Goblin corpse with a little gold. The record can be interacted with to reveal that it contains knowledge about Goblin culture.
2. West of the goblin there is a table with three further rune slates, one of which is about the composition of the nautiloid ship.
2. Westwards and to the north of the room there is a table on which you can find an Eldritch Tablet. The tablet can be interacted with just like the illithid record. The tablet contains knowledge about humanoid history (elves, dwarves, humans, etc.).
3. In the middle of the room, a small elevator can get you to an upper section of the room. Here you will find a dying person sitting on a chair with their scalp removed, their exposed brain telepathically asking you for help.
The Intellect Devourer
When you interact with the person in the chair, your character may be able to notice that the exposed brain is not in fact the person's own brain, but rather an Intellect Devourer named Us by succeeding an Arcana Check. You have various options to try to free the creature from the skull, although you can also just leave it in place or destroy it outright. Should you choose to free it and succeed, it can give you a bit of information about your situation, and will become a temporary Companion who can assist you in battle.
While freeing the intellect devourer from the skull, you also have the option of trying to mutilate it to make it more obedient to you, although this seems to be unnecessary as it's obedient to you either way, and failing the Dexterity Check while trying to mutilate it will cause the creature to go hostile.
Meeting Lae'zel
To the west of the brain room there's an opening in the Nautiloid's shell. An outer path leads northwest, where you have to jump over a gap and will have your first encounter with the Githyanki soldier Lae'zel, who was previously seen in the opening cinematic, also being infected with a larva.
As Lae'zel jumps down from a ledge to attack you, the telepathic connection between you caused by the mind flayer larva makes her realize that you're not under mind control, and that the two of you could cooperate. She insists that you go to the helm of the Nautiloid, where you can take control of it, but first you will need to clear the way by battling some imps.
In the battle, there are three imps you need to defeat. This is easily done by going on the offense. They drop Scimitar, Handaxe and Light Crossbow.
After the battle, you can loot a dead incinerated Mind Flayer, two imp corpses and four dead thralls for minor loot, including another Handaxe and Light Crossbow as well as Shortsword, Simple Robe and Potion of Healing. You can exit this room to the northeast, climbing some cliffs. There's a healing pod on the ascent.
Shadowheart room
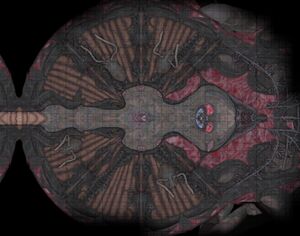
In this room you will be greeted by a pair of knocked out cultists on chairs, and some sort of control panel with three pairs of sigils and buttons. Lae'zel will warn you not to touch anything.
1. You will also hear a woman trapped in a mind flayer pod thudding against its glass encasing. It's Shadowheart, who will suggest you try to use the contraption next to the pod to get it opened. Looking at said contraption will reveal that there is an empty socket of some sort. You need an object to fit in there (see the next section). Aside Shadowheart's pod, there is a backpack with gold and a random gem.
2. To the south, there's a table with various objects on it: a Burnished Necklace, Dark Mind (a brain in a jar), the Illithid Manuscript, which seems to tell a story about "a brain, a githyanki warrior, and centuries of darkness", and a locked Elaborate Reliquary. You might be able to pick the lock of the reliquary, otherwise you can look for the key (see below). It contains gold and an Onyx.
3. Going back towards the entrance, you can look at the sigils on the control panel. Each will trigger an Arcana Check to allow you to read it. The left one says "Unleash," the middle one "Aggression," and the right one "Annihilate". The Unleash button apparently makes psionic energy radiate from the two knocked out cultists, but it's unclear what use this has (It does not allow you to talk to them. This might be just unimplemented yet). The Aggression button will make them become hostile against you. Annihilate will kill them. Making them attack you and then defeating them gives you 1 XP each if you're into that. Looting them can also be done by just pressing Annihilate.
You might notice that an intellect devourer occasionally walks through this room. The intellect devourer won't drop any loot if it is killed.
If you weren't able to lockpick the reliquary containing the Eldritch Rune for Shadowheart's pod, you'll want to look into the room to the east to find the key. To the south, in turn, you can finally enter the helm.
Ceremorphosis room
At the entrance of the room lies a dead thrall on which you can find the key to the reliquary in the previous room. There is yet another mind flayer pod at the center. This one contains a dazed woman who seems unresponsive. Behind her is a console with a sigil and a button. The sigil yet again triggers an arcana check, and succeeding it reveals that it says "Perfect". Pushing it makes the woman in the pod become a mind flayer.
On a raised platform at the back of the room there is a cartilaginous chest with 2 Potions of Healing and another dead thrall with an Edlritch Rune, that can be inserted into the control panel of Shadowheart's pod back in the other room to free her. There's nowhere to go from this room but back to the previous, so at this point you can go back and south, to free Shadowheart and/or go to the helm.
- If you are a Warlock or Sorcerer, you can free her without using the rune by passing an Arcana Check on the machine.
- If you are a Barbarian, you can free her without using the rune by passing a Strength Check on the pod.
With Lae'zel as a companion, Shadowheart will be a little snarky, but either way she asks to join you as a companion.
This page is in the process of being constructed or reformatted. You are welcome to contribute as well. Last edited on 2023-08-08. If multiple days have passed since, this template should be removed. |
Helm of the Nautiloid
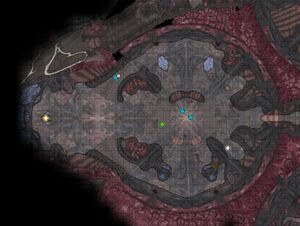
As you enter the helm, you will see a mind flayer fighting Commander Zhalk, a powerful Cambion wielding a flaming greatsword. A cutscene will play in which the mind flayer orders you to connect the nerves of the transponder, referring to the control apparatus of the ship that allows it to travel between dimensions. The mind flayer thinks that you're a thrall, thus considers you an ally.
A pair of lesser imps and a Lesser Hellsboar will block your path, but they should be easy to defeat if you have both Lae'zel and Shadowheart as companions. One of the imps carries a light crossbow, the other a Scimitar.
There are also lots of dead bodies on the floor, though none contain any notable loot. A dead thrall can be looted for a Leather Armour and Short Sword, an imp for a Light Crossbow, and two more thralls for Short Swords.
You can find two more caustic bulbs in this room as well, lying on tables (one in an upper area of the room), but it's probably not worth chasing after them.
While all the cutscenes and dialogue in this scene of the game tell you to ignore Commander Zhalk and reach the console, it's actually possible to help the mind flayer kill him. This gives you a large XP boost, and he will drop the greatsword Everburn Blade.
Don't take too long though, as a pair of Cambion soldiers will enter the room to join the fight at some point. They are almost as powerful as Commander Zhalk himself, so if they defeat the mind flayer and start attacking you, the battle will become nigh impossible. Although killing them might give you another big XP boost, this is almost certainly not worth the effort.
There is one plausible strategy for milking out even more XP from this room though, and that's killing Zhalk (along with all the minor minions in the room) just before the other two cambions appear. This makes the mind flayer go hostile against you, saying "you are no longer needed," and you have to be careful not to be immediately killed by it. If you get the timing just right, the two cambions should arrive right after that, after which the flayer will focus on them instead. The cambions will easily kill it, providing your party XP as the killed flayer was a hostile. (If the cambions arrive before Zhalk dies, the flayer doesn't turn hostile, thus its death doesn't provide you with XP.)
Note that nearing the console also makes another two lesser imps and another lesser hellsboar appear, though these should be easy to kill or even just run past. (If you've already milked Zhalk and the flayer for XP, you really don't need these minor guys on top of all that.) Once you've reached the console, interact with it to start a cutscene and end the prologue.
The Crash
In the cutscene that follows, the character that interacted with the neural console connects two arms to make the ship warp out of Avernus and back into the Prime Material Plane, but moments before the warp a red dragon latches on to the ship and breathes fire onto the console.
As the ship appears in the sky of the Material Plane, a Tiefling behind a telescope (Nadira) is seen looking at it with worry, and in another place, a Hobgoblin (Dror Ragzlin) and a rather smug-looking Drow (Minthara) observe the ship's descent. They order a group of goblins to march out of some sort of fort they seem to be occupying.
Back in the crashing Nautiloid, our main character is trying to hold on, but is hit in the face by a piece of debris and sent flying out of the Nautiloid. As the character falls to the ground, moments before impact they are held mid-air by magical force and end up having a soft landing. There is nobody nearby, indicating that this might be the doing of the mind flayer larva lodged behind the character's eye.

