Defiled Temple
More actions

Overview edit
Access edit

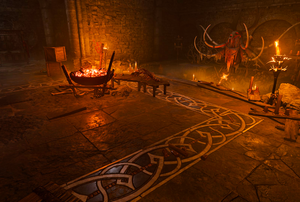
The Defiled Temple is a secluded part of the Shattered Sanctum of the former Selûnite temple. Since goblins have turned the temple into their camp, the Defiled Temple serves as Priestess Gut's personal chambers. It can be accessed through several points:
- A locked door in Gut's private chapel in the Shattered Sanctum at X: 253 Y: -7 (requires a DC 10 Sleight of Hand check to lockpick or the Priestess' Key, which can be pickpocketed or looted from Gut)
- A cave mouth in the spider pit which leads into Gut's private prison cell beneath the floor. To use this path, the Cracked Floor in the cell at X: 389 Y: 44 must be broken from inside. However, due to map level change, entering this way may require using spatial movement such as Misty Step.
- A small hole at X: 255 Y: -42 in the Zhentarim storeroom.
Gut's room edit
Gut's room has two parts: her bedroom and her private prison cell. The room is guarded by the ogre Polma. If Priestess Gut managed to knock out the player character, she is also here, praying to the Absolute at her personal altar. The other half of the room is a prison cell, where the player character finds themselves chained, should they stumble into Gut's trap. The key to their chains is in Gut's pockets.
If the player character avoided the trap, they comment on interacting with the chains on the cell floor. The key in this case lies on Gut's bed.
Throughout the dialogue with Gut, the chained character can attempt to break free or save their strength. If choosing the former and succeeding ability checks (see Ask the Goblin Priestess for Help), they free themselves. The iron gate to the cell is not locked, but if Gut or Polma notice the player character, a fight breaks out. Otherwise, if choosing to remain chained, Korrilla appears in the room and swiftly kills both Gut and Polma. After a short dialogue, she releases the player character's chains and vanishes.
If the player character frees themselves, they can also try to break the Cracked Floor in the cell to open a cave that leads into the spider pit. When broken, most of the floor falls away, and the character in question may fall and suffer damage accordingly. If the other party members have dealt with the spiders already (or convinced them to attack the goblins), the way is clear, and none of the goblins question the escaping party member on the way out. In this case, Korrilla does not appear, and Gut remains in her room with Polma.
A wooden ladder at X: 396 Y: 28 allows the party to try and sneak through the room past Polma (and possibly Gut) to the hall with the Moon Tile puzzle (see below).
The gilded chest at X: 386 Y: 8 contains an Amulet of Misty Step. The Selûnite Journal is in the cabinet near the bed. Reading it provides information on the Moon Tile puzzle farther in the temple. Inside the cell, a Scroll of Hold Person and a bottle of Basic Poison can be found. Near the altar, passing a DC 13 Perception check reveals a Pouch with some valuables, and on a stone table nearby lies a random uncommon scroll and another bottle of Basic Poison. Two more random scrolls can be found in the cabinet near the Rosewood Desk.
Proceeding deeper in Gut's room to X: 441 Y: 20, it is possible to jump down to a crumbled stone perch, where a skeleton lies, which can be looted for gold, random valuables, and / or potions.
Moon Tile puzzle edit

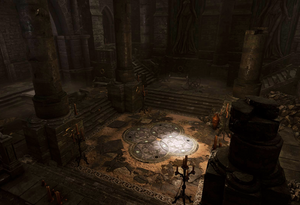
In the north-eastern section of the temple is a room with four movable tiles in the centre. All together, the tiles depict Selûne's symbol with phases of the moon. The puzzle is solved by rotating the tiles so that the new moon icons (black circles) are all gathered on the southernmost (illuminated) disc. The player character can find the hints on how to deal with the puzzle either from the Dwarf's Poem, which can be obtained from Klagga in the outer camp, or from the Selûnite Journal from Gut's room. The party members' reactions to noticing the puzzle depend on whether they have read any of these texts and on passing a DC 15 investigation check, which is rolled regardless of reading either.
The number of moves while solving the puzzle is not limited. One of the shortest sequences (but by no means the only correct one) is as follows:
North - North - East - West - South - South - East
Once the puzzle is completed, a door opens to reveal a long descent into the Underdark, which ends in the Selûnite Outpost. Solving the puzzle grants the inspiration The Phases Unfold for characters with the Sage background, and updates the Find the Nightsong quest.
Alternatively, a hidden and locked lever at X: 442 Y: 64 can be revealed by passing a DC 15 Perception check. The lever can be lockpicked with a DC 15 Sleight of Hand check to bypass the puzzle and open the way.[1]
Related locations edit
Related quests edit
Characters edit
Loot edit
- Amulet of Misty Step in a gilded chest at X: 386 Y: 8
- Recipe of Elixir of Arcane Cultivation near the gilded chest
- Selûnite Journal in a cabinet at X: 386 Y: 8
Notes edit
- ↑ The aforementioned inspiration is not given when the lever is used to open the way, but is still granted for solving the puzzle even after using the lever.

