More actions
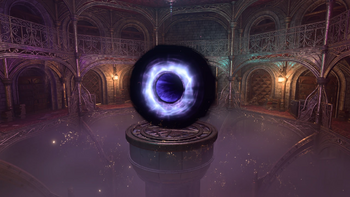
The Sorcerous Vault is a sub-area of Sorcerous Sundries. This area is fast travel restricted.
Spoiler warning: The following content contains unhidden spoilers. Read at your own risk. |
Area Information
Accessing the Sorcerous Vault
There are two ways to access the Sorcerous Vault:
- Press the Weave Button labelled 'Below' in Ramazith's Tower, after jumping down to the middle level using the floating furniture. This teleports you to the hidden northern room of the Vault.
- Go up the stairs to the second floor of Sorcerous Sundries and lockpick (DC 15) the metal door to the left X: 12 Y: -79. Interact with the Clasped Book in the bookcase in this room to open a portal to the central room of the Vault.
Unlocking the Elminster and Karsus Vaults
![]() Note: You will need to safely traverse this area; each octagonal room contains an invisible lever that disables all of the traps in that room. Several chests in the vaults are also invisible.
Note: You will need to safely traverse this area; each octagonal room contains an invisible lever that disables all of the traps in that room. Several chests in the vaults are also invisible.
To unlock the named vaults, open doors in the following order:
- Silverhand -> Evocation -> Wish -> pull the lever to unlock the Elminster Vault -> proceed through any door to return to the beginning.
- Silverhand -> Abjuration -> Silver -> pull the lever to unlock the Karsus Vault -> proceed through any door to return to the beginning.
Hidden Rooms
There are four hidden rooms in this area.
Hellfire Greataxe Room
Behind the Silverhand -> Illusion door lies the X: 366 Y: 941. Destroy the 'Illusion' door to find this room.
Hidden Northern Room
If you entered the Vault from Ramazith's Tower, you will begin in the hidden northern room. Otherwise, the room can be found behind a wall just north of the entry portal to the vault, locked behind a hidden button X: 369 Y: 1034 (requires a DC 15 Perception check to reveal). This room holds and several chests and crates full of items.
Yafeu the Djinni's Room
In the transitional hallway between the portal room and the hidden northern room, walk up to the eastern wooden chest to discover an illusory wall X: 374 Y: 1039. The room behind this wall contains a Peculiar Lamp.
Clicking on the Peculiar Lamp swaps you with whoever is currently stuck in the lamp (initially, Yafeu the Djinni). The character who clicked on the lamp is now stuck inside. "See: Escape Tactics" below for known methods of escape.
You may also choose to fight Yafeu when he tries to leave, though he only grants 10xp and does not drop any items. Note: It can be a convenient tactic to swap in and out of the lamp between turns, because inside the lamp is considered a separate region.
Escape Tactics
- Summon any creature and have them interact with the lamp to swap places with your trapped character. Dismissing the trapped summon will destroy the lamp, assuming it was the only occupant.
- There is sometimes a Scroll of Summon Quasit in one of the Gilded Chests X: -1602 Y: 113.
- Banishment can also be used to escape the lamp.
Hidden Library
The final hidden area can be found behind another illusory wall X: 359 Y: 1010, behind a wooden chest in the transitional hallway between the portal room and the door puzzle. This library contains notes about Lorroakan's attempts to gain immortality, a letter from Lenore De Hurst, and .
Related Quests
Related Locations
Notable Items
Notable items obtained in this location, whether looted, purchased, or obtained as a quest reward:
- : In a locked storage case in the hidden northern room of the Vault X: 368 Y: 1057
- : In a Gilded Chest behind the Silverhand -> Illusion door (destroy the 'Illusion' door) X: 366 Y: 941
- : In a hidden library area behind an illusory wall X: 350 Y: 1010
- : In an invisible Opulent Chest within the Elminster Vault X: 415 Y: 995
- : In a locked display case (DC 20) within the Elminster Vault X: 417 Y: 998
- : In a Gilded Chest in the Karsus Vault X: 327 Y: 1001
- : On a bookshelf in the Karsus Vault X: 318 Y: 997

