Ad placeholder
Sorcerous Vault


“Books as temperamental as these are not on sale. They are secured in our vault, where none can harm them, nor can they do any harm.„
Overview[edit section | visual editor]

The Sorcerous Vault is the main storage of both Ramazith's Tower and the Sorcerous Sundries. It is a hidden part of the tower and is available only by teleportation the tower or the magical shop's office.
The vault consists of series of small rooms filled with traps and peculiar, but dangerous items. However, its coffers also contain a small fortune of Valuables, potions, rare alchemical ingredients and spell scrolls of various grade.
While the party are inside the Sourcerous Sundries vault, they cannot fast travel or move to the Campsite.
The Sorcerous Vault is also a location where several major quests can be progressed, including 
Access to the Vault[edit section | visual editor]
There are two ways to access the Sorcerous Vault:
- From Ramazith's Tower: Pressing the Weave Button labelled 'Vaults' in teleports the party to the northernmost room of the Vault. The pedestal with the button can be reached by jumping down to the middle level using the magically suspended furniture at X: 4980 Y: 706 or using movement spells such as


- Pressing the button teleports only the the interacting character to the Vault.
- From the Sorcerous Sundries: Interacting with the


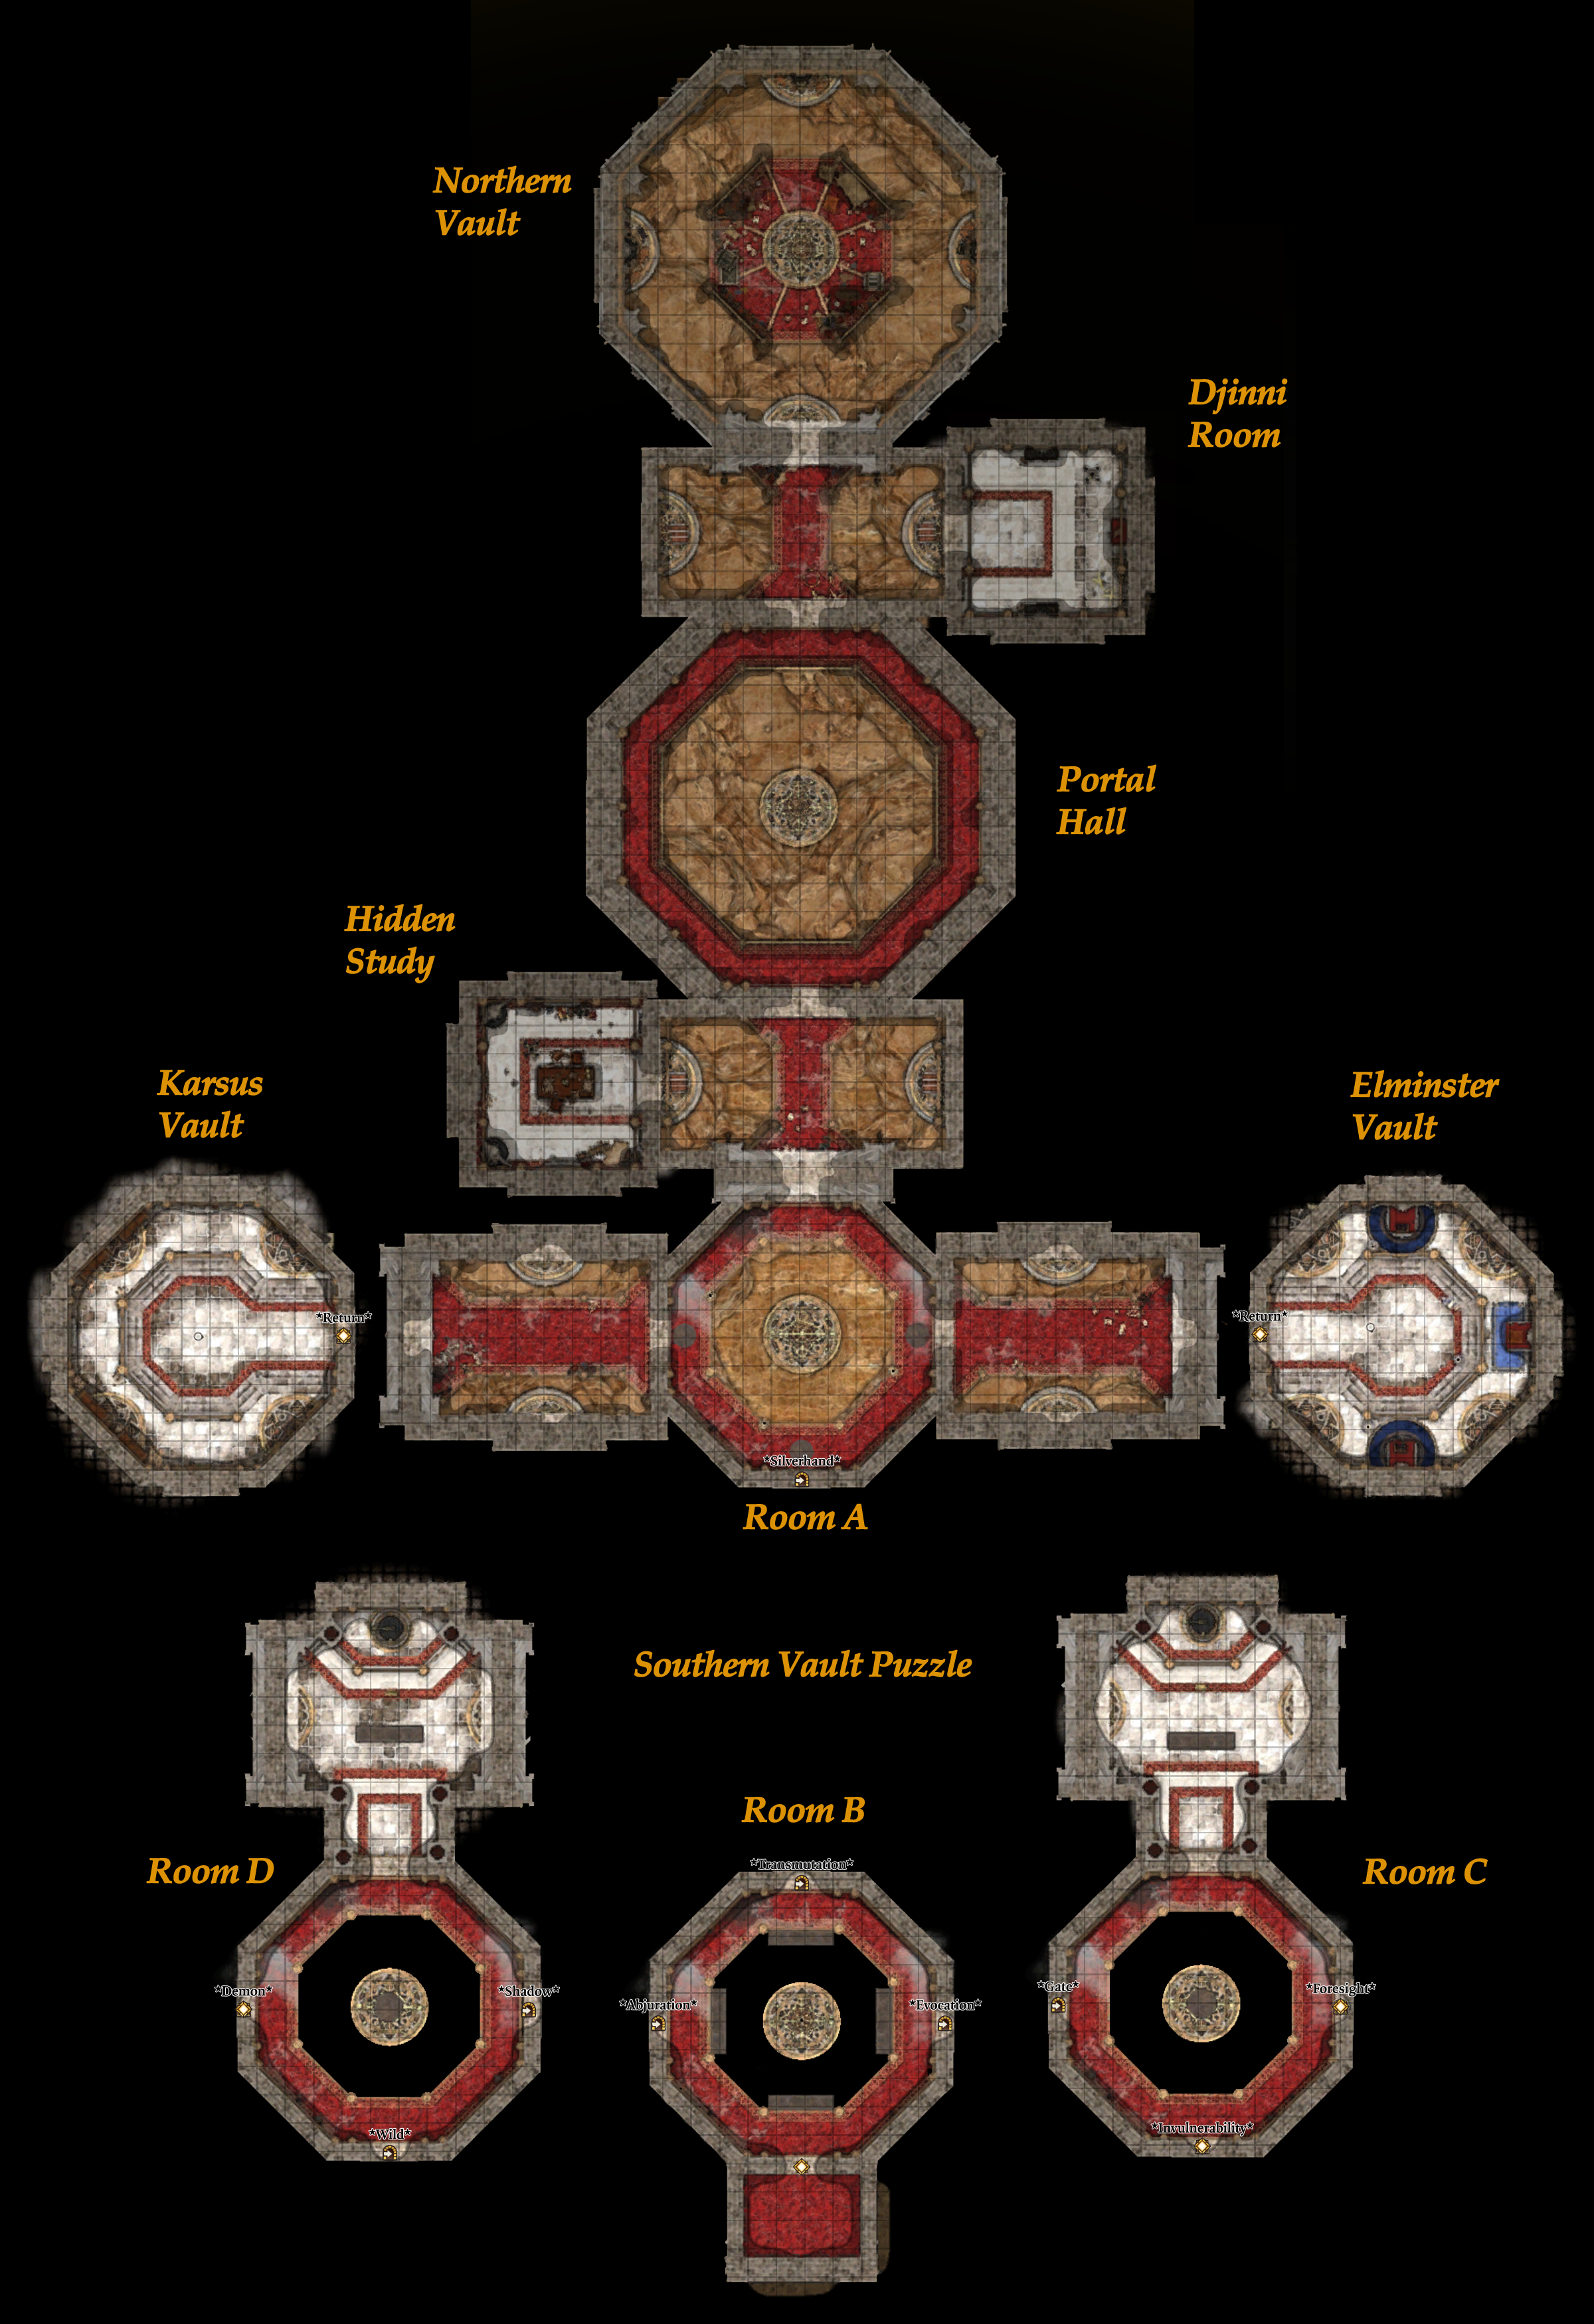
Vault layout[edit section | visual editor]

(a template by Tim Wilmsen)
For convenience, the rooms here are described in their position with respect to the portal room, which lies approximately in the centre of the vault.
The portal room features bookcases and stacks of scrolls lining up the walls. The bookcases cannot be interacted with, while stacks of scrolls may contain random spell scrolls from common to Very rare. Several metal crates here contain alchemical ingredients.
Northern part[edit section | visual editor]
To the north of the portal is a brick wall section. A passive 
In the passage are two wooden chests. The one at X: 361 Y: 1039 can be opened with the ![]()
The chest on the opposite side requires
Peculiar lamp[edit section | visual editor]

(by Stimona Milanova)
This lamp is mentioned in a ![]()
Interacting with the lamp swaps the interacting character or creature with whoever is currently stuck in the lamp. Initially, the lamp dweller is 
![]()
Upon breaking loose, Yafeu initiates a dialogue with the nearest party member outside the lamp. He honestly warns them about the lamp, which must have a tenant. The party can ask Yafeu for gold or provoke him when he tries to leave.[1] He gives 1000 ![]()
Escape the lamp[edit section | visual editor]
- Summon any creature (for example


- Summon


- Summon


- The imprisoned character can use

- The imprisoned party member can damage themselves until they fall unconscious; the lamp is then destroyed and the party member is sent back to the hidden room.


After the last trapped creature leaves the lamp (assuming it was the only occupant), the lamp is destroyed.
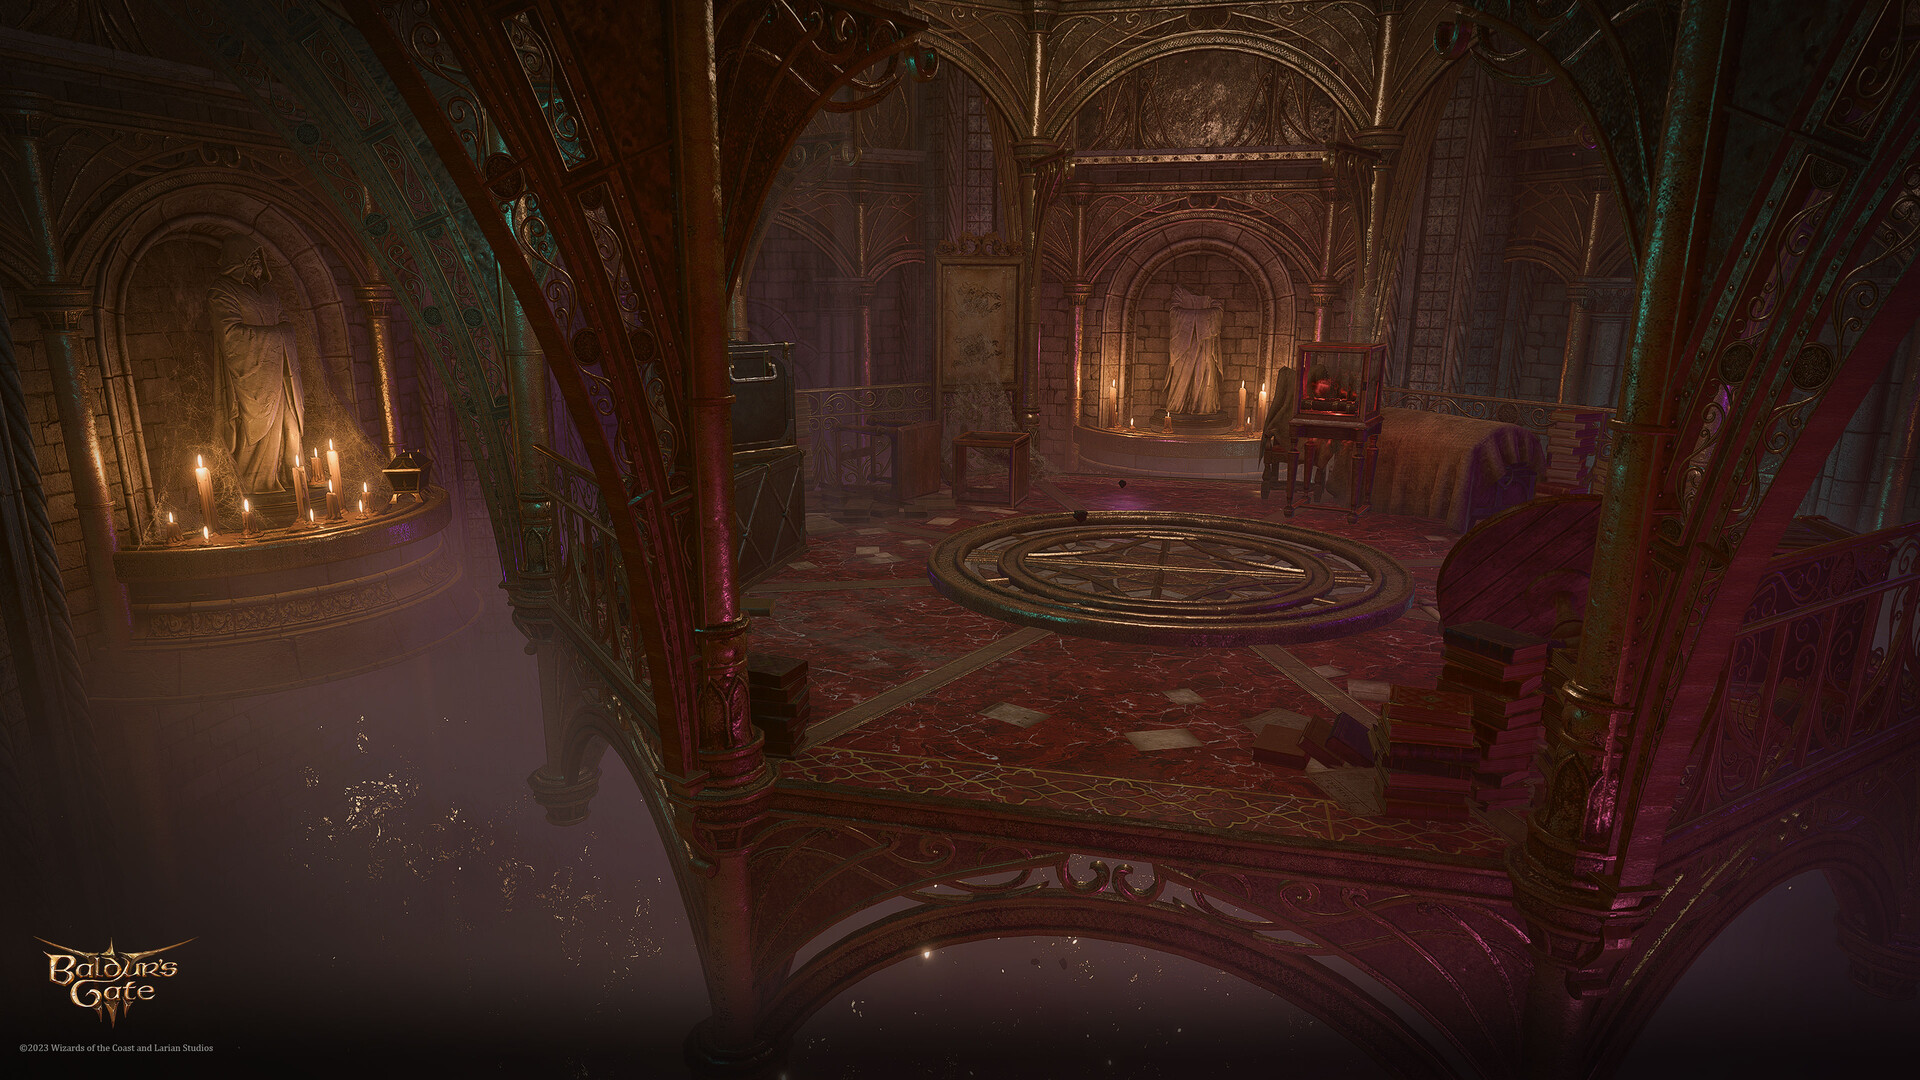
Northern vault room[edit section | visual editor]

(by Tim Wilmsen)
If the party enter the vault from Ramazith's Tower, they start here. There is no way to teleport back to the tower from this part of the vault.
The red-glowing display case at X: 368 Y: 1056 is locked, requiring ![]()
![]()
![]()
Several Gilded Chests and metal crates nearby may contain random loot from precious gems and Very rare spell scrolls to useful potions to alchemical ingredients.
Southern part[edit section | visual editor]
To the south of the portal room is another passage. Like in the northern part, two wooden chests stand on two side grounds here. The chest at X: 371 Y: 1011 can be opened with the ![]()
This room apparently serves as 
![]()
![]()

On a table here are several documents, including Lorroakan's personal notes, which reveal his utmost fear of impending age and infirmity. A Gilded Chest on the top of a bookcase contains gold.
The passage ends with a locked door labelled "Ramazith", which can be opened with the ![]()
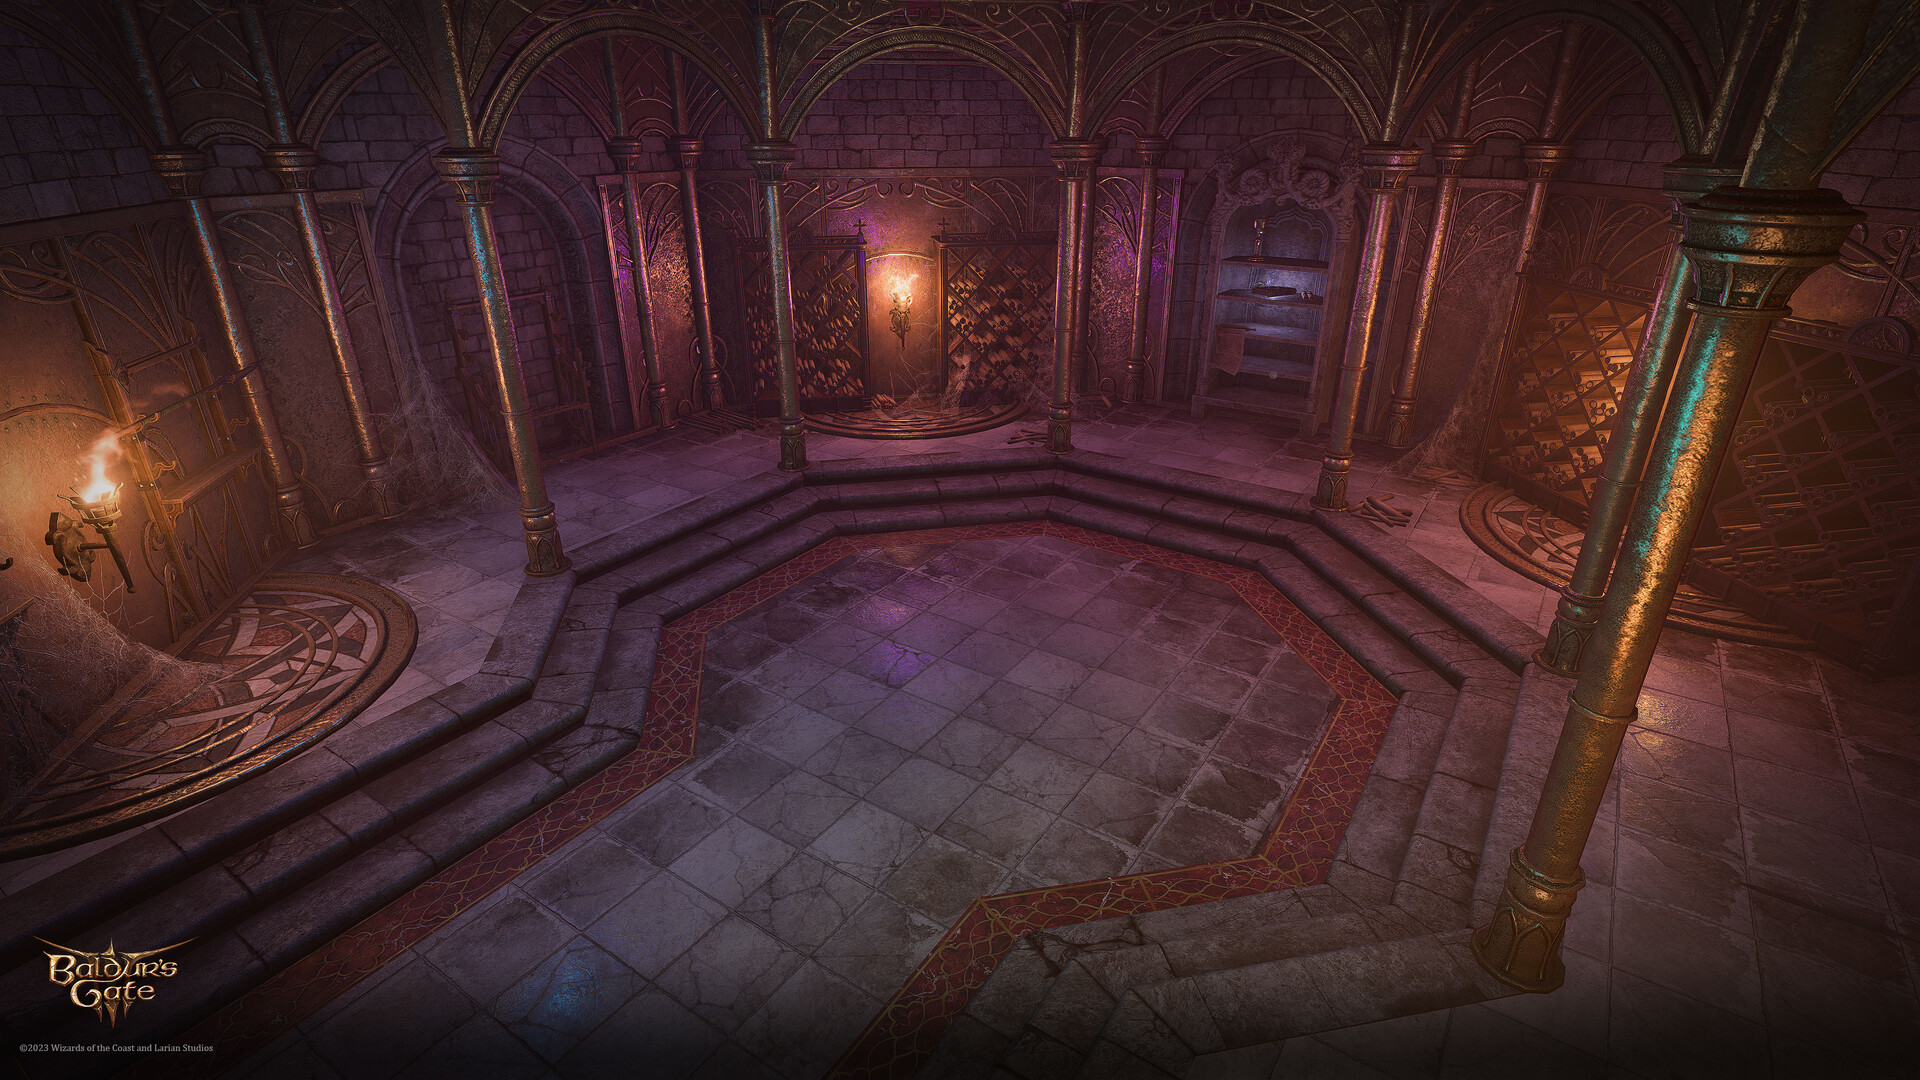
Southern vault[edit section | visual editor]

(by Tim Wilmsen)
Behind the door is a series of rooms offering the party a puzzle: each room has four labelled doors teleporting the interacting party member(s) between them. All rooms are heavily trapped with Marble Plates, gas pits and / or Gargoyle Heads hurling fire or ice bolts. It is recommended that the party use ![]()
The initial room has three doors labelled "Silverhand", "Elminster" and "Karsus". The last two doors are locked, and impossible to lockpick (but the ![]()
The ultimate goal of the room puzzle is to follow the correct door sequence to make the way to the rooms containing levers which unlock these two rooms, and there are two documents in Sorcerous Sundries which offhandedly describe the door sequences leading to these two rooms.
- The note titled

- The note titled
Below is a chart showing the puzzle rooms' details.
| Room | Room A | Room B | Room C | Room D |
|---|---|---|---|---|
| Doors |
|
|
|
|
| Traps |
|
|
|
|
| Loot |
|
|
|
In Room C and Room D is an unmistakable way to discern the correct door which hides the vault-unlocking lever: it is marked with the Door icon when pointing the cursor at it, while all others show the Interaction icon (two engaged cogs).
The Elminster vault[edit section | visual editor]
At X: 416 Y: 998 is the locked display case with the ![]()
![]()
![]()
![]()
![]()
![]()
In the vault are two small Gilded Chests with random precious gems and rare alchemical ingredients. Also two Opulent Chests are initially invisible and can be revealed with any means of ![]()
![]()
The Karsus vault[edit section | visual editor]
At X: 318 Y: 997 is a stone bookshelf with the ![]()
![]()
![]()
![]()
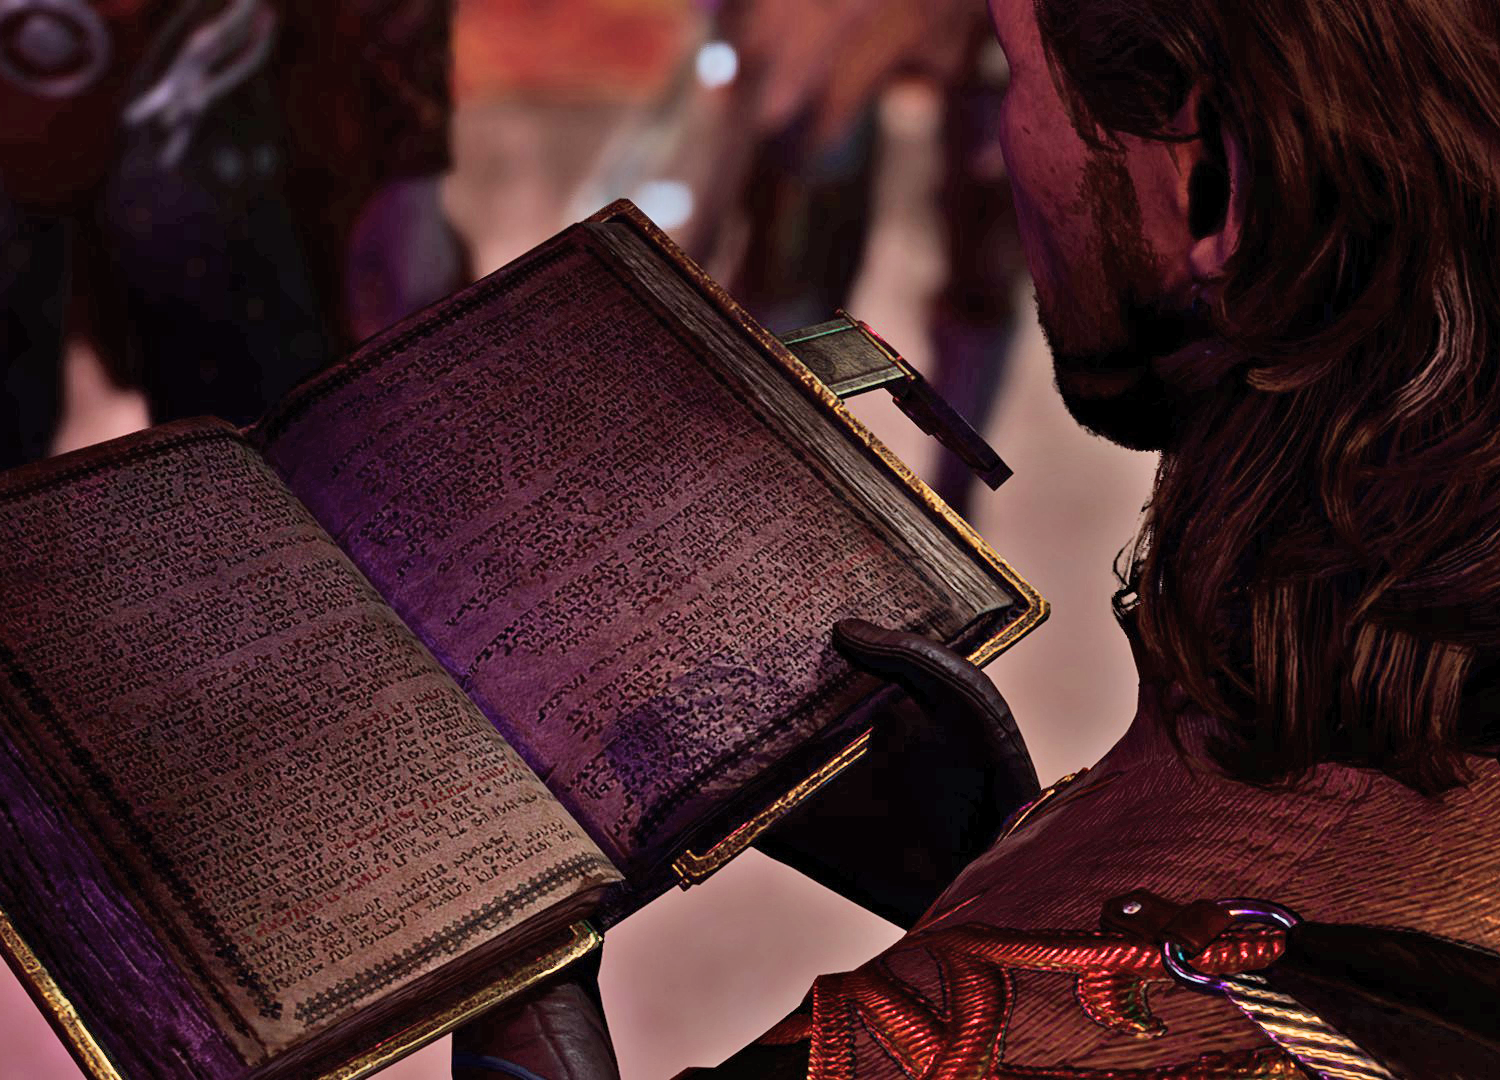
The book mentions three artefacts created and left by Karsus: the Crown (currently worn by the Netherbrain), the Orb[3], and the Sceptre. The latter item was unimplemented in the release version of the game, but there is a mod on NexusMods which can restore it.
This room also has two initially invisible Gilded Chests, one of them contains ![]()
![]()
Companion interactions[edit section | visual editor]


“Just think of it... the power of the gods in mortal hands at last. We'd be free of doctrine and dogma, confined only by the limits of our imaginations.„
Reading The Annals of Karsus is a pivotal point for
If Gale is in the party as a companion, but another character interacts with the book, Gale initiates the conversation, asking to let him read the book as well. Refusing Gale twice lowers his approval of the player character by 
If the character in question agrees, Gale starts reading through the book immediately, concluding that it contains not only the description of the crown, but relates the whole Karsus' plot to unseat Mystryl and ascend to godhood in her stead. The interacting character then has several options to support or discourage Gale's enthusiasm. Gale's ambition, however, leads him to conclude he can likely succeed where Karsus failed.
Related locations[edit section | visual editor]
Related quests[edit section | visual editor]
Characters[edit section | visual editor]
Loot[edit section | visual editor]
Legendary books[edit section | visual editor]


Unique spell scrolls[edit section | visual editor]
Weapons and armour[edit section | visual editor]
Related literature[edit section | visual editor]
This list does not include four legendary plot-involved books.
Notes and references[edit section | visual editor]
- ↑ Both choices earn approval/disapproval from various companions. To get the gold, the interacting party member can ask for money directly or tell the djinni they did not like the now-trapped person anyway.
- ↑ 2.0 2.1 This trap system has no lever to disarm, but the plates can be disarmed or jumped over (which is much simpler).
- ↑ By its description, this is seemingly the very same blot of the Weave nested in Gale's chest. Gale, however, does not match the Karsite Orb described in the book with the one he carries inside.
- ↑ Apart from the importance of these books for various quests, each one of them is worth 2000 gold pieces (by nominal cost).