Save the Gondians: Difference between revisions
Tags: Mobile edit Mobile web edit |
No edit summary |
||
| Line 1: | Line 1: | ||
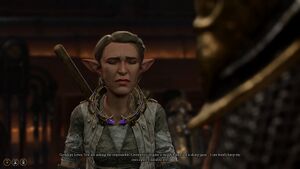
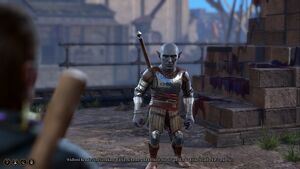
[[File:Gondian Lowa Quest.jpg|thumb|Lowa and the other Gondians are oppressed by the Banite cultists.]] | [[File:Gondian Lowa Quest.jpg|thumb|Lowa and the other Gondians are oppressed by the Banite cultists.]] | ||
'''Save the Gondians''' is a [[quest]] in [[ | '''Save the Gondians''' is a [[quest]] in [[Act Three]] of Baldur's Gate 3. It can be started by speaking with [[Zanner Toobin]] in the [[Steel Watch Foundry]]. | ||
{{SpoilerWarning}} | {{SpoilerWarning}} | ||
| Line 7: | Line 7: | ||
<div style="font-weight: bold; line-height: 1.6;">Find the prison.</div> | <div style="font-weight: bold; line-height: 1.6;">Find the prison.</div> | ||
<div class="mw-collapsible-content"> | <div class="mw-collapsible-content"> | ||
* We met Zanner Toobin, leader of the Gondians constructing Steel Watchers. We agreed to free their families, kept hostage by Gortash, in exchange for the Steel Watch's destruction. The hostages' location is kept secret, but Zanner thinks there may be clues in the Foundry's lower levels. We must be careful not to be seen - or risk disaster. | |||
</div></div> | </div></div> | ||
<div class="toccolours mw-collapsible mw-collapsed" style="border-top: none;"> | <div class="toccolours mw-collapsible mw-collapsed" style="border-top: none;"> | ||
<div style="font-weight: bold; line-height: 1.6;">Go to the prison.</div> | <div style="font-weight: bold; line-height: 1.6;">Go to the prison.</div> | ||
<div class="mw-collapsible-content"> | <div class="mw-collapsible-content"> | ||
* It seems the Banites are using a type of submersible to transport people to an underwater prison. We should leave and search the warehouse by the docks. | |||
* We found a warehouse occupied by worgs - they must be guarding something. | |||
* We discovered a secret dock beneath the warehouse - and a submersible. This must be the way to the underwater prison. | |||
* On our way to the Iron Throne, Gortash warned us to turn back, or he would destroy the prison. However, if we leave, then we will abandon the Iron Throne prisoners to their fate. | |||
</div></div> | </div></div> | ||
<div class="toccolours mw-collapsible mw-collapsed" style="border-top: none;"> | <div class="toccolours mw-collapsible mw-collapsed" style="border-top: none;"> | ||
<div style="font-weight: bold; line-height: 1.6;">Save as many hostages as possible.</div> | <div style="font-weight: bold; line-height: 1.6;">Save as many hostages as possible.</div> | ||
<div class="mw-collapsible-content"> | <div class="mw-collapsible-content"> | ||
* We entered the Iron Throne - the underwater prison. We don't have much time before the entire thing blows. We need to save as many people as possible. | |||
* We entered a collapsing Iron Throne, and an escaping hostage boarded our submersible. We should find the others and get them on board quickly - there's not much time before the Iron Throne sinks. | |||
</div></div> | </div></div> | ||
<div class="toccolours mw-collapsible mw-collapsed" style="border-top: none;"> | <div class="toccolours mw-collapsible mw-collapsed" style="border-top: none;"> | ||
<div style="font-weight: bold; line-height: 1.6;">Escape the Iron Throne.</div> | <div style="font-weight: bold; line-height: 1.6;">Escape the Iron Throne.</div> | ||
<div class="mw-collapsible-content"> | <div class="mw-collapsible-content"> | ||
* The hostages, those who survived, have made it to the submersible. We need to leave as soon as we can. | |||
</div></div> | </div></div> | ||
<div class="toccolours mw-collapsible mw-collapsed" style="border-top: none;"> | <div class="toccolours mw-collapsible mw-collapsed" style="border-top: none;"> | ||
<div style="font-weight: bold; line-height: 1.6;">Check on the survivors.</div> | <div style="font-weight: bold; line-height: 1.6;">Check on the survivors.</div> | ||
<div class="mw-collapsible-content"> | <div class="mw-collapsible-content"> | ||
* We saved all the prisoners and fled using the submersible. We should speak to the survivors. | |||
* We saved everyone we could, and fled using the submersible. We should speak to the survivors. | |||
* The Iron Throne hostages we saved asked us to go to the Steel Watch Foundry and liberate their families. | |||
* The prisoners in the Iron Throne are dead. We should let Zanner Toobin know what happened. | |||
</div></div> | </div></div> | ||
<div class="toccolours mw-collapsible mw-collapsed" style="border-top: none;"> | <div class="toccolours mw-collapsible mw-collapsed" style="border-top: none;"> | ||
<div style="font-weight: bold; line-height: 1.6;">Protect the Gondians.</div> | <div style="font-weight: bold; line-height: 1.6;">Protect the Gondians.</div> | ||
<div class="mw-collapsible-content"> | <div class="mw-collapsible-content"> | ||
* We returned to the Steel Watch Foundry in the nick of time. We need to protect the Gondians. | |||
</div></div> | </div></div> | ||
<div class="toccolours mw-collapsible mw-collapsed" style="border-top: none;"> | <div class="toccolours mw-collapsible mw-collapsed" style="border-top: none;"> | ||
<div style="font-weight: bold; line-height: 1.6;">Talk to Zanner Toobin.</div> | <div style="font-weight: bold; line-height: 1.6;">Talk to Zanner Toobin.</div> | ||
<div class="mw-collapsible-content"> | <div class="mw-collapsible-content"> | ||
* We should speak to Zanner Toobin. | |||
</div></div> | </div></div> | ||
<div class="toccolours mw-collapsible mw-collapsed" style="border-top: none;"> | <div class="toccolours mw-collapsible mw-collapsed" style="border-top: none;"> | ||
<div style="font-weight: bold; line-height: 1.6;">Explore the Steel Watch Foundry's depths.</div> | <div style="font-weight: bold; line-height: 1.6;">Explore the Steel Watch Foundry's depths.</div> | ||
<div class="mw-collapsible-content"> | <div class="mw-collapsible-content"> | ||
* We need to go to the Foundry's depths in order to destroy it. Along the way, we can liberate any Gondians we meet. They know we're coming and will help us. | |||
* We lied to Zanner Toobin about saving his daughter - he believed us. He can help us destroy the Steel Watch Foundry. | |||
</div></div> | </div></div> | ||
<div class="toccolours mw-collapsible mw-collapsed" style="border-top: none;"> | <div class="toccolours mw-collapsible mw-collapsed" style="border-top: none;"> | ||
<div style="font-weight: bold; line-height: 1.6;">Save the rest of the Gondians.</div> | <div style="font-weight: bold; line-height: 1.6;">Save the rest of the Gondians.</div> | ||
<div class="mw-collapsible-content"> | <div class="mw-collapsible-content"> | ||
* Zanner Toobin is dead, but we cannot stop. We need to go to the Foundry's depths, save the Gondians we meet along the way, and destroy the Steel Watch Foundry - for good. | |||
</div></div> | </div></div> | ||
<div class="toccolours mw-collapsible mw-collapsed" style="border-top: none;"> | <div class="toccolours mw-collapsible mw-collapsed" style="border-top: none;"> | ||
<div style="font-weight: bold; line-height: 1.6;">Defeat the Steel Watcher Titan in the Control Centre.</div> | <div style="font-weight: bold; line-height: 1.6;">Defeat the Steel Watcher Titan in the Control Centre.</div> | ||
<div class="mw-collapsible-content"> | <div class="mw-collapsible-content"> | ||
* Zanner Toobin warned us of a Steel Watcher Titan guarding the Foundry's Control Centre. We should prepare ourselves for a fight. | |||
</div></div> | </div></div> | ||
<div class="toccolours mw-collapsible mw-collapsed" style="border-top: none;"> | <div class="toccolours mw-collapsible mw-collapsed" style="border-top: none;"> | ||
<div style="font-weight: bold; line-height: 1.6;">Destroy the Steel Watch Foundry.</div> | <div style="font-weight: bold; line-height: 1.6;">Destroy the Steel Watch Foundry.</div> | ||
<div class="mw-collapsible-content"> | <div class="mw-collapsible-content"> | ||
* Free of their Banite oppressors, the surviving Gondians asked us to destroy the Steel Watch Foundry. We need to head to the Control Centre in the Foundry's depths to do so. | |||
</div></div> | </div></div> | ||
<div class="toccolours mw-collapsible mw-collapsed" style="border-top: none;"> | <div class="toccolours mw-collapsible mw-collapsed" style="border-top: none;"> | ||
<div style="font-weight: bold; line-height: 1.6;">Bring Zanner Toobin to the Control Centre.</div> | <div style="font-weight: bold; line-height: 1.6;">Bring Zanner Toobin to the Control Centre.</div> | ||
<div class="mw-collapsible-content"> | <div class="mw-collapsible-content"> | ||
* We destroyed the Steel Watcher Titan and cleared the path to the Control Centre for Zanner Toobin. We should tell him - then the Foundry's destruction can begin. | |||
</div></div> | </div></div> | ||
<div class="toccolours mw-collapsible mw-collapsed" style="border-top: none;"> | <div class="toccolours mw-collapsible mw-collapsed" style="border-top: none;"> | ||
<div style="font-weight: bold; line-height: 1.6;">Talk to Zanner Toobin.</div> | <div style="font-weight: bold; line-height: 1.6;">Talk to Zanner Toobin.</div> | ||
<div class="mw-collapsible-content"> | <div class="mw-collapsible-content"> | ||
* The Steel Watcher Titan lies destroyed at our feet - we just need Zanner to begin the Foundry's destruction. | |||
</div></div> | </div></div> | ||
<div class="toccolours mw-collapsible mw-collapsed" style="border-top: none;"> | <div class="toccolours mw-collapsible mw-collapsed" style="border-top: none;"> | ||
| Line 103: | Line 103: | ||
=== The Gondian's Plight === | === The Gondian's Plight === | ||
[[File:Prinskis Motivation.jpg|thumb|Prinski's Motivation Sequence and the Motivators allow the Banites to control the Gondians.]] | [[File:Prinskis Motivation.jpg|thumb|Prinski's Motivation Sequence and the Motivators allow the Banites to control the Gondians.]] | ||
Once the Foundry has been entered, a cutscene plays, revealing that the Gondians are being forced to work by Banite cultists, under threat of explosive collars and their families being murdered. If the party approachs, the Banites | Once the Foundry has been entered, a cutscene plays, revealing that the Gondians are being forced to work by Banite cultists, under threat of explosive collars and their families being murdered. If the party approachs, the Banites move to attack the cultists and bid the Gondians to aid them. It is possible to convince the Gondians to help fight back: | ||
* [INTIMIDATION] Gondians! Fight back!Do not let these people torment you. | * [INTIMIDATION] Gondians! Fight back!Do not let these people torment you. | ||
| Line 109: | Line 109: | ||
* Touch these people, and I'll kill you. | * Touch these people, and I'll kill you. | ||
If the first two options are chosen, the Gondians help the party. Otherwise, they are too scared to fight against the Banites and | If the first two options are chosen, the Gondians help the party. Otherwise, they are too scared to fight against the Banites and remain hostile until Black Gauntlet Tamia Holzt is defeated. Upon her death, the Motivator she carries begins to activate and can be deactivated with an Intellect roll (DC 5). After the battle, the Gondians begin to panic and state that their families are being kept hostage. | ||
In order to gain more information, the party must go into the Security Office. The key can be looted off of Tamia Holzt's body, or lockpicked (DC 15). Only one Gondian is inside - Zanner Toobin, who | In order to gain more information, the party must go into the Security Office. The key can be looted off of Tamia Holzt's body, or lockpicked (DC 15). Only one Gondian is inside - Zanner Toobin, who immediately recognizes the party as intruders. He explains more about the Gondian's families being held hostage and beg the party to rescue his daughter. If the party agrees, he will help shut the place down. Unfortunately, Zanner is not sure where the family members are being held and suggests going deeper into the Foundry to find more information. | ||
(Note: if the | (Note: if the party rescued the Iron Throne prisoners before visiting the Foundry, Zanner Toobin is present for the cutscene and the Gondians automatically help the party, skipping the dialogue check.) | ||
[[File:Foundry Vessel Note.jpg|thumb|Location of the note with the prison's location.]] | [[File:Foundry Vessel Note.jpg|thumb|Location of the note with the prison's location.]] | ||
| Line 123: | Line 123: | ||
=== Dealing with Redhammer === | === Dealing with Redhammer === | ||
Deep within the basement of Flymm Cargo and past the machine parts storage room, there is an area with a single Dwarf, near a submersible. This man is [[Redhammer]], the man in charge of transporting prisoners. If he is approached, he asks the party what they are doing there. Choosing "[INTIMIDATE] I have questions. You have answers" (DC 15) | Deep within the basement of Flymm Cargo and past the machine parts storage room, there is an area with a single Dwarf, near a submersible. This man is [[Redhammer]], the man in charge of transporting prisoners. If he is approached, he asks the party what they are doing there. Choosing "[INTIMIDATE] I have questions. You have answers" (DC 15) provides a chance to gain more information about Redhammer and his actions. | ||
Redhammer reveals that the submersible is used to ship off prisoners to the [[Iron Throne]]. After this, the party can implore him to take them to the throne and either intimidate, persuade, deceive, or bribe him with 1000 gold. He can also be killed and the submersible piloted by the party. | Redhammer reveals that the submersible is used to ship off prisoners to the [[Iron Throne]]. After this, the party can implore him to take them to the throne and either intimidate, persuade, deceive, or bribe him with 1000 gold. He can also be killed and the submersible piloted by the party. | ||
| Line 131: | Line 131: | ||
=== The Iron Throne === | === The Iron Throne === | ||
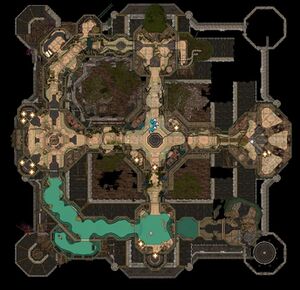
[[File:Iron Throne Map.jpg|thumb|Map of the Iron Throne]] | [[File:Iron Throne Map.jpg|thumb|Map of the Iron Throne]] | ||
There are six cells of Gondians, each with a level that releases them, as well as one Gondian who is strapped to a chair that must be released. Within the Iron Throne [[Sahuagin]] are lurking and more | There are six cells of Gondians, each with a level that releases them, as well as one Gondian who is strapped to a chair that must be released. Within the Iron Throne [[Sahuagin]] are lurking and more spawn over time. Once the Gondians have been released, they make a dash for the submersible. When all four party members have returned to the submersible, then the mission ends, and those trapped on the Iron Throne perish. The party has only 6 turns to save the Gondians, or 8 if on Explorer difficulty. | ||
==== Saving Duke Ravengard ==== | ==== Saving Duke Ravengard ==== | ||
Duke Ravengard can only be saved if Gortash's coronation has been attended. If Wyll has been recruited, it is highly recommended to speak to her after the coronation, and then return to camp to see Mizora's bargain, as part of [[The Blade of Frontiers]] and [[The Grand Duke]]. Wyll does ''not'' have to accept Mizora's new pact to save his father, but doing so | Duke Ravengard can only be saved if Gortash's coronation has been attended. If Wyll has been recruited, it is highly recommended to speak to her after the coronation, and then return to camp to see Mizora's bargain, as part of [[The Blade of Frontiers]] and [[The Grand Duke]]. Wyll does ''not'' have to accept Mizora's new pact to save his father, but doing so makes it easier. | ||
Duke Ravengard is in the block of cells directly east from the ladder to the submersible. He is in the middle cell, and has only 35 HP and the Fiendish Obeisance status. Upon opening the door to his cell, the party | Duke Ravengard is in the block of cells directly east from the ladder to the submersible. He is in the middle cell, and has only 35 HP and the Fiendish Obeisance status. Upon opening the door to his cell, the party gains control over the Duke's movements. However, once he leaves the cell, if Wyll broke his pact with Mizora, then she appears and summons multiple [[Combustion Belly Spiderling|Combustion Belly Spiderlings]] to kill the duke. She orders him to kneel while the spiderlings explode on their turn. The Duke can be saved by healing him while he is in his cell (via [[Healing Word]], throwing healing potions, or other tactics) or through spells like [[Arcane Gate]]. | ||
==== Saving Omeluum ==== | ==== Saving Omeluum ==== | ||
If [[Steal a Githyanki Egg]] was resolved without [[Lady Esther]] receiving an egg, then Omeluum | If [[Steal a Githyanki Egg]] was resolved without [[Lady Esther]] receiving an egg, then Omeluum is trapped in the Iron Throne. He is strapped in a chair in the southwestern corner of the area. Omeluum has a teleportation spell that allows him to get back to the submersible quickly, which makes him a lower priority to rescue. | ||
=== Liberating the Gondian Workers === | === Liberating the Gondian Workers === | ||
If she survived, then [[Obelia Toobin]] thanks the party for saving her and the other Gondians. She urges the party to go and save the workers at the Steel Watch Foundry. If the party did not visit the Foundry before saving the Gondians at the Iron Throne, then the Gondians on the ground floor immediately begin attacking the Banite cultists who are keeping them subjugated. The party needs to be mindful of the Motivators, which | If she survived, then [[Obelia Toobin]] thanks the party for saving her and the other Gondians. She urges the party to go and save the workers at the Steel Watch Foundry. If the party did not visit the Foundry before saving the Gondians at the Iron Throne, then the Gondians on the ground floor immediately begin attacking the Banite cultists who are keeping them subjugated. The party needs to be mindful of the Motivators, which kill the collared Gondians if they aren't deactivated. | ||
After defeating the Banites on the production floor, the party can talk to Zanner. He asks the party if his daughter is alright, which the party can either tell him she is alive or lie about it if she died during the escape. If he believes Obelia is alive and well, then he volunteers to help take the Foundry down and destroy the Steel Watch. The party can agree, to which he becomes a controllable companion, or state that they already have a [[Runepowder Bomb]], if they were given the bomb by [[Wulbren]] as part of [[Avenge the Ironhands]]. | After defeating the Banites on the production floor, the party can talk to Zanner. He asks the party if his daughter is alright, which the party can either tell him she is alive or lie about it if she died during the escape. If he believes Obelia is alive and well, then he volunteers to help take the Foundry down and destroy the Steel Watch. The party can agree, to which he becomes a controllable companion, or state that they already have a [[Runepowder Bomb]], if they were given the bomb by [[Wulbren]] as part of [[Avenge the Ironhands]]. | ||
| Line 173: | Line 173: | ||
* Once the Iron Throne is reached, [[Consider Gortash's Bargain]] will no longer be available, and Gortash becomes hostile to the party. | * Once the Iron Throne is reached, [[Consider Gortash's Bargain]] will no longer be available, and Gortash becomes hostile to the party. | ||
* It is technically possible to complete this quest before attending Gortash's coronation. If this happens, then Duke Ravengard does not appear in the Iron Throne and is in the audience chamber with Gortash. If that happens, he becomes hostile to the party, even after Gortash is defeated. | * It is technically possible to complete this quest before attending Gortash's coronation. If this happens, then Duke Ravengard does not appear in the Iron Throne and is in the audience chamber with Gortash. If that happens, he becomes hostile to the party, even after Gortash is defeated. | ||
* If the Runepowder Bomb is in the inventory of a different character than the one interacting with the control console, it | * If the Runepowder Bomb is in the inventory of a different character than the one interacting with the control console, it is not actually removed even when the "place the bomb" option is chosen and the Foundry is destroyed. | ||
[[Category:Quests]] | [[Category:Quests]] | ||
Revision as of 20:14, 3 September 2023
Save the Gondians is a quest in Act Three of Baldur's Gate 3. It can be started by speaking with Zanner Toobin in the Steel Watch Foundry.
Spoiler warning: The following content contains unhidden spoilers. Read at your own risk. |
Objectives
- We met Zanner Toobin, leader of the Gondians constructing Steel Watchers. We agreed to free their families, kept hostage by Gortash, in exchange for the Steel Watch's destruction. The hostages' location is kept secret, but Zanner thinks there may be clues in the Foundry's lower levels. We must be careful not to be seen - or risk disaster.
- It seems the Banites are using a type of submersible to transport people to an underwater prison. We should leave and search the warehouse by the docks.
- We found a warehouse occupied by worgs - they must be guarding something.
- We discovered a secret dock beneath the warehouse - and a submersible. This must be the way to the underwater prison.
- On our way to the Iron Throne, Gortash warned us to turn back, or he would destroy the prison. However, if we leave, then we will abandon the Iron Throne prisoners to their fate.
- We entered the Iron Throne - the underwater prison. We don't have much time before the entire thing blows. We need to save as many people as possible.
- We entered a collapsing Iron Throne, and an escaping hostage boarded our submersible. We should find the others and get them on board quickly - there's not much time before the Iron Throne sinks.
- The hostages, those who survived, have made it to the submersible. We need to leave as soon as we can.
- We saved all the prisoners and fled using the submersible. We should speak to the survivors.
- We saved everyone we could, and fled using the submersible. We should speak to the survivors.
- The Iron Throne hostages we saved asked us to go to the Steel Watch Foundry and liberate their families.
- The prisoners in the Iron Throne are dead. We should let Zanner Toobin know what happened.
- We returned to the Steel Watch Foundry in the nick of time. We need to protect the Gondians.
- We should speak to Zanner Toobin.
- We need to go to the Foundry's depths in order to destroy it. Along the way, we can liberate any Gondians we meet. They know we're coming and will help us.
- We lied to Zanner Toobin about saving his daughter - he believed us. He can help us destroy the Steel Watch Foundry.
- Zanner Toobin is dead, but we cannot stop. We need to go to the Foundry's depths, save the Gondians we meet along the way, and destroy the Steel Watch Foundry - for good.
- Zanner Toobin warned us of a Steel Watcher Titan guarding the Foundry's Control Centre. We should prepare ourselves for a fight.
- Free of their Banite oppressors, the surviving Gondians asked us to destroy the Steel Watch Foundry. We need to head to the Control Centre in the Foundry's depths to do so.
- We destroyed the Steel Watcher Titan and cleared the path to the Control Centre for Zanner Toobin. We should tell him - then the Foundry's destruction can begin.
- The Steel Watcher Titan lies destroyed at our feet - we just need Zanner to begin the Foundry's destruction.
- Zanner Toobin is dead, and the other Gondians will not rise against their oppressors.
- We sided with Wulbren Bongle and condemned all the surviving Gondians to death.
- We came to blows with Wulbren Bongle to protect the surviving Gondians.
- We brokered a shaky peace between the Gondian and Ironhand gnomes.
- There is nothing left of the Gondian workers to save.
- Zanner Toobin and the surviving Gondians turned on us when they learned of the Iron Throne hostages' demise.
- All the Iron Throne hostages are dead.
- A Banite contingency measure incinerated all the Gondian workers. There's nothing but ash left to save.
- We saved the Gondians from the Steel Watch Foundry - striking a blow at the heart of Gortash's metal militia.
- We saved the Gondians without bloodshed by deposing the Ironhand's bloodthirsty leader, Wulbren.
- We left the quarrels of gnomes behind us to face our final foe.
- With Gortash dead, the Steel Watch destroyed the Foundry that created them - covering up the atrocities committed there.
Walkthrough
Investigating the Steel Watch Foundry
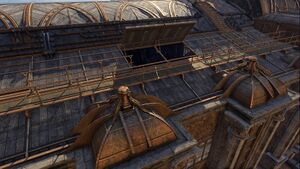
The Foundry is in the southwestern corner of the Lower City, near the Grey Harbour waypoint. There are multiple ways into the Foundry - including lockpicking (DC 20) the iron gates (X:-234, Y:-181), entering a vent in Wild Shape form (X:-246, Y:-126), or flying onto the roof and jumping down from an open hatch (X:-295, Y:-135).
There are two Steel Watchers guarding the front entrance - one which patrols the front and western side of the building, and another which stays on the western side near the loading dock. The Steel Watcher patrolling the front can easily be avoided by lockpicking the front gate and door while the Watcher is on the western side.
The Gondian's Plight
Once the Foundry has been entered, a cutscene plays, revealing that the Gondians are being forced to work by Banite cultists, under threat of explosive collars and their families being murdered. If the party approachs, the Banites move to attack the cultists and bid the Gondians to aid them. It is possible to convince the Gondians to help fight back:
- [INTIMIDATION] Gondians! Fight back!Do not let these people torment you.
- [PERSUASION] I am here to help, Gondians. Together, we can free you all.
- Touch these people, and I'll kill you.
If the first two options are chosen, the Gondians help the party. Otherwise, they are too scared to fight against the Banites and remain hostile until Black Gauntlet Tamia Holzt is defeated. Upon her death, the Motivator she carries begins to activate and can be deactivated with an Intellect roll (DC 5). After the battle, the Gondians begin to panic and state that their families are being kept hostage.
In order to gain more information, the party must go into the Security Office. The key can be looted off of Tamia Holzt's body, or lockpicked (DC 15). Only one Gondian is inside - Zanner Toobin, who immediately recognizes the party as intruders. He explains more about the Gondian's families being held hostage and beg the party to rescue his daughter. If the party agrees, he will help shut the place down. Unfortunately, Zanner is not sure where the family members are being held and suggests going deeper into the Foundry to find more information.
(Note: if the party rescued the Iron Throne prisoners before visiting the Foundry, Zanner Toobin is present for the cutscene and the Gondians automatically help the party, skipping the dialogue check.)
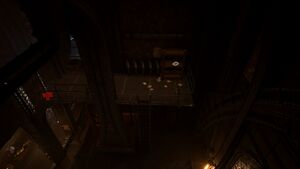
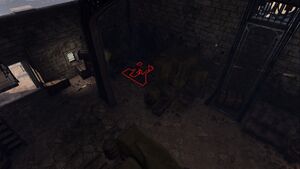
The party can find more information via a note about vessels (X:-1966, Y:459). This area is heavily guarded and Banites and Gondians alike become hostile to any intruders. However, finding the note isn't necessary to find the prison. This information can also be found by undertaking Avenge the Drowned, making a deal with Mizora to gain the location, or simply by stumbling upon the location. Regardless, the prisoners are being held in an underwater prison which is accessed via a submersible under Flymm Cargo.
Flymm Cargo
Flymm Cargo is further along the docks. The double metal doors (X:-169, Y:-150) can be lockpicked (DC 20), and cause several Worgs within to attack. After defeating them, there is little else in the building to indicate what is going on there. However, there is a basement entrance (X:-164, Y:-141). The entrance is covered by various trunks and crates that must be moved or destroyed to access it.
Dealing with Redhammer
Deep within the basement of Flymm Cargo and past the machine parts storage room, there is an area with a single Dwarf, near a submersible. This man is Redhammer, the man in charge of transporting prisoners. If he is approached, he asks the party what they are doing there. Choosing "[INTIMIDATE] I have questions. You have answers" (DC 15) provides a chance to gain more information about Redhammer and his actions.
Redhammer reveals that the submersible is used to ship off prisoners to the Iron Throne. After this, the party can implore him to take them to the throne and either intimidate, persuade, deceive, or bribe him with 1000 gold. He can also be killed and the submersible piloted by the party.
Once the party has piloted the submersible, Enver Gortash appears on a screen to warn the party that he will blow up the whole place if they proceed. He gives them one chance to turn back, otherwise he goes through with his threat, flooding the prison and filling it with Sahuagin.
The Iron Throne
There are six cells of Gondians, each with a level that releases them, as well as one Gondian who is strapped to a chair that must be released. Within the Iron Throne Sahuagin are lurking and more spawn over time. Once the Gondians have been released, they make a dash for the submersible. When all four party members have returned to the submersible, then the mission ends, and those trapped on the Iron Throne perish. The party has only 6 turns to save the Gondians, or 8 if on Explorer difficulty.
Saving Duke Ravengard
Duke Ravengard can only be saved if Gortash's coronation has been attended. If Wyll has been recruited, it is highly recommended to speak to her after the coronation, and then return to camp to see Mizora's bargain, as part of The Blade of Frontiers and The Grand Duke. Wyll does not have to accept Mizora's new pact to save his father, but doing so makes it easier.
Duke Ravengard is in the block of cells directly east from the ladder to the submersible. He is in the middle cell, and has only 35 HP and the Fiendish Obeisance status. Upon opening the door to his cell, the party gains control over the Duke's movements. However, once he leaves the cell, if Wyll broke his pact with Mizora, then she appears and summons multiple Combustion Belly Spiderlings to kill the duke. She orders him to kneel while the spiderlings explode on their turn. The Duke can be saved by healing him while he is in his cell (via Healing Word, throwing healing potions, or other tactics) or through spells like Arcane Gate.
Saving Omeluum
If Steal a Githyanki Egg was resolved without Lady Esther receiving an egg, then Omeluum is trapped in the Iron Throne. He is strapped in a chair in the southwestern corner of the area. Omeluum has a teleportation spell that allows him to get back to the submersible quickly, which makes him a lower priority to rescue.
Liberating the Gondian Workers
If she survived, then Obelia Toobin thanks the party for saving her and the other Gondians. She urges the party to go and save the workers at the Steel Watch Foundry. If the party did not visit the Foundry before saving the Gondians at the Iron Throne, then the Gondians on the ground floor immediately begin attacking the Banite cultists who are keeping them subjugated. The party needs to be mindful of the Motivators, which kill the collared Gondians if they aren't deactivated.
After defeating the Banites on the production floor, the party can talk to Zanner. He asks the party if his daughter is alright, which the party can either tell him she is alive or lie about it if she died during the escape. If he believes Obelia is alive and well, then he volunteers to help take the Foundry down and destroy the Steel Watch. The party can agree, to which he becomes a controllable companion, or state that they already have a Runepowder Bomb, if they were given the bomb by Wulbren as part of Avenge the Ironhands.
On the lab floor, the Gondians aid the party in taking down their oppressors. There is a Hellfire Watcher, several Black Gauntlet wardens, and other Banite cultists surrounding the Gondians. The ultimate goal is to get Zanner to the Control Centre Antechamber on the western side of the floor, although liberating the Gondians can provide valuable potential allies. If all of the Gondians perish, then Zanner can lose his will and need to be persuaded or intimidated into continuing onward. If that fails, he simply tells the party the control code needed to destroy the Foundry.
The Titan
In order to get to the console to disable the Steel Watch and destroy the Foundry, the party must defeat the Steel Watch Titan, a level 12 enemy, and three level 11 Hellfire Watchers. If Zanner is with the party, then he warns them after entering the Control Centre Antechambre that something horrible is ahead. He recommends that when the Titan raises its shields, to hit it with every scrap of magic available. With that advice, he remains in the antechamber during the battle and reappears once the Titan is dealt with.
After the battle, Zanner appears and asks if the party is ready to proceed. If Zanner was left behind or was not asked to join the party, then the console at the west end of the room can be approached and either the Runepowder Bomb placed or the code used.
The Ironhands Arrive
The Ironhand Gnomes appear once the Foundry explodes to confront any surviving Gondians and congratulate the party. He states that any Gondians must be killed, as they are a threat to Baldur's Gate. If Barcus is alive, he interjects that the Gondians are no threat and that Wulbren has been a negative influence on the Ironhands.
- [PERSUASION] Perhaps the Ironhand Gnomes need a new leader. What say you, Barcus?
- [INTIMIDATION] Walk away WUlbren - I won't ask twice.
- I won't let you hurt the Gondians.
- Wulbren makes a good point - you must die for the city, Gondians.
Choosing the first option causes Barcus to step up as the new leader of the Ironhand Gnomes, and both the Gondians and the Ironhand Gnomes to become allies to the party. Choosing the second option makes Wulbren walk away, but promising death on both the party and the Gondians. The last two options make the respective side hostile and a fight ensues.
If none of the hostages were saved from the Iron Throne, Wulbren points out the dead bodies floating in the harbor. If the party had previously told Zanner that they survived, he and the Gondians become hostile and attack the party automatically.
Quest Rewards
- Gontr Mael - a legendary weapon dropped by the Steel Watch Titan
- A new ally for Gather Your Allies - potentially both the Ironhand Gnomes and the Gondians, or one or the other.
Notes
- Once the Iron Throne is reached, Consider Gortash's Bargain will no longer be available, and Gortash becomes hostile to the party.
- It is technically possible to complete this quest before attending Gortash's coronation. If this happens, then Duke Ravengard does not appear in the Iron Throne and is in the audience chamber with Gortash. If that happens, he becomes hostile to the party, even after Gortash is defeated.
- If the Runepowder Bomb is in the inventory of a different character than the one interacting with the control console, it is not actually removed even when the "place the bomb" option is chosen and the Foundry is destroyed.
