Rosymorn Monastery: Difference between revisions
Llamageddon (talk | contribs) (→Points of Interest: 'Eagle's nest') |
HiddenDragon (talk | contribs) mNo edit summary |
||
| (28 intermediate revisions by 11 users not shown) | |||
| Line 1: | Line 1: | ||
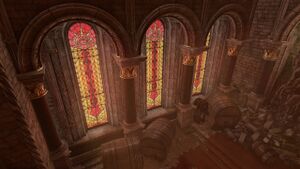
[[File:Screen Stained Glass Firewine Rosymorn Monastery.jpg|thumb|Stained Glass Windows in a [[Firewine]] storage room.]] | [[File:Screen Stained Glass Firewine Rosymorn Monastery.jpg|thumb|Stained Glass Windows in a [[Firewine_Barrel|Firewine]] storage room.]] | ||
Rosymorn Monastery is a [[List of Locations|location]] that can be found in the | '''Rosymorn Monastery''' is a [[List of Locations|location]] that can be found in the northeast of the [[Rosymorn Monastery Trail]] [[region]]. | ||
{{Relative location | |||
|region= Rosymorn Monastery Trail | |||
|location = {{PAGENAME}} | |||
|south = Rosymorn Monastery Trail | |||
|north=Crèche Y'llek}} | |||
== Overview == | == Overview == | ||
=== Waypoints === | === Waypoints === | ||
This location contains the following {{ | This location contains the following [[waypoints]]{{SmallIcon|Waypoint Header Map Icon.png}}: | ||
{{WpCo|Rosymorn Monastery|17|23}} | |||
=== Connected | === Connected locations === | ||
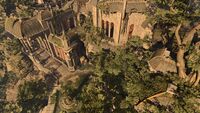
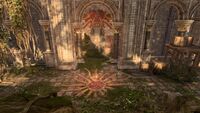
[[File:Screen View South Building Rosymorn Monastery.jpg|thumb|The courtyard, and south side of the monastery building]] | [[File:Screen View South Building Rosymorn Monastery.jpg|thumb|200px|The courtyard, and south side of the monastery building]] | ||
*[[Rosymorn Monastery Trail]] | *[[Rosymorn Monastery Trail]] | ||
*[[Crèche Y'llek| | *[[Crèche Y'llek]] | ||
=== Firewine storage === | |||
On the ground floor of the monastery {{Coords|45|37}}, are a group of Kobolds who have raided the [[Firewine_Barrel|Firewine]] storage of the monastery. Many are comatose and suffering from [[Firewine Belly]]. | |||
=== | === Gremishka den === | ||
On the first floor of the monastery {{Coords|43|30}}, a large pack of [[Gremishka]] are waiting in [[Ambushing (Condition)|ambush]] here, [[Invisible (Condition)|Invisible]] to the naked eye. | |||
=== | === Eagle's nest === | ||
[[File:Screen Lathander Mural Rosymorn Monastery.jpg|thumb|200px|A mural of Lathander and his Holy Symbol, found next to the Eagle's Nest.]] | |||
On a terrace on the second floor of the monastery {{Coords|79|39}}, you can find an Eagle's nest, next to a mysterious device covered in vines. | |||
* | === Dawnmasters memorial === | ||
A room with a stained-glass window depicting four former Dawnmasters of '''Rosymorn Monastery''', and four plinths representing each of them {{Coords|75|75}}. | |||
* [[Dawnmaster's Crest]] can be found here after solving a puzzle. (See: [[#Find_the_Blood_of_Lathander|Find the Blood of Lathander]]) | |||
=== | ===Crèche Y'llek=== | ||
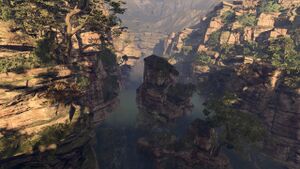
[[File:Screen Canyon North Rosymorn Monastery.jpg|thumb|The view north from the monastery building]] | |||
{{hatnote|Main article: [[Crèche Y'llek]]}} | |||
Crèche Y'llek is beneath the monastery, accessed by using a door at the bottom of a ramp at the northernmost point of the aboveground section of the monastery. | |||
=== Creatures === | === Creatures === | ||
| Line 35: | Line 48: | ||
*[[Kobold Scout]] | *[[Kobold Scout]] | ||
= | === Related quests === | ||
*[[The Githyanki Warrior]] | |||
*[[Find the Blood of Lathander]] | |||
*[[Reclaim the Blue Jay's Nest]] | |||
== | == Find the Blood of Lathander == | ||
{{hatnote|Main article: [[Find the Blood of Lathander]]}} | |||
Rosymorn Monastery has a puzzle that is part of the ''Find the Blood of Lathander'' quest that will allow you to find one of the first Legendary items. There are three weapons around the Monastery that can be used to solve the puzzle: | |||
Rosymorn Monastery has a puzzle that is part of the | |||
{{SpoilerBox| | {{SpoilerBox| | ||
# The [[Ceremonial Mace]] can be found on a drunk Kobold on the first floor of the monastery. | # The [[Ceremonial Mace]] can be found on a drunk Kobold on the first floor of the monastery. | ||
# The [[Ceremonial Battleaxe]] | # The [[Ceremonial Battleaxe]] behind an enchanted door on the second floor, guarded by a [[Guardian of Faith (creature)|Guardian of Faith]]. | ||
# The [[Ceremonial Warhammer]] is on the roof of the monastery in the Eagle's Nest. (If you help the Blue Jay to take back the nest as part of [[Blue Jay's Find]] he'll mark this location on your map) | # The [[Ceremonial Warhammer]] is on the roof of the monastery in the Eagle's Nest. (If you help the Blue Jay to take back the nest as part of [[Blue Jay's Find]] he'll mark this location on your map) | ||
On the middle floor of the monastery you will find a room with a stained glassed windows and four blocks in front of each window. | On the middle floor of the monastery you will find a room with a stained glassed windows and four blocks in front of each window. Place all four ceremonial weapons on the right stand to in order to acquire the [[Dawnmaster's Crest]]. Without the crest, if you try to take [[The Blood of Lathander]], you will trigger the destruction of the entire Monastery in 4 turns (7 in [[explorer]]). | ||
* Warhammer | * Warhammer — Dawnmaster Seed | ||
* Mace | * Mace — Dawnmaster Stockhold | ||
* Battleaxe | * Battleaxe — Dawnmaster Vaseid | ||
* Longsword | * Longsword — Dawnmaster Welkinglory (already in place) | ||
Once all 4 ceremonial weapons are placed in the correct location a | Once all 4 ceremonial weapons are placed in the correct location a hidden compartment will open with the [[Dawnmaster's Crest]]. | ||
}} | }} | ||
== | == Interactions == | ||
*Crumbling Shrine {{Coords|-18|23}} - Offerings and a letter have been left here by pilgrims. | |||
*Cable Car Landing {{Coords|-6|3}} - If you can fix it, the cable car here provides a shortcut to the top of the cliffs. | |||
*Blue Jay's Find {{Coords|-5|-29}} | |||
== Notable loot == | |||
Notable items obtained in this location, whether looted, purchased, or obtained as a quest reward: | |||
* {{MdRarityItem|Holy Lance Helm}} can be found in a chest at {{Coords|120|35}}. | |||
* {{MdRarityItem|Dawnmaster's Crest}} looted from the Dawnmasters memorial after placing all the ceremonial weapons. | |||
== External links == | |||
* {{FRWiki|Rosymorn Monastery|long}} | |||
[[Category:Locations]] | |||
[[Category:Locations]] [[Category: | [[Category:Act One Locations]] | ||
{{NavRosymornMonastery|nocat=1}} | |||
Latest revision as of 21:20, 30 April 2024

Rosymorn Monastery is a location that can be found in the northeast of the Rosymorn Monastery Trail region.
| Rosymorn Monastery Trail | ||||
| Crèche Y'llek | ||||
| ↑ | ||||
| Rosymorn Monastery | ||||
| ↓ | ||||
| Rosymorn Monastery Trail | ||||
Overview[edit | edit source]
Waypoints[edit | edit source]
This location contains the following waypoints![]() :
:
![]() Rosymorn Monastery X: 17 Y: 23
Rosymorn Monastery X: 17 Y: 23
Connected locations[edit | edit source]
Firewine storage[edit | edit source]
On the ground floor of the monastery X: 45 Y: 37, are a group of Kobolds who have raided the Firewine storage of the monastery. Many are comatose and suffering from Firewine Belly.
Gremishka den[edit | edit source]
On the first floor of the monastery X: 43 Y: 30, a large pack of Gremishka are waiting in ambush here, Invisible to the naked eye.
Eagle's nest[edit | edit source]
On a terrace on the second floor of the monastery X: 79 Y: 39, you can find an Eagle's nest, next to a mysterious device covered in vines.
Dawnmasters memorial[edit | edit source]
A room with a stained-glass window depicting four former Dawnmasters of Rosymorn Monastery, and four plinths representing each of them X: 75 Y: 75.
- Dawnmaster's Crest can be found here after solving a puzzle. (See: Find the Blood of Lathander)
Crèche Y'llek[edit | edit source]
Crèche Y'llek is beneath the monastery, accessed by using a door at the bottom of a ramp at the northernmost point of the aboveground section of the monastery.
Creatures[edit | edit source]
Related quests[edit | edit source]
Find the Blood of Lathander[edit | edit source]
Rosymorn Monastery has a puzzle that is part of the Find the Blood of Lathander quest that will allow you to find one of the first Legendary items. There are three weapons around the Monastery that can be used to solve the puzzle:
![]() Spoiler warning! This section reveals details about the story of Baldur's Gate 3.
Spoiler warning! This section reveals details about the story of Baldur's Gate 3.
- The Ceremonial Mace can be found on a drunk Kobold on the first floor of the monastery.
- The Ceremonial Battleaxe behind an enchanted door on the second floor, guarded by a Guardian of Faith.
- The Ceremonial Warhammer is on the roof of the monastery in the Eagle's Nest. (If you help the Blue Jay to take back the nest as part of Blue Jay's Find he'll mark this location on your map)
On the middle floor of the monastery you will find a room with a stained glassed windows and four blocks in front of each window. Place all four ceremonial weapons on the right stand to in order to acquire the Dawnmaster's Crest. Without the crest, if you try to take The Blood of Lathander, you will trigger the destruction of the entire Monastery in 4 turns (7 in explorer).
- Warhammer — Dawnmaster Seed
- Mace — Dawnmaster Stockhold
- Battleaxe — Dawnmaster Vaseid
- Longsword — Dawnmaster Welkinglory (already in place)
Once all 4 ceremonial weapons are placed in the correct location a hidden compartment will open with the Dawnmaster's Crest.
Interactions[edit | edit source]
- Crumbling Shrine X: -18 Y: 23 - Offerings and a letter have been left here by pilgrims.
- Cable Car Landing X: -6 Y: 3 - If you can fix it, the cable car here provides a shortcut to the top of the cliffs.
- Blue Jay's Find X: -5 Y: -29
Notable loot[edit | edit source]
Notable items obtained in this location, whether looted, purchased, or obtained as a quest reward:
 Holy Lance Helm can be found in a chest at X: 120 Y: 35.
 Dawnmaster's Crest looted from the Dawnmasters memorial after placing all the ceremonial weapons.


