Ad placeholder
Overgrown Tunnel: Difference between revisions
No edit summary |
HiddenDragon (talk | contribs) (Added concept art) |
||
| (20 intermediate revisions by 5 users not shown) | |||
| Line 1: | Line 1: | ||
{{ | {{Location page | ||
| | | prefix = The | ||
| | | name = Overgrown Tunnel | ||
| alt name = | |||
| image = Overgrown Tunnel.webp | | image = Overgrown Tunnel.webp | ||
| image description = The Entrance Gallery of the tunnel. | |||
| act = one | |||
| summary = It is a sub area of the [[Riverside Teahouse]] the lair of the hag, {{CharLink|Auntie Ethel}}. | |||
| region prefix = the | |||
| region = Sunlit Wetlands | |||
| north = | |||
| west = | |||
| east = | |||
| south = | |||
}} | }} | ||
==Overview== | ==Overview== | ||
It is an optional dungeon, reached by walking through an illusory fireplace found in the [[Riverside Teahouse]]. This location is divided into three main sub areas: the '''Entrance Gallery''', the '''Ancient Abode''', and the '''Acrid Workshop'''. While inside the Overgrown Tunnel, the party cannot fast-travel to a [[Waypoint]] or go to [[Camp]]. | |||
While inside the Overgrown Tunnel, the party cannot fast-travel to a [[Waypoint]] or go to [[ | |||
== Entrance Gallery == | === Entrance Gallery === | ||
The Entrance Gallery is the first of the three main sections of the dungeon. What remains of previous victims of the hag, Auntie Ethel, are scattered about the area. The wood elf [[Lorin]] shouts to stay back and not to look. {{CharLink|Efrin Hammerborn|Efrin}}, a petrified [[Dwarf]] stands next to a [[Blinded Elf]]. {{CharLink|Magron}}, another victim holds her own head in her hands. The skull of Calim is mounted on a pedestal, facing a mirror. If a character breaks the mirror, that character is afflicted with [[Bane (Condition)|Bane]] until long rest, and then Nauseated until a second long rest. | |||
The Entrance Gallery is the first of the three main sections of the dungeon. What remains of previous victims of the hag, | |||
{{SAI|Speak with Dead}} can reveal some of their pasts. Interacting with the items nearby lets Auntie Ethel speak about how her victims got into these predicaments. | |||
Access to the rest of the dungeon is blocked off by a '''Gnarled Door'''. The door is one of the hag's previous victims, transformed, and it begs the party not to pass. The party can speak with it and succeed at persuading or intimidating it to allow them them through. This door will reveal that it is an illusion. Alternatively, wearing one of the nearby | Access to the rest of the dungeon is blocked off by a '''Gnarled Door'''. The door is one of the hag's previous victims, transformed, and it begs the party not to pass. The party can speak with it and succeed at persuading or intimidating it to allow them them through. This door will reveal that it is an illusion. Alternatively, wearing one of the nearby {{SmRarityItem|Whispering Mask|Whispering Masks}} will reveal the true nature of the door. However, these masks come with [[Whispering Mask|consequences]]. | ||
== Overgrown Tunnel == | === Overgrown Tunnel === | ||
The next room is unmarked on the map, labelled only as the '''Overgrown Tunnel'''. This section of the dungeon, past the Gnarled Door, contains four more previous victims of the hag. They are controlled by the | The next room is unmarked on the map, labelled only as the '''Overgrown Tunnel'''. This section of the dungeon, past the Gnarled Door, contains four more previous victims of the hag. They are controlled by the {{SmRarityItem|Whispering Mask|Whispering Masks}} they wear and will immediately attack the party on sight. This can be avoided if the party members also wear Whispering Masks. As long as Auntie Ethel is alive, it is necessary to cast {{SAI|Protection from Evil and Good}} on the party members before equipping the masks to prevent the negative effects of the masks. | ||
This room is covered with Mud (difficult terrain). | This room is covered with Mud (difficult terrain). | ||
=== The Descent === | ==== The Descent ==== | ||
Past the four masked victims is a waterfall. Jumping through the water will bring the party to final part of the Overgrown Tunnel section of the dungeon. This area is a steep descent down to the Ancient Abode, covered with climbable vines and many traps. | Past the four masked victims is a waterfall. Jumping through the water will bring the party to final part of the Overgrown Tunnel section of the dungeon. This area is a steep descent down to the Ancient Abode, covered with climbable vines and many traps. | ||
The next part of the hag's lair, the [[#Ancient Abode|Ancient Abode]], is at the end of the descent. | The next part of the hag's lair, the [[#Ancient Abode|Ancient Abode]], is at the end of the descent. | ||
There are many traps in this area: | |||
* Ruptured Stone - These traps resemble piles of rocks, and emit {{cond|Noxious Fumes}}. | * Ruptured Stone - These traps resemble piles of rocks, and emit {{cond|Noxious Fumes}}. | ||
** These can be covered by objects to block the fumes. It is possible to put or throw several items, like barrels, chests, bones or mugs, or indeed the whispering masks from the prior room onto the vents to disable them and pass through. | ** These can be covered by objects to block the fumes. It is possible to put or throw several items, like barrels, chests, bones or mugs, or indeed the whispering masks from the prior room onto the vents to disable them and pass through. | ||
** If the party is ''wearing'' the Whispering Masks, the traps will not emit fumes. | ** If the party is ''wearing'' the Whispering Masks, the traps will not emit fumes. | ||
** If | ** If Auntie Ethel is later defeated, the '''Ruptured Stones''' will stop emitting fumes. | ||
** They can also be disabled with a {{Ability check|Sleight of Hand|30}} check. | ** They can also be disabled with a {{Ability check|Sleight of Hand|30}} check. | ||
* '''Peculiar Flowers''' - These traps are which are hidden until spotted with a [[Perception]] check. They will explode if a party member draws too close. They litter the walkways leading down to the Ancient Abode. | * '''Peculiar Flowers''' - These traps are which are hidden until spotted with a [[Perception]] check. They will explode if a party member draws too close. They litter the walkways leading down to the Ancient Abode. Most are able to be safely shot and destroyed at range by some spells, [[Eldritch Blast]] being one known to work, though they need to be hit almost dead center. | ||
{{SAI|Misty Step}} and {{SAI|Feather Fall}} are useful for avoiding the traps safely. Alternatively, the poison gas clouds dissipate (and the other traps are visible and easy to avoid) if | {{SAI|Misty Step}} and {{SAI|Feather Fall}} are useful for avoiding the traps safely. Alternatively, the poison gas clouds dissipate (and the other traps are visible and easy to avoid) if at least one party member wears a Whispering Mask. | ||
=== Mushroom Circle and Underdark === | === Mushroom Circle and Underdark === | ||
There is a second '''Gnarled Door''' that can be reached from the trapped descent. This Gnarled Door is accessed by taking the ladder down just slightly south of the waterfall the party jumped through, following it around to the north and then jumping up to the door. | There is a second '''Gnarled Door''' that can be reached from the trapped descent. This Gnarled Door is accessed by taking the ladder down just slightly south of the waterfall the party jumped through, following it around to the north and then jumping up to the door. | ||
A | A Whispering Mask is required to gain access to the room beyond. Only the active party member has to wear the mask. Inside is a [[Mushroom Circle]] that leads to the [[Underdark]] ({{Coords|98|-283}}). | ||
== Ancient Abode == | === Ancient Abode === | ||
[[File:Ancient Abode.webp|thumb|right|The Ancient Abode in the Overgrown Tunnel.]] | [[File:Ancient Abode.webp|thumb|right|The Ancient Abode in the Overgrown Tunnel.]] | ||
The Ancient Abode is where | The Ancient Abode is where Auntie Ethel keeps {{CharLink|Mayrina}} locked up in a cage suspended over a gaping pit. | ||
If Ethel is alive, she will fight any intruders that make it here. If the masked victims from the Overgrown Tunnel are still alive and conscious, Ethel will summon them to fight the party. | If Ethel is alive, she will fight any intruders that make it here. If the masked victims from the Overgrown Tunnel are still alive and conscious, Ethel will summon them to fight the party. | ||
== Acrid Workshop == | === Acrid Workshop === | ||
[[File:Acrid Workshop.webp|thumb|right|The hag's workshop.]] | [[File:Acrid Workshop.webp|thumb|right|The hag's workshop.]] | ||
This small workshop is where Auntie Ethel concocted all manner of wicked brews. She also stores some of her treasures here. | This small workshop is where Auntie Ethel concocted all manner of wicked brews. She also stores some of her treasures here. | ||
There is a Mushroom Circle at the end of the workshop that | There is a Mushroom Circle at the end of the workshop that leads to the [[Sunlit Wetlands]] {{Coords|-74|210}}. | ||
==Connected locations== | ==Connected locations== | ||
* | *{{Loc|Riverside Teahouse}} | ||
* | *{{Loc|Sunlit Wetlands}} | ||
* | *{{Loc|Underdark}} | ||
==Characters== | ==Characters== | ||
* {{ | * {{MdCharLink|Auntie Ethel}} | ||
* {{ | * {{MdCharLink|Efrin Hammerborn}} | ||
* {{ | * {{MdCharLink|Lorin}} | ||
* {{ | * {{MdCharLink|Magron}} | ||
* {{ | * {{MdCharLink|Mayrina}} | ||
* {{ | * {{MdCharLink|Mask of Regret (Overgrown Tunnel)}} - can be saved and then met again in [[Act Three]] | ||
* {{ | * {{MdCharLink|Mask of Servitude (Overgrown Tunnel)}} | ||
* {{ | * {{MdCharLink|Mask of Terror (Overgrown Tunnel)}} | ||
* {{ | * {{MdCharLink|Mask of Vengeance (Overgrown Tunnel)}} | ||
==Notable loot== | ==Notable loot== | ||
{{div col}} | {{div col}} | ||
* {{MdRarityItem| | * {{MdRarityItem|Auntie Ethel's Hair}} | ||
* {{MdRarityItem|Bitter Divorce}} | |||
* {{MdRarityItem|Poisonous Slime Bomb}} | |||
* {{MdRarityItem|Potion of Speed}} | * {{MdRarityItem|Potion of Speed}} | ||
* {{MdRarityItem| | * {{MdRarityItem|Staff of Crones}} | ||
* {{MdRarityItem|Tarnished Charm}} | |||
* {{MdRarityItem|The Ever-Seeing Eye}} | * {{MdRarityItem|The Ever-Seeing Eye}} | ||
* {{MdRarityItem| | * {{MdRarityItem|Whispering Mask}} | ||
* {{MdRarityItem| | {{div col end}} | ||
=== Auntie Ethel's special potions === | |||
{{div col}} | |||
* {{MdRarityItem|A Mother's Loathing}} | |||
* {{MdRarityItem|Broken Promises}} | |||
* {{MdRarityItem|Butterflies in the Stomach}} | |||
* {{MdRarityItem|Faltering Will}} | |||
* {{MdRarityItem|Heart of Stone}} | |||
* {{MdRarityItem|Insanity's Kiss}} | |||
* {{MdRarityItem|Lost Time}} | * {{MdRarityItem|Lost Time}} | ||
* {{MdRarityItem| | * {{MdRarityItem|Lover's Avarice}} | ||
* {{MdRarityItem|Missing Pets}} | * {{MdRarityItem|Missing Pets}} | ||
* {{MdRarityItem|Wilted Dreams}} | * {{MdRarityItem|Wilted Dreams}} | ||
{{div col end}} | {{div col end}} | ||
| Line 98: | Line 107: | ||
*{{Quest|Save Mayrina}} | *{{Quest|Save Mayrina}} | ||
== Gallery == | |||
<gallery heights="250"> | |||
Dan-iorgulescu-hag-lair-2-baldur-s-gate-3-dan-iorgulescu.jpg|Concept art by Dan Iorgulescu | |||
Dan-iorgulescu-hag-lair-baldur-s-gate-3-dan-iorgulescu.jpg|Concept art by Dan Iorgulescu | |||
</gallery> | |||
{{Sunlit Wetlands}} | {{Sunlit Wetlands}} | ||
[[Category:Locations]] | [[Category:Locations]] | ||
[[Category:Act One Locations]] | [[Category:Act One Locations]] | ||
Latest revision as of 08:05, 11 November 2024

Overview[edit | edit source]
It is an optional dungeon, reached by walking through an illusory fireplace found in the Riverside Teahouse. This location is divided into three main sub areas: the Entrance Gallery, the Ancient Abode, and the Acrid Workshop. While inside the Overgrown Tunnel, the party cannot fast-travel to a Waypoint or go to Camp.
Entrance Gallery[edit | edit source]
The Entrance Gallery is the first of the three main sections of the dungeon. What remains of previous victims of the hag, Auntie Ethel, are scattered about the area. The wood elf Lorin shouts to stay back and not to look. Efrin, a petrified Dwarf stands next to a Blinded Elf. Magron, another victim holds her own head in her hands. The skull of Calim is mounted on a pedestal, facing a mirror. If a character breaks the mirror, that character is afflicted with Bane until long rest, and then Nauseated until a second long rest.
![]() can reveal some of their pasts. Interacting with the items nearby lets Auntie Ethel speak about how her victims got into these predicaments.
can reveal some of their pasts. Interacting with the items nearby lets Auntie Ethel speak about how her victims got into these predicaments.
Access to the rest of the dungeon is blocked off by a Gnarled Door. The door is one of the hag's previous victims, transformed, and it begs the party not to pass. The party can speak with it and succeed at persuading or intimidating it to allow them them through. This door will reveal that it is an illusion. Alternatively, wearing one of the nearby ![]() Whispering Masks will reveal the true nature of the door. However, these masks come with consequences.
Whispering Masks will reveal the true nature of the door. However, these masks come with consequences.
Overgrown Tunnel[edit | edit source]
The next room is unmarked on the map, labelled only as the Overgrown Tunnel. This section of the dungeon, past the Gnarled Door, contains four more previous victims of the hag. They are controlled by the ![]() Whispering Masks they wear and will immediately attack the party on sight. This can be avoided if the party members also wear Whispering Masks. As long as Auntie Ethel is alive, it is necessary to cast
Whispering Masks they wear and will immediately attack the party on sight. This can be avoided if the party members also wear Whispering Masks. As long as Auntie Ethel is alive, it is necessary to cast ![]() on the party members before equipping the masks to prevent the negative effects of the masks.
This room is covered with Mud (difficult terrain).
on the party members before equipping the masks to prevent the negative effects of the masks.
This room is covered with Mud (difficult terrain).
The Descent[edit | edit source]
Past the four masked victims is a waterfall. Jumping through the water will bring the party to final part of the Overgrown Tunnel section of the dungeon. This area is a steep descent down to the Ancient Abode, covered with climbable vines and many traps.
The next part of the hag's lair, the Ancient Abode, is at the end of the descent.
There are many traps in this area:
- Ruptured Stone - These traps resemble piles of rocks, and emit
 .
.
- These can be covered by objects to block the fumes. It is possible to put or throw several items, like barrels, chests, bones or mugs, or indeed the whispering masks from the prior room onto the vents to disable them and pass through.
- If the party is wearing the Whispering Masks, the traps will not emit fumes.
- If Auntie Ethel is later defeated, the Ruptured Stones will stop emitting fumes.
- They can also be disabled with a
 DC 30 Sleight of Hand check check.
- Peculiar Flowers - These traps are which are hidden until spotted with a Perception check. They will explode if a party member draws too close. They litter the walkways leading down to the Ancient Abode. Most are able to be safely shot and destroyed at range by some spells, Eldritch Blast being one known to work, though they need to be hit almost dead center.
![]() and
and ![]() are useful for avoiding the traps safely. Alternatively, the poison gas clouds dissipate (and the other traps are visible and easy to avoid) if at least one party member wears a Whispering Mask.
are useful for avoiding the traps safely. Alternatively, the poison gas clouds dissipate (and the other traps are visible and easy to avoid) if at least one party member wears a Whispering Mask.
Mushroom Circle and Underdark[edit | edit source]
There is a second Gnarled Door that can be reached from the trapped descent. This Gnarled Door is accessed by taking the ladder down just slightly south of the waterfall the party jumped through, following it around to the north and then jumping up to the door.
A Whispering Mask is required to gain access to the room beyond. Only the active party member has to wear the mask. Inside is a Mushroom Circle that leads to the Underdark (X: 98 Y: -283).
Ancient Abode[edit | edit source]

The Ancient Abode is where Auntie Ethel keeps Mayrina locked up in a cage suspended over a gaping pit.
If Ethel is alive, she will fight any intruders that make it here. If the masked victims from the Overgrown Tunnel are still alive and conscious, Ethel will summon them to fight the party.
Acrid Workshop[edit | edit source]

This small workshop is where Auntie Ethel concocted all manner of wicked brews. She also stores some of her treasures here.
There is a Mushroom Circle at the end of the workshop that leads to the Sunlit Wetlands X: -74 Y: 210.
Connected locations[edit | edit source]
Characters[edit | edit source]
- Auntie Ethel
- Efrin Hammerborn
- Lorin
- Magron
- Mayrina
- Mask of Regret (Overgrown Tunnel) - can be saved and then met again in Act Three
- Mask of Servitude (Overgrown Tunnel)
- Mask of Terror (Overgrown Tunnel)
- Mask of Vengeance (Overgrown Tunnel)
Notable loot[edit | edit source]
Auntie Ethel's special potions[edit | edit source]
Related quests[edit | edit source]
Gallery[edit | edit source]
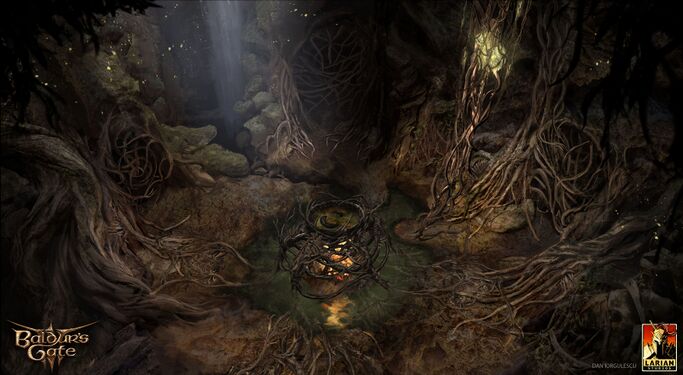
Concept art by Dan Iorgulescu
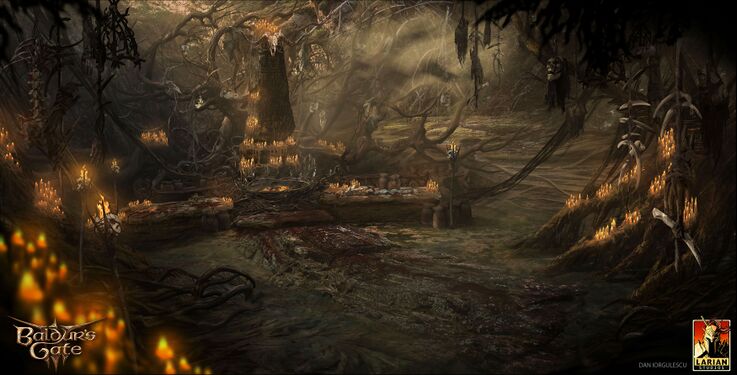
Concept art by Dan Iorgulescu

