Help Omeluum Investigate the Parasite: Difference between revisions
(→The 4th Floor (Bedroom): Saving changes) |
|||
| Line 53: | Line 53: | ||
|5th Floor (Roof) | |5th Floor (Roof) | ||
|Can be reached by the '''elevator''' and/or '''flight'''. | |Can be reached by the '''elevator''' and/or '''flight'''. | ||
|This level contains [[Bernard]], and the [[Guiding Light]] ring which is one method to visit the basement. | |This level contains [[Bernard]], and the {{SmallIcon|Guiding Light Icon.png}} [[Guiding Light]] ring which is one method to visit the basement. | ||
|- | |- | ||
|4th Floor (Bedroom) | |4th Floor (Bedroom) | ||
| Line 61: | Line 61: | ||
|3rd Floor (Main Entrance) | |3rd Floor (Main Entrance) | ||
|Can be accessed by the '''Main Door'''. Or '''flight''' and '''elevator''' if approaching from another level. | |Can be accessed by the '''Main Door'''. Or '''flight''' and '''elevator''' if approaching from another level. | ||
|Contains the '''Chest of Mundane''' and 2x [[Arcane Cannon|Arcane Cannons]]. | |Contains the '''Chest of Mundane ({{SmallIcon|Leather Boots Magical Icon.png}}''' [[Mystra's Grace]] + two [[Scrolls]]) and 2x [[Arcane Cannon|Arcane Cannons]]. | ||
|- | |- | ||
|2nd Floor (Greenhouse) | |2nd Floor (Greenhouse) | ||
| Line 72: | Line 72: | ||
|- | |- | ||
|Basement (Secret Room) | |Basement (Secret Room) | ||
|Can reach through elevator with the [[Guiding Light]] ring equipped, or by '''flying''' through a gap from the 1st level. | |Can reach through elevator with the {{SmallIcon|Guiding Light Icon.png}} [[Guiding Light]] ring equipped, or by '''flying''' through a gap from the 1st level. | ||
|Contains treasures - including the [[Staff of Arcane Blessing]], [[the Sparkswall]], and another set of the quest items ([[Tongue of Madness]], [[Timmask Spores]]). | |Contains treasures - including the {{SmallIcon|Staff of Arcane Blessing Icon.png}}[[Staff of Arcane Blessing]], {{SmallIcon|The Sparkswall Icon.png}}[[the Sparkswall]], and another set of the quest items ([[Tongue of Madness]], [[Timmask Spores]]). | ||
|} | |} | ||
| Line 110: | Line 110: | ||
* The Northern balcony has the Chest of the Mundane. | * The Northern balcony has the Chest of the Mundane. | ||
** Approaching it will trigger an [[Arcana]] [[Skill Check|Check]]. If your character passes, they'll identify that the chest is in-fact magical, despite its name and mundane looking loot. Taking the items out from it will reveal they are two level 1 magical scrolls (randomized), and [[Mystra's Grace]]. Approaching the chest with the Sussur Bloom's Anti-Magic aura will also dispel the illusion and show the true loot inside the chest. | ** Approaching it will trigger an [[Arcana]] [[Skill Check|Check]]. If your character passes, they'll identify that the chest is in-fact magical, despite its name and mundane looking loot. Taking the items out from it will reveal they are two level 1 magical scrolls (randomized), and {{SmallIcon|Leather Boots Magical Icon.png}} [[Mystra's Grace]]. Approaching the chest with the Sussur Bloom's Anti-Magic aura will also dispel the illusion and show the true loot inside the chest. | ||
===The 4th Floor (Bedroom) === | ===The 4th Floor (Bedroom) === | ||
[[File:Roads to Darkness.jpg|thumb|The Roads to Darkness book on Lenore's desk. ]] | |||
This floor can only be accessed by the restored elevator or by flying. This floor contains documents that the player should inspect prior to ascending to the 5th Floor (Roof). | This floor can only be accessed by the restored elevator or by flying. This floor contains documents that the player should inspect prior to ascending to the 5th Floor (Roof). | ||
* The Road to Darkness can be found on | * The '''Road to Darkness''' can be found on the desk at the South-Eastern corner at (X:-25, Y:-297). | ||
* The Torn-out paper on the | * The '''Torn-out paper''' on the table close to the elevator at (X:-35, Y:-286). | ||
Aside from the books, the magical ring [[Mage's Friend]] can also be looted on this floor. | Aside from the books, the magical ring [[Mage's Friend]] can also be looted on this floor in a wooden chest by the bed, at (X:-29, Y:-273). | ||
Lastly, there is an interactable button at the North-Eastern corner of the tower that appears to do nothing when pressed. To make it work, the player will need to retrieve and equip the [[Dog Collar]] from a grave in [[Dread Hollow]] at (X:-41, Y:-212), prior to interacting with it. Doing so will reveal that the button served as a food dispenser for Lenore's pet, as a piece of [[Camp Supplies|raw steak]] appears. The player can only do this once. | |||
===The 5th Floor (The Roof) === | ===The 5th Floor (The Roof) === | ||
This floor can only be accessed by the restored elevator or by flying. Upon arriving onto the floor, a dialogue will trigger with [[Bernard]], who is standing guard by the elevator. | This floor can only be accessed by the restored elevator or by flying. Upon arriving onto the floor, a dialogue will trigger with [[Bernard]], who is standing guard by the elevator along with a group of [[Animated Armour|Animated Armours]]. | ||
Bernard speaks strictly in poetry, with the scattered lines found throughout the Arcane Tower serving as various command phrases for him. In the first meeting, if the player must have read '''The Roads of Darkness''' and responded with ''"Or art though friend, a rescue from my lonely wake?"'' to avoid having Bernard become hostile and attack. Successfully doing this grants the player 50 Experience points. | Bernard speaks strictly in poetry, with the scattered lines found throughout the Arcane Tower serving as various command phrases for him. In the first meeting, if the player must have read '''The Roads of Darkness''' and responded with ''"Or art though friend, a rescue from my lonely wake?"'' to avoid having Bernard become hostile and attack. Successfully doing this grants the player 50 Experience points. | ||
| Line 150: | Line 153: | ||
| Torn-out paper (4th Floor) | | Torn-out paper (4th Floor) | ||
|} | |} | ||
The [[Guiding Light]] Ring can be obtained by reciting the passage above, or by destroying Bernard in combat. It cannot be pick-pocketed. | The [[Guiding Light]] Ring can be obtained by reciting the passage above, or by destroying Bernard in combat. It cannot be pick-pocketed. Destroying Bernard will also grant the player the {{SmallIcon|Light of Creation Icon.png}} [[Light of Creation]] Halberd - a strong weapon that has significant drawback. | ||
==Secret Basement== | ==Secret Basement== | ||
[[File:Flying Secret.jpg|thumb|Flying down to the secret basement room. ]] | |||
This floor can only be accessed by the restored elevator or by flying. To access it with the elevator, the player must obtain the Guiding Light from Bernard and equip it. Then, when they approach the elevator, an additional "Basement" button will appear, which will take the player directly to this secret room when activated. | This floor can only be accessed by the restored elevator or by flying. To access it with the elevator, the player must obtain the Guiding Light from Bernard and equip it. Then, when they approach the elevator, an additional "Basement" button will appear, which will take the player directly to this secret room when activated. | ||
Alternatively, with access to flight, the player can take advantage of a gap between the first floor and basement stair well that will allow them to fly down to the secret floor without ever needing to interact with Bernard or getting the Guiding Light. | Alternatively, with access to flight, the player can take advantage of a gap between the first floor and basement stair well that will allow them to fly down to the secret floor without ever needing to interact with Bernard or getting the Guiding Light. | ||
In the basement, aside from more [[Tongue of Madness]] and [[Timmask Spores]], the player can also find: | |||
* {{SmallIcon|Staff of Arcane Blessing Icon.png}} [[Staff of Arcane Blessing]] | |||
* {{SmallIcon|The Sparkswall Icon.png}}[[The Sparkswall]] | |||
* {{SmallIcon|Basilisk Oil Icon.png}}[[Basilisk Oil]] | |||
* [[Scrolls|Level 3 Spell Scroll]] (Randomized) | |||
== Returning to Omeluum == | == Returning to Omeluum == | ||
Once the player returns to Omeluum, he will brew the potion as promised and attempts to extract the tadpole from the player. (To be added). | Once the player returns to Omeluum, he will brew the potion as promised and attempts to extract the tadpole from the player. (To be added). | ||
Revision as of 02:24, 17 July 2023
Spoiler warning: The following content contains unhidden spoilers. Read at your own risk. |
Objectives
- Let Omeluum examine the parasite.
- We mentioned the parasite to Blurg, a hobgoblin. His colleague, a mind flayer named Omeluum, offered to examine it. Perhaps it can cure us?
- Ask Omeluum how to negate the tadpole's magic.
- The mind flayer couldn't extract the parasite, but offered us a way to negate the magic protecting it.
- Find the mushrooms Omeluum requested.
- To help us, Omeluum requires a Tongue of Madness mushroom and some Timmask Spores. We can find both at the mysterious tower nearby.
- Drink the potion Omeluum made for us.
- Before Omeluum can start the procedure, we'll need to drink the potion it made from the mushrooms we found.
- Get the Ring of Mind Shielding from Omeluum.
- The potion Omeluum gave us didn't work - it made the parasite even stronger. To calm it down, Omeluum is willing to trade us a ring of mind shielding.
Walkthrough
To complete this quest, the player will have to travel to the Arcane Tower per Omeluum's instructions to obtain the items they need. This guide will contain information for the full exploration of the tower. Strictly speaking the player does not need to explore most of the tower to complete this quest.
Dealing with the Defenses
The tower is guarded by automated Arcane Cannons. They are automatically hostile and will shoot at your characters whenever they're in sight-line and in range - there is a targeting indicator that will tell you this. Anything that breaks this line of sight indicator - i.e. solid obstacles, will effectively stop the attacks.
As of the Early Access, automated defenses do not trigger a Turnbased combat encounter - rather, they will shoot and attack in real-time exploration mode as well. It is recommended that you consider turning on Turnbase Mode to make movement and controlling your party more manageable.
In general, there are a few approaches to dealing with these the Arcane Cannons:
- Brute force - the cannons can be directly damaged and rendered inoperable. Take note of its resistances and Lightning vulnerability.
- Override - the cannons can be shut down once the player gains access to the 1st floor and restores power.
- Running by/Stealth - this is best done in Turnbase Mode as it'll allow the player to move cover-to-cover between turns.
- Anti-Magic - as the Arcane Cannons are magical constructs, being within the vicinity of the Anti-Magic effect of the Sussur Bloom will shut them down temporarily.
- Sussur Blooms can be found in the garden at the bottom of the Arcane Tower, or at the Sussur Tree in Dread Hollow.
- Attacking a Cannon while it's shut-down by the Anti-Magic field will destroy it, as opposed to "knocking it out".
Destroying the turrets will net you more experience overall - as each defeated tower nets 40 XP as of Patch 9 of the Early Access.
Note, cannons that have previously been rendered inoperable (by brute force) but not destroyed can actually be revived by the Anti-Magic aura, by walking into and then out of its range. You'll see the circuitry on the cannon re-ignite when this happens. This is something to take note of and to be careful of if you're combining the brute force approach with the Anti-magic approach afterwards.
In general, there are two formal/obvious ways to navigate the tower:
- Platforming on the fungus growing on the South side of the tower (can access the 2nd floor, and the exterior of the 1st).
- Restoring power and using the elevator (all floors).
If the player have access to flight (such as the Fly spell, or the Circle of the Moon Druid's Dire Raven form), they can completely bypass the need to restore the tower's power. However, this means they'll give up on 25 Experience and potentially Inspiration Points for the Guild Artisan background.
To successfully finish the quest, the player only needs to visit 2nd Floor (Greenhouse), which contains some Tongue of Madness mushroom and Timmask Spores. Once they have these, they can return to Omeluum to finish the quest. Everything else is strictly optional:
| Level | How to Access | Notable Elements |
|---|---|---|
| 5th Floor (Roof) | Can be reached by the elevator and/or flight. | This level contains Bernard, and the |
| 4th Floor (Bedroom) | Can be reached by the elevator and/or flight. | Contains key elements that allows the player to converse with Bernard and other constructs peacefully. |
| 3rd Floor (Main Entrance) | Can be accessed by the Main Door. Or flight and elevator if approaching from another level. | Contains the Chest of Mundane ( |
| 2nd Floor (Greenhouse) | Can be reached by the elevator, flight, or by jumping or teleporting on the mushrooms on the tower exterior. | Contains the quest related items (Tongue of Madness, Timmask Spores). If the player does not wish to explore the rest of the tower, they only have to visit this one floor. |
| 1st Floor (Generator) | The exterior Garden can be access by flight, jumping or teleporting on outside the tower. The locked 1st floor itself can be accessed by the Back Door or a Hole on the wall. | Contains the generator that allows you to restore power to the tower. |
| Basement (Secret Room) | Can reach through elevator with the |
Contains treasures - including the |
The 1st Floor (Generator) and Activating the Tower
To fully explore the tower, the player's goal would be to enter the locked 1st level of the tower - as the generator used to restore power to the tower is located there. To access this floor, the player must first get to the bottom of the tower.
Without a working elevator, the player will have to use the fungus platforms growing on the Southern wall of the tower to jump their way down. It is a good idea to cast Feather Fall to prevent unnecessary fall damage. Alternatively, Flying or teleporting (via Misty Step) will also get the player down without issues.
The 1st floor is locked and one of the few areas that is not accessible directly by flight. There are two options to get in:
- Through the Ornate Door in the back, which can be unlocked with a DC15 Sleight of Hand check, or by breaking it down (24 Hit Points, Lesser Toughness).
- By accessing a hole on the South wall (it looks like a pipe). The player will need to first pass a Perception check, and then crawl through as a small creature (i.e. the Druid's Cat Wildshape or a character shrunk by the Reduce spell).
To restore power to the tower - which will activate the elevator and deactivate the automated defenses - the player will need to bring Sussur Blooms to the Power Generator. Sussur Blooms can be found at the Garden just outside the door, or from the tree at Dread Hollow.
Interact with the Power Generator to bring up the crafting menu and use it to combine the machine with the Bloom. A cutscene should play where the tower comes to life, and you will gain 25 Experience and an Inspiration Point for the Guild Artisan background. With the power restore, you can now navigate up and down the tower via the central elevator.
The 2nd Floor (Greenhouse)
This floor can only be accessed by the restored elevator, by flying, or by platforming on the exterior fungus on the south side of the tower. This is a level that contains all the mushrooms required for the quest. Once the quest items are obtained, all other actions at the tower is strictly option. Skip forward to the Return to Omeluum section to finish the quest.
The other notable items on this floor is the Threadbare Book containing the following phrase:
- "How can I trust? How should I know? How can I show myself, my darkest me?"
This can provides additional options to interact with Bernard later on the roof.
The 3rd Floor (Main Entrance)
The main floor can be access directly through the front door of the tower. Exploring this floor is completely optional as the player can go straight to the 2nd floor Greenhouse to complete the quest, or the 1st floor to restore power.
The primary benefit of exploring the main floor prior to restoring the power would be additional XP from the two still-active Arcane Cannons, and getting access to Mystra's Grace earlier. The latter can provide the party an additional casting of Feather Fall which can help them avoid some damage trying to access the 1st floor. As the elevator inside is inactive, they will ultimately need to still find an alternative way to the lower levels.
Opening the Main Door requires succeeding on a Difficulty Class 15 Sleight of Hand Check. Alternatively, the main door can also be broken down - it has Medium Toughness and 36 Hit Points. Opening this door prior to the restoration of power will lead to a confrontation with two Arcane Cannons. Once they've been dealt with, you are free to roam and explore the main level of the Arcane Tower.
- The Southern balcony doesn't contain any notable items, but lets you access the exterior fungus platforms to the lower levels.
- The Northern balcony has the Chest of the Mundane.
- Approaching it will trigger an Arcana Check. If your character passes, they'll identify that the chest is in-fact magical, despite its name and mundane looking loot. Taking the items out from it will reveal they are two level 1 magical scrolls (randomized), and
 Mystra's Grace. Approaching the chest with the Sussur Bloom's Anti-Magic aura will also dispel the illusion and show the true loot inside the chest.
- Approaching it will trigger an Arcana Check. If your character passes, they'll identify that the chest is in-fact magical, despite its name and mundane looking loot. Taking the items out from it will reveal they are two level 1 magical scrolls (randomized), and
The 4th Floor (Bedroom)
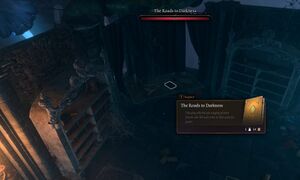
This floor can only be accessed by the restored elevator or by flying. This floor contains documents that the player should inspect prior to ascending to the 5th Floor (Roof).
- The Road to Darkness can be found on the desk at the South-Eastern corner at (X:-25, Y:-297).
- The Torn-out paper on the table close to the elevator at (X:-35, Y:-286).
Aside from the books, the magical ring Mage's Friend can also be looted on this floor in a wooden chest by the bed, at (X:-29, Y:-273).
Lastly, there is an interactable button at the North-Eastern corner of the tower that appears to do nothing when pressed. To make it work, the player will need to retrieve and equip the Dog Collar from a grave in Dread Hollow at (X:-41, Y:-212), prior to interacting with it. Doing so will reveal that the button served as a food dispenser for Lenore's pet, as a piece of raw steak appears. The player can only do this once.
The 5th Floor (The Roof)
This floor can only be accessed by the restored elevator or by flying. Upon arriving onto the floor, a dialogue will trigger with Bernard, who is standing guard by the elevator along with a group of Animated Armours.
Bernard speaks strictly in poetry, with the scattered lines found throughout the Arcane Tower serving as various command phrases for him. In the first meeting, if the player must have read The Roads of Darkness and responded with "Or art though friend, a rescue from my lonely wake?" to avoid having Bernard become hostile and attack. Successfully doing this grants the player 50 Experience points.
Afterwards, the player will have several options/commands they can use with Bernard, depending on what they've read.
| Line | Action | Required Book |
|---|---|---|
| "Or art though friend, a rescue from my lonely wake?" | Causes Bernard to not turn hostile. Triggered during the first conversation. Required for the other options. | The Roads of Darkness (4th Floor) |
| "How can I trust? How will I ever know? / How can I show myself, my darkest me?" | Bernard will place |
Threadbare Book (2nd Floor) |
| "These empty sheets are all that's left on you. / The last of all the thoughtless gifts you gave." | Bernard will give the player a Potion of Greater Healing. | Patched Parchment (table next to Bernard, 5th Floor) |
| "There is a light in every living thing. / It's crawling t'wards the surface to survive." | Bernard and the nearby Animated Armours become hostile and attack. | Dusty Book (3rd Floor) |
| "The silence stretches on - I'm all alone. / Please, can I hold your hands, for just a while?" | Bernard will hug the player and reassure them. It speaks as if the player is Lenore. | Torn-out paper (4th Floor) |
The Guiding Light Ring can be obtained by reciting the passage above, or by destroying Bernard in combat. It cannot be pick-pocketed. Destroying Bernard will also grant the player the ![]() Light of Creation Halberd - a strong weapon that has significant drawback.
Light of Creation Halberd - a strong weapon that has significant drawback.
Secret Basement
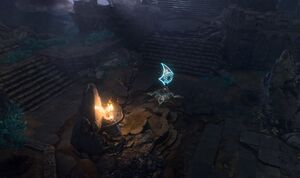
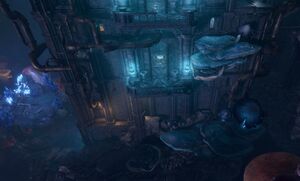
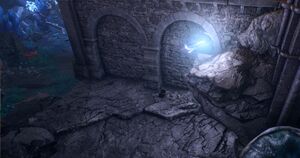
This floor can only be accessed by the restored elevator or by flying. To access it with the elevator, the player must obtain the Guiding Light from Bernard and equip it. Then, when they approach the elevator, an additional "Basement" button will appear, which will take the player directly to this secret room when activated.
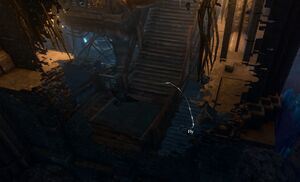
Alternatively, with access to flight, the player can take advantage of a gap between the first floor and basement stair well that will allow them to fly down to the secret floor without ever needing to interact with Bernard or getting the Guiding Light.
In the basement, aside from more Tongue of Madness and Timmask Spores, the player can also find:
Returning to Omeluum
Once the player returns to Omeluum, he will brew the potion as promised and attempts to extract the tadpole from the player. (To be added).
