House of Hope: Difference between revisions
(Added missing information about the skull's location on the room) |
m (Minor grammar correction (misplaced apostrophe)) |
||
| Line 44: | Line 44: | ||
East of the feast hall is a large room filled with portals to leading to a number of different locations. The portals are all closed, but can be interacted with to hear a brief line about each destination. | East of the feast hall is a large room filled with portals to leading to a number of different locations. The portals are all closed, but can be interacted with to hear a brief line about each destination. | ||
Scrubbing the floor of the room is | Scrubbing the floor of the room is its keeper, [[Nubaldin]], who can be persuaded into revealing Hope's physical location. | ||
=== Archive === | === Archive === | ||
Revision as of 01:21, 25 January 2024

The House of Hope is a location that can be accessed through a portal after performing the ritual in the Devil's Fee, Baldur's Gate during Act Three. This is Raphael's home, and prison to many Eternal Debtors who made the mistake of contracting him.
Arriving
Haggle with Helsik
To access the House of Hope, the player must travel to Devil's Fee in the northern-central part of the Lower City. From the Lower City Centre Wall waypoint, head north up the path and go inside the gate towards the large house. Inside you will talk to the proprietor, Helsik, who will provide the components to open a portal, provided the player meets one the following conditions:
- Spend 20,000 gold
- Perform a Persuasion check and pay the lower price of 10,000 gold
- Agree to bring back the Gauntlets of Hill Giant Strength from the House. [note 1]
Helsik will then provide the player with a Ritual Pouch containing the required items, and a note on how to perform the ritual itself. Head upstairs and inside of the ritual circle, pull out all of the items from the bag. The note, Opening a Hell Gate, will explain all the steps involved (order does not matter).
Alternative solution
The Ritual Pouch and the Grimoire Bound in Imp Skin can also be pick-pocketed from Helsik, the grimoire providing hints to complete the ritual. If the items were stolen, Helsik will comment on the player's thievery after completing the House of Hope, but won't be hostile and still happily trade.
Duplicates of five of the ritual ingredients, but not the Grimoire, can be found in various places around Helsik's room: the skull on the wooden casket in the middle of the room next to a row of books on the left side of the double door, incense on the small table next to the southern balcony door; infernal marble in the opulent chest beside the door to the bedroom; a diamond in the gilded chest near the desk by the window; and a Coin of Mammon in the gilded chest on the bedside cabinet.
At the top of the stairs is a Ward trap placed that will cast a Fireball spell each time it is stepped on. On its right is a Ward shaped as an Imp that recites; "Gravelled tongue, sanded throat. Hard to swallow... hurts to breathe...". Placing any water or wine[note 2] will disarm the trap, replying "Too wet. Too cold. No fun. Begone!".
Opening the portal
Place the items in the correct order and use the portal to head to the House of Hope:
- Place the skull on the star point near the altar
- Place the coin of Mammon on the next point to the right (if your character is facing the altar)
- Skip a point and place the diamond on the next point after that
- Place the incense on the point following the diamond
- Place the Infernal Marble in the centre of the star
Like what was said above, the order of placing these items doesn't matter as long as they are placed in their correct places.
![]() Be careful with mods when using the portal, and in the House itself![See: Bugs]
Be careful with mods when using the portal, and in the House itself![See: Bugs]
Overview
Foyer
The portal exits into the House's foyer, which has a large door and four Pillar of Souls. Using the door will summon Hope, who will introduce herself and give the party four sets of Debtor's Attire, which will disguise them from the Eternal Debtors while in the house.
Feast hall
The next room north of the foyer is the feast hall, where Raphael transported the player during his first introduction. Gone are the lavish displays of food and ordered furniture, the player now sees the reality of Raphael's illusory temptations as they truly are; rotting food, disorder and wandering, trapped souls.
Cleaning the hall is a lone Infernal Mason, who introduces himself as the architect who built Moonrise Towers.
Chamber of Egress
East of the feast hall is a large room filled with portals to leading to a number of different locations. The portals are all closed, but can be interacted with to hear a brief line about each destination.
Scrubbing the floor of the room is its keeper, Nubaldin, who can be persuaded into revealing Hope's physical location.
Archive
The last room down the hall is the archive. Opposite the entrance is a lever which opens a shortcut back to the feast hall.
Inside the archive are several books with information related to the House and to the Crown of Karsus. More notably, there are three pedestals with rare equipment, and the Archivist who is keeping an eye on them.
The pedestals each have a pressure plate (which can be disarmed) that alerts the House if the item is removed. The northern pedestal holds the Gauntlets of Hill Giant Strength, the southern the Amulet of Greater Health, and to the west is the Orphic Hammer, which can only be retrieved by removing the shield with a password.
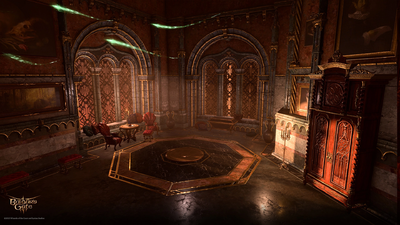
Boudoir
In the centre of the hall is entrance to the the boudoir; the northernmost room in the House. Access to the boudoir requires either an invitation from The Archivist in the archive, or traversal across the platforms from a balcony next-door to the Chamber of Egress.
In the first section of the room are some locked opulent chests, one of which contains a Potion of Angelic Slumber. A pool sits in the centre of the room, with some restoration facets that will restore the party.
Further back, the party will find Haarlep lazing about. They can be talked into giving up the password for the Orphic Hammer's shield, or killed. A large portrait west of the bed can also be opened with a key from Haarlep to find the password.
Raphael's vault
Directly south of the boudoir is an infernal gem, which can be picked with a DC 10 Wisdom check, followed by a DC 20 Arcana check. Inside is the Helldusk Helmet, Staff of Spellpower, and Mol's contract.
Hope's prison
At the end of the hallway near the Chamber of Egress is a prison hatchway, which leads down beneath the House and into Hope's prison. Hope herself is at the centre of the room, bound by two unbreakable chains held by rocks which can be broken with the Orphic Hammer.
There are also two Spectators, one of which drops the Burnished Ring, and some Vengeful Imps.
Characters
Creatures
Related quests
- Save Hope
- Deal with the Devil
- Acquire the Gauntlets for Helsik
- Free Orpheus
- The Githyanki Warrior
- Help Kith'rak Voss
- Find Mol
Walkthrough
![]() Act 3 Spoilers! This section reveals details about the story of Baldur's Gate 3.
Act 3 Spoilers! This section reveals details about the story of Baldur's Gate 3.
After first arriving in the House of Hope, you will be teleported into the Foyer. Make your way towards the exit where you will have your first interaction with Hope, the house's namesake. Agree or disagree to help her (this walkthrough will assume that you are agreeing), and obtain the Debtor's clothing from her. These will allow your party to walk around the House without the occupants initiating combat. You cannot long rest in the House of Hope, but you can freely come and go through the portal while the House is passive.
Archive
Take a left from the Feast Hall towards the western side of the map and head into the archive. Here you can steal the Gauntlets of Hill Giant Strength and the Amulet of Greater Health from the pedestals on either side of the room after disarming the traps underneath them. Provided you are not caught or can talk your way out of it, the Archivist will not initiate combat; otherwise, the entire house will turn on you. Speak to the Archivist about the Orphic Hammer in the centre of the room, and follow the dialogue options until he tells you to head into the boudoir.
Budoir
Inside the boudoir there are two healing fountains that will provide your characters with unlimited long rests. There are two locked opulent chests, one of which contains a Potion of Angelic Slumber. Resting on Raphael's bed is Haarlep, his incubus. Speak to them and follow the dialogue options to try and obtain the magic words necessary to remove the shield from the Hammer.
Alternative, kill them in a relatively simple fight. They will summon six lesser demons that should not be a problem, but they has an ability that will cause them to go Ethereal (functionally invulnerable) after taking damage, so hit them with your meatiest attacks and they will eventually fall. Loot the Helldusk Gloves and the key to Raphael's safe. The safe is located to the left (if your character is facing it) of Raphael's bed on the wall. Use the key or lockpick in order to obtain a note from Raphael about the words to the Hammer.
Head back to the archive to retrieve the hammer. Afterwards, the Debtors turn hostile, and turn into Fiends after being killed. Fight your way (stopping to long rest at the pools in the boudoir when necessary) to the eastern portion of the House. Right outside of the Portal Room on the southern terminal end of the hallway is a hatch leading to the Hope's prison. Unlock, and head inside.
Hope's prison
Inside the prison you will find Hope bound by chains on two sides where two Spectators and a handful of lesser demons wait. Kill them and equip the Orphic Hammer to the melee slot of any character. Use that character to smash the rocks holding Hope's chains, and she will join your party. She's a relatively strong level 10 Cleric, who has access to a Divine Intervention — don't use it until we get to the finale of the House.
Exiting
Head back up and through the Feast Hall, make sure you are fully healed and rested, and head back to the Foyer. When you click on the portal back to Baldur's Gate, Raphael is back, and he is very upset. There is no way to avoid combat here. He will be accompanied by Hope's sister, as well as Yugir, the demon from the Gauntlet of Shar. Yugir can be persuaded to join the fight on your side with a DC30 persuasion check, even if you convinced him to kill himself during Act Two. In either event, we will now, finally, be fighting Raphael.
Knock out the soul pillars in the four corners of the room, as Raphael draws power from them in the form of powerful spells as well as increasing his DEX by a significant amount. Alternatively, a party with very strong single target damage may choose to forgo the pillars and focus on Raphael from the start. His high AC can be negated via some crowd control spells such as Hold Monster, although their duration is reduced to 1 turn on this particular enemy.
Try to keep Hope alive as she has access to very powerful spells, and powerful AoE healing. She can also use a Level 5 spell slot (though the spell is located under Cantrips) to 'banish' someone from her house — effectively being able to kill 2 (or more, if the slots are refreshed) adds for a single Action.
Kill the towers, keep Hope alive and healing, use Divine Intervention when you need to, and the fight is fairly straightforward for a Level 12 party. Afterwards, soak in your victory and loot the Helldusk Armour from Raphael — a very powerful armour that will provide AC21 Heavy Armour that negates the need for Proficiency.
Notable loot
Notable items obtained in this location, whether looted, or obtained as a quest reward:
Boudoir
 Helldusk Gloves,acquired by defeating Haarlep
 Potion of Angelic Slumber, inside a locked Opulent Chest DC 15
Archive
When stealing from daises in Archive, the House will become hostile unless their pressure plate is disarmed first. This requires DC 15 Perception check to unveil followed by a DC 20 Sleight of Hand check to disarm.
 Gauntlets of Hill Giant Strength, stolen from a dais
 Amulet of Greater Health, stolen from a dais
 Orphic Hammer, stolen from a dais, must have the necessary words in order to turn off the shield
Raphael's vault
A vault across from the boudoir, which requires a DC 10 Wisdom check followed by a DC 20 Arcana check to unlock.
Hope's prison
 Burnished Ring, acquired after defeating Spectator during the quest Save Hope
Foyer
 Helldusk Armour, acquired after defeating final encounter of the area
 Gloves of Soul Catching, reward from the quest Save Hope
Gallery
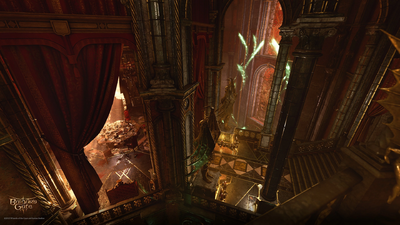
Top view
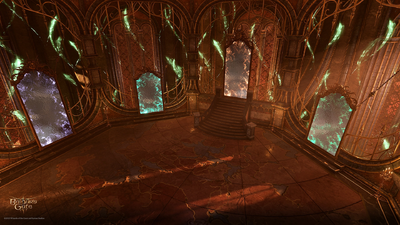
The portals
The hatch to Hope's prison


Bugs
- As of Hotfix #4, the portal will be bugged and will not work if you have a mod that increases the level cap. A workaround is to reset your party to 1st level by talking to Withers, and then perform the ritual. You can then level up again once you've entered the portal.
- If you have a mod that allows you to have more than 4 party members (summons don't count) then this will cause issues as Hope's Disguise will only work for the first four characters meaning you will alert some of the house residents. To remedy this, additional disguises can be found in the Wardrobes scattered throughout the hallways.
Notes
- ↑ Note that after successfully turning in the Gauntlets of Hill Giant Strength to Helsik, she then adds them to the wares in her shop for 1620 gold when purchasing at a 0% discount, making this the cheapest choice while still keeping the gauntlets.
- ↑ There is a bottle of Stagswift Tonic and Frostkiss Ale below a Stuffed Deep Rothé head on the stairway.
- The Grimoire Bound in Imp Skin's hints can be deciphered as follows:
- "Place that which has no eyes but used to see at the western point of the circle" -> Place the skull west of the altar.
- "Two spaces lie opposite that point. 'Pon the left - place what is cut but cannot bleed" -> At the opposite direction from which you placed the skull there's two points; on the left one as you face them (i.e. the northern of the two points to the east), place the diamond.
- "To the right - that which smells but cannot sniff." -> Place the Incense on the right of where you placed the diamond (i.e. the southern of the two points to the east).
- "Besides the dead remains - the aspect of the Avariced lord sits clockwise so." -> Place the Coin of Mammon next to the skull clockwise (i.e. on the point to the north-west).
- "Then the circle's centre shall receive the internal marvel of infernal marble." -> Place the infernal marble in the centre.
- "Finally - and I mean no disrespect - go to hell" -> Self-explanatory: "Enter the House of Hope".
- The portal between Baldur's Gate and the House of Hope will remain open for the rest of the game, except when confronting Raphael.
- Entering the House of Hope causes Raphael to disappear from Sharess' Caress, thus becoming inaccessible until the confrontation.