Modding:Meshes (Blender)
| This page is a modding page, and follows its own rules and standards separate from the rest of the wiki. |

In this tutorial we will assume you are generally knowledgable about how to use 3d software, so this will focus on things specific to Baldur’s Gate 3 exporter made by Norbyte. Remember, there are many general youtube tutorials about how to weight paint and edit meshes in Blender.
This does not cover anything in the toolset.
This last edited 29/05/25, please check modding discords for any up to date information
BG3 Tutorials and Resources[edit section | visual editor]
Be sure to watch ![]() by Druu using the BG3 Blender plugin and follow along. It is older but still very relevant and helpful.
by Druu using the BG3 Blender plugin and follow along. It is older but still very relevant and helpful.
Read the official Armor Creation Guidelines page, which also has guideline meshes available to download.
Setup[edit section | visual editor]
Here we are using Modder's Multitool, Blender, and Norbyte’s Blender import tool. The Norbyte Blender import tool requires lslib to run.
Make sure you install it correctly- ![]() should give you some example of how to install it.
should give you some example of how to install it.
Any version of Blender newer than 3.5 should be able to run the addon now- previously 3.6 was favoured for its compatibility with addons(and is still a viable version to use) but almost all have now updated. So even Blender 4+ can safely run the addons mentioned in this tutorial.
As of 29/05/25, the beta version of lslib (ExportTool-v1.20) will by default x-flip meshes on export, which can be hugely confusing for troubleshooting issues. If you are using it, be sure to leave 'Flip Meshes on X axis' unticked. If you're new to using Blender, you may wish to stick to ExportTool-v1.19.5 or 19.4 for now.
You should also install Padme’s Addon, ‘Create LODs’. You may also find use of the 'Reset Transforms' tools as they are helpful when weight painting a model.
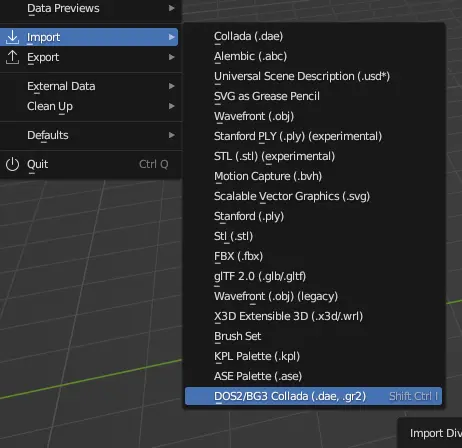
Extracting a model to work with[edit section | visual editor]

You should at least extract HUM_F_NKD_Body_A (or whatever nude you are basing your outfit on) to fit your new outfit around.
When you have found a model to your liking, click the extract file/open folder. You should find the mesh in .GR2 and .dae form on your computer. Older versions of the importer prefer the .dae- but modern versions you can just use the .GR2.
This should not be an issue if you keep a master file intact so you can re-export your meshes from there, and you have obtained permission to edit all the modded items you want to import anyway. If you have this issue the mesh may be more amenable to being imported as a dae, or it is possible to extract the model with the tool 'Noesis' although I will not be covering that in this tutorial.
Importing[edit section | visual editor]
It will be a fairly standard rig with an Armature modifier (see the Modifier tab, the little blue wrench).
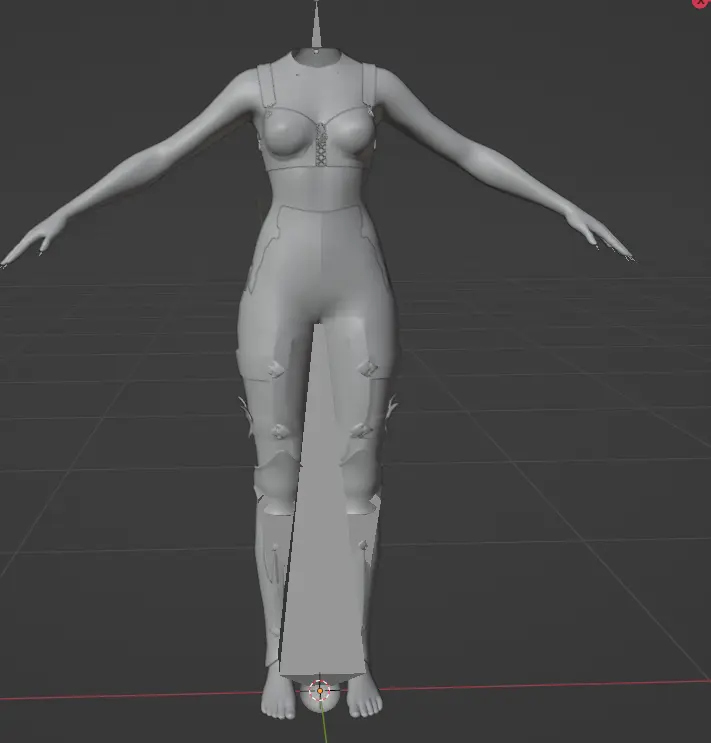
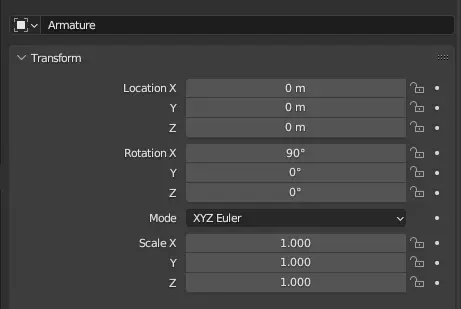
Your armatures will import in at 90 degrees. If exported to game like this, that will cause it to export flat to the floor and follow a naked character around like a weird sad windsock, so you need to fix it.
[Object Mode] Object > Apply> All Transforms on the armature, until the coordinates for its location all read 0, 0, 0. You may want to do the same thing on the meshes as well, but generally they just follow the armature so it's not usually needed.
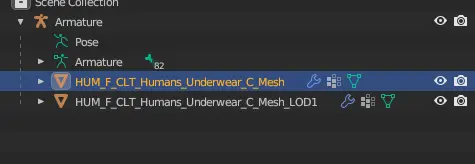
The mesh will import in with 1 or more LODS. These are level of detail meshes, intended to be viewed at a distance so they are lower poly. You only need the best quality one as we are making new LODs later, so delete anything that has LOD in the name. (Padme's addon has a button for quick deletion.)
If your mesh you imported has a skirt, it may have an undetailed boxy thing called a ‘Cloth Mesh’. This has to do with Physics (see below).
Editing Meshes[edit section | visual editor]
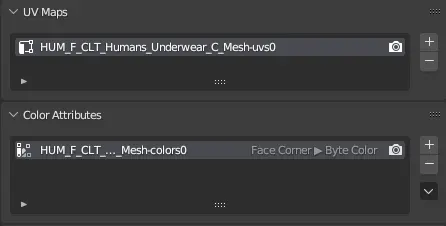
If you wish to combine two meshes for whatever reason, remember that each mesh will have its own name for the UV map and colour maps.
The colour map is what the vertex painting is in- essential for bodies and desirable for most items of clothing.
You need to rename the UV maps and Colour maps to be the same before you combine them, or one will be absorbed into the other.
The UV map may seem bare when you tab into the UV display, but BG3 meshes sometimes are not on the actual UV square itself- this works in game because the UV tiles. This is called a UDIM and it's like that for baking. So you may need to scroll out quite far to see the full UV. You can drag it back (select it and use the command g x -1) or keep it there, it usually does not matter.

If making a new full body mesh, it is generally a good idea to parent your mesh to a naked body, which does have all the bones, as this can avoid weighting issues.
Remember that genitals are attached later via lsx code and aren't a part of the body mesh.
Vertex Paint[edit section | visual editor]

Tab into Vertex Paint mode to look at the clothes and (for reference) the naked body.
The game’s armour system works by vertex paint. It uses this, in combination with the .lsx code, to tell it what to hide and what to show. For example, an armour mesh may unload the body's torso as it will not be shown. The bottom half of a pant leg may not show when boots are equipped. Genitals have their own vertex paint and only load in when nothing with the 'hide genitals' tag is equipped. You can use existing meshes and code as a reference for this.
Check here for a reference and Hex codes for the vertex paint including physics colours.
Keeping the HUM_F_NKD_Body_A in the scene is useful as reference here. For example, if you set an upper arm to be hidden for some gloves, you may wish to fit it around these seams to ensure there is no gap in the body showing.
You can turn on the vertex paint to look at it in non-Vertex Paint modes by touching the Blender attributes menu.
You can also turn on Flat shading from the same menu, to get a better view of things if you are creating your own vertex paint for outfits.
Generally outfit meshes are black in vertex paint, with some dark green on elements intended to disappear such as the pant legs. You may not need to touch the vertex paint if you are just editing existing outfits!
If you intend to use part of an underwear mesh on an outerwear outfit, make sure you paint it black in Vertex Paint or it will hide when it’s not supposed to.

How to Vertex Paint Sleeves and Pant Legs[edit section | visual editor]
If you handpaint vertex paint on your own meshes, the mesh will often glitch. You may need to use this method to make it work.
Go into Edit mode.
Select the vertices you want painted.
Shift + P to seperate the vertices (right click so they stay in place)
Go into Vertex color and click the little icon on top that makes sure you only paint on selected vertices.
Fill vertex color. (You can use a keyboard shortcut to bucket fill vertex paints also- it's shift+k on older Blender versions, but Ctrl+X from 4.0 onward)
Reattach the chunk to the rest of the body with Edit Mode>Mesh>Clean Up>Merge by distance
You can also use individual vertex select mode before painting.
Remember also you need to have a VertCut material set up in your LSX for Vertcut to take effect, as well as enabling it to True in the code.
Fixing meshes that import in wrong[edit section | visual editor]

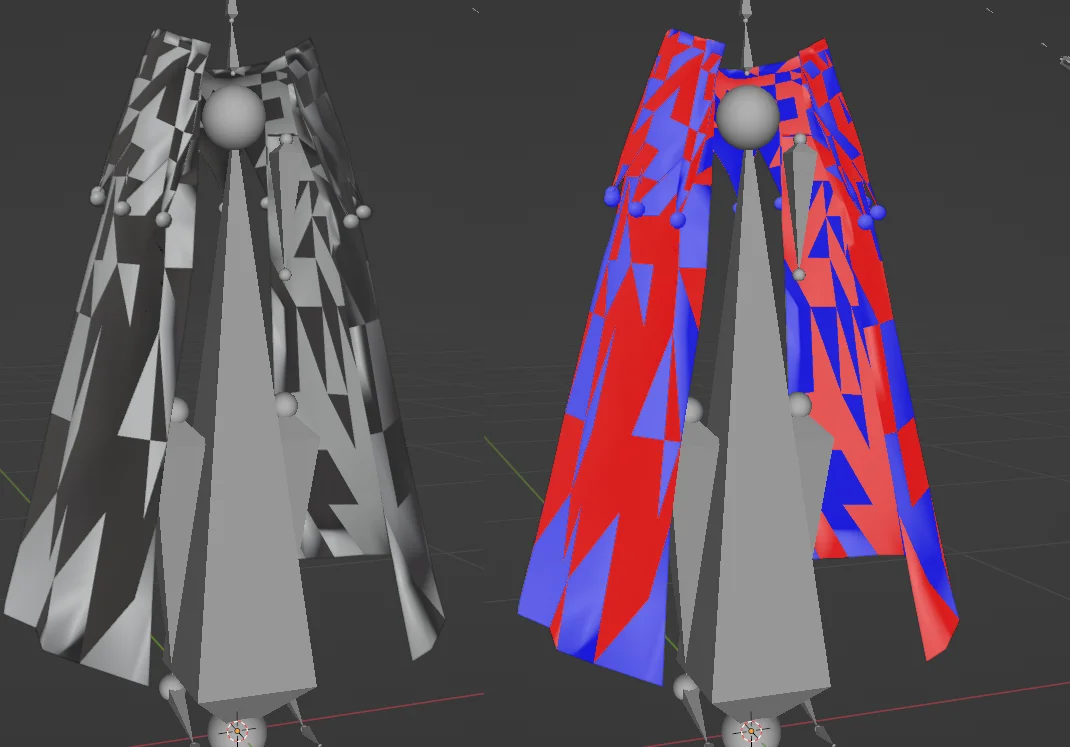
Sometimes meshes will import in with broken shading and stuck together, usually on skirt meshes. This is because the verts were too close together and the importer couldn't interpret it. This often causes an issue with the normals as well.
See this video for how to fix meshes that import in with messed up normals and export looking like see through checkerboards.
You can also fix with [Edit Mode] Mesh> Clean Up> Merge By Distance, and then put a solidify modifier at 00.1 thickness. Recalculate Normals> Average Face Area may also help.
Alternately, select all, alt+n to average face area. If any blue lines on the edges appear, select edges, then 'clear sharp' and alt+n average face areas again.

Physics[edit section | visual editor]
![]()
Nico Physics tool is available here although it is uncompiled. The compiled version is available for download from his dev thread on the official Larian discord.
-
As of Patch7 there are differences between adding physics with toolset, and adding them manually. This writeup does not cover toolset physics.
-
Physics are set with red vertex paint. Blue vertex paint makes the physics slower, counterbalancing them -usually seen as hot pink vertex paint.
A cloth mesh (Generally named something like HUM_F_CLT_Daisy_Dress_A_Cloth_Mesh when imported in) is the collider mesh, which stops it clipping through things. If you actually change any of the geometry of anything (possibly the geometry will change just from the mesh being imported), it will no longer link up with the code and so become useless. You can however change the weight paint without needing to redo the code.
A physics enabled mesh has the 'cloth' box ticked on it. A cloth mesh has both the 'cloth' box, and the 'cloth physics' box ticked on it.
If a mesh is 100% weighted to a single bone, adding physics will cause it to crash the game. If you are making a helmet item and therefore need it to be entirely static, weight some of it to the piercing bones as they also do not move.
A mesh cannot be entirely vertex painted red or it will bounce around, it needs some black vertex paint left to anchor it.
If your mesh is creasing up at the back, you may want to lower the vertex paint to be lower down.

To totally forgo having to import the item in and edit it, some people have experimented with not exporting the mesh and setting non-skirt parts of the original mesh to use an invisible material, then combining it with their own torso in a roottemplate.
LODs and Load Order[edit section | visual editor]
![]()
LODs are a way of improving performance on weaker computers by using a lower-quality version of the mesh at farther distances.
Using Padme’s addon tool, click the button to generate LOD and you will have your nice new set of LODs. This basically just duplicates and renames the mesh and puts a 'Decimate' modifier on it, so if you want to make your own LODs without the addon you easily can.

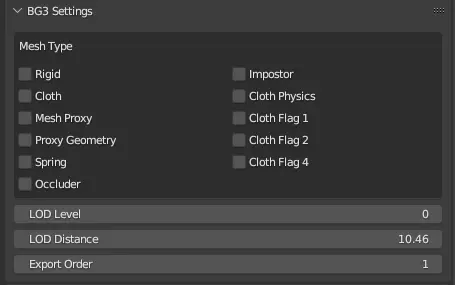
-LOD Level is what level of LOD it is. LOD0 is the best quality. Meshes generally have no more than 4-5 LODS, usually depending on how 'common' an asset it is. (A common peasant shirt will have many LODS, while an armour intended only for the player or an important NPC may have only 1 LOD.)
-Lod Distance is the distance from which your mesh swaps to the next LOD. For this reason, your highest quality mesh should probably be something like 9-15 metres, your middle ones 15-20, while your last LOD always needs to be set to 0. Or it will vanish from a distance. There are certain cutscenes in Act 3 and elsewhere where your player character is seen from a very long distance, so this is important!
-Export order. All your LOD0 meshes go first, then your LOD1, LOD2, LOD3, assuming you have multiple LOD0 meshes. Look at imported game meshes for reference. If there is not a consistent 1, 2, 3, 4, and so on order, the addon will complain about gaps in the order, and refuse to export.
If you get the export order wrong in the code, some meshes may end up with the wrong material assigned to them.
Using No LODs[edit section | visual editor]
If you don’t particularly care about it performing well on bad computers, you can have no LOD meshes and just set your high quality mesh to have a LOD distance of 0.
Make sure to remember to look at your settings if it's an all new mesh, as it won't know what settings a BG3 mesh should have.
Weight Painting[edit section | visual editor]
Here is a tutorial on Weight Painting by Lynia.
If you hand edited the weight paints and now your outfit has spiky weights, you may need to limit the total amount of vertices affected by the weight.
Weight Painting Mode> Weights > Limit Total
Usually the default '4' will work, but you can try '2' if it persists. The 2 should definitely fix it, though may delete any subtlety from your weight painting.
If you are painting, having the 'auto quantise weights' box on the paint settings checked should reduce any chance of spiky weights, although this may cause other problems as it's a blunt force option.
The ExportTool-v1.20 lislib is more forgiving when it comes to weight painting, so you may wish to use that version before taking the above measures.
Exporting[edit section | visual editor]
Remember to set all of your mesh to the same material in Blender or delete all materials assigned to the mesh before exporting, or some parts of the outfit may not show up in the game.
Default export settings are usually fine to use.
Remember to save as .GR2 not .gr2 and use that in all your code, the game is very concerned with capitalisation.
Your mesh will export x-mirrored. Meshes import in from the multitool x-mirrored, so they are the right way around now! (See above for a caveat with beta lslib)
Make sure to parent your mesh to a that has the correct bones. Many meshes from the game, such as boots, have only a few bones in them so they won't work for a non-boot item. If in doubt, parenting to the nude body armature will do.
If you parented your mesh to the nude body armature, remember to delete the nude body before exporting it!
See here for an old list of past and future Blender export settings.

Testing in Game[edit section | visual editor]
It can be sensible to test the mesh first by exporting it as a replacer for an existing mesh(even one from a mod you have unpacked) if you are new to modding, as there’s a lot of things that can cause an item to not show up in your code.
For adding the item in game as a seperate item, see here- Coding an Item.
Hotloading[edit section | visual editor]
It is not only possible but very recommended to hotload meshes, it enables you to fix them in action.
If you have a mod pak called MYSWEETMOD and it contains a mesh called SWEETDRESS.GR2 in this file structure:
MYSWEETMOD\Generated\Public\MYSWEETMOD\Assets
You can rexport SWEETDRESS.GR2 and place it in this folder structure-
Steam\steamapps\common\Baldurs Gate 3\Data\Generated\Public\MYSWEETMOD\Assets
(Change as applicable for whatever your installation path is on GOG)
This means you can reload it while the game is still running and see changes in real time. Usually by unequipping and requipping it so the game has a chance to load and reload it.
Although remember it has to have the same mesh order as the thing you are replacing or the material will be wrong.
General Blender tutorials[edit section | visual editor]
You may find ![]() short videos on Blender to be helpful.
short videos on Blender to be helpful.
Modder's Resources[edit section | visual editor]
Outfit Builder by LazyIcarus- uses shapekeys to edit a mesh to a different body type- useful if you want to make an outfit for different body types.
Lazy Tailor by Volno- uses a different method to edit a mesh to a different body type.
Volno texture toolbox- for previewing textures on the mesh.
Mesh data transfer -free addon
Robust Weight transfer - free addon
Vertex Colour Master -free addon
Padme4000 physics tutorial- Older and some outdated information but stil useful