Ad placeholder
Zhentarim Basement


Overview[edit section | visual editor]

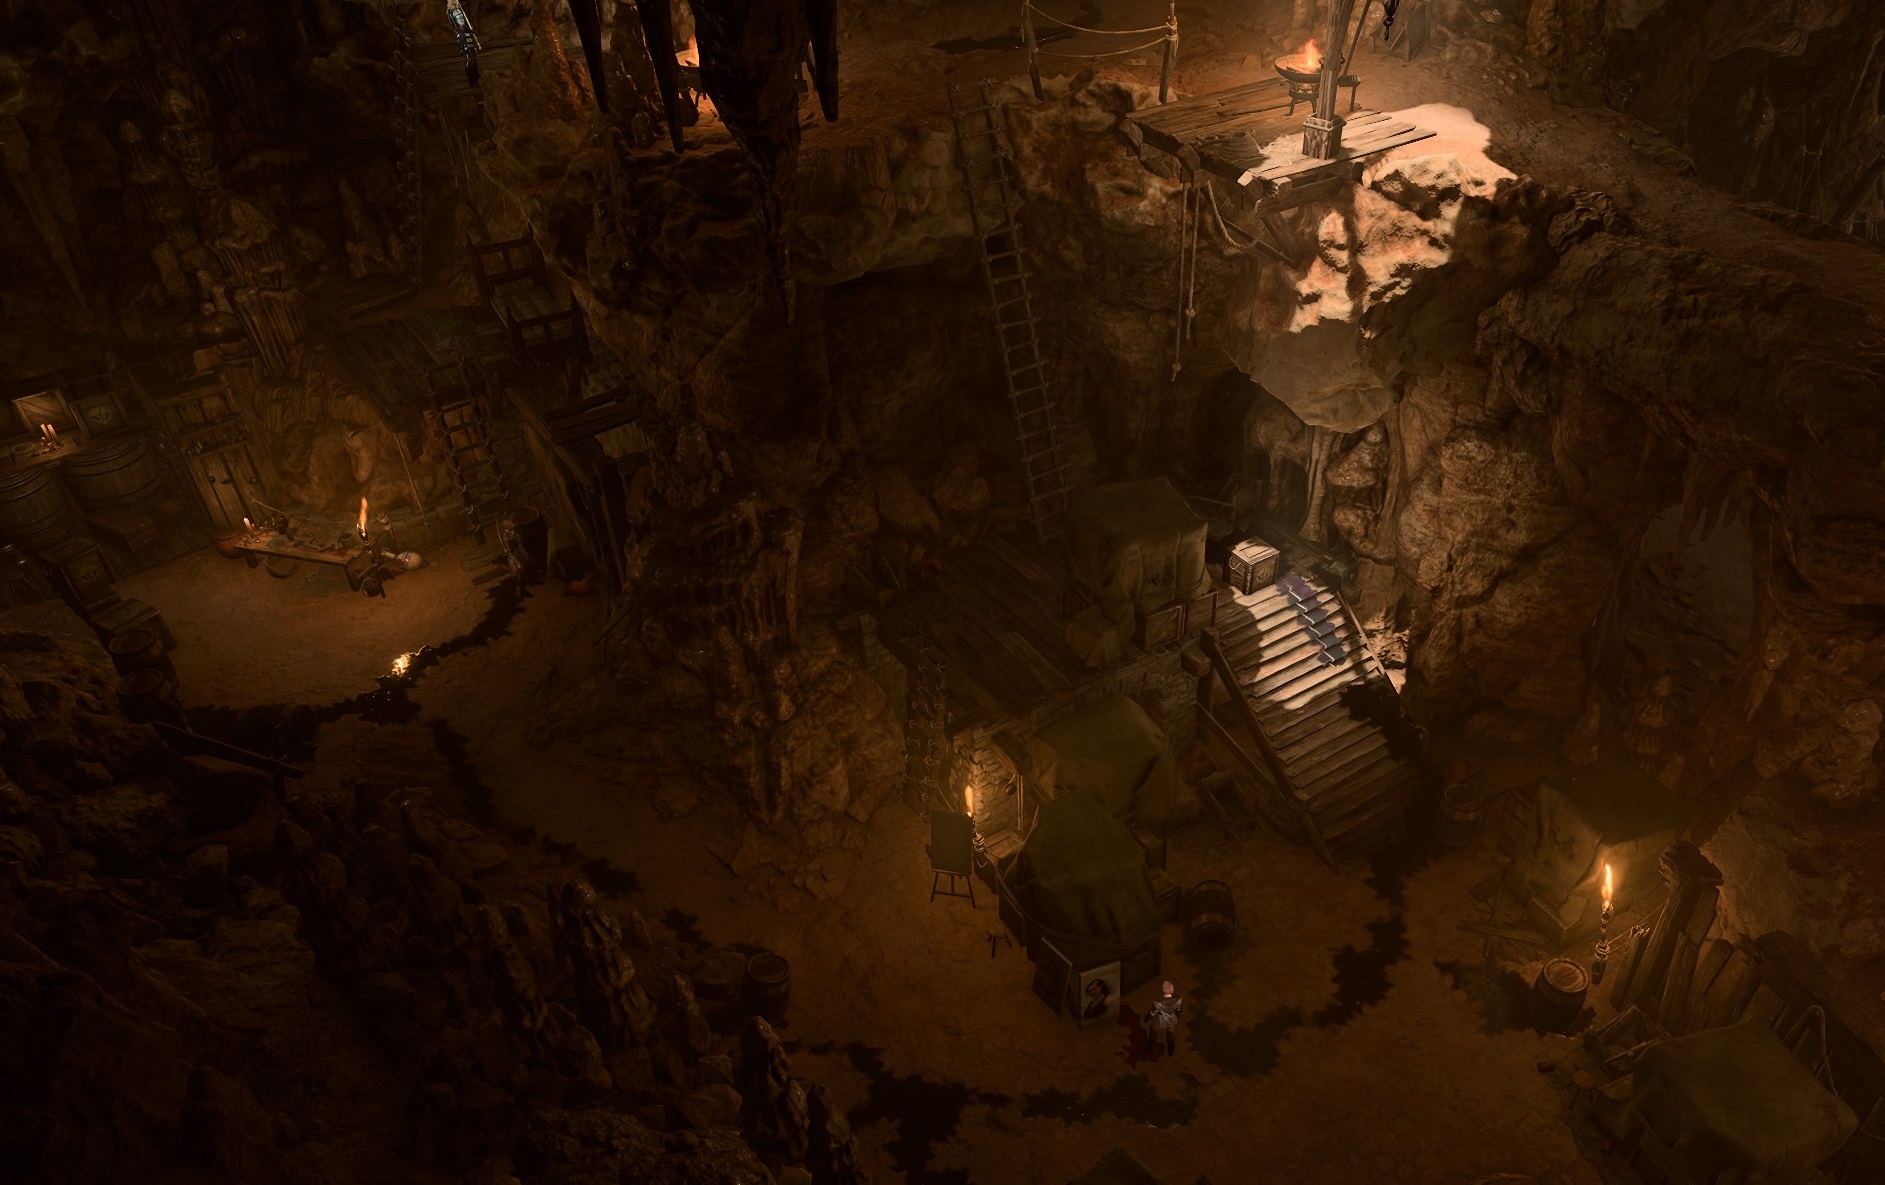
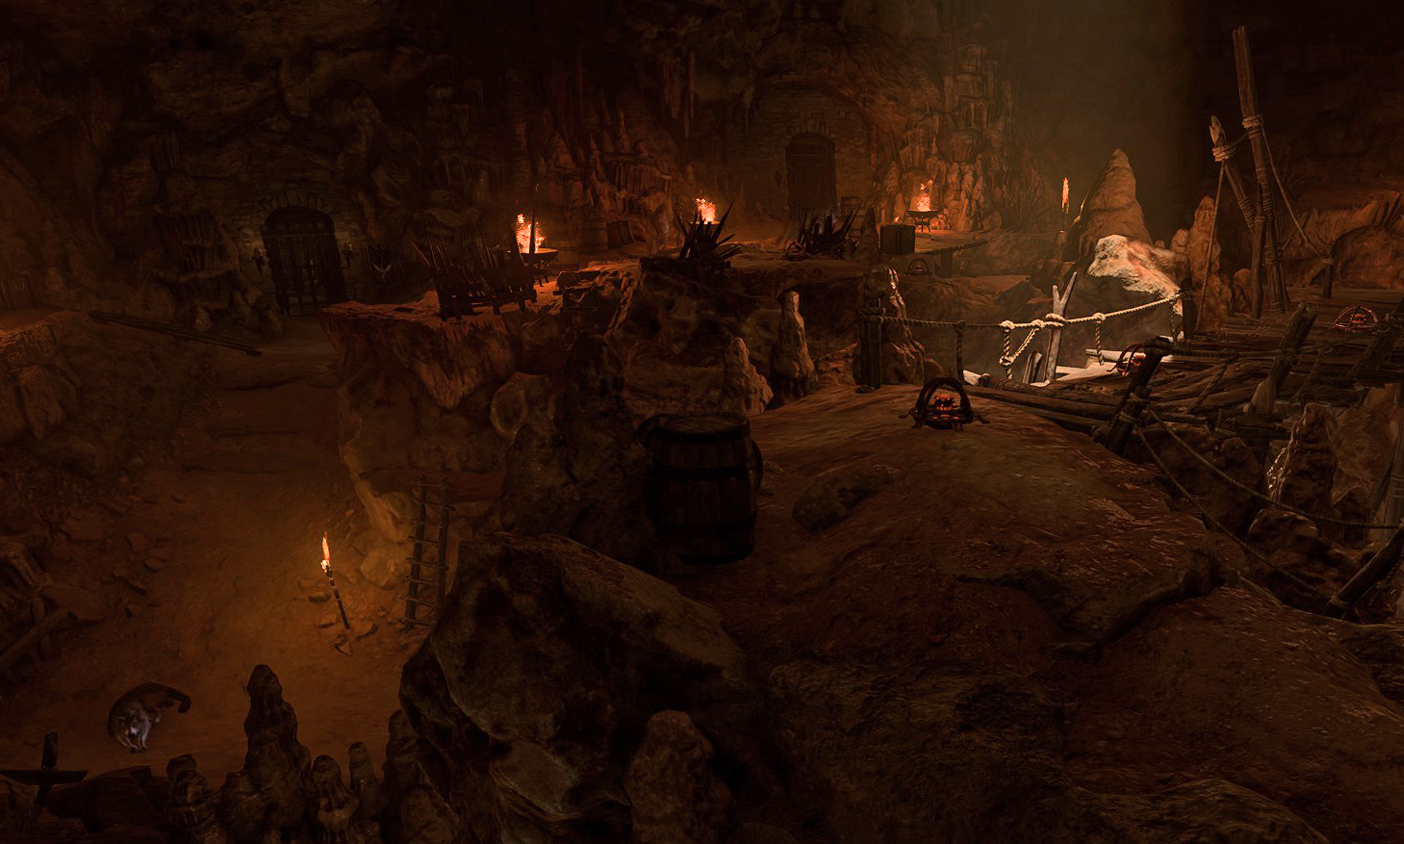
The Zhentarim Basement is a large subterranean cave beneath the Waukeen's Rest inn. It features deep basins spanned by stone arcs and bridges. Various levels of the paths are connected with wooden ladders and footways. In its far end is a descend to the Underdark.
The cavern is occupied by the Zhentarim, an association of traders and mercenaries with dubious morals, who are using it as a base of operations in the region. Prior to the game events, however, the inn above their hideout was ransacked by goblins and drow. The Zhentarim are concerned the Flaming Fists might find the cavern while investigating, and are feverishly preparing to abandon and destroy the hideout in order to cover up any tracks of their activity. The cavern is already cluttered with ![]()
However, the Zhentarim cannot leave until their recent business of transporting a certain valuable ![]()
Access[edit section | visual editor]
There are two ways to access the Zhentarim Basement:
- Through a barn on the western side of Waukeen's Rest at X: -114 Y: 612. Upon approaching, party members passing a


- Salazon lets the party pass if he hears the correct password, or if the player character succeeds a


- If placated, Salazon provides the party with the


- The other entrance to the basement can be accessed from the Underdark, but only if it has been opened from inside the hideout. In the northern end of the basement, behind

The Cellar[edit section | visual editor]

Down through the hatch, the party finds themselves in a vast cellar, cluttered with numerous crates, trunks and heaps of junk. Most crates contain various Camp Supplies, which can be looted freely. Near the desk at X: 282 Y: -258 a wooden crate contains the spare key to a secret passage. The passage itself is concealed behind the wardrobe in the far corner of the cellar. Once opened, it becomes an interactable object named "Hidden Stairs".
Exploring the Hideout[edit section | visual editor]
After descending into the hideout proper the first time, an automated dialogue is triggered approximately at X: 272 Y: -278 with 
- Whether the party have already met the agents escorting the cargo: Rugan and

- Whether the party have saved them from

- Whether the party have bargained with Rugan about selling the cargo


If Rugan survives the encounter with the gnolls and delivers the cargo to the hideout, he intervenes and convinces Zarys to let the party in peacefully.
If neither survive, the party must convince Zarys, which requires various ability checks. All possible options are listed on Zarys's page.
If Rugan and Olly survive and the party strike a deal with Rugan about splitting the profits from divesting the cargo, both agents can then be found in the hideout: Olly is already dead, while Rugan is tied to a chair and being tortured by Zarys for betrayal.
Successfully convincing Zarys to let them proceed grants the ![]()
![]()

The shipment of the Zhentarim[edit section | visual editor]
In order to effectively interact with any character in the hideout, the party must first talk to Zarys. She is standing on a high cliff across the entrance to the hideout, barking orders from time to time to hasten the pace of her crew below - 


![]()
- If the party saved Rugan and Olly (or at least retrieved the


- If the party bargained with Rugan on splitting the profits from cargo, Zarys may still excuse the party's mistake. To this end, she demands the player character execute Rugan and then deliver the strongbox to Baldur's Gate.[2] If they agree, Brem's special stock is still available, unlike other possible awards.
- If the party opened the strongbox and took the

- If the Zhentarim turn hostile to the party, the iron gate at the entrance is locked. It can be unlocked with the
Attacking Zarys and her crew after successfully delivering her the cargo is considered an oathbreaking action for ![]()
![]()
Various containers on the cliff where Zarys's stands contain Camp Supplies, while crates in the basin below can be looted for random Valuables potions, grenades and plain weapons.
Brem's special stock[edit section | visual editor]
Brem's special stock is locked behind certain quest and dialogue choices. These items only appear in Brem's inventory if gaining Zarys's trust. If antagonizing Zarys in any way, the Zhentarim turn hostile and the items do not appear in Brem's inventory.
If the party convinces Rugan to cross the Zhents and let the party take the shipment, then the only way to gain Zarys's trust is to follow her order to kill Rugan. It is not possible to obtain the shipment, spare Rugan's life, and get access to Brem's special stock. If the party angers the Zhentarim after completing the quest, however, some items from Brem's special stock can be looted from his corpse.
The Pet Artist[edit section | visual editor]
The only character initially present in the hideout who is not aligned with the Zhentarim is 
If the party convinces Zarys to let them in, Oskar can then be spoken with. He begs to ransom him from the Zhentarim, so he can return to Baldur's Gate and his patron, 
![]()
![]()
Buying Oskar[edit section | visual editor]
Convincing Brem to set Oskar free without any payment[edit section | visual editor]
- We can skip threats and go straight to blades, if you like. (DC 20)

- If he's as talented as you say, someone will be looking for him. (DC 20)
- If this artist were to tragically expire, his portfolio would become finite - therefore priceless. (DC 15

- ROAR. (DC 20
- Here's my offer: give me your slave, or become mine. (DC 15
- Slavekeeping's bad for business with any halfway-moral customer. Let him go. (DC 15)
- Art's more valuable once the creator is dead. I can arrange that. (DC 15
![]()
If the player character agrees to sit for a portrait (regardless of whether they talked to the artist prior), Brem sends them to Oskar, but he refuses to draw for them under these circumstances. The party still can acquire the portrait later in Act Three, provided they save Oskar from the Zhentarim now and successfully complete the quest afterwards.
Convincing Brem to set Oskar loose grants one of the following inspirations:


If freed, Oskar also asks for additional 200 gold "for the road". Giving him the money earns approval 


If a battle with Zhentarim starts, Oskar runs to the corner at X: 271 Y: -263 and cowers there until the fight is over. However, two Smokepowder barrels stand there, and if the party or the Zhentarim ignite them, he dies. Talking to him after defeating the Zhentarim adds the ![]()
Basement office and storehouse[edit section | visual editor]

At the far end of the vast cavern another group of Zhentarim can be encountered; 


![]()
This part of the hideout is laden thickly with Proximity Explosives, planted in plain sight. Initially all these traps are inactive (glowing orange). They are connected in a system triggered by a button at X: 286 Y: -178. If the Zhentarim become hostile to the party, any of the guards mentioned above can activate the system. In this case, the mines become green and change color to yellow and red if a potential target comes close enough. A party member can also press the button to get a leverage in a fight with the Zhentarim, if such occurs. Pressing the button without any means of stealth is considered a transgression.
Two small rooms in the farmost part of the cavern are locked behind iron gates: the one at X: 304 Y: -177 is an office, and the other at X: 282 Y: -174 is storage. A burrow hole behind the crates at X: 272 Y: -176 allows Small or Tiny characters and summons of appropriate size to access the storage, but doing so (even by a ![]()
![]()
In the storage room, two trapped chests contain gold, potions and a piece of ![]()
![]()
In the office a heavy chest can be found; it contains the ![]()
Several crates around both iron gates contain random scrolls, arrows, potions, grenades and plain weapons. At X: 319 Y: -214 a chest is buried, containing random Valuables. It can be revealed with a
Entrance to the Underdark[edit section | visual editor]
The Zhentarim Basement is one of four entrances to the Underdark. A secret elevator leads to there, hidden behind an illusionary wall at X: 268 Y: -190 and revealed by a ![]()
The elevator winch is initially locked. It can be unlocked with the ![]()
![]()
![]()
Waypoints[edit section | visual editor]
This location contains the following Waypoint
Related locations[edit section | visual editor]
Related quests[edit section | visual editor]
Characters[edit section | visual editor]


Creatures[edit section | visual editor]


Loot[edit section | visual editor]
Brem's Store[edit section | visual editor]
The following items are offered by Brem once gaining the trust of the Zhentarim:
Hidden treasure[edit section | visual editor]
- A buried chest at X: 319 Y: -214
Related literature[edit section | visual editor]
Listed here are only items which cannot be found or bought in any other location.
Notes[edit section | visual editor]
- ↑ If saved from the gnolls, both Rugan and Olly stand up on the cliff near Zarys.
- ↑ Despite the fact that Zarys stands up on the cliff, after the cutscene ends Rugan (or his body) can be found in the corner at X: 271 Y: -263.
- ↑ The flask can be a helpful asset in completing difficult tasks, primarily among them, the early acquisition of the Silver Sword of the Astral Plane, but also any battle where a significant distraction is wanted. Therefore, it is advisable to either keep the strongbox or to steal it back from Zarys after delivering it to her.
- ↑ This inspiration can also be earned by returning the strongbox to Zarys and pickpocketing her afterwards, or attacking the Zhentarim and looting Zarys for the flask afterwards.
- ↑ 5.0 5.1 Dialogue file: Act1/Plains/PLA_ZhentDungeon_Zhent03
- ↑ This option is not available to

- ↑ The dialogue layout differs depending on whether the

- ↑ The latter option is available only if the player character indeed paid Brem a ransom, not convinced him.