Ad placeholder
Waukeen's Rest

| Wilderness | ||||
| Mountain Pass | ← | Waukeen's Rest | → | Risen Road |
| ↓ | ||||
| Goblin Camp | ||||

Overview[edit section | visual editor]
Waukeen's Rest is a two-story inn with a central building and two wings on either side. Neatly built in a natural rocky alcove, its premises make for a secluded pocket of space, divided from the outer world by a gate. Such a layout could provide strong defences – or turn into a deadly trap for those inside if caught off guard.
If the party have not already discovered Waukeen's Rest, they can first hear about it from 
After the assault[edit section | visual editor]
The inn is on fire when the party first arrive. Any party member may see smoke and hear cries from afar and comment on it. Saving the possible survivors is a time-sensitive activity. The timer is set upon reaching the inner yard of the inn. Using fast travel (including simply returning to camp and back) or taking a long rest after it has started causes the flames to progress and all characters trapped inside the inn to die.
There are many corpses of drow, goblins and Flaming Fists lying about. On one of the drow corpses, the party can find ![]()
![]()
![]()
Upon the party's approach, they see several members of the Flaming Fist – 


![]()
![]()
![]()
Talking to Yeva near the main door starts the quest Rescue the Grand Duke. If 
The player character can then help the Flaming Fists to break the door by passing a 
![]()

![]()
![]()
The interior of Waukeen's Rest can be accessed through several alternative routes if the main entrance is blocked:
- Western Wing: Enter through the room where

- Front Gallery: A character with high Strength can jump to the gallery above the main doors (X: -72 Y: 605) and enter by destroying the boarded-up window.
- Eastern Wing: Destroy the large wine barrel blocking the eastern entrance. Once inside, jump to the first floor or use nearby crates to construct improvised stairs.
- First Floor Suite: The locked door on the upper floor can be opened using the


Once freed, regardless of the method, Florrick moves down to the inn entrance, telling the player character she will explain everything outside.
Florrick and the Grand Duke[edit section | visual editor]
After following Florrick outside the building, dialogue with her starts automatically.[2]
The player character may then learn that Counsellor Florrick is the closest assistant to 
If she is rescued,
Quest Rewards and Consequences[edit section | visual editor]
- Inspirations: Saving Florrick grants


- Departure: Following her rescue, she orders the Flaming Fist to regroup and track the kidnappers.
- NPC Dispersal: Most members of the Flaming Fist leave the area. While the text implies only


If the party missed their chance to save Florrick (due to fast travel or taking a long rest), they return to the smouldering ruins of the inn. All the Fists are gone, except Ephren (still praying) and Gauntlet Dain, who wanders around the inner yard, trying to read the tracks of the raiders. The party may offer their help, which requires passing a ![]()
Benryn and Mirileth[edit section | visual editor]
As the party come to the first floor of the burning inn at X: -71 Y: 624, they feel the heat emerging from behind the doors nearby and comment on it. From behind the door, they can hear cries for help. However, breaking or opening the doors causes a backdraft effect; all nearby party members are thrown back approximately 12 m (40 ft), possibly gaining the ![]()
Inside, 
![]()
![]()
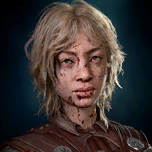
Once freed, Benryn runs past the player character to the next room in the eastern wing, where the corpse of a half-elven woman lies at X: -85 Y: 600. Benryn recognises her as 
![]()
Letting Benryn burn to death under the fallen beams grants the inspiration ![]()
![]()
In the room adjacent to where Benryn was trapped is a wooden chest with some gold and also a locked gilded chest with ![]()
Zhentarim Hideout[edit section | visual editor]
Behind the western wing of the inn, there are three barns.
In the one to the right, at X: -102 Y: 621, a hay stack can be inspected by passing a ![]()
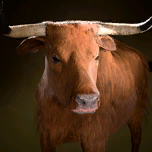
The left barn is a shed with two cows, an ox which has been killed, and another alive. As the party approach, dialogue begins with the 
![]()
The barn in the middle serves as a clandestine entrance to the Zhentarim Hideout. As the party approach, a 
![]()
![]()
![]()
![]()
Alternatively, passing any of the dialogue ability checks with Salazon has him stand down. Rogue characters have an additional option: showing him a "profit" hand gesture, which earns approval from 


![]()
If the attempt to convince Salazon is not successful, he ignites the barrels and moves to flee back to the hideout. In this case, the spare key to the secret passage may be found in a wooden crate at X: 382 Y: -258.
Waypoints[edit section | visual editor]
Related locations[edit section | visual editor]
Related quests[edit section | visual editor]
Characters[edit section | visual editor]


Available for Speak with Dead[edit section | visual editor]


Loot[edit section | visual editor]
Quest rewards[edit section | visual editor]
Hidden treasure[edit section | visual editor]
- Buried chest containing gold and camp supplies at X: -98 Y: 632
- Succeeding a Perception check when interacting with the hay bale at X: -102 Y: 621 reveals a chest containing the

- Hidden rocky crevice outside the inn walls along the easternmost path at X: -28 Y: 586
Other[edit section | visual editor]
The kitchen and storerooms of the inn, in its eastern wing, initially blocked by the huge wine barrel, contain a large amount of camp supplies.
Notes[edit section | visual editor]
- ↑ If the party get inside via a side route, the door remains blocked and requires a
- ↑ The conversation actually starts as soon as she reaches the main door, so if the party is divided, the dialogue may be initiated with the nearest party member. If no party member is close, Florrick waits near the main door, and the dialogue must be initiated by the player character.
- ↑ While the description says "save whoever you can," saving either Florrick or Benryn grants this inspiration even if the other perishes.
External links[edit section | visual editor]
