More actions
Investigate the Murders is a sub-quest of the Quest Get Orin's Netherstone in Act Three of Baldur's Gate 3.
Objectives
- Gortash told us how to find Orin the Red - follow the spate of murders across the city. The Open Hand Temple may be a good place to start.
- Duke Stelmane was ritualistically killed at the Elfsong Tavern shortly before our arrival into the city. We should investigate - it may help us find the Lord of Murder's Chosen.
- The Flaming Fist have found elaborate, ritualistic murder scenes around the city. They could be Bhaalist - and could lead us to Orin.
- Gauntlet Devella asked us to check out an elaborate murder scene that could be Bhaalist in nature. It could lead us to Orin the Red.
- Father Lorgan's name appears on a target list we found - tying his murder into a test for cultists to access the Temple of Bhaal. We should show Investigator Valeria.
- Investigator Valeria is now convinced Father Lorgan's murder is linked to a wider plot - and has asked us to bring the news to her constable, Gauntlet Devella, in the Lower City's Elfsong Tavern.
- We found a target list for Bhaalist assassins hoping to access the Temple of Bhaal - presumably where we'll find Orin. Duke Stelmane's on this list. We should inform Gauntlet Devella.
- We found a list of targets for Bhaalist murderers - the only victims left alive are in the Lower City. The murderers following this list are trying to gain access to the Temple of Bhaal, presumably where we'll find Orin.
- We confirmed Franc Peartree was dead, as the Bhaalist target list noted. We should check on the other victims too.
- One of the victims from the Bhaalist target list told us his killer was dressed in red. We should track down the remaining victims before they strike again.
- We confirmed Alexander Rainforest was dead, as the Bhaalist target list noted. We should check on the other victims too.
- A talkative rat in a Bhaalist victim's cellar saw the murderer - a dwarf dressed in red. We should track down the remaining victims before they strike again.
- Chef Roveer is dead by our hands - we should check in on the other victims from the Bhaalist target list.
- We warned Chef Roveer of the Bhaalist target list he's on - we should do the same for the other marked targets.
- Nesha Leesha is dead by our hands - we should check in on the other victims from the Bhaalist target list.
- We warned Nesha Leesha of the Bhaalist target list she's on - we should do the same for the other marked targets.
- Figaro Pennygood is dead by our hands - we should check in on the other victims from the Bhaalist target list.
- We warned Figaro Pennygood of the Bhaalist target list he's on - we should do the same for the other marked targets.
- Gauntlet Devella is convinced the target list we found is linked to a wider Bhaalist plot. She asked us to follow the people noted on the list, save them if possible, and get more information about the Bhaalist cult.
- We discovered Cora Highberry, one of the people noted on the Bhaalist target list, slaughtered brutally. Figaro Pennygood is next on the list - we need to find him before the killer does.
- We saved Cora Highberry from a Bhaalist serial killer disguised as a wine merchant. Figaro Pennygood is next on the target list - we need to find him before the killer does.
- We stopped a spree of murders by taking down the killer - a dwarf named Dolor. We should check his body for any clues about finding the Bhaalist cult.
- The next victim on the Bhaalist target list is the late Figaro Pennygood. We should check his place - see if the killer stopped by and left any clues.
- We found a note on Figaro Pennygood's corpse instructing his killer to enter Candulhallow's Tombstones with a passphrase - seems as though the Bhaalist cult may be there.
- We found a note in the killer Dolor's pockets, instructing him to enter Candulhallow's Tombstones with a passphrase - seems the Bhaalist cult may be there.
- We learned the passphrase we must speak at Candulhallow's Tombstones to meet with the Bhaalist cult.
- We spoke the passphrase to enter Candulhallow's Tombstones - we should explore within to find the Bhaal cult.
- Justice Sarevok is dead by our hands - we should speak to his hollyphant captive before heading to the Temple of Bhaal.
- Investigator Valeria told us where to find the Temple of Bhaal - Orin awaits us there.
- With Justice Sarevok and Investigator Valeria dead, we must search the Tribunal for a way of accessing the Temple of Bhaal.
- We became Unholy Assassins of Bhaal at the cost of Investigator Valeria's life - we wetted ourselves with her blood and were granted a way to access the Temple of Bhaal.
- We defeated the Justice Sarevok and his Murder Tribunal, stopping the serial killings in Baldur's Gate for now. To end them for good, we must find Orin.
- Justice Sarevok is dead by our hands - we can use his amulet to enter the Temple of Bhaal.
Walkthrough
A Bhaalist Plot
According to Enver Gortash, Orin the Red can be found by following the murders in the city, starting with the latest reported murder at the Open Hand Temple. Completing provides more information on Father Lorgan, the latest victim of the Bhaalist plot, as well as information on the killer behind the murders. In this case, the party will encounter Inspector Valeria who is charged with investigating the murders, and she refers the party to Gauntlet Devella Fountainhead once they've shown her sufficient proof of Bhaal's involvement in the murders.
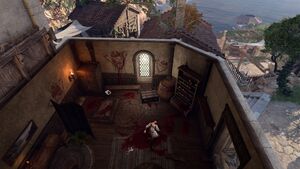
The party can also come across information on the murders by going up the stairs in the Elfsong Tavern and encountering the murder scene of Duke Belynne Stelmane. Upstairs, the party meets Gauntlet Devella Fountainhead, who is investigating the murders in town and believes they are part of a Bhaalist conspiracy. The party can tell her they are adventurers, and use Perception, Investigation, or Insight to convince Devella they can be of use. If Devella believes they can help, she will give a ![]() Map of Murder that points to another crime scene.
Map of Murder that points to another crime scene.
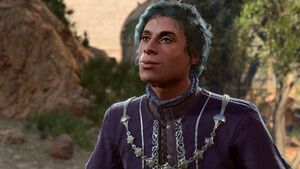
Speaking to any of the deceased victims, or speaking with the rats in Rainforest's home, reveals that they were killed by a dwarf in red. Speaking to Ffion Goldgrind's corpse in Fraygo's Flophouse reveals his name is Dolor and he is her son, who killed her after she found out he was a serial killer.
The Murder List
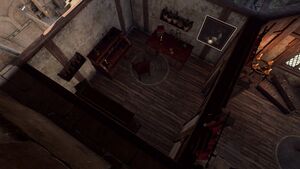
Fraygo's Flophouse is across the way from Sharess' Caress. After going up the stairs of the Flophouse, a ladder at X: -12 Y: 87 can be taken up to the top floor. On this floor, a red wardrobe can be found at X: -17 Y: 82.
There are multiple ways to get into the secret room on the uppermost floor of the Flophouse:
- Passing a lockpicking check of 25
- Using the spell
- Completing and obtaining the
 Flowery Key.
On the table to the right of the room's entrance is a ![]() Bloodstained Parchment. This parchment contains a list of murder victims and can be picked up to present to Valeria or Devella as hard evidence of a Bhaalist plot.
Bloodstained Parchment. This parchment contains a list of murder victims and can be picked up to present to Valeria or Devella as hard evidence of a Bhaalist plot.
Another Bloodstained Parchment can be found inside Peartree House.
Save the Victims
Once the Bhaal murder list has been found, the party can utilize it to track down the victims who haven't yet been killed in order to seek out the murderer.
Living Victims:
- Cora Highberry (X:22, Y:-38): The Wine Festival southwest of the Elfsong Tavern.
- Figaro Pennygood (X:-182, Y:-31): Inside Facemaker's Boutique.
- Chef Roveer (X:64, Y:8).: In the kitchen of the Elfsong Tavern.
- Nesha Leesha (X:-153, Y:-90): Outside of the Blushing Mermaid.
Deceased Victims:
- Father Lorgan (X:-57, Y:-22): In the infirmary of the Open Hand Temple.
- Duke Belynne Stelmane (X:73, Y:-19): Second floor of the Elfsong Tavern.
- Alexander Rainforest (X:-95, Y:-114): Near the bed on the top floor of Rainforest's Home.
- Franc Peartree (X:42, Y: -96): On the ground in Peartree's Home.
Chef Roveer
Roveer is in the kitchen of Elfsong Tavern. He immediately insists the party take care of rats in the cellar, as part of Roveer's Storehouse and won't listen to the party otherwise. After killing the rats, the party can return and warn him of the murder plot.
Nesha Leesha
Nesha Leesha wanders the outer decks near the Blushing Mermaid's entrance. The party can warn her that she is a target for murder, but Nesha initially takes it as a joke. She doesn't think anyone would want to murder her. With a successful Persuasion roll (DC 15), she can be convinced that her life is in danger, after which she walks off to take care of her tab at the bar.
Cora Highberry
Cora Highberry is at a table at the wine festival southwest of Elfsong Tavern. Speaking to her, she tells the party she's about to taste some of "Master Meztli's" wine. A successful medicine check reveals that the wine smells sickly sweet, with an acrid note on the periphery, indicating poison. Then there will be the following dialogue options:
- Cora Highberry, your life is in danger. A serial killer is after you.
- I would love a glass, Master Meztli.
- I'm afraid I must decline, but I hope you enjoy your wine.
- I think it's only polite that we let Master Meztli drink first, or should I say... Dolor?
- Attack the poisoner.
Choosing "I would love a glass" or "I hope you enjoy your wine" results in Cora being poisoned and killed. Otherwise, "Master Meztli" reveals himself to be the serial killer Dolor and is infuriated that his perfect crime was interrupted. He retreats, summoning multiple doppelgangers to keep the party busy, while using the ![]() Spaceshunt Boots to teleport himself away. One of the corpses contains a
Spaceshunt Boots to teleport himself away. One of the corpses contains a ![]() Tombstone Shop Key necessary for later on in the quest. Successfully warning Cora Highberry earns the
Tombstone Shop Key necessary for later on in the quest. Successfully warning Cora Highberry earns the ![]() Inspirational Event Wine Connoisseur (Noble background).
Inspirational Event Wine Connoisseur (Noble background).
However, his can be , meaning the party can simply kill him at his initial appearance and avoid the fight at Facemaker's Boutique, if trying to kill him here after the Counterspell he will likely to throw a potion to paralyze party member followed by a modified sneak attack that doesn't require an advantage. And he will always drink an invisibility potion for a second escape attempt. If he reaches his next turn he will cast Dimension Door again at level 5.
Figaro Pennygood
Only if fleeing from the wine festival Dolor can be found where his last target Figaro Pennygood is, at Facemaker's Boutique, near the Baldur's Gate waypoint. Figaro and Gauntlet Devella can be found in the back room, paralyzed, while Dolor prepares to murder them. If the party chooses the option to sneak into a better position, Dolor is able to kill Figaro, while announcing themselves immediately saves Figaro's life. During the battle, Dolor will target Devella first, making it imperative to heal (or cast on) her. Entering through the right (southmost) double door can also put the party in a better position to save Devella. After the fight, Devella thanks the party and suggests searching Dolor's body for clues on what he intended to do next.
Killing Dolor grants the party a bag of his victims' hands, as well as a ![]() Dirge of the Unholy Assassin with a poem from the Dirge of the Unholy Assassin. Reading the page provides a passphrase, 'Sicarius,' and a location, Candulhallow's Tombstones. Successfully killing Dolor awards the
Dirge of the Unholy Assassin with a poem from the Dirge of the Unholy Assassin. Reading the page provides a passphrase, 'Sicarius,' and a location, Candulhallow's Tombstones. Successfully killing Dolor awards the ![]() Inspirational Event Culling the Imitator (Haunted One background).
Inspirational Event Culling the Imitator (Haunted One background).
Murder the Victims
In contrast to saving the victims, the party can choose to murder the remaining victims for themselves and claim their hands as trophies. While Dolor is busy with Cora Highberry, the party can target Figaro Pennygood. The party can also take out Nesha Leesha and Roveer, either by announcing they've come to kill them or by using subterfuge (i.e. utilizing or ). If the party announces they intend to kill the targets, the targets become hostile and are joined by friendly NPCs.
After the first kill, or after killing Devella, the party is approached by Olfaith Olumssdottir who congratulates them and asks them to kill another target on the list. Once this is done, he directs the party to Canduhallow's Tombstones and gives them the secret passphrase - 'Sicarius.'
Candulhallow's Tombstones
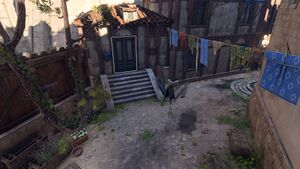
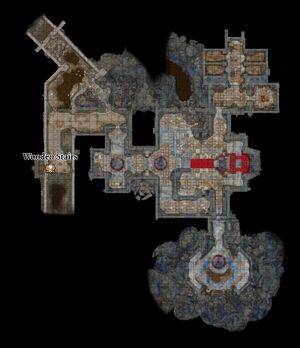
Candulhallow's Tombstones (X:74, Y:25) is northeast of Elfsong Tavern. Its entrance can either be lockpicked, broken (normal attack), or a key used if the party killed Dolor. Move into the back office room and remove the Butterfly on Skull painting (X:87, Y:15) to find a button. Press the button to reveal a secret door. The only way to get past this door is to know the passphrase, Sicarius.
Within the basement, there is immediately a sign that says "Flaming Fists this Way." This area is heavily trapped with grease barrels that alight if the party enters that way. Instead, remain on the brick path on the right and enter the door to the Murder Tribunal's antechamber (X:-1302, Y:519).
Infiltrate the Murder Tribunal
Enter the Murder Tribunal Antechamber and speak to That Which Guards. The entity provides a riddle, "Present me well from gifts thine own, or I shall rend thy flesh from bone." Choose "I killed to be here - and took the victim's hand as proof" to proceed forward. The party can use the hand bag from Dolor, the hands taken from any victims they chose to kill, or the hand of Gortash to gain entry. Choosing any other option results in a fight with the guards, and the Murder Tribunal becomes hostile as well.
Choosing to go the murder route and not pursue Dolor results in Dolor being at the Tribunal and arguing with That Which Guards. That Which Guards states that only one murderer can go forth into the Tribunal. The party can tell Dolor to either go ahead, persuade him to fight against the Tribunal, or fight him to the death.
If the party chooses not to fight their way through, they come face to face with Sarevok Anchev, along with the Echo of Amelyssan, Echo of Sendai, and Echo of Illasera. The party can ask various questions about Sarevok and how he is still alive, his ties to Orin, and information about what the Murder Tribunal is.
Sarevok states that there is no better mirror in which to see the true nature of a killer than his victim. Thus, he summons the image of one of the murder victims. The spectre cannot speak, as the murderer stole its voice. Thus, the party must speak for it. Sarevok asks how the pitiful creature was slain:
- The deed is done - the details don't matter.
- In combat. Honourably.
- [DECEPTION] First, I ended its sorry existence. Then I cut the hand from its corpse.
- [DECEPTION] Slowly and painfully. I savoured every scream.
- [DECEPTION] With a smile on my face, and pleasure in my heart.
- I didn't kill this person. But I will kill you.
If the soul was actually slain by the party, then no deception checks are needed. Choosing the first two options or the last option make Sarevok and the echoes hostile. Otherwise, Sarevok leads the party to the Dread Lord's Abattoir, for the next challenge. Inside the abattoir is the hollyphant investigator, Valeria. The party must choose to kill Valeria, becoming a holy assassin of Bhaal, or slay Sarevok.
An additional scene plays if either Minsc or Jaheira is in the party during the tribunal. Sarevok instantly recognizes them and declares them traitors. The party can respond by stating they are sacrifices offered up to Bhaal and kill them, or go through Intimidation or Performance checks to having Jaheira/Minsc kneel before the Tribunal. Doing the latter satisfies Sarevok enough to allow the Tribunal to continue and both Minsc and Jaheira can be baptised as unholy assassins.
Quest Rewards
 Amulet of Bhaal
 Map to Bhaal Temple
 Sarevok's Horned Helmet, if Sarevok is killed.
 Sword of Chaos
Companion approval
In the confrontation at Figaro's shop:
- Ordering Meztli to stop (either the first option or any class option)
 -1
-1  -1
-1  +1
+1  +1
+1  +1
+1  +1
+1  +1
+1  +1
+1  +1
+1 - Telling Meztli to back off of the kill
 -1
-1  -1
-1  -1
-1  -1
-1  -1
-1  +1
+1  +1
+1  +1
+1 - Offering to investigate the tribunal
 +1
+1  +1
+1  +1
+1  +1
+1  +1
+1 - Sacrificing Devella Fountainhead|Gauntlet Devella Fountainhead
 -1
-1  +1
+1  +1
+1  -1
-1  -1
-1  -1
-1  -1
-1  -1
-1 +1
+1
Notes
- This quest intertwines heavily with , which is completed at the same time as this quest.
- Several of the murder sites also contain body parts for .
- Warning Roveer and Nesha does not appear to make a difference - Dolor only targets Cora and Figaro.
- A part of this Quest is time-sensible. If the party takes a Long Rest after entering the Lower City and getting close to the Wine Festival but not interacting with anyone, Cora will have been murdered the next day.

