Ad placeholder
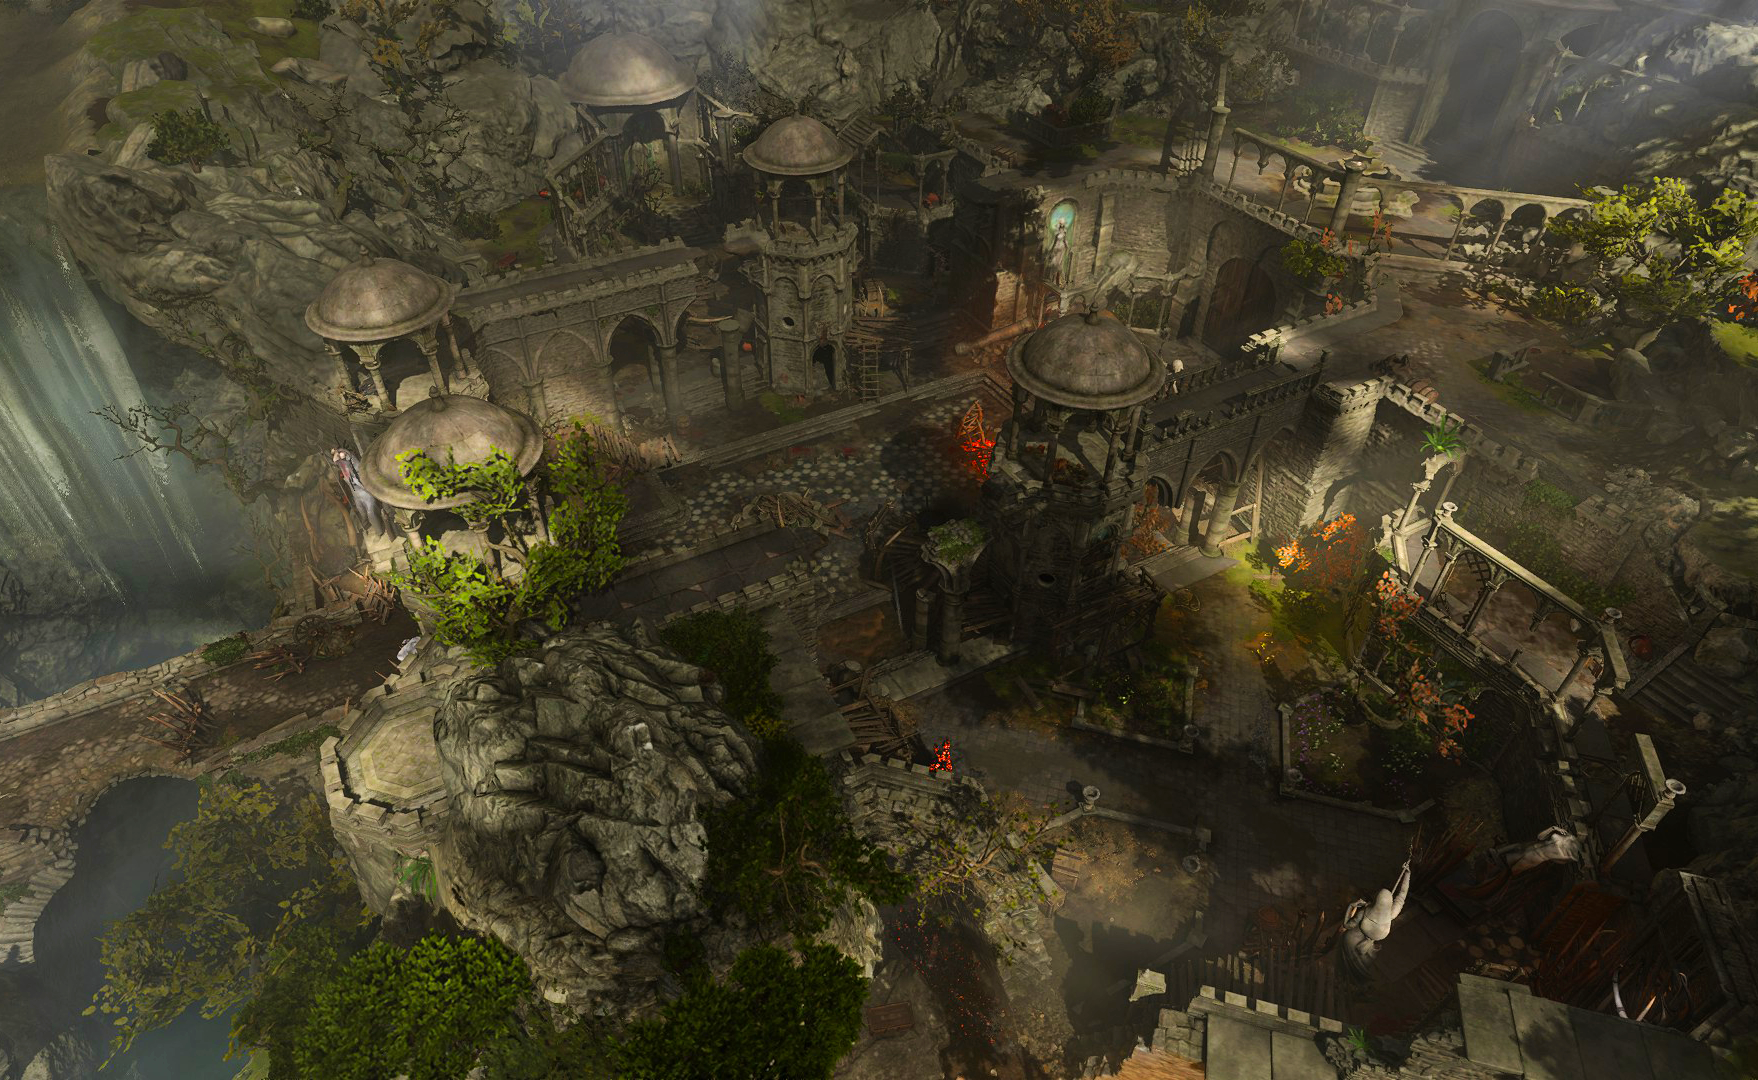
Goblin Camp

| Wilderness | ||||
| Shattered Sanctum | ||||
| ↑ | ||||
| Rosymorn Monastery Trail | ← | Goblin Camp | → | Blighted Village |
| ↓ | ||||
| Sunlit Wetlands | ||||

Overview[edit section | visual editor]

The Goblin Camp covers a vast territory beyond the gulch of the river, which separates it from the Blighted Village. The gulch has several crossings allowing the party to enter the camp either openly or covertly.
The camp consists of two parts: a forest checkpoint and the ruins of the temple of ![]()
The main camp layout consists of the central square and two lesser squares both to east and west, as well as small ground above the entrance to the Shattered Sanctum with a destroyable wall and a system of half-ruined archways running around the central square.
Disembodied Voice[edit section | visual editor]
Approaching the main territory of the goblin camp for the first time triggers a cutscene, where the party members for the first time feel the overwhelming psionic power of the Absolute, and receive a vague vision of its Chosen. Eventually, the ![]()
The narration within the cutscene changes slightly depending on whether the player character has already exerted the illithid powers on any character in a dialogue, and also depending on whether 
![]()
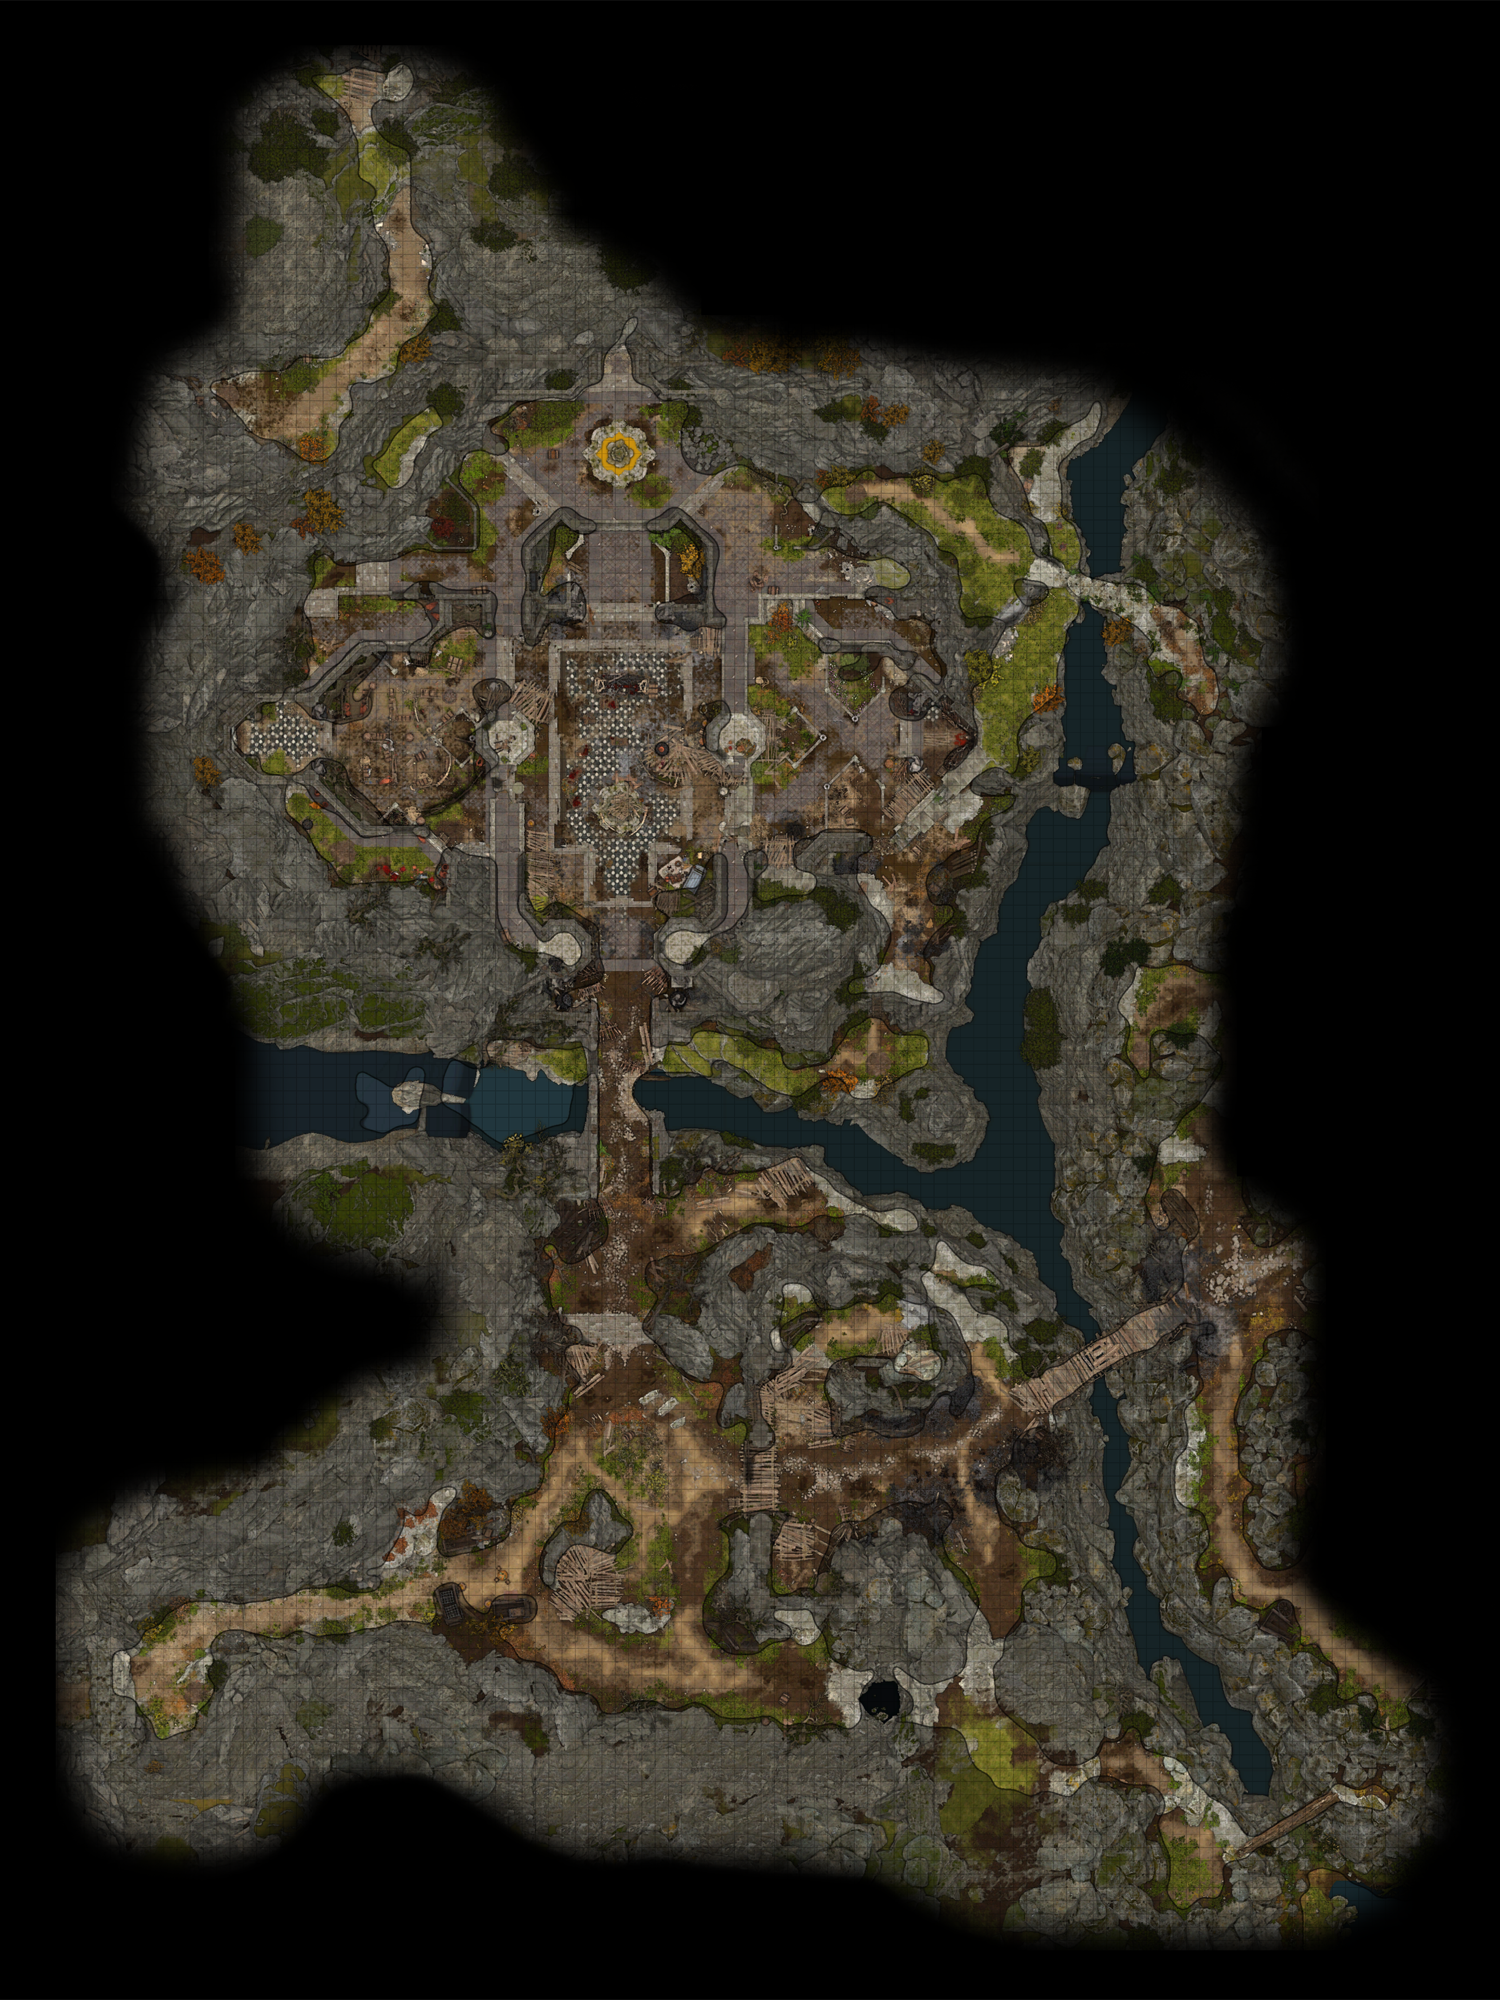
Access[edit section | visual editor]
There are several ways to enter the Goblin camp:
- Venturing through the main entrance, which can be reached after crossing the wooden bridge at X: -50 Y: 369.
- Jumping down the cliff at X: -17 Y: 327, from a road running around the Blighted Village, then crossing the fallen log. Using

- Leaping off the cliff west of the windmill in the Blighted Village at X: -29 Y: 437, behind the broken statue of

The Goblin Camp is also connected to the Rosymorn Monastery Trail (labelled as Mountain Pass) at X: -160 Y: 332. Also, at X: -121 Y: 470 it is possible to climb up two stone cliffs one by one and jump over the chasm at X: -134 Y: 512 to reach the the Mountain Pass where the Githyanki patrol can be found. To go this way, means of spatial movement such as ![]()
![]()
![]()
![]()
Reaching the territory of the Goblin Camp for the first time by any method normally rewards about 15 xp.
Forest road checkpoint[edit section | visual editor]
Olak[edit section | visual editor]
To reach the camp via this entrance point, the guard post along the main road must be passed. A passive 
At the outpost there are several goblin guards led by 


If 
![]()


![]()
Passing the checkpoint through most of these methods rewards 140 xp. Also, this is one of the points where the ![]()
![]()
If failing any of the checks (or picking certain ones), Olak tries to goad the player character into smearing worg dung over their face. If refusing or trying to leave, a fight is initiated. Otherwise, the player character can obey, or fling the dung at Olak and / or other guards, also starting a fight with them.
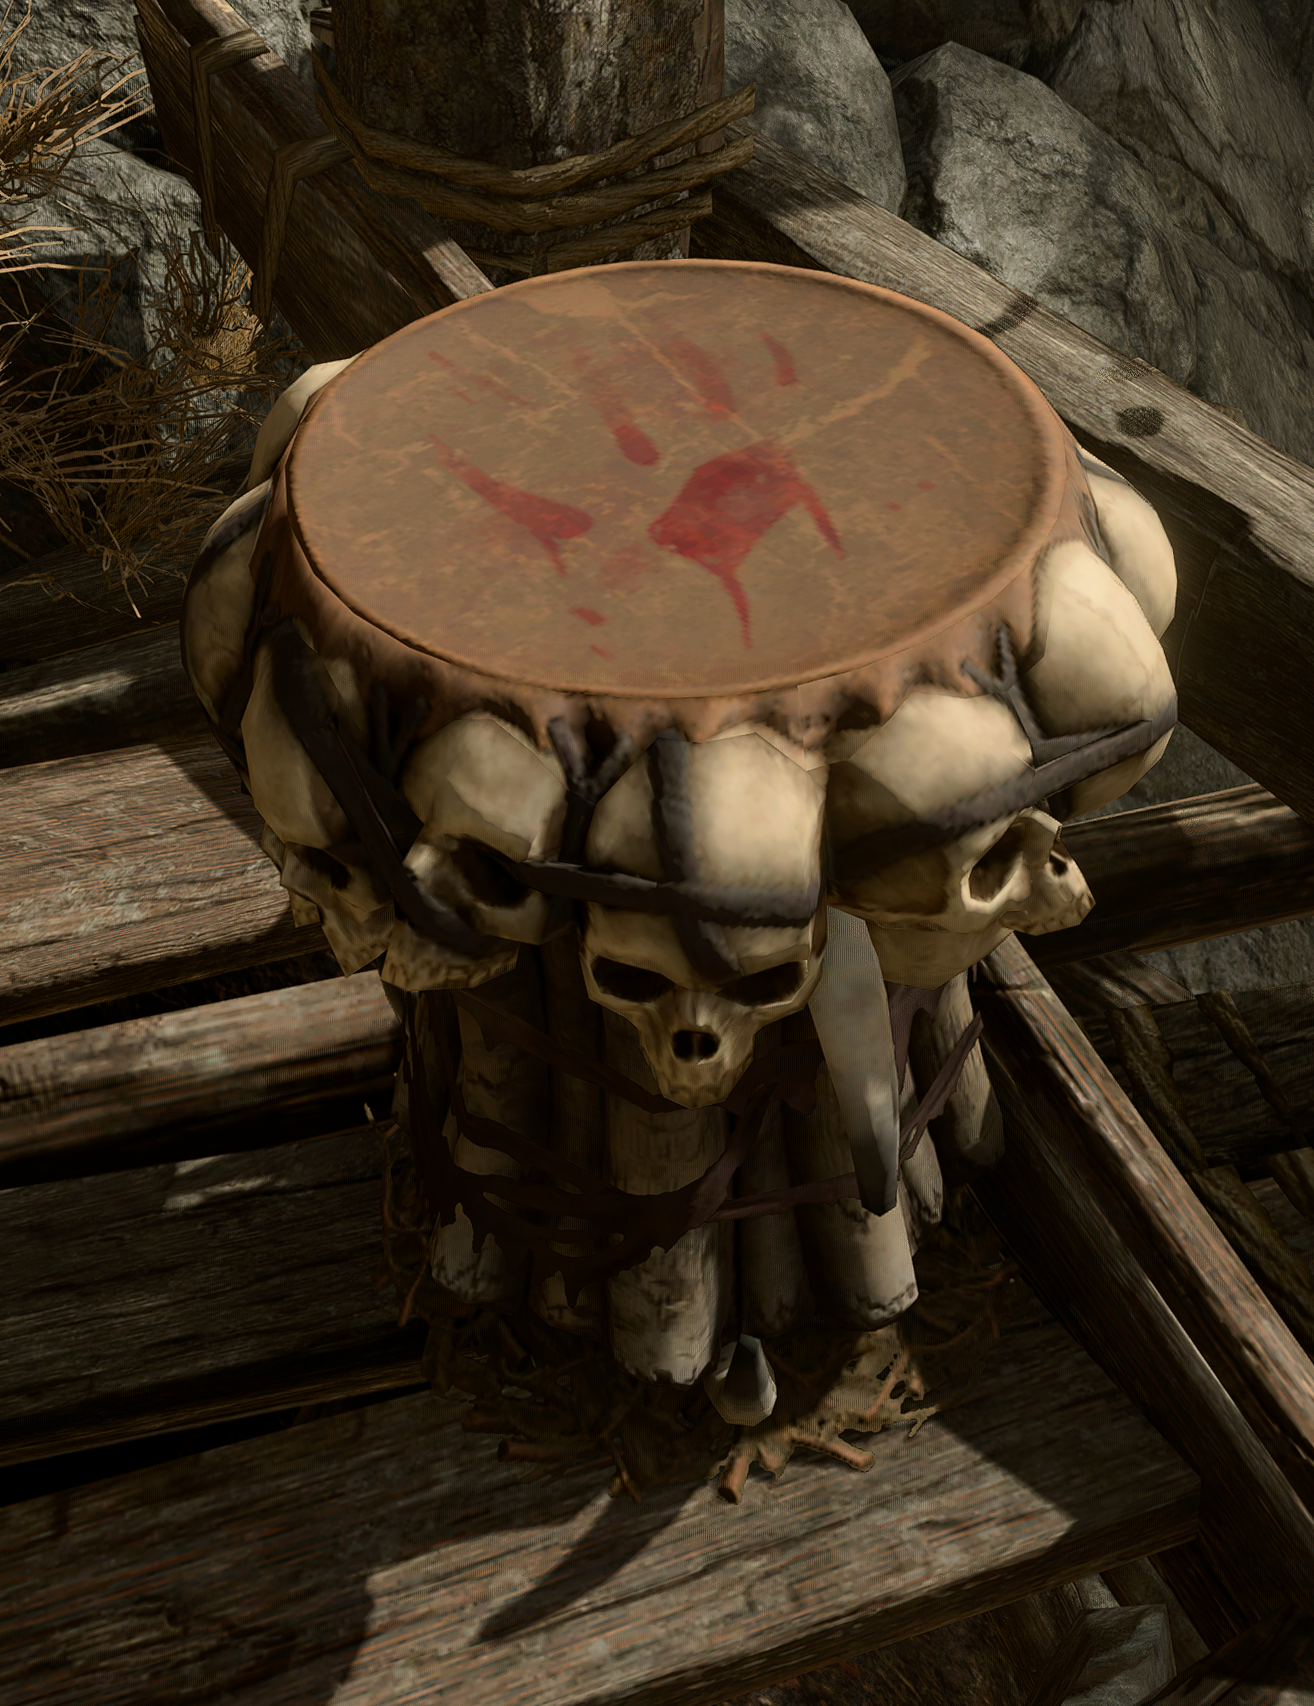
War Drum[edit section | visual editor]

If combat occurs, one of the goblins at the checkpoint tries to reach the War Drum on their first turn and call for help. However, this alerts only three goblins who are feasting at the table westward of the checkpoint; the goblins in the main camp are not alerted.
The War Drum at the checkpoint is the only one in the whole camp that can be played by any party member once without goblins considering it a transgression. Interacting with it grants several options:
- Bang the drum with an open palm. (causes all goblins at the checkpoint and beyond to become hostile.)
- Rap out a simple rhythm. (DC 10) (leads to a funny scene of the player character beating the membrane self-forgetfully. While it alerts three goblins mentioned above, no fight occurs on the first time. However, Olak gives the player character a warning, and if they repeat the music-making again, a fight breaks out. [2])
- Tear the drumhead open. (disables the drum, making it unusable.)
Playing the War Drum grants the ![]()
![]()
Boulder trap[edit section | visual editor]
On the southern rocky hill is a barricade which, if destroyed, causes a large boulder to roll across the checkpoint. It causes 3d6![]()


Trapped tunnel[edit section | visual editor]
To bypass the check point, or if entering via the fallen log bridge, the party can use a tunnel to the south rigged with Blast Mines, planted under the web surface. The closest mine to the checkpoint requires a passive
If approaching the checkpoint from the the other side without stealth or invisibility, the party members are spotted by
Checkpoint reinforcement[edit section | visual editor]


Travelling towards the Rosymorn Monastery Trail from here automatically progresses certain quests, causing some to fail or remain incomplete.
Main area of the camp[edit section | visual editor]


“Ah, drink it in - that sweet, sweet chaos. Not that I approve of goblins, of course - filthy little beasts - but I do like a good den of debauchery.„
The main area of the Goblin Camp is across a crumbling bridge.
Shadowheart[edit section | visual editor]
If ![]()
Goblin tunnels[edit section | visual editor]

Scattered around the camp are tunnels, which are usable only by goblins. They link the ground level areas of the camp to the upper level areas, which are primarily the ramparts and terrace. They look like ground holes, but cannot be interacted with by summons or Small or ![]()
Centre courtyard[edit section | visual editor]

The central courtyard contains several scattered tables set before a crude stage where 

![]()
![]()
![]()
Most of the goblins are gathered at the courtyard, walking between the tables, the Booze Tub (see below) and the cooking pit. If 

Also in the central courtyard is the cooking pit where the remains of the dwarf 


![]()
![]()
Speaking with 


![]()
![]()
In the south-eastern corner is 
![]()
![]()
![]()
In the far northern end of the courtyard is a Heavy Oak Door guarded by the Ogre 
Booze Tub[edit section | visual editor]

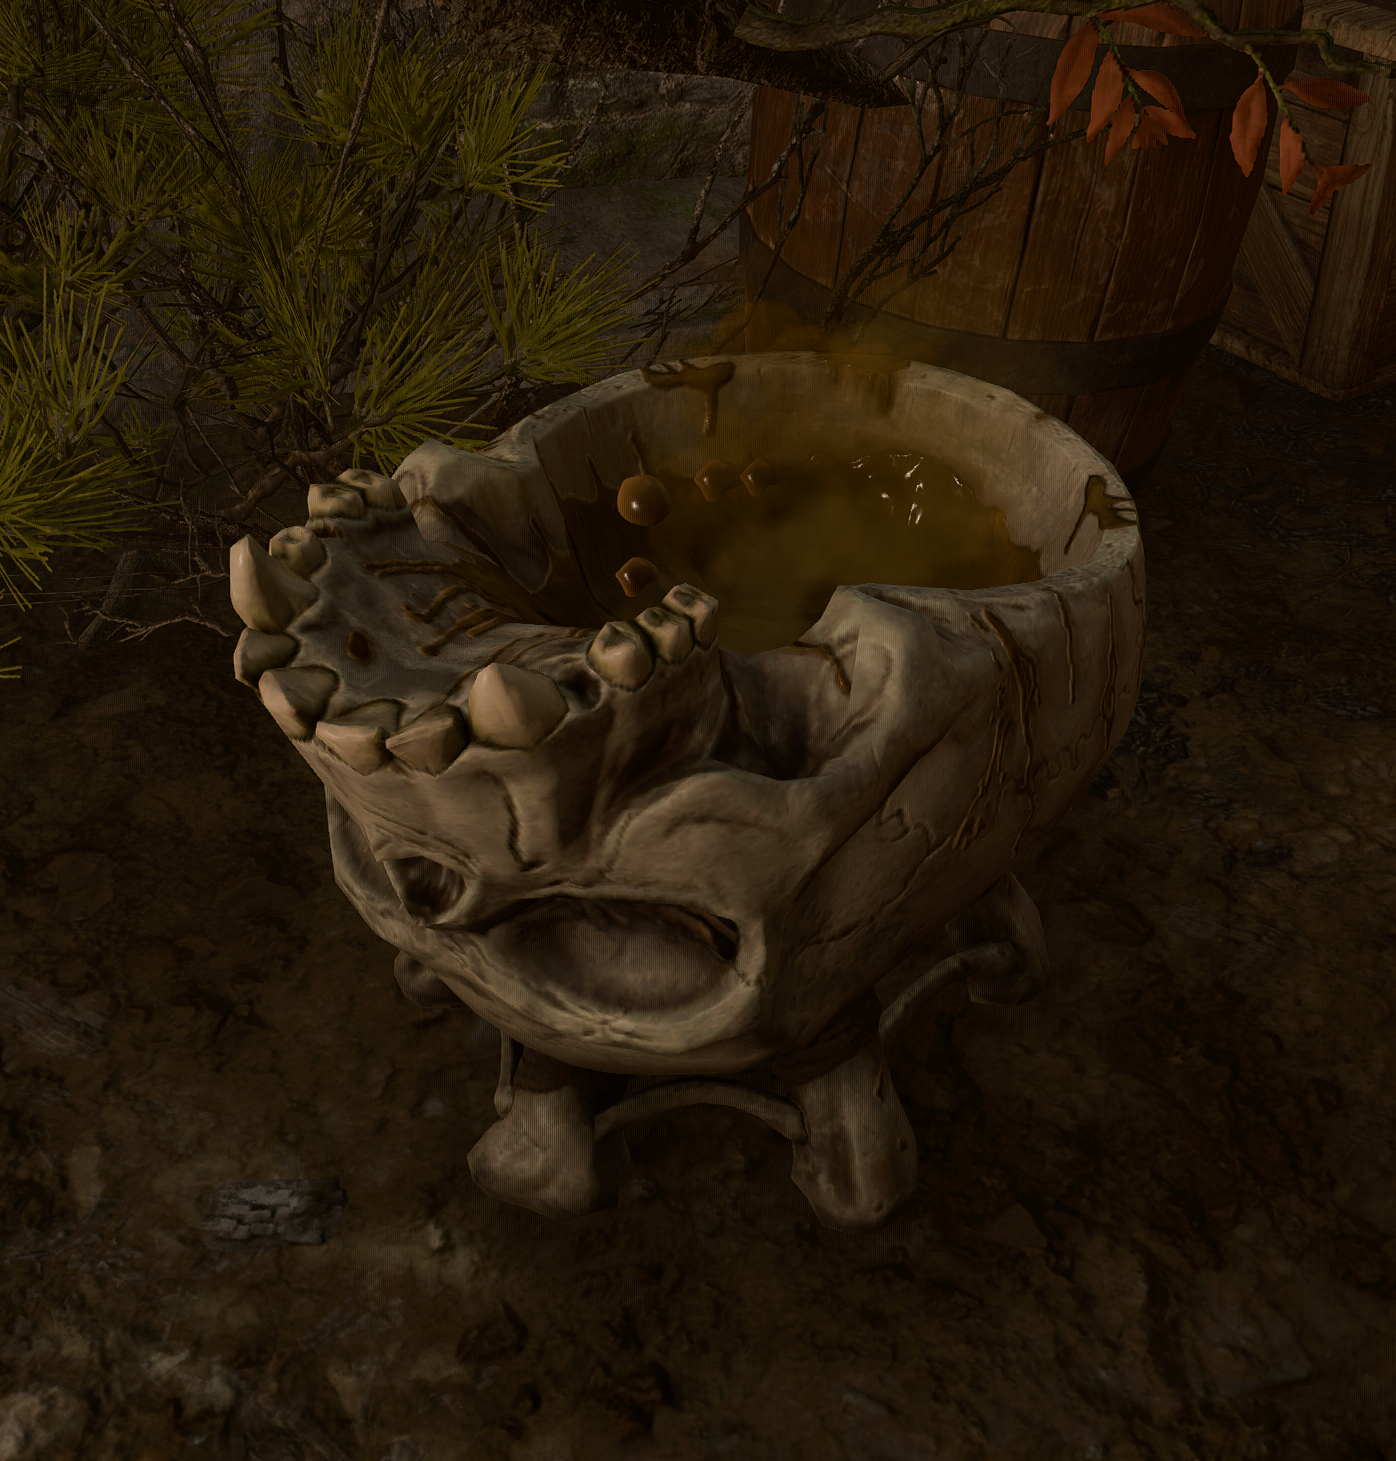
Northeast of the cooking spit is a large, upside down skull at X: -95 Y: 442 that the goblins use as Booze Tub. If interacted with, the party can spike it with a vial of ![]()
![]()
![]()
As soon as the booze is spiked, 
If raising suspicion, there is another chance to down the beer or persuade/deceive the goblins.
If successfully avoiding suspicion, the goblins all drink up, causing Mirg, 


After the goblins die, the party gain experience as if killing them. The survivors swiftly accuse the party for the poisoning, but if convinced otherwise they take defensive positions around camp, believing they are under attack. Each party member may be questioned by any goblin and has to pass the checks separately. The booze tub is destroyed to prevent further incidents. However, there is enough time to walk far from the scene (even to reach the Shattered Sanctum) to avoid accusations at all.
![]()
Participating in the toast raised by Mirg grants the ![]()
![]()
Successfully poisoning the booze tub grants the following inspirations:


Western courtyard[edit section | visual editor]
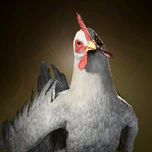
This area is dedicated to the chicken chasing game organized by 
The game is a mix of tag and trim-trail, with the participant trying to corner the 

![]()
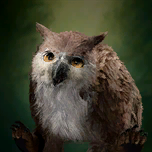
To get the Owlbear Cub as a camp follower, he must be invited to the campsite by letting him sniff the player character's hand or by using ![]()
![]()
![]()
![]()
![]()
Winning a tour of chicken-chasing grants the ![]()
![]()
On the north side of this courtyard are climbable vines which lead to the upper tier of the camp. The barrels and crates which are used to line off the tracks are all empty.
Eastern courtyard[edit section | visual editor]

The camp's Waypoint is on the eastern side of the camp, along with a small stage near a broken statue where 
![]()
In the fight, if it is initiated through the dialogue, only Crusher and his listeners confront the party. All his listeners flee after having their HP lowered under 50%, while Crusher tries to yield. The player character can let him go or kill him, but killing him this way results in the whole camp becoming hostile. If letting Crusher go, he can be found afterwards standing in the middle of the bridge between the camp and forest outpost.
Ordering Crusher to kiss their feet after he is defeated does not require any skill checks, but grants the ![]()
![]()
Degrading themselves to kneel and kiss Crusher's feet grants the player character a chance to obtain ![]()

On the north side of the eastern courtyard are knotted roots that lead to the ledge above the waypoint. Unlike the western courtyard, the stairs further to the upper tier of the camp are ruined and blocked, and jumping or any spatial movement means is needed to proceed. However, behind the stage is a ladder which leads up on the wall and allows to bypass the ruined area. The small grassy ground adjacent to the top of the wall is the point approached by the party if they choose to reach the goblin camp from the Blighted Village outskirts behind the windmill.
The area under the stone bridge is trapped with three Blast Mines, two of them leaving a ![]()
![]()
Eastern cliffs[edit section | visual editor]
The south-eastern section of the wall is breached, opening onto a riverside cliff. Three goblin kids 


A ladder leads down the cliff to a fane to the Absolute under the bridge, hidden behind the waterfall. The way to reach it is trapped with a Tripwire. A locked Crude Chest here contains some alchemical ingredients and gold. Also, scattered around are several love letter drafts addressed from Klagga to 
This area can also be reached if venturing northward from the forest checkpoint to X: -65 Y: 373 and climbing down the knotted roots. It is yet another way to try and reach the camp bypassing the main entrance.
Upper tier and courtyard towers[edit section | visual editor]
This part of the camp lies above the entrance to the Shattered Sanctum and can be reached by climbing the vines in the Western courtyard or by using a ladder behind the stage in the eastern courtyard. The former path is arguably preferrable, as it can be walked without any hindrance.
Just above the main entrance is an open ground with a fountain. Several drunk goblins and bugbears sleep around it. They can wake up from any loud sound, including throwing an item or jumping close to them. If waked, they start an automated dialogue threatening the player character and must be placated by passing any skill check or by giving them a bottle of any wine. Waking them for the second time make them hostile, unless they were quelled with an illithid Wisdom skill check.
The wall at X: -104 Y: 479 can be destroyed; to detect it a ![]()
From the upper tier it is possible to reach two courtyard towers. In the eastern one the party can find 
![]()
![]()
![]()
![]()
![]()
![]()
![]()
Piddle is arguably unique amoungst the goblin Absolute followers in that he is not eager to fight for its cause. If still alive while the party is fighting the whole goblin camp, he makes his escape, running away to disappear permanently. In this case, he leaves the book near the garbage heap in his tower, and the inspiration point can still be earned.
Any party member with enough Strength can jump from Piddle's tower further southward to loot a Heavy Chest at X: -98 Y: 413. The similar archway system to the west hides a Wooden Chest at X: -119 Y: 415.
Waypoints[edit section | visual editor]
This location contains the following Waypoints:
Related locations[edit section | visual editor]
Related quests[edit section | visual editor]
Characters[edit section | visual editor]
The characters in this location may vary based on storyline choices and progress.
Goblin leaders[edit section | visual editor]


Notable characters[edit section | visual editor]


Merchants[edit section | visual editor]

Bugbears[edit section | visual editor]


Goblins[edit section | visual editor]


Goblin Children[edit section | visual editor]


Ogres[edit section | visual editor]

Creatures[edit section | visual editor]


Items[edit section | visual editor]
Notable items obtained in this location, whether looted, purchased, or obtained as a quest reward:
Sold by Grat the Trader[edit section | visual editor]
Looted[edit section | visual editor]


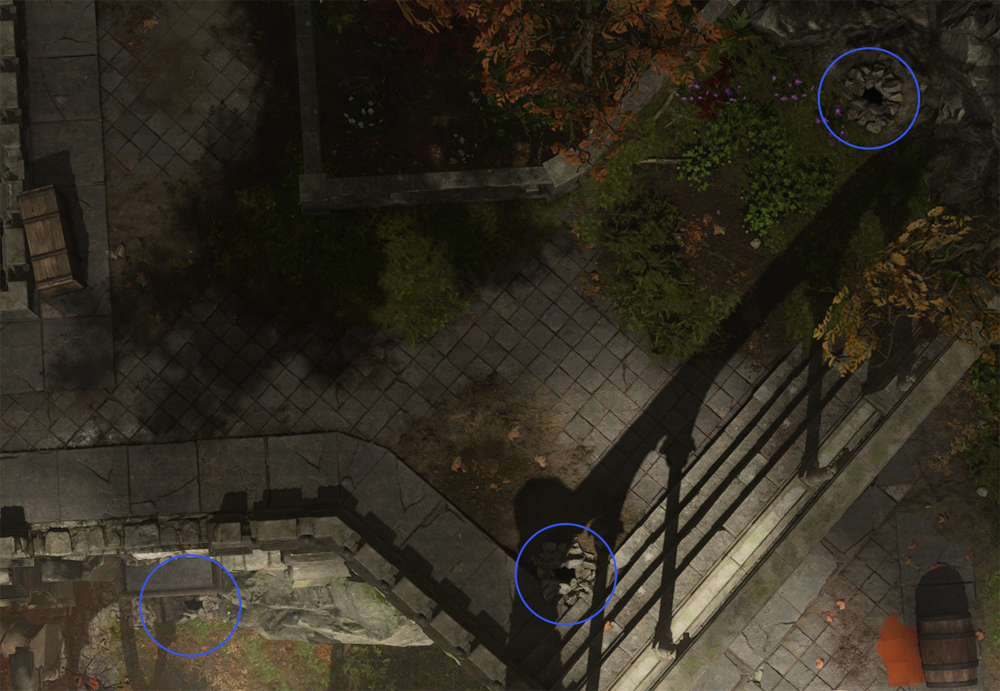
Hidden treasures[edit section | visual editor]
- Buried chest on the ledge south of the chicken chasing arena, containing some scrolls at X: -136 Y: 424
- Buried chest on the northeastern ledge, overlooking the sleeping bugbears on the upper level, requiring a

- Buried chest on the east road leading to the Rosymorn Monastery Trail, requiring a
- Buried chest on a ledge below Rancer, requiring a
- Buried chest up on the rock cliff leading to the githyanki patrol meeting at X: -147 Y: 476, available only by the means of spatial movement
- Heavy chest in the southeastern tower of the camp entrance, which can be reached with Jump and contains a

- Locked chest along the cliffs in the northeastern corner at X: -57 Y: 467, requiring a

Related literature[edit section | visual editor]


Notes and references[edit section | visual editor]
- ↑ By default, the artefact comes to the party leader or remains in Shadowheart's possession. However, if any other single party member explores the area separately from the party and triggers the cutscene, they receive the artefact and become bound to it.
- ↑

Gallery[edit section | visual editor]
-
Concept art by Dan Iorgulescu
