Ad placeholder
Mountain Pass

| Wilderness | ||||
| Rosymorn Monastery Trail | ← | Mountain Pass | → | Waukeen's Rest |
| ↓ | ||||
| Goblin Camp | ||||

Overview[edit section | visual editor]

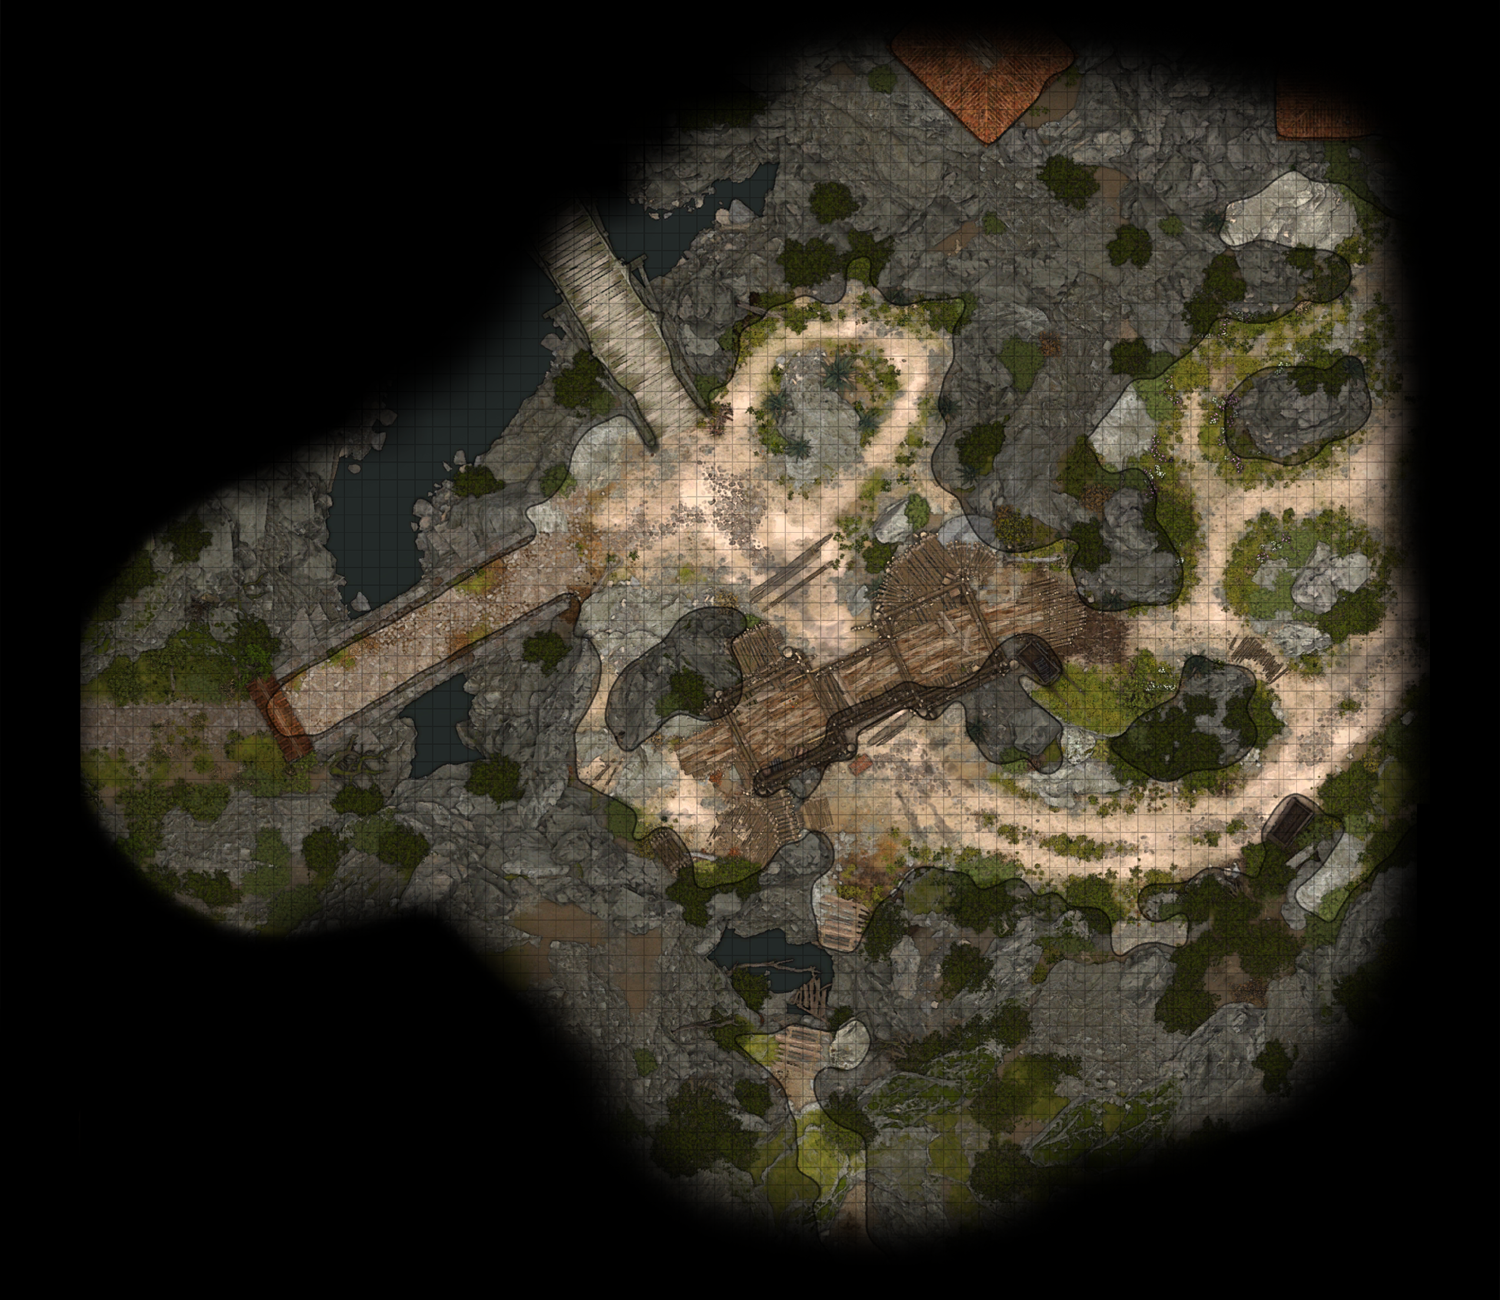
The Mountain Pass location is a small area adjacent to the Waukeen's Rest environs, actually being an extension of the Risen Road. The party can access it from the Risen Road approximately at X: -86 Y: 550, where several paths running from the inn and along the river shore collide. At the crossroads leading further along the Risen Road a wooden ramparts stands. The party can choose to walk under the rampart archway, cross it atop and descend from the other (western) side, or climb down the cragged rock to its east.
Also, the Mountain Pass can be accessed from the Goblin Camp at X: -121 Y: 470, but doing so requires spatial movement such as ![]()
![]()
![]()
![]()
The road westward from the Mountain Pass at X: -146 Y: 569 lead to the Rosymorn Monastery Trail and prompts a warning message about tying up all loose ends before proceeding. Travelling there automatically resolves some quests, notably ![]()
![]()
Interactions[edit section | visual editor]

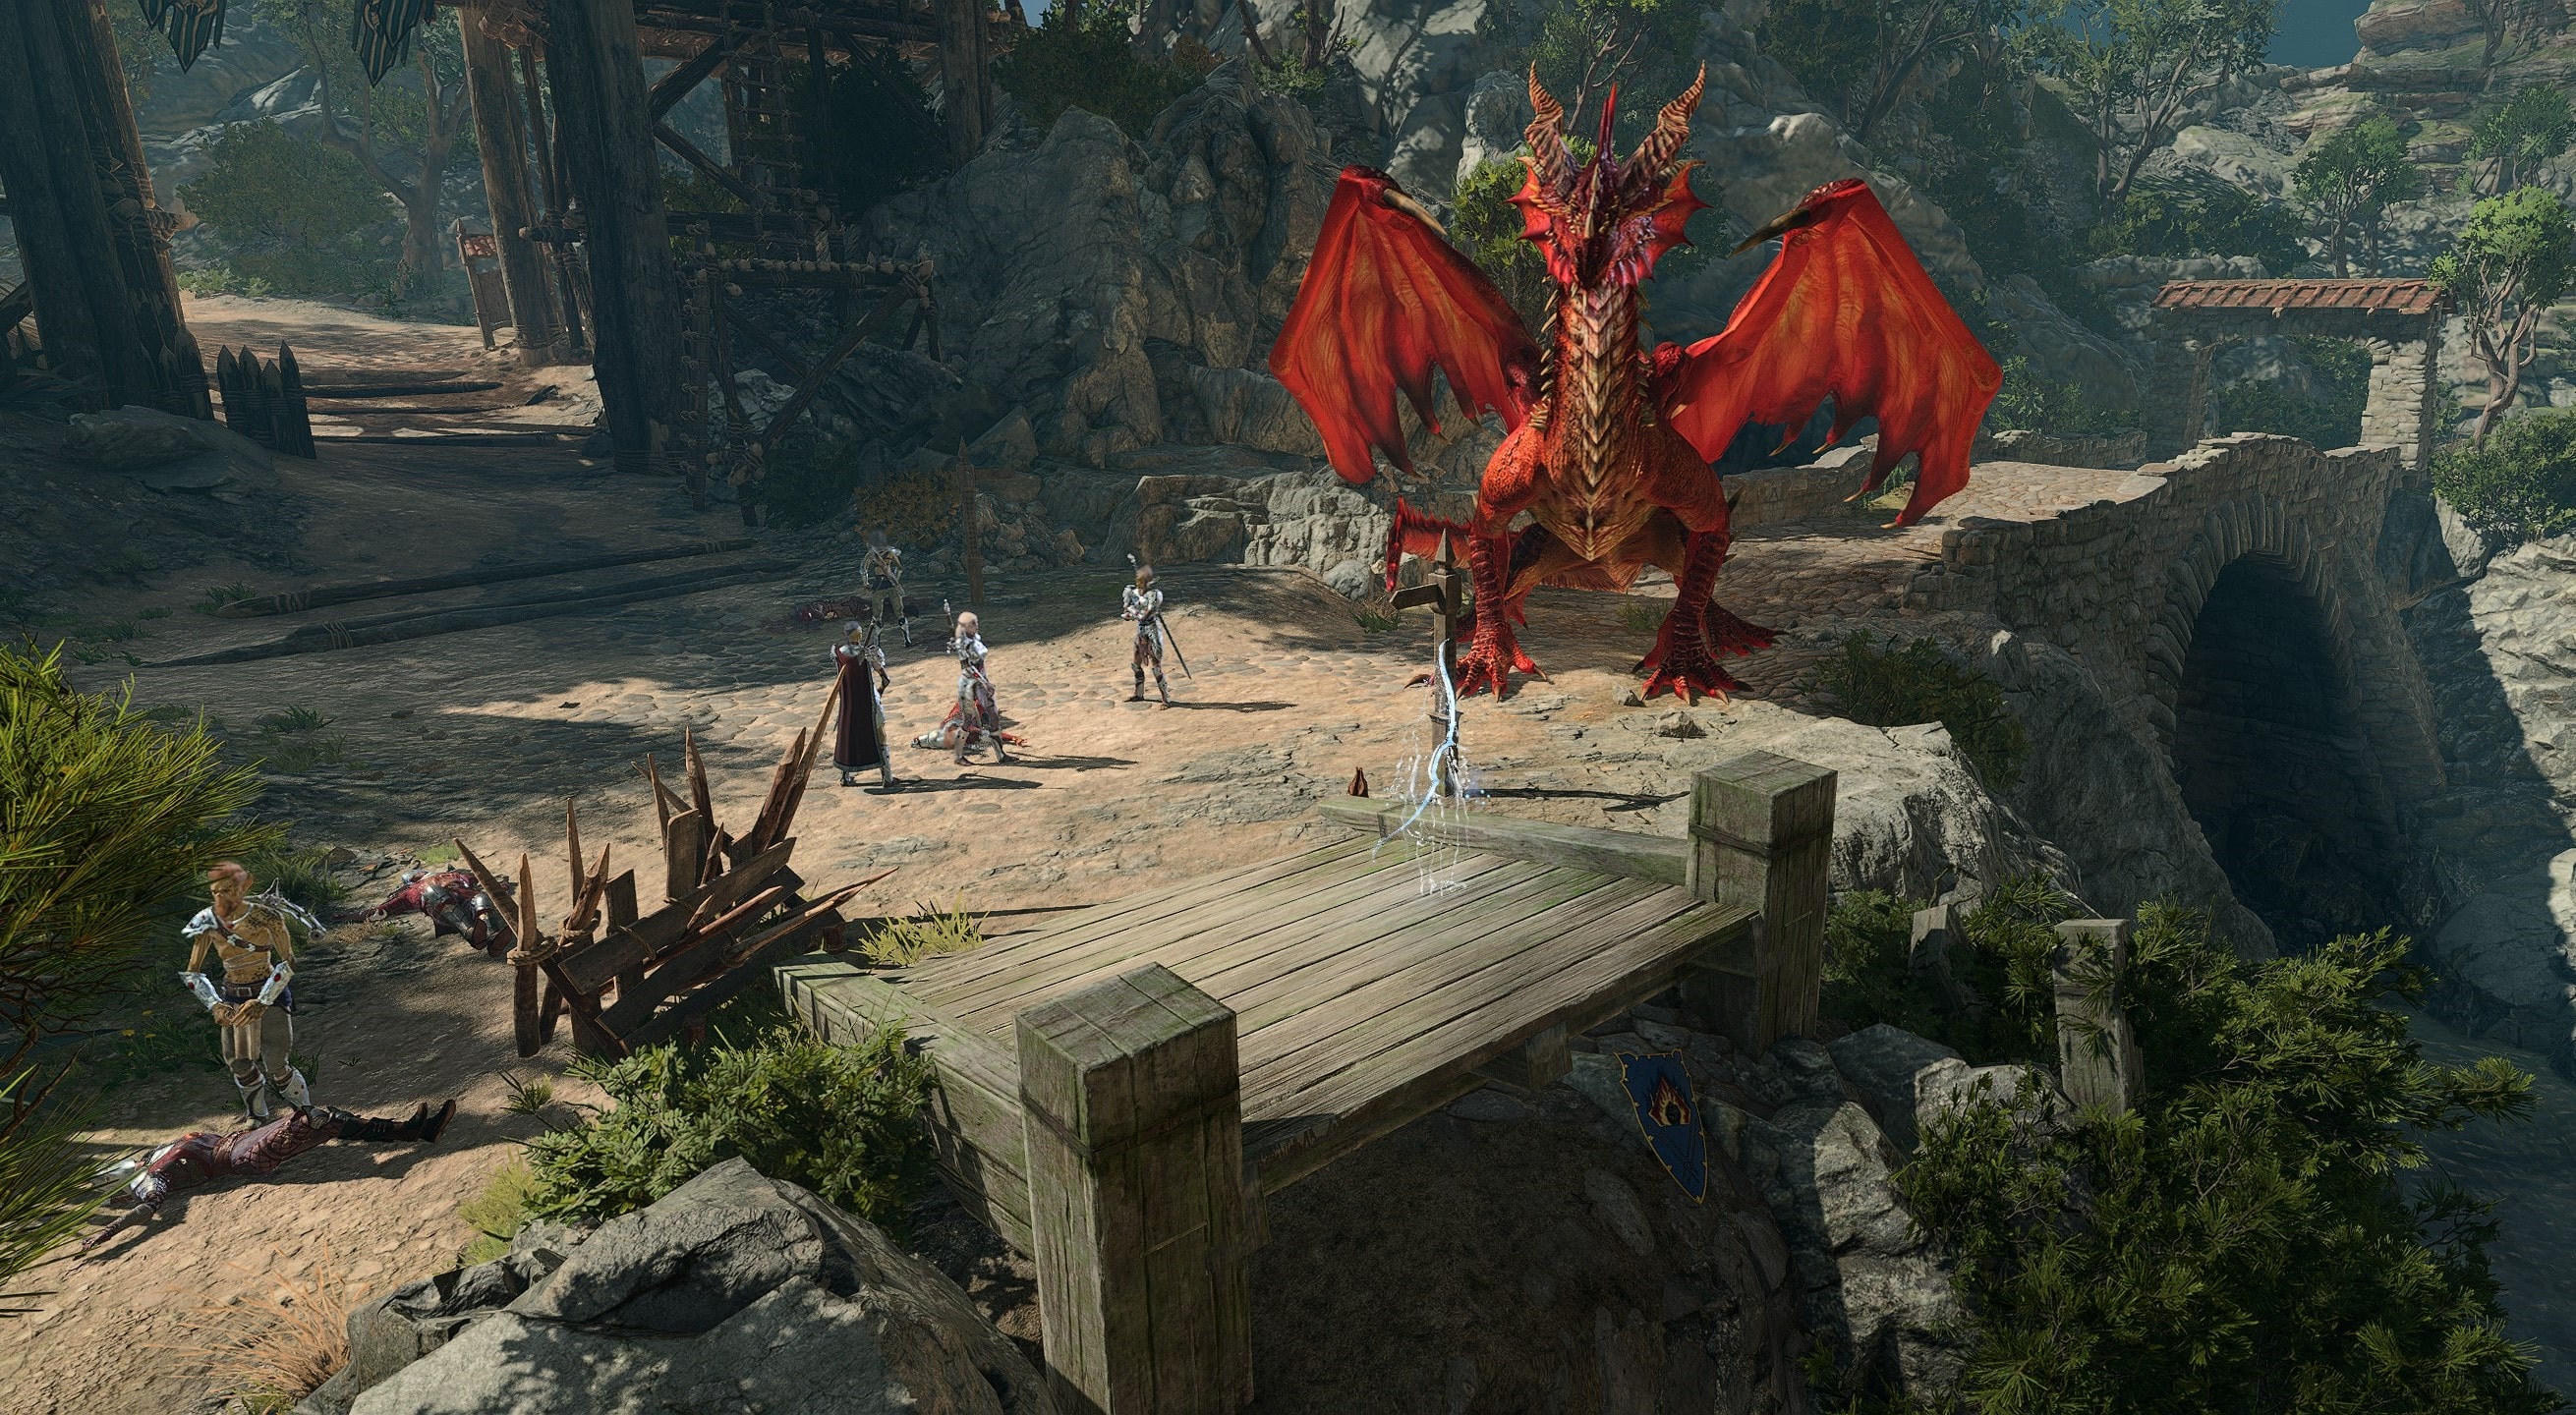
When approaching the mountain pass for the first time, the party witness a red dragon flying overhead. At this moment, if a passive ![]()
![]()

When coming close to the chokepoint, a cutscene is triggered where the 
The githyanki knight 

At X: -116 Y: 552 a tiefling scout 
If 
![]()
The dialogue includes several ability checks, listed on Voss's page. Successfully passing them leads to a peaceful ending, otherwise the githyanki patrol attacks the party. Regardless of the conversation result, Voss normally departs on his dragon[2], while the patrol members become hostile or run away to disappear from the game for good.
Depending on the outcome of the dialogue, one of the following inspirations can be granted:


These inspirations are mutually exclusive and cannot be earned in the same walkthrough.
If the githyanki patrol is defeated, 
![]()
![]()
At X: -138 Y: 554 the body of an ill-fated tiefling scout 
![]()
A ![]()
![]()
![]()
Related quests[edit section | visual editor]
Characters and creatures[edit section | visual editor]
Githyanki[edit section | visual editor]


Members of the Flaming Fist[edit section | visual editor]


Other[edit section | visual editor]


Available to Speak with Dead[edit section | visual editor]

Loot[edit section | visual editor]
Hidden Treasure[edit section | visual editor]
- At X: -73 Y: 539 a buried chest contains gold, a random gem and a random scroll (requires

Notes and references[edit section | visual editor]
- ↑ If the Rosymorn Monastery Trail is entered from the Goblin Camp, the patrol leaves the mountain pass.
- ↑ Voss' appearance here presents an opportunity for early acquisition of his Silver Sword of the Astral Plane. This Guide explains how.
- ↑ If not recruited to the party before.
- ↑ This item can only be acquired by disarming Voss by using


