Rosymorn Monastery Trail
More actions

| Rosymorn Monastery | ||||
| ↑ | ||||
| Ruined Battlefield | ← | Rosymorn Monastery Trail | ||
| ↓ | ||||
| Mountain Pass | ||||
Overview edit

Travelling here advances the story; this has consequences for many Act One quests, notably:
- Hunt the Devil
- Rescue the Druid Halsin
- Rescue the Gnome
- Rescue the Grand Duke
- Save the Goblin Sazza
- Save the Refugees
- Save the First Druid
- The Githyanki Warrior
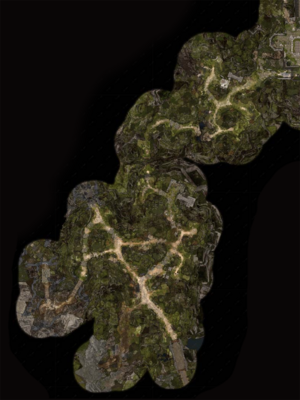
The description of the location provided here is given as if progressing in from the Mountain Pass. If entering the region from other possible points, the order of encounters might be shuffled.
Entrance edit
The Rosymorn Monastery Trail can be entered from two points of other Act One locations, and it is possible as well to reach it from the Shadow-Cursed Lands until entering the Shadowfell through the Gauntlet of Shar in Act Two.

The possible points where the party may start exploring the region are:
- X: -48 Y: -183 (if coming from the Mountain Pass)
- X: -100 Y: -204 (if entering from the Goblin Camp)
- X: -142 Y: -128 (if returning from the Shadow-Cursed Lands)
If Lae'zel is present, she stops the party shortly after entering the region (from whichever point), drawing their attention to the markings on the earth at X: -65 Y: -154 (Mountain Pass / Goblin Camp) or at X: -140 Y: -157 (Shadow-Cursed Lands). She recognizes the markings as her native language tir'su, and recites their meaning - the crèche she was searching since being recruited is somewhere nearby.
Battle with the undead edit
Two Death Shepherds, four Ghouls, and a Ghast can be encountered at X: -91 Y: -119. The battle with them is commenced automatically if any of these creatures notices the party. The point where they wander about cannot be evaded if heading from the Rosymorn Monastery Trail into Shadow-Cursed Lands, or if coming the opposite direction.
The ghouls are devouring several corpses littering the area around, both Githyanki Youths and Absolute cultists. Using Speak with Dead on the corpse of a Zealot of the Absolute at X: -92 Y: -117 reveals that he summoned the undead in order to buy time for the raiding party that ravaged Waukeen's Rest, to complete their mission to capture Ulder Ravengard. The Zealot's body can be looted for standard armour, a weapon, and a Missive From Moonrise.
After resolving the battle the party can loot an Opulent Chest on the cart nearby, and dig out a Dirt Mound to find yet another chest at X: -119 Y: -138 ( DC 10 Survival check to find).
To the east of the battle place at X: -103 Y: -92 the party can find a long-ago ruined bridge, on which the closest party member ruefully comments. On its other side arborous vines, gnarled and warped by the curse can be seen - an example of what the party can encounter closer to the Moonrise Towers. Also, around the bridge the player character might hear roarings of a bear, however, no actual animal is encountered here.
If the party continue their way to the north through a hanging bridge, they again see the signs of nature withering from the curse, along with corpses of rabbits and blue jays strewn along the path. At X: -133 Y: -161 the party can encounter a Weary Traveller (if they have not met him before in the Shadow-Cursed Lands). The dialogue with him starts automatically and advances Gale's companion quest.
Lady Esther's camp edit
At X: -62 Y: -133 stands a statue depicting a man with raised hands. Reading its plaque and succeeding the DC 10 Religion check reveals that the Rosymorn Monastery was consecrated to Lathander.
On the opposite side of the path the ![]() Trielta Crags Waypoint is located. A small path to the east (and down) leads to Lady Esther's camp at X: -43 Y: -129.
Trielta Crags Waypoint is located. A small path to the east (and down) leads to Lady Esther's camp at X: -43 Y: -129.

“I mean no offence to the Morninglord, I simply prefer when his monasteries aren't overrun with brutish, stupid, rude githyanki.„
Esther is an expeditioner hired by the Society of Brilliance to provide them with a Githyanki Egg, in order to conduct a somewhat eugenic experiment to extinguish in the spawn its brutal instincts by means of proper upbreeding. However, up to the moment of encountering the party she has had no luck in obtaining an egg. Telling her that an egg is actually a Githyanki child confuses the enterprising lady only for a moment, but does not make her give up on her task. Agreeing to do it for her initiates the quest Steal a Githyanki Egg.
Esther reacts quite differently if the player character is a Githyanki or if Lae'zel is present and initiates the dialogue. However, even if the player character refuses to engage in her mission, Esther still remains a merchant with several powerful items (e.g., The Graceful Cloth or Periapt of Wound Closure).
It is also possible to placate Esther's needs there and then, convincing her to cheat the Society and trade to them an Owlbear Egg which may have been obtained earlier in Act One (requires various DC 21 Ability check rolls). There is no need to actually have the egg in the inventory at this moment; the dialogue option is available even if the party have it stashed in the camp.
Cable car and descent to the monastery edit

From the statue of Lathander, another path leads to the north and to the encouinter with the undead. However, this path is armed with two Repulsion Mines at the both side of it ( DC 15 Perception check to detect).
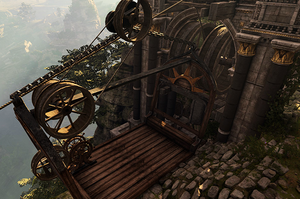
Heading to the east from this crossroads, the party come to a high cliff with the aerial ropeway station at X: -44 Y: -74. The Cable Car, however, is at the lowest point of the route. To use the mechanism, the party must first unblock the Cable Car Wheel nearby (which requires a DC 15 Strength check and allows a single try for each party member). If repaired, the cable car can be used to travel to the landing ground just west of the Rosymorn Monastery at X: -10 Y: 6. With the upper wheel unblocked, the lower wheel also becomes operational.
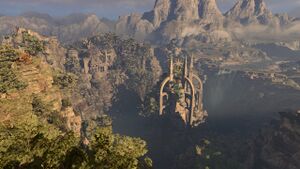
Also, just above of the cable car station at X: -33 Y: -102, is the point of a marvellous vista on the valley and the monastery on its far side (various other points offer similarly beautiful sights; this one is commented by the currently selected party member).
If none of party members succeeded the Strength check to unlock the ropeway, the party must head to the small stairs to the west and start their way down the cliffs. To the left of the stairs is a leftovers of a campsite with an Elegant Chest, which contains a random Uncommon arrow and a Potion of Greater Healing.
The party should be careful while making their way down; the crags are trapped with several Repulsion Mines. Notwithstanding the null damage, the mines might cause the death of any party member by pushing them into a Chasm area around; thus killed party members appear nearby as the Soul Echoes and can be looted or resurrected through the use of a Scroll of Revivify, or at camp by Withers.
Aside from the ropeway landing ground at X: -17 Y: 23 there is a broken effigy to Lathander, with pilgrims' donations left around. Here the party can pick up another Potion of Greater Healing and also a Greater Elixir of Arcane Cultivation, along with some gold and notes with prayers to Lathander.
Blue Jay's nest edit
At X: -59 Y: -19 the party can meet a Blue Jay hovering over a nest, which contains a key. If speaking to the bird via Speak with Animals, the party can find out its vies to own a nest on the monatery roof, from where it claims to have been chased off by the Giant Eagles. Agreeing to help the jay initiates the quest Reclaim the Blue Jay's Nest.
Upon completing the quest the Blue Jay reveals the location of a hidden stash at X: -6 Y: -29, which otherwise might be found only by succeeding a DC 25 Survival check.
If the eagles are killed before speaking with the Blue Jay, the bird disappears from its place, leaving the key to the stash in the nest.
From approximately X: -19 Y: -16 the location changes into the "Rosymorn Monastery", despite the building itself starts only behind the waypoint.
Regional locations edit
Connected locations edit
The following locations are connected to Rosymorn Monastery Trail:
- Goblin Camp in the Wilderness at X: -103 Y: -205
- Mountain Pass in the Wilderness at X: -49 Y: -180
- Ruined Battlefield in the Shadow-Cursed Lands at X: -142 Y: -127
Regional waypoints edit
The Rosymorn Monastery Trail contains the following Waypoints:
Related quests edit
Characters edit
Available to Speak with Dead edit
- Samwell Staxford - located near the death shepherds and ghouls

