Gauntlet of Shar: Difference between revisions
(→Meet Balthazar: Merge from Find Ketheric Thorm's Relic) |
(→Walk-through: Merge more) |
||
| Line 8: | Line 8: | ||
This location plays an important part in [[Shadowheart]]'s personal quest. There are 4 [[Umbral Gems]] in Gauntlet of Shar, you need to collect in order to progress through the dungeon and the quests [[Daughter of Darkness]] and [[The Chosen of Shar]]. In order to find the four gems you need to solve a number of problems / trials. You can do these trials in any order you want. | This location plays an important part in [[Shadowheart]]'s personal quest. There are 4 [[Umbral Gems]] in Gauntlet of Shar, you need to collect in order to progress through the dungeon and the quests [[Daughter of Darkness]] and [[The Chosen of Shar]]. In order to find the four gems you need to solve a number of problems / trials. You can do these trials in any order you want. | ||
=== | === Entrance === | ||
[[File:Gauntlet of Shar Statue Puzzle.png|thumb|The statue and its (non-takeable) Umbral Gem.]] | [[File:Gauntlet of Shar Statue Puzzle.png|thumb|The statue and its (non-takeable) Umbral Gem.]] | ||
| Line 20: | Line 20: | ||
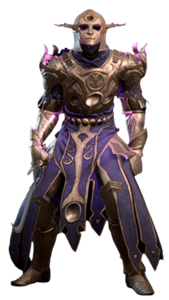
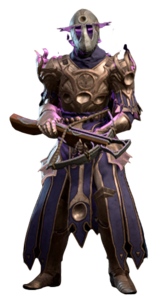
The tremors persist until the party moves west and encounters more Reconstituted Duelists. The tremors begin in earnest as more Umbral Tremors and Justiciars are summoned to attack the party. Several waves appear, until finally a [[Justiciar Crusader]] appears. Defeat it and its minions and the path opens, revealing [[Balthazar]] at {{Coords|-852|-786}} along with [[Flesh]], a flesh golem, and three [[Ghoul Medic]]s. Balthazar assumes you are a [[True Soul]] and tells the party to go and complete the trials for him, as the Justiciars have been making it impossible for them to move forward. The party can either agree to help him or attack him outright. Balthazar can be convinced to offer help in the form of a bell that summons his brother, [[Flesh]]. | The tremors persist until the party moves west and encounters more Reconstituted Duelists. The tremors begin in earnest as more Umbral Tremors and Justiciars are summoned to attack the party. Several waves appear, until finally a [[Justiciar Crusader]] appears. Defeat it and its minions and the path opens, revealing [[Balthazar]] at {{Coords|-852|-786}} along with [[Flesh]], a flesh golem, and three [[Ghoul Medic]]s. Balthazar assumes you are a [[True Soul]] and tells the party to go and complete the trials for him, as the Justiciars have been making it impossible for them to move forward. The party can either agree to help him or attack him outright. Balthazar can be convinced to offer help in the form of a bell that summons his brother, [[Flesh]]. | ||
=== | === Trials of Shar === | ||
In order to reach the [[Nightsong]], you must find five [[Umbral Gem]]s to access the heart of the Gauntlet. | |||
[[File:Gauntlet of Shar Trial Halls.jpg|thumb|The Trial Hall.]] | [[File:Gauntlet of Shar Trial Halls.jpg|thumb|The Trial Hall.]] | ||
=== | ==== Soft-step Trial ==== | ||
[[File:Soft Step Key Quest.jpg|thumb|The key to the Soft-Step Trial.]] | |||
A sacrificial bowl is located at the beginning of the room {{Coords|-767|-755}}. You must give a blood offering to continue onto the trial. If [[Shadowheart]] is in the party, she volunteers, gaining {{Approval|Shadowheart}} if she is allowed to. | |||
The Soft-Step Trial is a stealth trial. There are two [[Shadow]]s patrolling a small maze, which you must sneak past to get to the Umbral Gem. Only one character needs to successfully reach the end of the room to complete the trial. If a character is detected, they are teleported back to the start of the maze. You can either use normal [[Stealth]] mechanics or some form of [[Invisibility]]. There is a [[Scroll of Invisibility]] on a skeleton on a bench nearby. | |||
A gate blocks your way to the Umbral Gem. You can open the gate with the [[Soft-Step Key]] in a hidden room of the maze. There is a button on the wall to the right that, when pushed, will rearrange the maze and allow access to the key. You can also lockpick the door {{Difficulty|Sleight of Hand|10}}, or use teleportation such as [[Misty Step]] to bypass the gate entirely. | |||
Once you pick up the Gem, a transporter will appear that can be interacted with to teleport any characters to the beginning of the room. | |||
=== | ==== Self-same Trial ==== | ||
Along the corridor to the north from the Soft-step Trial | Along the corridor to the north from the Soft-step Trial is a door with a plaque that says "''Her Most Hallowed Mercy''". This is the entrance to the Self-same Trial {{coords|-767|-727}}. | ||
Once you start the trial with a blood offering, you must defeat copies of the four members of your party. The copies have the same abilities and gear as your party and cannot be restrained or shoved. If a character attacks a copy that is not themselves, they will be permanently cursed with a debuff to ability scores that can be removed with [[Remove Curse]]. | |||
Once all the shadows are defeated, you can loot an '''Umbral Gem''' from one of the shadows and take the transporter that appears back to the start of the room. | |||
The [[Killer's Sweetheart]] can be found on the top level. | |||
==== Faith-step Trial ==== | |||
[[File:Faith Step Path Quest.jpg|thumb|The dimly lit path in the Faith-Step Trial.]] | |||
From the Self-same Trial, head north and down the stairs. At the bottom, you’ll find a door to the '''Faith-step Trial'''. There is a plaque on the outside of the door that reads "''Her Most Sacred Path''". | |||
In order to complete this trial, you must follow an invisible path as marked on the mosaic floor near the start of the trial. Similar to the Soft-step Trial, it is easiest to complete this trial with a single character. It may be possible to use a method of teleportation such as [[Dimension Door]] to skip the trial and go directly to the Umbral Gem. | |||
=== ' | ==== Yurgir's Tribulation ==== | ||
The | The fifth and final Umbral Gem is in the possession of the orthon [[Yurgir]] in the northern branch of the Gauntlet at {{coords|-652|-776}}, lying near his bed of corpses. You can fight him or help him resolve his contract with Raphael, which starts the quest [[Break Yurgir's Contract]]. It may also be possible to steal the gem and get out safely. | ||
=== The Silent Library === | |||
It is possible to complete the Gauntlet of Shar and find the [[Nightsong]] at this point. However, if she is in the party [[Shadowheart]] has a request. She says that she needs the [[Spear of Night]] if she is to become a Dark Justiciar. The Spear is in the Silent Library. | |||
The door to the south of the '''Faith-step Trial''' is to the '''Silent Library'''. Inside this area are a lot of traps together with a some undead [[Dark Justiciars]]. The whole room is under the effect of [[Silence]], so it is not possible to cast any spells while inside until you kill [[The Librarian]], which is generating the effect. | |||
One of the trapped ({{SkillCheck|Sleight of Hand|15}}) bookshelves in the north east of the library contains a book called {{SmItemIcon|Teachings of Loss: The Nightsinger}}. | |||
If you succeed on a passive {{SkillCheck|Perception}} you can discover a hidden button at {{Coords|-784|-747}}. Alternatively, you can pick the door ({{SkillCheck|Sleight of Hand|21}}). The chamber behind it contains a pedestal named '''The Riddle of the Night'''{{anchor|riddle-of-the-night}}, which accepts [[Teachings of Loss: The Nightsinger]] and produces the {{RarityItem|Spear of Night}}, {{RarityItem|Dark Justiciar Half-Plate}}, and a {{RarityItem|Dark Justiciar Helmet}}. | |||
At the bottom, | |||
=== Find the Nightsong === | |||
Return to the Pedestal of Reckoning to the north of the entrance hall. You can place an Umbral Gem on the altar to unlock a platform that will take you downwards. | |||
At the bottom, you will find another altar. Place the remaining three Umbral Gems on the altar, and a door will open. Inside, you’ll find the '''Verge of the Shadows''' [[waypoint]] and a pool of water that serves as a portal to the [[Shadowfell]]. If [[Shadowheart]] is in your party she will want to pray. | |||
Enter the portal and jump downwards to the [[Nightsong]]. | Enter the portal and jump downwards to the [[Nightsong]]. | ||
'''NOTE''': You will get a warning that this action will advance the story and lock you out of quests/areas if you haven't already completed | '''NOTE''': You will get a warning that this action will advance the story and lock you out of quests/areas if you haven't already completed or visited them. | ||
The following sequence completes the quest [[The Chosen of Shar]]. | |||
==Waypoints== | ==Waypoints== | ||
Revision as of 22:42, 3 October 2023
This page is in the process of being constructed or reformatted. You are welcome to contribute as well. Last edited on 2023-10-03. If multiple days have passed since, this template should be removed. |

The Gauntlet of Shar is a Location found in the Grand Mausoleum in Chapter Two.
Walk-through
This location plays an important part in Shadowheart's personal quest. There are 4 Umbral Gems in Gauntlet of Shar, you need to collect in order to progress through the dungeon and the quests Daughter of Darkness and The Chosen of Shar. In order to find the four gems you need to solve a number of problems / trials. You can do these trials in any order you want.
Entrance

Just inside the entrance is a statue with an Umbral Gem. Shar speaks to you through the statue, inviting you to take on her trials and prove yourselves worthy. Approaching the statue will repel you. In order to continue, you party must extinguish eight Mystic Thuribles around the room. There are two side hallways to the east and west of the room, and levers located in alcoves to the north and south of each hallway. each side of the room. The alcoves are protected by pressure plates, which can be disarmed (![]() DC 10 Sleight of Hand check) as well as vents that are activated by the pressure plates and produce a cloud similar to Darkness[Needs Verification]. Activate the levers to lower the Thuribles, then interact with them to snuff out their lights. Any Moonlanterns or other sources of light must also be unequipped. Once the room is shrouded in darkness, purple glyphs are revealed around the statue. Follow the gaps in the glyphs to touch the Umbral Gem. This opens the way north.
DC 10 Sleight of Hand check) as well as vents that are activated by the pressure plates and produce a cloud similar to Darkness[Needs Verification]. Activate the levers to lower the Thuribles, then interact with them to snuff out their lights. Any Moonlanterns or other sources of light must also be unequipped. Once the room is shrouded in darkness, purple glyphs are revealed around the statue. Follow the gaps in the glyphs to touch the Umbral Gem. This opens the way north.
Alternatively, you can also bypass the puzzle entirely by teleporting to the gem via Misty Step, Dimension Door, or other means.
Meet Cute with Balthazar
After the riddle in the entrance room, you can go either north or west. You will encounter Reconstituted Duelists which attempt to warn you away before leaving to address tremors. A group of undead Dark Justiciars will attack you, and Umbral Tremors will spawn that continuously summon more Dark Justiciars until they are destroyed. The Reconstituted undead fight against the undead with you.
The tremors persist until the party moves west and encounters more Reconstituted Duelists. The tremors begin in earnest as more Umbral Tremors and Justiciars are summoned to attack the party. Several waves appear, until finally a Justiciar Crusader appears. Defeat it and its minions and the path opens, revealing Balthazar at X: -852 Y: -786 along with Flesh, a flesh golem, and three Ghoul Medics. Balthazar assumes you are a True Soul and tells the party to go and complete the trials for him, as the Justiciars have been making it impossible for them to move forward. The party can either agree to help him or attack him outright. Balthazar can be convinced to offer help in the form of a bell that summons his brother, Flesh.
Trials of Shar
In order to reach the Nightsong, you must find five Umbral Gems to access the heart of the Gauntlet.

Soft-step Trial

A sacrificial bowl is located at the beginning of the room X: -767 Y: -755. You must give a blood offering to continue onto the trial. If Shadowheart is in the party, she volunteers, gaining ![]() + if she is allowed to.
+ if she is allowed to.
The Soft-Step Trial is a stealth trial. There are two Shadows patrolling a small maze, which you must sneak past to get to the Umbral Gem. Only one character needs to successfully reach the end of the room to complete the trial. If a character is detected, they are teleported back to the start of the maze. You can either use normal Stealth mechanics or some form of Invisibility. There is a Scroll of Invisibility on a skeleton on a bench nearby.
A gate blocks your way to the Umbral Gem. You can open the gate with the Soft-Step Key in a hidden room of the maze. There is a button on the wall to the right that, when pushed, will rearrange the maze and allow access to the key. You can also lockpick the door Template:Difficulty, or use teleportation such as Misty Step to bypass the gate entirely.
Once you pick up the Gem, a transporter will appear that can be interacted with to teleport any characters to the beginning of the room.
Self-same Trial
Along the corridor to the north from the Soft-step Trial is a door with a plaque that says "Her Most Hallowed Mercy". This is the entrance to the Self-same Trial X: -767 Y: -727.
Once you start the trial with a blood offering, you must defeat copies of the four members of your party. The copies have the same abilities and gear as your party and cannot be restrained or shoved. If a character attacks a copy that is not themselves, they will be permanently cursed with a debuff to ability scores that can be removed with Remove Curse.
Once all the shadows are defeated, you can loot an Umbral Gem from one of the shadows and take the transporter that appears back to the start of the room.
The Killer's Sweetheart can be found on the top level.
Faith-step Trial

From the Self-same Trial, head north and down the stairs. At the bottom, you’ll find a door to the Faith-step Trial. There is a plaque on the outside of the door that reads "Her Most Sacred Path".
In order to complete this trial, you must follow an invisible path as marked on the mosaic floor near the start of the trial. Similar to the Soft-step Trial, it is easiest to complete this trial with a single character. It may be possible to use a method of teleportation such as Dimension Door to skip the trial and go directly to the Umbral Gem.
Yurgir's Tribulation
The fifth and final Umbral Gem is in the possession of the orthon Yurgir in the northern branch of the Gauntlet at X: -652 Y: -776, lying near his bed of corpses. You can fight him or help him resolve his contract with Raphael, which starts the quest Break Yurgir's Contract. It may also be possible to steal the gem and get out safely.
The Silent Library
It is possible to complete the Gauntlet of Shar and find the Nightsong at this point. However, if she is in the party Shadowheart has a request. She says that she needs the Spear of Night if she is to become a Dark Justiciar. The Spear is in the Silent Library.
The door to the south of the Faith-step Trial is to the Silent Library. Inside this area are a lot of traps together with a some undead Dark Justiciars. The whole room is under the effect of Silence, so it is not possible to cast any spells while inside until you kill The Librarian, which is generating the effect.
One of the trapped (![]() DC 15 Sleight of Hand check) bookshelves in the north east of the library contains a book called
DC 15 Sleight of Hand check) bookshelves in the north east of the library contains a book called ![]() Teachings of Loss: The Nightsinger.
Teachings of Loss: The Nightsinger.
If you succeed on a passive ![]() Perception check you can discover a hidden button at X: -784 Y: -747. Alternatively, you can pick the door (
Perception check you can discover a hidden button at X: -784 Y: -747. Alternatively, you can pick the door (![]() DC 21 Sleight of Hand check). The chamber behind it contains a pedestal named The Riddle of the Night, which accepts Teachings of Loss: The Nightsinger and produces the
DC 21 Sleight of Hand check). The chamber behind it contains a pedestal named The Riddle of the Night, which accepts Teachings of Loss: The Nightsinger and produces the ![]() Spear of Night, Dark Justiciar Half-Plate, and a
Spear of Night, Dark Justiciar Half-Plate, and a ![]() Dark Justiciar Helmet.
Dark Justiciar Helmet.
Find the Nightsong
Return to the Pedestal of Reckoning to the north of the entrance hall. You can place an Umbral Gem on the altar to unlock a platform that will take you downwards.
At the bottom, you will find another altar. Place the remaining three Umbral Gems on the altar, and a door will open. Inside, you’ll find the Verge of the Shadows waypoint and a pool of water that serves as a portal to the Shadowfell. If Shadowheart is in your party she will want to pray.
Enter the portal and jump downwards to the Nightsong.
NOTE: You will get a warning that this action will advance the story and lock you out of quests/areas if you haven't already completed or visited them.
The following sequence completes the quest The Chosen of Shar.
Waypoints
This location contains the following ![]() :
:
- Gauntlet of Shar X: -758 Y: -794
- Verge of the Shadows X: -722 Y: -842
Related Locations
Related Quests
- Lift the Shadow Curse
- Infiltrate Moonrise Towers (sub-quest Find Ketheric Thorm's Relic)
- Find the Nightsong
- Kill Raphael's Old Enemy
- Break Yurgir's Contract
- Daughter of Darkness (sub-quest The Chosen of Shar)
Notable Loot
Notable items obtained in this location, whether looted, purchased, or obtained as a quest reward:
 Boots of Brilliance - North of Yurgir at (X: -632, Y: -723)
 Hellfire Hand Crossbow - Dropped by Yurgir
 Dark Justiciar Gauntlets - Found laying on a pile of boxes near Yurgir at (X: -660 Y: -760)
 Least Expected - Found in the NE of the dungeon just before Yurgir at (X: -730, Y: -800)
 Callous Glow Ring - Found in a vault (Lockpick DC30) near Balthazar at (X: -821, Y: -752)
 Justiciar's Scimitar - Dropped by Lyrthindor
 Justiciar's Greatshield Dropped by Lyrthindor
 Killer's Sweetheart - In the Self-Same Trial at (X: -833, Y: -729)
 Circle of Bones - Dropped by Balthazar
 Spear of Night - In the Silent Library
 Dark Justiciar Helmet - In a chest next to the Spear of Night
 Dark Justiciar Half-Plate - At the bottom of the altar with the Spear of Night