Druid Grove: Difference between revisions
(FRW) |
TieflingTea (talk | contribs) (Added missing sub areas and XY coordinates for entry to them.) |
||
| Line 24: | Line 24: | ||
== Sub Areas == | == Sub Areas == | ||
The '''Druid Grove''' spans is a large area and also contains several notable sub-areas: | The '''Druid Grove''' spans is a large area and also contains several notable sub-areas: | ||
=== The Hollow === | === The Hollow === | ||
[[File:The Hollow.jpg|thumb|right|The Hollow]] | [[File:The Hollow.jpg|thumb|right|The Hollow]] | ||
| Line 41: | Line 39: | ||
*[[Auntie Ethel]] | *[[Auntie Ethel]] | ||
*[[Dammon]] | *[[Dammon]] | ||
*[[Mattis]] | *[[Mattis]] ===<br /> | ||
=====Notable Loot===== | |||
===== Notable Loot ===== | |||
Notable items obtained in this location, whether looted, purchased, or obtained as a quest reward: | Notable items obtained in this location, whether looted, purchased, or obtained as a quest reward: | ||
* {{SmallIcon|Amulet of Elemental Torment Icon.png}} [[Amulet of Elemental Torment]] | *{{SmallIcon|Amulet of Elemental Torment Icon.png}} [[Amulet of Elemental Torment]] | ||
* {{SmallIcon|Corellons Grace Icon.png}} [[Corellon's Grace]] | *{{SmallIcon|Corellons Grace Icon.png}} [[Corellon's Grace]] | ||
* {{SmallIcon|Handaxe PlusOne Icon.png}} [[Dragon's Grasp]] | *{{SmallIcon|Handaxe PlusOne Icon.png}} [[Dragon's Grasp]] | ||
* {{SmallIcon|Rain Dancer Staff Icon.png}} [[Rain Dancer]] | *{{SmallIcon|Rain Dancer Staff Icon.png}} [[Rain Dancer]] | ||
* {{SmallIcon|Scale Mail PlusOne Icon.png}} [[Scale Mail Armour +1]] | *{{SmallIcon|Scale Mail PlusOne Icon.png}} [[Scale Mail Armour +1]] | ||
* {{SmallIcon|Longbow PlusOne Icon.png}} [[Spellthief]] | *{{SmallIcon|Longbow PlusOne Icon.png}} [[Spellthief]] | ||
===== Hidden Treasure ===== | =====Hidden Treasure===== | ||
* The haystack by the two oxen tended by [[Toron]]. Need to pass a [[Ability Check|Perception check]] to be able to interact with it. | * The haystack by the two oxen tended by [[Toron]]. Need to pass a [[Ability Check|Perception check]] to be able to interact with it. | ||
* Past the oxen, where [[Doni]] loiters, there's a pair of [[Metallic Gloves]] lying on the horse cart. They can be picked up without it counting as stealing. The locked Travel-Worn Chest right aside the cart is also worth checking. | *Past the oxen, where [[Doni]] loiters, there's a pair of [[Metallic Gloves]] lying on the horse cart. They can be picked up without it counting as stealing. The locked Travel-Worn Chest right aside the cart is also worth checking. | ||
* Behind the Storage shed where you find [[Pandirna]] there's a pouch on the ground with a good amount of riches. You can access this from both sides: either break into the storage shed somehow, climb up the stack of wooden crates to the roof, then jump to the area behind it; or go to the Makeshift Prison area where the caged goblin is, jump down to a stone path to the right, and keep jumping until you reach the area behind the shed. Caution: there's exploding plants along this path that are only revealed by an ability check. | *Behind the Storage shed where you find [[Pandirna]] there's a pouch on the ground with a good amount of riches. You can access this from both sides: either break into the storage shed somehow, climb up the stack of wooden crates to the roof, then jump to the area behind it; or go to the Makeshift Prison area where the caged goblin is, jump down to a stone path to the right, and keep jumping until you reach the area behind the shed. Caution: there's exploding plants along this path that are only revealed by an ability check. | ||
=== Secluded Chamber === | ===Secluded Chamber === | ||
[[File:Secluded Chamber.jpg|thumb|right|The Secluded Chamber]] | [[File:Secluded Chamber.jpg|thumb|right|The Secluded Chamber]] | ||
Located past a large door in the northern '''Hollow'''. After his confrontation with [[Aradin]], [[Zevlor]] will retreat to this location alongside [[Tilses]]. | Located past a large door in the northern '''Hollow'''. After his confrontation with [[Aradin]], [[Zevlor]] will retreat to this location alongside [[Tilses]]. | ||
| Line 65: | Line 61: | ||
The Secluded Chamber contains a ladder that can be found by climbing up several slabs of stone. This ladder leads back out into the [[Wilderness]], onto a cliff overlooking [[The Risen Road]] to the west. | The Secluded Chamber contains a ladder that can be found by climbing up several slabs of stone. This ladder leads back out into the [[Wilderness]], onto a cliff overlooking [[The Risen Road]] to the west. | ||
===== Notable Loot ===== | =====Notable Loot===== | ||
Notable items obtained in this location, whether looted, purchased, or obtained as a quest reward: | Notable items obtained in this location, whether looted, purchased, or obtained as a quest reward: | ||
* {{SmallIcon|Metallic Gloves Magical Icon.png}} [[Hellrider's Pride]] | *{{SmallIcon|Metallic Gloves Magical Icon.png}} [[Hellrider's Pride]] | ||
* {{SmallIcon|Wapiras Crown Icon.png}} [[Wapira's Crown]] | *{{SmallIcon|Wapiras Crown Icon.png}} [[Wapira's Crown]] | ||
=== Sacred Pool === | ===Sacred Pool === | ||
[[File:Druid Grove.jpg|thumb|right|The Sacred Pool]] | [[File:Druid Grove.jpg|thumb|right|The Sacred Pool]] | ||
The Sacred Pool is the ritual area of the druids, whom are using the [[Idol of Silvanus]] to perform the Rite of Thorns. Outsiders are not welcome here. | Main entry to the Sacred Pool is by descending the staircase at X:251 Y:547. | ||
Alternate entry is through the elevator, which is blocked by a sleeping bear. | |||
The Sacred Pool is the ritual area of the druids, whom are initially using the [[Idol of Silvanus]] to perform the Rite of Thorns. Outsiders are not welcome here. | |||
If the player approaches, they will encounter a confrontation between [[Locke]], [[Komira]], and some of the druids, who are currently holding the two Tieflings' daughter, [[Arabella]], against her will. This will grant the player the [[Save Arabella]] quest. | ===== Interactions ===== | ||
If the player approaches from the main entry, they will encounter a confrontation between [[Locke]], [[Komira]], and some of the druids, who are currently holding the two Tieflings' daughter, [[Arabella]], against her will. This will grant the player the [[Save Arabella]] quest. | |||
After this confrontation resolves, one of the druids will receive a message from [[Kagha]], and inform the player that she wishes to speak with them, granting the player's party access to the '''Sacred Pool'''. | After this confrontation resolves, one of the druids will receive a message from [[Kagha]], and inform the player that she wishes to speak with them, granting the player's party access to the '''Sacred Pool'''. | ||
| Line 80: | Line 81: | ||
In this area the player has his first encounter with [[Volo]]. He acts as a trader and offers a unique magic ring. | In this area the player has his first encounter with [[Volo]]. He acts as a trader and offers a unique magic ring. | ||
===== Notable Loot ===== | =====Notable Loot===== | ||
Notable items obtained in this location, whether looted, purchased, or obtained as a quest reward: | Notable items obtained in this location, whether looted, purchased, or obtained as a quest reward: | ||
* {{SmallIcon|Cherished Locket Icon.png}} [[Komira's Locket]] | *{{SmallIcon|Cherished Locket Icon.png}} [[Komira's Locket]] | ||
* {{SmallIcon|Idol of Silvanus Icon.png}} [[Idol of Silvanus]] | *{{SmallIcon|Idol of Silvanus Icon.png}} [[Idol of Silvanus]] | ||
* {{SmallIcon|The Whispering Promise Icon.png}}[[The Whispering Promise]] | *{{SmallIcon|The Whispering Promise Icon.png}}[[The Whispering Promise]] | ||
=== Secluded Cove === | |||
Entry to the [[Secluded Cove]] is exclusively through the Sacred Pool, via the pathway at X: 298 Y:542. | |||
=== Emerald Grove === | ===Emerald Grove === | ||
[[File:Emerald Grove.jpg|thumb|right|The Emerald Grove]] | [[File:Emerald Grove.jpg|thumb|right|The Emerald Grove]] | ||
Main entry to the Emerald Grove is through a door inside the [https://bg3.wiki/wiki/Druid_Grove#Sacred_Pool Sacred Pool] at X:224 Y:528. | |||
[[ | [[Kagha]] and [[Arabella]] can be found here. | ||
===== Notable Loot ===== | =====Notable Loot===== | ||
Notable items obtained in this location, whether looted, purchased, or obtained as a quest reward: | Notable items obtained in this location, whether looted, purchased, or obtained as a quest reward: | ||
* {{SmallIcon|Broodmothers Revenge Icon.png}} [[Broodmother's Revenge]] | * {{SmallIcon|Broodmothers Revenge Icon.png}} [[Broodmother's Revenge]] | ||
* {{SmallIcon|Pale Oak Staff Icon.png}} [[Pale Oak]] | *{{SmallIcon|Pale Oak Staff Icon.png}} [[Pale Oak]] | ||
=== Servant's Quarters === | |||
Main entry to the Servant's Quarters is through a door in the Emerald Grove at X:-464 Y:-13. | |||
[[Marcoryl]] can be found in this small room. | |||
=== Druid's Chambers === | |||
Main entry to the Druid's Chambers is through a door in the Emerald Grove at X:-448 Y:-13. | |||
[[Nettie]] can normally be found here. | |||
=== Enclave Library === | |||
Main entry to the Enclave Library is granted by [[Nettie]] through a door in the Druid's Chambers at X:-440 Y:9. | |||
Alternate entry to the Enclave Library is through the [[Underground Passage]] door at X:-408 Y:-186 | |||
=== Hidden Vault === | ==== Enclave Library Puzzle ==== | ||
The center of the Enclave Library is a large wolf statue surrounded by four pedestals. One of the pedestals is missing a tablet, the [[Rune of the Wolf]]. You must obtain the missing tablet to complete this puzzle. | |||
{{SpoilerBox| [[Rune of the Wolf]] is obtained by speaking with [[Rath]] after completing [[Save the First Druid]], by pickpocketing, or by looting his corpse. Once the tablet is in your possession, click on the empty pedestal to combine the tablet with it. Next, activate each pedestal by interacting with them. When each tablet is lit up, the floor around the statue will transform into a staircase leading to the [[Hidden Vault]]. | |||
}} | |||
===Hidden Vault === | |||
[[File:Hidden Vault.jpg|thumb|right|The Hidden Vault]] | [[File:Hidden Vault.jpg|thumb|right|The Hidden Vault]] | ||
Main entry to the the Hidden Vault is in the Enclave Library, and requires completing the Enclave Library Puzzle. | |||
===== Notable Loot ===== | =====Notable Loot ===== | ||
Notable items obtained in this location, whether looted, purchased, or obtained as a quest reward: | Notable items obtained in this location, whether looted, purchased, or obtained as a quest reward: | ||
* {{SmallIcon|Robe of Summer Icon.png}} [[Robe of Summer]] | *{{SmallIcon|Robe of Summer Icon.png}} [[Robe of Summer]] | ||
* {{SmallIcon|Glaive PlusOne Icon.png}} [[Sorrow]] | *{{SmallIcon|Glaive PlusOne Icon.png}} [[Sorrow]] | ||
* {{SmallIcon|Wyvern Poison Icon.png}} [[Wyvern Poison]] | *{{SmallIcon|Wyvern Poison Icon.png}} [[Wyvern Poison]] | ||
== Related Quests == | ==Related Quests== | ||
*[[Save Arabella]] | *[[Save Arabella]] | ||
*[[Investigate the Beach]] | *[[Investigate the Beach]] | ||
| Line 125: | Line 143: | ||
**[[Save the First Druid]] | **[[Save the First Druid]] | ||
*[[Find the Nightsong]] | *[[Find the Nightsong]] | ||
* [[Save the Goblin Sazza]] | *[[Save the Goblin Sazza]] | ||
* [[Steal the Sacred Idol]] | *[[Steal the Sacred Idol]] | ||
== External Links == | ==External Links== | ||
* {{FRWiki|Emerald Grove|long}} | *{{FRWiki|Emerald Grove|long}} | ||
Revision as of 21:10, 11 August 2023
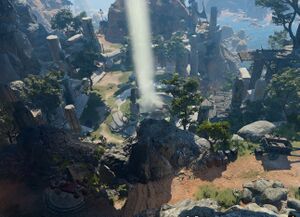
The Druid Grove is a Location within the Wilderness in Chapter One.
This location is also called Silvanus' Grove or Emerald Grove.
Waypoints
This location contains the following Waypoint:
- Silvanus' Grove (X:246, Y:423)
Related Locations
Notable Loot
Notable items obtained in this location, whether looted, purchased, or obtained as a quest reward:
 Cap of Curing
 Gloves of Power
 Soul Coin
 Amulet of Silvanus (hidden underneath a rock southeast of the Sacred Pool)
Sub Areas
The Druid Grove spans is a large area and also contains several notable sub-areas:
The Hollow
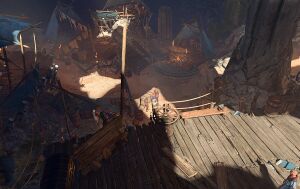
Nearly all of the Tiefling refugees that have taken up temporary residence in the Druid Grove are located here. The Hollow is above the Sacred Pool in elevation.
The Tiefling Hideout can be accessed from The Hollow.
Companions
- Shadowheart can be found and recruited here if not previously recruited on the Nautiloid or in the Ravaged Beach.
- Wyll can be found and recruited in The Hollow.
Traders
Several traders can be found in the Hollow.
Notable Loot
Notable items obtained in this location, whether looted, purchased, or obtained as a quest reward:
 Amulet of Elemental Torment
 Corellon's Grace
 Dragon's Grasp
 Rain Dancer
 Scale Mail Armour +1
 Spellthief
Hidden Treasure
- The haystack by the two oxen tended by Toron. Need to pass a Perception check to be able to interact with it.
- Past the oxen, where Doni loiters, there's a pair of Metallic Gloves lying on the horse cart. They can be picked up without it counting as stealing. The locked Travel-Worn Chest right aside the cart is also worth checking.
- Behind the Storage shed where you find Pandirna there's a pouch on the ground with a good amount of riches. You can access this from both sides: either break into the storage shed somehow, climb up the stack of wooden crates to the roof, then jump to the area behind it; or go to the Makeshift Prison area where the caged goblin is, jump down to a stone path to the right, and keep jumping until you reach the area behind the shed. Caution: there's exploding plants along this path that are only revealed by an ability check.
Secluded Chamber
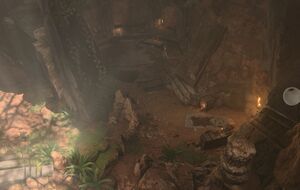
Located past a large door in the northern Hollow. After his confrontation with Aradin, Zevlor will retreat to this location alongside Tilses.
The Secluded Chamber contains a ladder that can be found by climbing up several slabs of stone. This ladder leads back out into the Wilderness, onto a cliff overlooking The Risen Road to the west.
Notable Loot
Notable items obtained in this location, whether looted, purchased, or obtained as a quest reward:
Sacred Pool
Main entry to the Sacred Pool is by descending the staircase at X:251 Y:547.
Alternate entry is through the elevator, which is blocked by a sleeping bear.
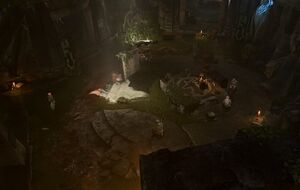
The Sacred Pool is the ritual area of the druids, whom are initially using the Idol of Silvanus to perform the Rite of Thorns. Outsiders are not welcome here.
Interactions
If the player approaches from the main entry, they will encounter a confrontation between Locke, Komira, and some of the druids, who are currently holding the two Tieflings' daughter, Arabella, against her will. This will grant the player the Save Arabella quest.
After this confrontation resolves, one of the druids will receive a message from Kagha, and inform the player that she wishes to speak with them, granting the player's party access to the Sacred Pool.
In this area the player has his first encounter with Volo. He acts as a trader and offers a unique magic ring.
Notable Loot
Notable items obtained in this location, whether looted, purchased, or obtained as a quest reward:
Secluded Cove
Entry to the Secluded Cove is exclusively through the Sacred Pool, via the pathway at X: 298 Y:542.
Emerald Grove
Main entry to the Emerald Grove is through a door inside the Sacred Pool at X:224 Y:528.
Kagha and Arabella can be found here.
Notable Loot
Notable items obtained in this location, whether looted, purchased, or obtained as a quest reward:
Servant's Quarters
Main entry to the Servant's Quarters is through a door in the Emerald Grove at X:-464 Y:-13.
Marcoryl can be found in this small room.
Druid's Chambers
Main entry to the Druid's Chambers is through a door in the Emerald Grove at X:-448 Y:-13.
Nettie can normally be found here.
Enclave Library
Main entry to the Enclave Library is granted by Nettie through a door in the Druid's Chambers at X:-440 Y:9.
Alternate entry to the Enclave Library is through the Underground Passage door at X:-408 Y:-186
Enclave Library Puzzle
The center of the Enclave Library is a large wolf statue surrounded by four pedestals. One of the pedestals is missing a tablet, the Rune of the Wolf. You must obtain the missing tablet to complete this puzzle.
![]() Spoiler warning! This section reveals details about the story of Baldur's Gate 3.
Spoiler warning! This section reveals details about the story of Baldur's Gate 3.
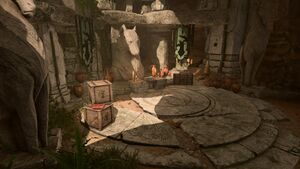
Hidden Vault
Main entry to the the Hidden Vault is in the Enclave Library, and requires completing the Enclave Library Puzzle.
Notable Loot
Notable items obtained in this location, whether looted, purchased, or obtained as a quest reward:
Related Quests
- Save Arabella
- Investigate the Beach
- Remove the Parasite
- Save the Refugees
- Find the Nightsong
- Save the Goblin Sazza
- Steal the Sacred Idol
