Inner Sanctum
More actions


“The power to... protect my people... sanctuary...„
Access edit

The Inner Sanctum[1] is accessed through the stone door in the Sacred Pool at X: 223 Y: 525. It can also be accessed from the hidden entrance through the Underground Passage (see below).
Overview edit
The Inner Sanctum of the Emerald Grove comprises a series of vast circular caverns divided by either movable stone doors or simple archways.
The central chamber features four large frescos on the walls, each corresponding to a plaque with a poetic description on a pillar (see below for interactions).
To the northwest, an archway leads from the central cavern to the Servants' Quarters. To the north, a stone door allows access into the Druids' Chambers. At the far end of the Druids' Chambers, a locked stone door leads to the Enclave Library. Four pedestals with rune slots surround a statue in the centre of the library, concealing stairs descending to the Hidden Vault of the grove.
Another stone door at the other end of the library opens into an antechamber with some poison vents, leading into the Underground Passage.
Chambers edit
Central cavern edit
Upon first entering the Inner Sanctum, a cutscene triggers, where ![]() Kagha, the acting leader of the druids, is deciding the fate of a tiefling child,
Kagha, the acting leader of the druids, is deciding the fate of a tiefling child, ![]() Arabella. Kagha's pet viper,
Arabella. Kagha's pet viper, ![]() Teela, guards and threatens the girl. If the quest
Teela, guards and threatens the girl. If the quest ![]() Save Arabella has not already been activated, it is added to the journal at this moment.
Save Arabella has not already been activated, it is added to the journal at this moment.
The player character may intervene to save Arabella. If they do nothing, Arabella tries to escape, and Teela pursues and kills her. Convincing Kagha to free Arabella grants the following inspirations:[2]
 Not On My Watch (
 Urchin background)
- Snake Whisperer (
 Folk Hero background)
![]() Druid characters have unique options within the dialogue to convince not only Kagha, but Teela herself to relent. If successful, Teela then makes Kagha change her mind as well.
Druid characters have unique options within the dialogue to convince not only Kagha, but Teela herself to relent. If successful, Teela then makes Kagha change her mind as well.
After Arabella's fate is resolved, the party can explore the cavern and speak to the druids inside. The characters with dialogue in this area are Kagha and ![]() Rath, as well as
Rath, as well as ![]() Silver the wolf if using
Silver the wolf if using ![]() Speak with Animals. Depending on their choices, the party may progress the quests
Speak with Animals. Depending on their choices, the party may progress the quests ![]() Find a Cure and
Find a Cure and ![]() Save the Refugees, and initiate the quests
Save the Refugees, and initiate the quests ![]() Save the First Druid and
Save the First Druid and ![]() Investigate Kagha.
Investigate Kagha.
If ![]() Shadowheart is in the party, when first approaching Silver[verify] she rolls a
Shadowheart is in the party, when first approaching Silver[verify] she rolls a ![]() Wisdom saving throw. If failed, she prompts a dialogue with the player character, which can progress her
Wisdom saving throw. If failed, she prompts a dialogue with the player character, which can progress her ![]() companion quest.
companion quest.
If speaking to Kagha, she confirms her resolve to finish the Rite of Thorns and states the player character must offer their services as guards to ![]() Zevlor and the tieflings on the road to Baldur's Gate. Until all quests concerning her are resolved in any way, Kagha stays in the Inner Sanctum, with three named
Zevlor and the tieflings on the road to Baldur's Gate. Until all quests concerning her are resolved in any way, Kagha stays in the Inner Sanctum, with three named ![]() rats remaining close by her side.
rats remaining close by her side.
While investigating Kagha's motives, the party may discover she has been swayed to the Shadow Druids' cause. If exposed, the rats – ![]() Olodan,
Olodan, ![]() Wren, and
Wren, and ![]() Pinta – reveal themselves as wildshaped Shadow Druids, and another cutscene triggers, which eventually results in a fight. During the conversation, Kagha can be convinced to reconsider, in which case she joins the party and the other druids as an ally against the Shadow Druids. Otherwise, she joins the Shadow Druids and must be defeated. Convincing Kagha to abandon the Shadow Druids is one of two ways to earn the
Pinta – reveal themselves as wildshaped Shadow Druids, and another cutscene triggers, which eventually results in a fight. During the conversation, Kagha can be convinced to reconsider, in which case she joins the party and the other druids as an ally against the Shadow Druids. Otherwise, she joins the Shadow Druids and must be defeated. Convincing Kagha to abandon the Shadow Druids is one of two ways to earn the ![]() A Story for the Ages inspiration for characters with the
A Story for the Ages inspiration for characters with the ![]() Entertainer background (the second one is described in the Frescos section below).
Entertainer background (the second one is described in the Frescos section below).
While speaking with Kagha and the Shadow Druids, choosing the option "Take the grove - I won't stand in your way" is considered an oathbreaking action for ![]() Paladins of any Oath.
Paladins of any Oath.
After the Shadow Druids are defeated, if a ![]() Druid character is in the party, Kagha (or Rath if Kagha dies in the battle) awards them with the
Druid character is in the party, Kagha (or Rath if Kagha dies in the battle) awards them with the ![]() Pale Oak and gives them the title Faithwarden. If the Druid character has the
Pale Oak and gives them the title Faithwarden. If the Druid character has the ![]() Noble background, this grants them the
Noble background, this grants them the ![]() Entitled inspiration as well, if it was not already obtained.
Entitled inspiration as well, if it was not already obtained.
Throughout the quest ![]() Save the Refugees, Zevlor may ask the party to kill Kagha. Doing this (regardless of killing the Shadow Druids) grants the
Save the Refugees, Zevlor may ask the party to kill Kagha. Doing this (regardless of killing the Shadow Druids) grants the ![]() Serpent's Bounty inspiration for characters with the
Serpent's Bounty inspiration for characters with the ![]() Criminal background.
Criminal background.
Servants' Quarters edit

To the northwest of the central cavern lies a smaller room divided by a movable stone door at X: -464 Y: -13. It features several rows of Stone Tablets and a primitive desk made from a stone slab with the ![]() Rite of Thorns scroll and
Rite of Thorns scroll and ![]() The Emerald Enclave: Tenets on it. All containers and lootable items (except the rite scroll) in this area are red-outlined. One of the druids,
The Emerald Enclave: Tenets on it. All containers and lootable items (except the rite scroll) in this area are red-outlined. One of the druids, ![]() Marcoryl, checks around this room from time to time, accompanied by Silver. However, any means of stealth or concealment, such as the spells
Marcoryl, checks around this room from time to time, accompanied by Silver. However, any means of stealth or concealment, such as the spells ![]() Fog Cloud or
Fog Cloud or ![]() Darkness, can be enough to evade their notice.
Darkness, can be enough to evade their notice.
Kagha's personal chest is hidden behind the stone bookcase at X: -487 Y: -7. Inside it is a book titled ![]() Faldorn's Canticle: The Shadow Druids' Doctrine. Reading the book progresses the quest
Faldorn's Canticle: The Shadow Druids' Doctrine. Reading the book progresses the quest ![]() Investigate Kagha (or initiates it if it wasn't received earlier) and earns the
Investigate Kagha (or initiates it if it wasn't received earlier) and earns the ![]() Secrets of the Shadow Druids inspiration for characters with the
Secrets of the Shadow Druids inspiration for characters with the ![]() Sage background.
Sage background.
Druids' Chambers edit

To the north of the central cavern is a large chamber behind another movable stone door at X: -448 Y: -13. The chamber is brightly lit with torches, with several stone beds and work desks placed along the walls. A Cauldron of Boiling Theriac stands between alembics and distillers.
The healer ![]() Nettie can be found here, tending to a
Nettie can be found here, tending to a ![]() Wounded Bird. After casting a spell[3], Nettie leaves the bird alone and is ready to speak with the player character. After explaining their problem, Nettie invites them into the Enclave Library, where she intends to poison them; she sees death as the only solution to prevent them from turning into an illithid. However, she can be convinced to give the party a chance or relent while trying to poison them (see Nettie's page for all interactions).
Wounded Bird. After casting a spell[3], Nettie leaves the bird alone and is ready to speak with the player character. After explaining their problem, Nettie invites them into the Enclave Library, where she intends to poison them; she sees death as the only solution to prevent them from turning into an illithid. However, she can be convinced to give the party a chance or relent while trying to poison them (see Nettie's page for all interactions).
A player character using ![]() Speak with Animals can also talk to the exhausted bird Nettie healed. They can let her rest or prod her wounded wing, forcing her to speak and subsequently die of exhaustion. Doing this is considered an oathbreaking action for
Speak with Animals can also talk to the exhausted bird Nettie healed. They can let her rest or prod her wounded wing, forcing her to speak and subsequently die of exhaustion. Doing this is considered an oathbreaking action for ![]() Paladins of any Oath.
Paladins of any Oath. ![]() Dark Urge characters have a unique dialogue option to "tear her wings off". Doing so grants them the
Dark Urge characters have a unique dialogue option to "tear her wings off". Doing so grants them the ![]() Indulge Thine Appetites inspiration, if it was not yet obtained.
Indulge Thine Appetites inspiration, if it was not yet obtained.
Near one of the stone beds lies a ![]() Druid Notebook. Its text contains one of the first mentions of the Shadow Curse and its effects.
Druid Notebook. Its text contains one of the first mentions of the Shadow Curse and its effects.
The Cauldron of Boiling Theriac used to be part of the quest ![]() Get Help from Healer Nettie, necessary to brew an antidote to the potent poison Nettie applies to the player character if they refuse to commit suicide in case of ceremorphosis; this was reworked in Patch 1.
Get Help from Healer Nettie, necessary to brew an antidote to the potent poison Nettie applies to the player character if they refuse to commit suicide in case of ceremorphosis; this was reworked in Patch 1.
Enclave Library edit

The Enclave Library is accessible through a locked stone door in the Druids' Chambers. The entryway requires a ![]() DC 10 Perception check to spot, and is impossible to lockpick. If the player character tells
DC 10 Perception check to spot, and is impossible to lockpick. If the player character tells ![]() Nettie they are infected with an illithid tadpole as part of the quest
Nettie they are infected with an illithid tadpole as part of the quest ![]() Find a Cure, she unlocks this door herself. Otherwise, a party member with the
Find a Cure, she unlocks this door herself. Otherwise, a party member with the ![]() Key of the Ancients equipped must interact with the door to open it.[4]
Key of the Ancients equipped must interact with the door to open it.[4]
The library has another work desk at X: -444 Y: 15; several items and notes on it belong to the missing First Druid ![]() Halsin. A vial with a
Halsin. A vial with a ![]() Mind Flayer Parasite Specimen inside it is immediately highlighted to the player character by the Dream Guardian.[5] An adjacent stone slab has been turned into a makeshift autopsy table upon which rests a
Mind Flayer Parasite Specimen inside it is immediately highlighted to the player character by the Dream Guardian.[5] An adjacent stone slab has been turned into a makeshift autopsy table upon which rests a ![]() Dissected Drow.
Dissected Drow.
Small alcoves to the north, west, and east contain multiple rows of Stone Tablets akin to bookshelves. They contain random common books and scrolls. Several ![]() Bullywug Trumpets grow around the library. As in other parts of the Inner Sanctum, most lootable containers and items in the library are red-outlined.
Bullywug Trumpets grow around the library. As in other parts of the Inner Sanctum, most lootable containers and items in the library are red-outlined.
A large wolf statue stands in the middle of the chamber, surrounded by pedestals with rune slots in the four cardinal directions. One of the ![]() runes is missing. After returning the missing rune and interacting with each pedestal, the party can access the Hidden Vault beneath the library (see below).
runes is missing. After returning the missing rune and interacting with each pedestal, the party can access the Hidden Vault beneath the library (see below).
At the far end of the room, at X: -446 Y: 30, is another locked stone door. It requires a ![]() DC 5 Perception check to notice and, as with the other door in the library, can only be opened if the Key of the Ancients is equipped by a party member. The small area behind it is trapped with two vents releasing
DC 5 Perception check to notice and, as with the other door in the library, can only be opened if the Key of the Ancients is equipped by a party member. The small area behind it is trapped with two vents releasing ![]() poison and opens into the Underground Passage at X: -411 Y: -186.
poison and opens into the Underground Passage at X: -411 Y: -186.
Hidden Vault edit

The Hidden Vault can be accessed through the Enclave Library. Access requires the ![]() Rune of the Wolf, which can be obtained from Rath as a reward for completing
Rune of the Wolf, which can be obtained from Rath as a reward for completing ![]() Rescue the Druid Halsin, or by looting or pickpocketing him. It needs to be placed in the empty slot and activated together with the three other runes to open a spiral staircase descending into the vault.
Rescue the Druid Halsin, or by looting or pickpocketing him. It needs to be placed in the empty slot and activated together with the three other runes to open a spiral staircase descending into the vault.
On the main altar underneath the wolf's head statue lies ![]() Sorrow and a
Sorrow and a ![]() Druid Note. Nearby crates contain an assortment of elixirs, poisons, potions, and scrolls. A trunk to the side contains the
Druid Note. Nearby crates contain an assortment of elixirs, poisons, potions, and scrolls. A trunk to the side contains the ![]() Robe of Summer.
Robe of Summer.
Frescos edit
| “ |
|
„ |
| — Inner Sanctum Frescos |
-
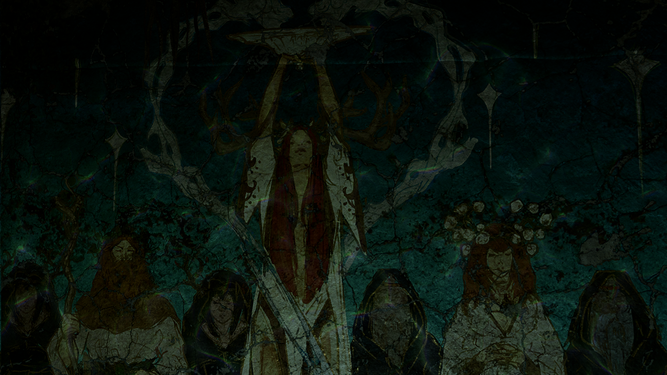 Wellspring. Druids gathering in Silvanus' name
 -
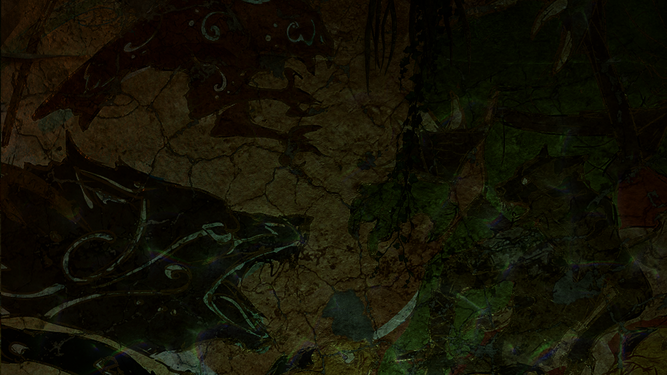 Wild. Druids and Beasts fighting together against monsters


-
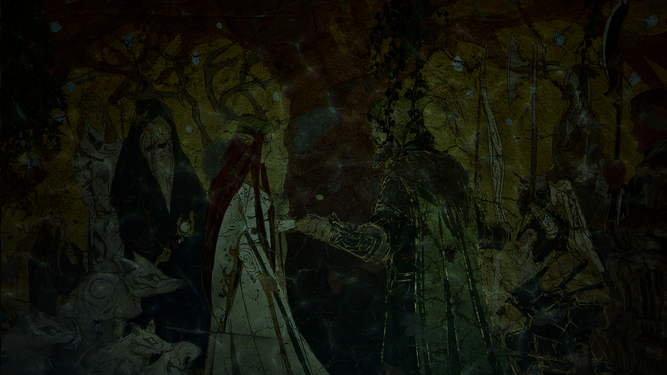 Union. Druids forge an alliance with Harpers
 -
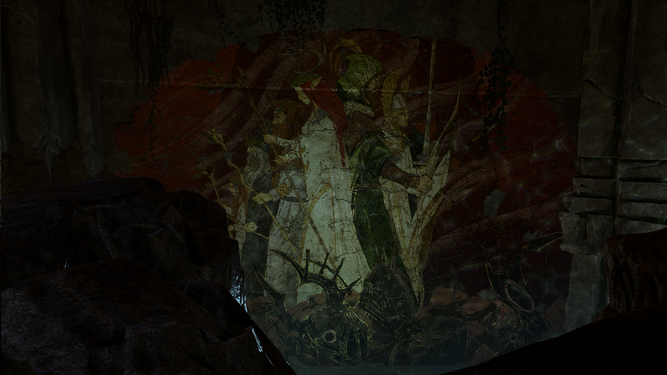 Fallen. A broken Sharran helmet at the feet of the druids


The frescos start from the west side of the room and continue along the eastern wall. They form a chain of illustrations depicting the history and legacy of the Emerald Grove. A variety of Ability Checks can be made to decipher the story from the frescos:
- X: -470 Y: -37 Wild. Requires a
 DC 10 Religion check
 - X: -470 Y: -36 Wellspring. Requires a DC 10 Investigation check
- X: -446 Y: -34 Union. Requires a DC 5 History check
- X: -450 Y: -28 Fallen. Requires a DC 10 Religion check
Characters with certain classes can recognise what a mural depicts without a skill check and also receive unique narration:
 Druids for the first two murals
 Bards for the third mural
 Paladins and
  Clerics (including
  Shadowheart) for the last mural
Succeeding all checks grants the ![]() Roots of the Grove inspiration for characters with the
Roots of the Grove inspiration for characters with the ![]() Sage background. However, it is not necessary to pass all the checks with a single party member to earn the inspiration point, nor does the one with the Sage background need to pass the checks. Recovering the whole story also earns the
Sage background. However, it is not necessary to pass all the checks with a single party member to earn the inspiration point, nor does the one with the Sage background need to pass the checks. Recovering the whole story also earns the ![]() A Story for the Ages inspiration for characters with the
A Story for the Ages inspiration for characters with the ![]() Entertainer background (the second possible way to obtain it). Understanding all the frescos can provide unique dialogue options and additional leverage in dealing with Kagha when the Shadow Druids are revealed.
Entertainer background (the second possible way to obtain it). Understanding all the frescos can provide unique dialogue options and additional leverage in dealing with Kagha when the Shadow Druids are revealed.
Examining the grove murals with ![]() Shadowheart in the party can progress her personal quest, either
Shadowheart in the party can progress her personal quest, either ![]() companion or
companion or ![]() origin, but only if the party already know she is a disciple of
origin, but only if the party already know she is a disciple of ![]() Shar. Seeing the murals, she recalls the Dark Justiciars, an order of elite Sharran warriors, and her dreams of becoming one herself.
Shar. Seeing the murals, she recalls the Dark Justiciars, an order of elite Sharran warriors, and her dreams of becoming one herself.
Characters edit
Emerald Grove Druids edit
Shadow Druids edit
Animals edit
Other edit
Related Quests edit
Connected Locations edit
Loot edit
Notable items obtained in this location, whether looted, purchased, or obtained as a quest reward:
 Broodmother's Revenge
 Key of the Ancients
 Mind Flayer Parasite Specimen - on Halsin's desk
 Pale Oak - available only to Druid characters
 Portrait of Lohse - on the stone shelf at X: -431 Y: -9[6]
 Robe of Summer
 Sorrow
 Wyvern Toxin
Related Literature edit
 Detailed Report
 Drow's Letter
 Druid Note
 Druid Notebook
 Faldorn's Canticle: The Shadow Druids' Doctrine
 Grimy Report
 Grove Annals
- Grove Artefacts
 Half-Torn Note
- Halsin's Journal, Vol I
 Hastily Written Note
 Logbook XII: 1371
 On Antidotes
 Notes on Drow Parasite
 Rite of Thorns
- Sightings Record
 Study of the Sword Coast
- The Emerald Enclave: Tenets
Notes edit
- ↑ There is no such location on the in-game map. The area beyond the stone door is marked as Emerald Grove. "Inner Sanctum" is a term used by the wiki to help disambiguate.
- ↑ The inspiration for Urchins is granted immediately on saving Arabella, while for Folk Heroes, it is granted only after speaking to her parents, Locke and Komira.
- ↑ Any player character with healing spells or healing potions can also cure the bird.
- ↑ This circlet can be obtained from either
 Findal or
  Nettie.
- ↑ The exact statement depends on how much the player character currently knows about the issue. The Dream Guardian chimes in regardless of whether their first appearance in a dream has already occurred.
- ↑ Available only if the Digital Deluxe Upgrade was purchased