Defiled Temple: Difference between revisions
No edit summary |
HiddenDragon (talk | contribs) mNo edit summary |
||
| Line 49: | Line 49: | ||
*{{MdRarityItem|Amulet of Misty Step}} in a gilded chest behind Polma {{coords|386|8}} | *{{MdRarityItem|Amulet of Misty Step}} in a gilded chest behind Polma {{coords|386|8}} | ||
{{Goblin Camp}} | |||
[[Category:Locations]][[Category:Act One Locations]] | [[Category:Locations]] | ||
[[Category:Act One Locations]] | |||
Revision as of 08:40, 2 June 2024
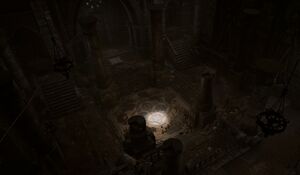
The Defiled Temple (also known as The Temple of Selûne) is a location in Act One that serves as one of the entrances to the Underdark. It is currently being used as Gut's quarters, and Polma guards it. It can be accessed through a door in the Shattered SanctumX: 253 Y: -7.
Spoiler warning: The following content contains unhidden spoilers. Read at your own risk. |
Overview
The Defiled Temple can be accessed through its main door in Priestess Gut's quarters, through a cave mouth in the spider pen, or through a small hole in the Zhentarim's stock room.
It is an old temple dedicated to Selûne, which has since been abandoned.
Connected locations
![]() Underdark (Selûnite Outpost) X: 441 Y: 98
Underdark (Selûnite Outpost) X: 441 Y: 98
Gut's room
Inside a small bedroom is Polma (and Gut if the player was knocked out by her). In a gilded chest near the bed is an Amulet of Misty Step X: 386 Y: 8. As well, a Selûnite Journal is found nearby, which gives information on the moon tile puzzle further in the temple.
Moon tile puzzle
A long descent down into the Underdark can be revealed by solving a puzzle in this room. In the north-eastern section of the Defiled Temple is a room with four tiles in the centre. The puzzle is solved by rotating the tiles such that the new moon icons (black circles) are all on the southern-most ring.
- The puzzle can be solved by interacting with the tiles in the following sequence: (note that this is only one of many possible solutions)
![]() Spoiler warning! This section reveals details about the story of Baldur's Gate 3.
Spoiler warning! This section reveals details about the story of Baldur's Gate 3.
- North
- West
- East
- East
- South
- South
- South
- West
- West
- Alternatively, there is a hidden lever in the north part of this room, near a set of stairs, that can be revealed with a Perception check X: 442 Y: 64. This lever can be Lockpicked to bypass the puzzle and open the way.
Points of interest
- Four Stone Discs X: 436 Y: 55
Notable characters
- Polma
- Priestess Gut (conditional)
Related quests
Notable loot
Notable items obtained in this location, whether looted, purchased, or obtained as a quest reward:
 Amulet of Misty Step in a gilded chest behind Polma X: 386 Y: 8
