Ad placeholder
Rosymorn Monastery: Difference between revisions
(→Roof: Clarified XP reward) |
|||
| (33 intermediate revisions by 7 users not shown) | |||
| Line 1: | Line 1: | ||
{{Location page | |||
| prefix = The | |||
| name = Rosymorn Monastery | |||
| alt name = | |||
| image = Screen Stained Glass Firewine Rosymorn Monastery.jpg | |||
| | | image description = Stained Glass Windows in a [[Firewine_Barrel|Firewine]] storage room. | ||
| | | act = one | ||
| | | summary = | ||
|north=Crèche Y'llek}} | | region prefix = the | ||
| region = Rosymorn Monastery Trail | |||
| north = Crèche Y'llek | |||
| west = | |||
| east = | |||
| south = Mountain Pass | |||
}} | |||
== Overview == | == Overview == | ||
=== Monastery doors === | |||
=== | When the party first approach the monastery gate, a cutscene plays. {{CharLink|Add'ath|Raider Add'ath}} and {{CharLink|Ith'dul|Warrior Ith'dul}} are moving a group of [[Halfling]] cultists ({{CharLink|Corliss Undertump}}, Mahrin, and Burrock) to the [[Crèche Y'llek|Crêche]] for interrogation by the Captain. Cultist Corliss attempts to flee and is shot in the back. If the raiders are allowed to proceed, the monastery gates will be magically locked behind them. Choosing to attack them leaves the gates open.{{ref|Apart from Corliss's corpse, unless defeated in combat, the cultists Burrock and Mahrin disappear regardless of whether they are saved or escorted inside.}} There are several other routes inside, including via the Firewine storage and Gremiska den. | ||
{{ | |||
[[ | |||
=== Firewine storage === | === Firewine storage === | ||
On the ground floor of the monastery {{Coords|45|37}}, are a group of [[Kobold Looter]]s, [[Kobold Scout|Scouts]] and [[Kobold Inventor|Inventors]] who have raided the | On the ground floor of the monastery {{Coords|45|37}}, are a group of [[Kobold Looter]]s, [[Kobold Scout|Scouts]] and [[Kobold Inventor|Inventors]] who have raided the Firewine storage of the monastery. Many are comatose and suffering from {{cond|Firewine Belly}}. Some Kobolds are hidden inside the {{SmRarityItem|Firewine Barrel|Firewine Barrels}} (identifiable by noises such as "*Gulp*" and "*Slurp*"), which can be destroyed if the party want to attack them. | ||
Entering in the storage room for the first time grants | Entering in the storage room for the first time grants [[Experience#Discovering_locations|95 experience]] at Level 6. | ||
=== Gremishka den === | === Gremishka den === | ||
On the first floor of the monastery {{Coords|43|30}}, a large pack of nine | On the first floor of the monastery {{Coords|43|30}}, a large pack of nine {{CharLink|Gremishka|Gremishkas}} are waiting in {{cond|Ambushing|ambush}} here, {{cond|Invisible|invisible}} to the naked eye. | ||
=== Roof === | === Roof === | ||
[[File:Screen Lathander Mural Rosymorn Monastery.jpg|thumb|200px|A mural of Lathander and his Holy Symbol, found next to the Eagle's Nest.]] | [[File:Screen Lathander Mural Rosymorn Monastery.jpg|thumb|200px|A mural of Lathander and his Holy Symbol, found next to the Eagle's Nest.]] | ||
On a terrace on the second floor of the monastery {{Coords|79|39}}, there is a nest guarded by an | On a terrace on the second floor of the monastery {{Coords|79|39}}, there is a nest guarded by an {{CharLink|Ancient Giant Eagle}} and a {{CharLink|Giant Eagle}}, next to a mysterious device covered in vines. | ||
On the eastern side, after a few jumps, there is a painted chest containing {{ | On the eastern side, after a few jumps, there is a painted chest containing {{SmRarityItem|Holy Lance Helm}}. | ||
Reaching the rooftop for the first time grants [[Experience#Discovering_locations|180 experience]] at Level 6, as a medium-sized location. | Reaching the rooftop for the first time grants [[Experience#Discovering_locations|180 experience]] at Level 6, as a medium-sized location. | ||
=== Dawnmasters memorial === | === Dawnmasters memorial === | ||
A room with a stained-glass window depicting four former Dawnmasters of '''Rosymorn Monastery''', and four plinths representing each of them {{Coords|75|75}}. | A room with a stained-glass window depicting four former Dawnmasters of '''Rosymorn Monastery''', and four plinths representing each of them {{Coords|75|75}}. The {{SmRarityItem|Dawnmaster's Crest}} can be found here after solving a puzzle, or picking the lock after a very difficult check. | ||
=== Statue of Lathander === | === Statue of Lathander === | ||
| Line 51: | Line 47: | ||
Crèche Y'llek is beneath the monastery, accessed by using a door at the bottom of a ramp on the west side of the room with the statue of Lathander. | Crèche Y'llek is beneath the monastery, accessed by using a door at the bottom of a ramp on the west side of the room with the statue of Lathander. | ||
=== | == Waypoints == | ||
This location contains the following [[waypoints]]{{SmallIcon|Waypoint Header Map Icon.png}}: | |||
* | * {{WpCo|Rosymorn Monastery|17|23}} | ||
* | |||
* | == Connected locations == | ||
* | [[File:Screen View South Building Rosymorn Monastery.jpg|thumb|200px|The courtyard, and south side of the monastery building]] | ||
* | *{{Loc|Crèche Y'llek}} | ||
*{{Loc|Rosymorn Monastery Trail}} | |||
== Characters == | |||
* {{MdCharLink|Corliss Undertump}} | |||
* {{MdCharLink|Add'ath|Raider Add'ath}} | |||
* {{MdCharLink|Ith'dul|Warrior Ith'dul}} | |||
== Creatures == | |||
* {{MdCharLink|Ancient Giant Eagle}} | |||
* {{MdCharLink|Giant Eagle}} | |||
* {{MdCharLink|Gremishka}} | |||
* {{MdCharLink|Kobold Inventor}} | |||
* {{MdCharLink|Kobold Looter}} | |||
* {{MdCharLink|Kobold Scout}} | |||
=== Available to Speak with Dead === | |||
* {{MdCharLink|Corliss Undertump|icon=Portrait_Ghost.png}} - Killed in front of the Rosymorn Monastery front doors. {{Coords|73|40}} | |||
=== Related quests === | === Related quests === | ||
* {{Quest|Find the Blood of Lathander}} | |||
*{{Quest|Find the Blood of Lathander}} | * {{Quest|Reclaim the Blue Jay's Nest}} | ||
*{{Quest|Reclaim the Blue Jay's Nest}} | * {{Quest|The Githyanki Warrior}} | ||
== Find the Blood of Lathander == | == Find the Blood of Lathander == | ||
| Line 68: | Line 81: | ||
Rosymorn Monastery has a puzzle that is part of the ''Find the Blood of Lathander'' quest that will allow the party to find one of the first Legendary items. There are three weapons around the Monastery that can be used to solve the puzzle: | Rosymorn Monastery has a puzzle that is part of the ''Find the Blood of Lathander'' quest that will allow the party to find one of the first Legendary items. There are three weapons around the Monastery that can be used to solve the puzzle: | ||
# The | # The {{SmRarityItem|Ceremonial Battleaxe}} behind an enchanted door on the second floor, guarded by a [[Guardian of Faith (creature)|Guardian of Faith]]. | ||
# The {{SmRarityItem|Ceremonial Mace}} can be found on a drunk Kobold on the first floor of the monastery. Alternatively, the {{SmRarityItem|Rusty Mace}} can be used. | |||
# The | # The {{SmRarityItem|Ceremonial Warhammer}} is on the roof of the monastery in the Eagle's Nest. If helping the Blue Jay to take back the nest as part of [[Blue Jay's Find]], he marks this location on the map. | ||
On the middle floor of the monastery there is a room with a giant stained-glass window on the floor and four stone tables with plaques that list the names of the Dawnmasters. Placing all four ceremonial weapons on the right stone table will open a hidden compartment with the | On the middle floor of the monastery there is a room with a giant stained-glass window on the floor and four stone tables with plaques that list the names of the Dawnmasters. Placing all four ceremonial weapons on the right stone table will open a hidden compartment with the {{SmRarityItem|Dawnmaster's Crest}} in it. | ||
* Warhammer — Dawnmaster Seed | * Warhammer — Dawnmaster Seed | ||
| Line 86: | Line 99: | ||
== Notable loot == | == Notable loot == | ||
Notable items obtained in this location, whether looted, purchased, or obtained as a quest reward: | Notable items obtained in this location, whether looted, purchased, or obtained as a quest reward: | ||
* {{MdRarityItem|Dawnmaster's Crest}} looted from the Dawnmasters memorial after placing all the ceremonial weapons | |||
* {{MdRarityItem|Holy Lance Helm}} can be found in a chest at {{Coords|120|35}} | |||
== Notes == | |||
{{notebegin}} | |||
{{reflist}} | |||
{{noteend}} | |||
== External links == | == External links == | ||
Latest revision as of 23:33, 24 November 2024
| Rosymorn Monastery Trail | ||||
| Crèche Y'llek | ||||
| ↑ | ||||
| Rosymorn Monastery | ||||
| ↓ | ||||
| Mountain Pass | ||||
Overview[edit | edit source]
Monastery doors[edit | edit source]
When the party first approach the monastery gate, a cutscene plays. Raider Add'ath and Warrior Ith'dul are moving a group of Halfling cultists ( Corliss Undertump, Mahrin, and Burrock) to the Crêche for interrogation by the Captain. Cultist Corliss attempts to flee and is shot in the back. If the raiders are allowed to proceed, the monastery gates will be magically locked behind them. Choosing to attack them leaves the gates open.[1] There are several other routes inside, including via the Firewine storage and Gremiska den.
Firewine storage[edit | edit source]
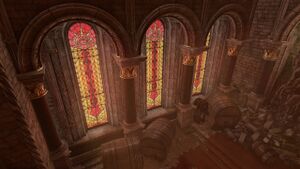
On the ground floor of the monastery X: 45 Y: 37, are a group of Kobold Looters, Scouts and Inventors who have raided the Firewine storage of the monastery. Many are comatose and suffering from . Some Kobolds are hidden inside the ![]() Firewine Barrels (identifiable by noises such as "*Gulp*" and "*Slurp*"), which can be destroyed if the party want to attack them.
Firewine Barrels (identifiable by noises such as "*Gulp*" and "*Slurp*"), which can be destroyed if the party want to attack them.
Entering in the storage room for the first time grants 95 experience at Level 6.
Gremishka den[edit | edit source]
On the first floor of the monastery X: 43 Y: 30, a large pack of nine Gremishkas are waiting in here, to the naked eye.
Roof[edit | edit source]
On a terrace on the second floor of the monastery X: 79 Y: 39, there is a nest guarded by an Ancient Giant Eagle and a Giant Eagle, next to a mysterious device covered in vines.
On the eastern side, after a few jumps, there is a painted chest containing ![]() Holy Lance Helm.
Holy Lance Helm.
Reaching the rooftop for the first time grants 180 experience at Level 6, as a medium-sized location.
Dawnmasters memorial[edit | edit source]
A room with a stained-glass window depicting four former Dawnmasters of Rosymorn Monastery, and four plinths representing each of them X: 75 Y: 75. The ![]() Dawnmaster's Crest can be found here after solving a puzzle, or picking the lock after a very difficult check.
Dawnmaster's Crest can be found here after solving a puzzle, or picking the lock after a very difficult check.
Statue of Lathander[edit | edit source]
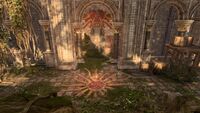
In the northern part of the ground floor is a cloister-like open room with a statue of Lathander at its center. The room is behind the big closed Rosymorn Monastery Doors, which are impossible to lockpick. To access the room, the party can make their way on the crumbling stairs on the eastern side of the second floor. The party then can destroy a barricade on the wall to find an Oak door, which opens in the room. Entering in the room for the first time grants 280 experience.
Crèche Y'llek[edit | edit source]
Crèche Y'llek is beneath the monastery, accessed by using a door at the bottom of a ramp on the west side of the room with the statue of Lathander.
Waypoints[edit | edit source]
This location contains the following waypoints![]() :
:
Connected locations[edit | edit source]
Characters[edit | edit source]
Creatures[edit | edit source]
Available to Speak with Dead[edit | edit source]
- Corliss Undertump - Killed in front of the Rosymorn Monastery front doors. X: 73 Y: 40
Related quests[edit | edit source]
Find the Blood of Lathander[edit | edit source]
Rosymorn Monastery has a puzzle that is part of the Find the Blood of Lathander quest that will allow the party to find one of the first Legendary items. There are three weapons around the Monastery that can be used to solve the puzzle:
- The
 Ceremonial Battleaxe behind an enchanted door on the second floor, guarded by a Guardian of Faith.
 - The
 Ceremonial Mace can be found on a drunk Kobold on the first floor of the monastery. Alternatively, the
  Rusty Mace can be used.
 - The
 Ceremonial Warhammer is on the roof of the monastery in the Eagle's Nest. If helping the Blue Jay to take back the nest as part of Blue Jay's Find, he marks this location on the map.
On the middle floor of the monastery there is a room with a giant stained-glass window on the floor and four stone tables with plaques that list the names of the Dawnmasters. Placing all four ceremonial weapons on the right stone table will open a hidden compartment with the ![]() Dawnmaster's Crest in it.
Dawnmaster's Crest in it.
- Warhammer — Dawnmaster Seed
- Mace — Dawnmaster Stockhold
- Battleaxe — Dawnmaster Vaseid
- Longsword — Dawnmaster Welkinglory (already in place)
Interactions[edit | edit source]
- Crumbling Shrine X: -18 Y: 23 - Offerings and a letter have been left here by pilgrims.
- Cable Car Landing X: -6 Y: 3 - After fixing it, the cable car here provides a shortcut to the top of the cliffs.
- Blue Jay's Find X: -5 Y: -29
Notable loot[edit | edit source]
Notable items obtained in this location, whether looted, purchased, or obtained as a quest reward:
 Dawnmaster's Crest looted from the Dawnmasters memorial after placing all the ceremonial weapons
 Holy Lance Helm can be found in a chest at X: 120 Y: 35
Notes[edit | edit source]
- ↑ Apart from Corliss's corpse, unless defeated in combat, the cultists Burrock and Mahrin disappear regardless of whether they are saved or escorted inside.


