Ad placeholder
Abandoned Cistern

| Undercity | ||||
| Abandoned Cistern | → | Lower City Sewers | ||

“If you deal efficiently with the cashguards, there may be time to gather additional funds before we withdraw. Bring everything to the Cistern in the Sewers.„
Overview[edit section | visual editor]

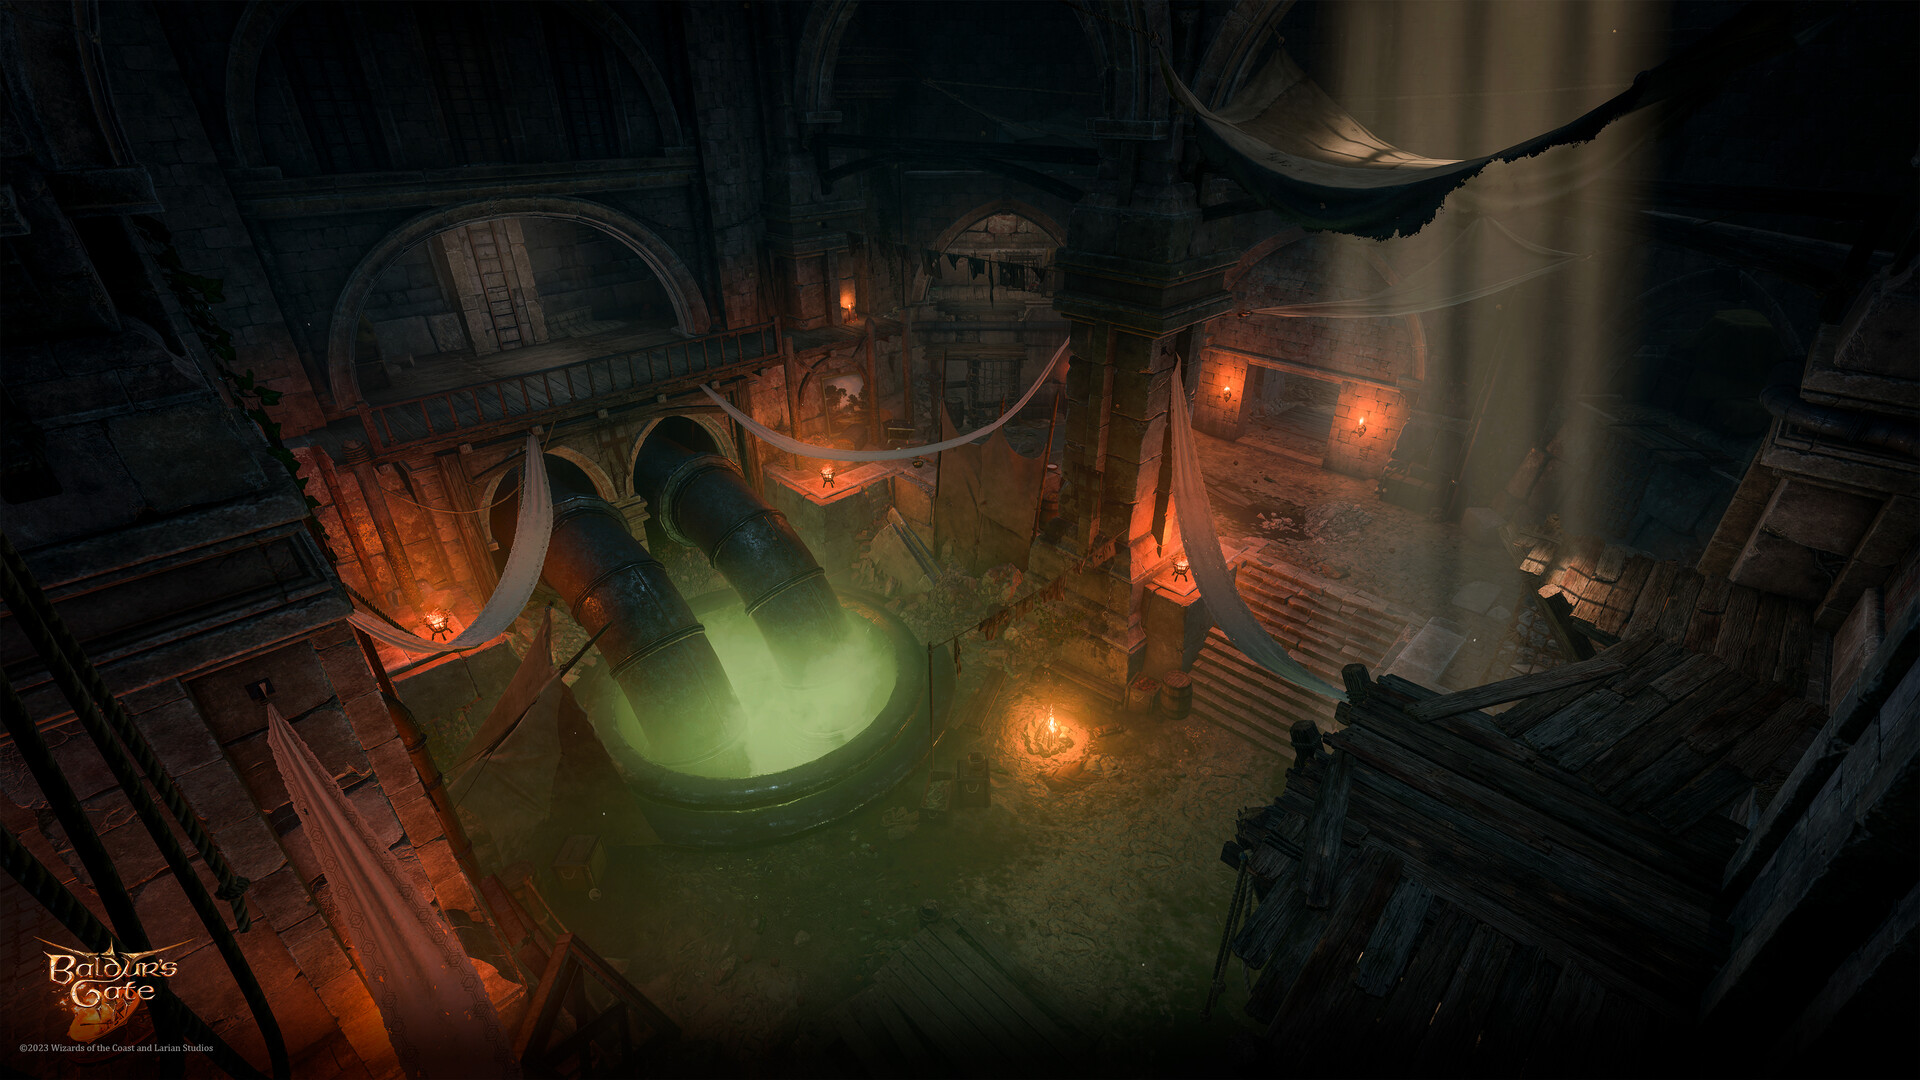
The Abandoned Cistern lies underneath Baldur's Gate and is part of its Undercity. It is the westernmost part of the Lower City Sewers and shares a similar aesthetics. It serves as mud-setting pit for the sewer filth, separated from the other drainage by a system of sluice gates and valves.
During the game the Abandoned Cistern serves as a hideout for the leader of a newly-sprung bandit gang, who goes by the name of the 
Access[edit section | visual editor]
The Cistern can be accessed in two ways:
- From the Lower City Sewers – the Abandoned Cistern can be reached via a hall with a large pipe surrounded with


- From the basement of a gardener's storage at Lady Jannath's Estate, the door is labeled "Keep Out", near X: -250 Y: -90. Inside is a hidden movable wall, which opens after applying weight to the two Marble Plates in opposite sides of the room. In the next room is the Ornate Wooden Hatch leading into the Cistern. The second room is trapped with a Blast Mine, and several

Building layout[edit section | visual editor]
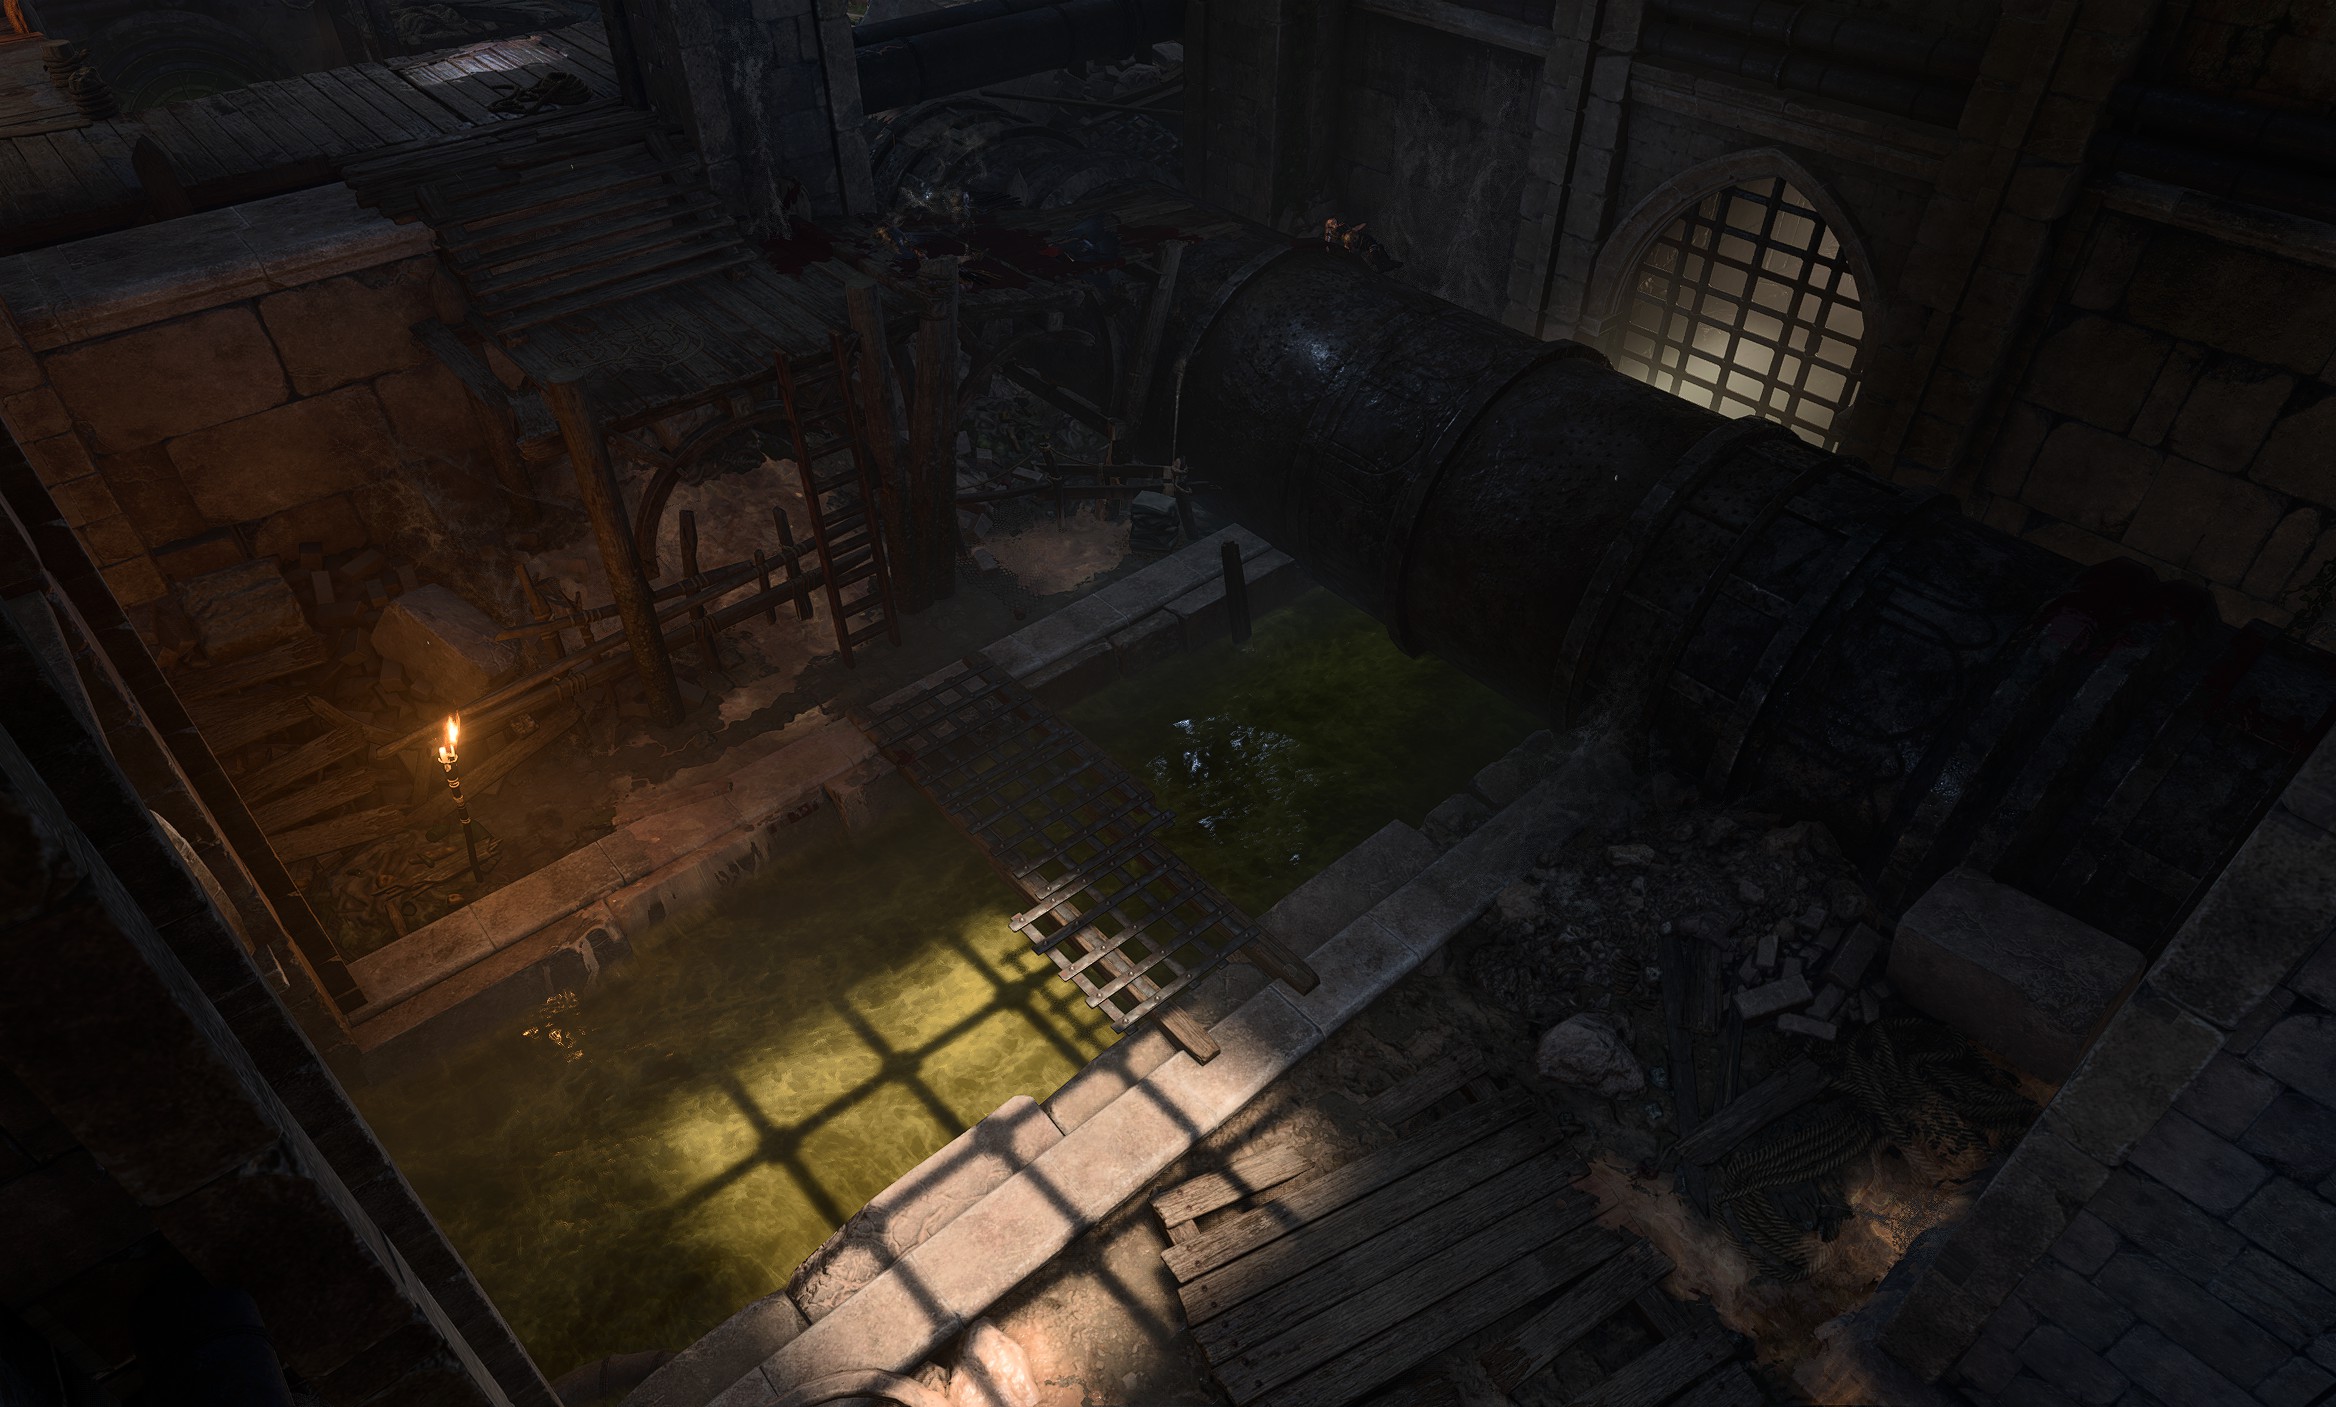
The area is roughly divided into two parts: the eastern one with the large pipe is accessible from the sewers, while the western one can be entered from the Jannath's Estate basement. The two parts are connected with a tunnel with locked gates on either side. On the eastern side the gate is called Sluice Gate and can be unlocked either by solving the valve puzzle or succeeding a 
The area with the large pipe is guarded by a group of Bhaalist cultists: 


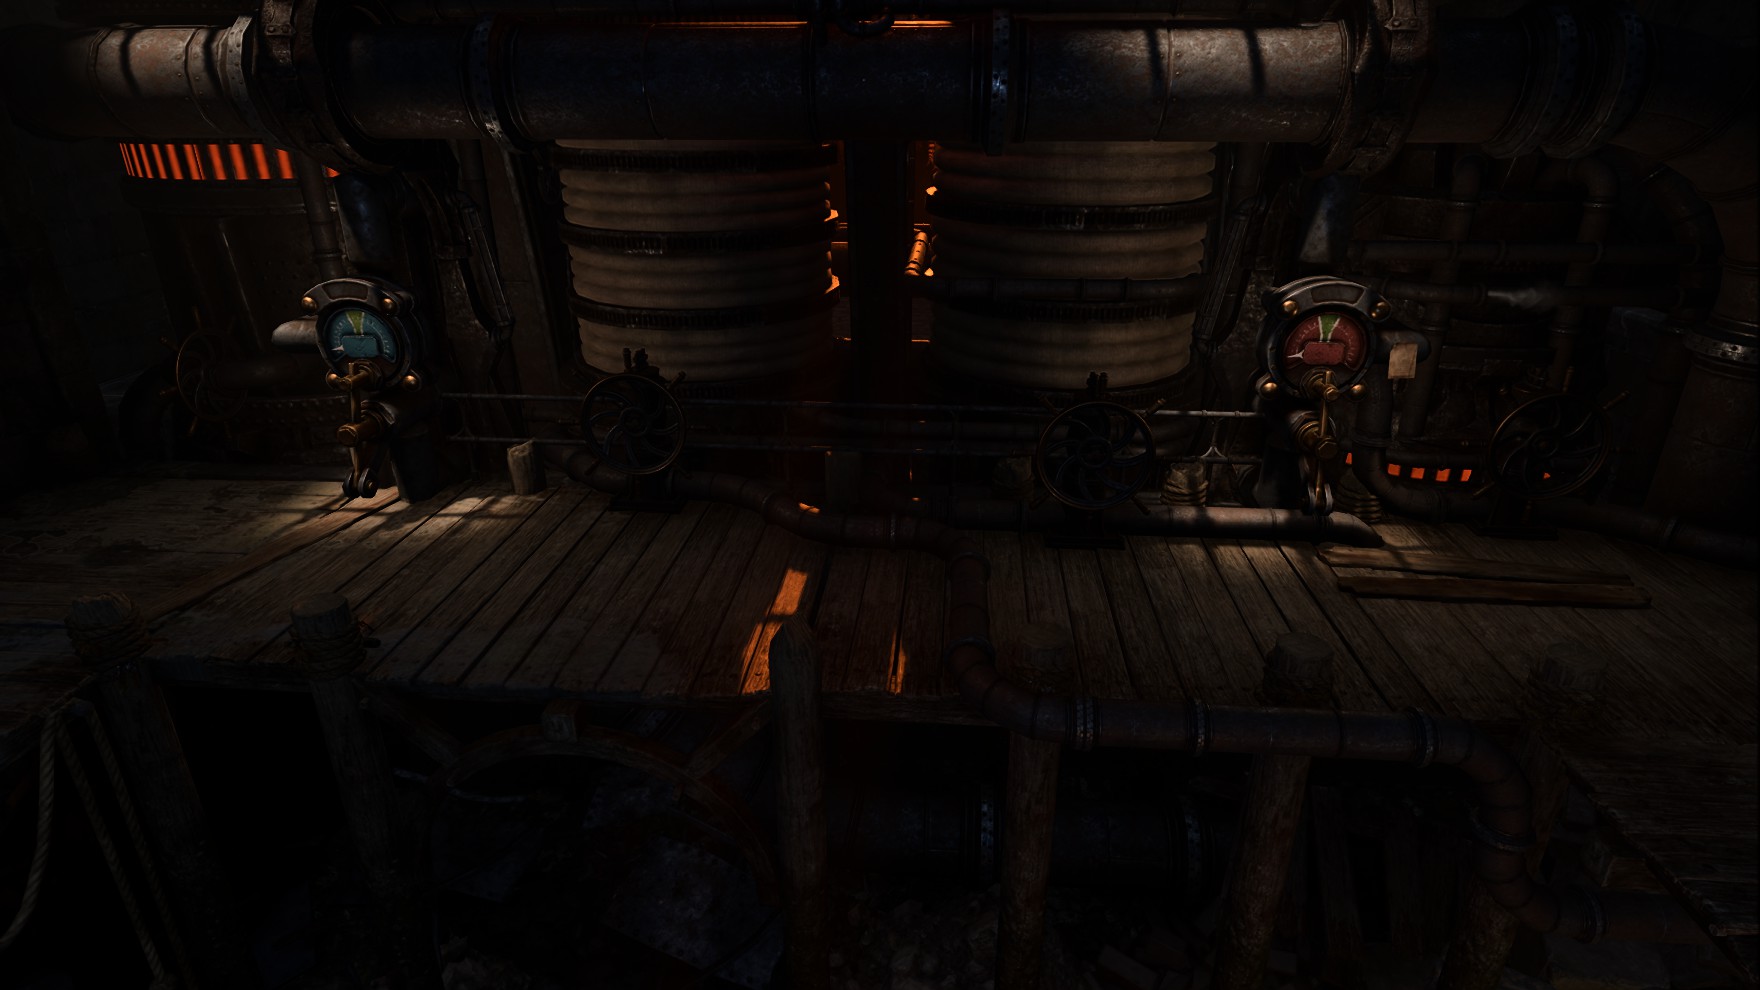
Sluice puzzle[edit section | visual editor]

Going from east to west, the pieces of the puzzle are:
- Sluice Valve (aforementioned) - interacting prompts an Athletics check which opens the gate immediately if successful
- A blue water level indicator with a green stroke marking the optimal level (cannot be interacted with)
- Water Level Valve - increases the water level when spun
- Temperature Valve - increases the temperature when spun
- A red temperature indicator with a green stroke marking the optimal level (cannot be interacted with)
- Emergency Release Valve - releases both the water and the heat, lowering their levels
A pinned ![]()
Once spun, both Water Level and Temperature Valves begin to increase the corresponding parameter, each passing the following stages:
- Low Water Level - Perfect Water Level - High Water Level - Flooded/Wet
- Barely Warm - Perfect Warmth - Perilously Hot - Overheated
Each condition lasts for 3 turns, accompanied correspondingly by Water Level Rising (lasts for 3 turns) and Temperature Increase (lasts for 1 turn) conditions. When the highest level of each valve is reached, it bursts out with either water or fire. While the water valve does no harm, the temperature valve deals 2d6![]()
![]()
To solve the puzzle and open the gate, the party must correctly time the gages and turn each valve so that both meet at the 'Perfect' condition. Using the Emergency Release Valve reverses both processes if either level gets too high.
To open the door in one attempt, the water level valve must be hit first, then after approximately five seconds the temperature valve must be hit as well. The progress can be followed by hovering the cursor over the valves or by watching the meter hands on their indicators.
Once the door is opened, the party can continue towards the western room, which serves as the hideout for the Stone Lord.
Stone Lord Hideout[edit section | visual editor]

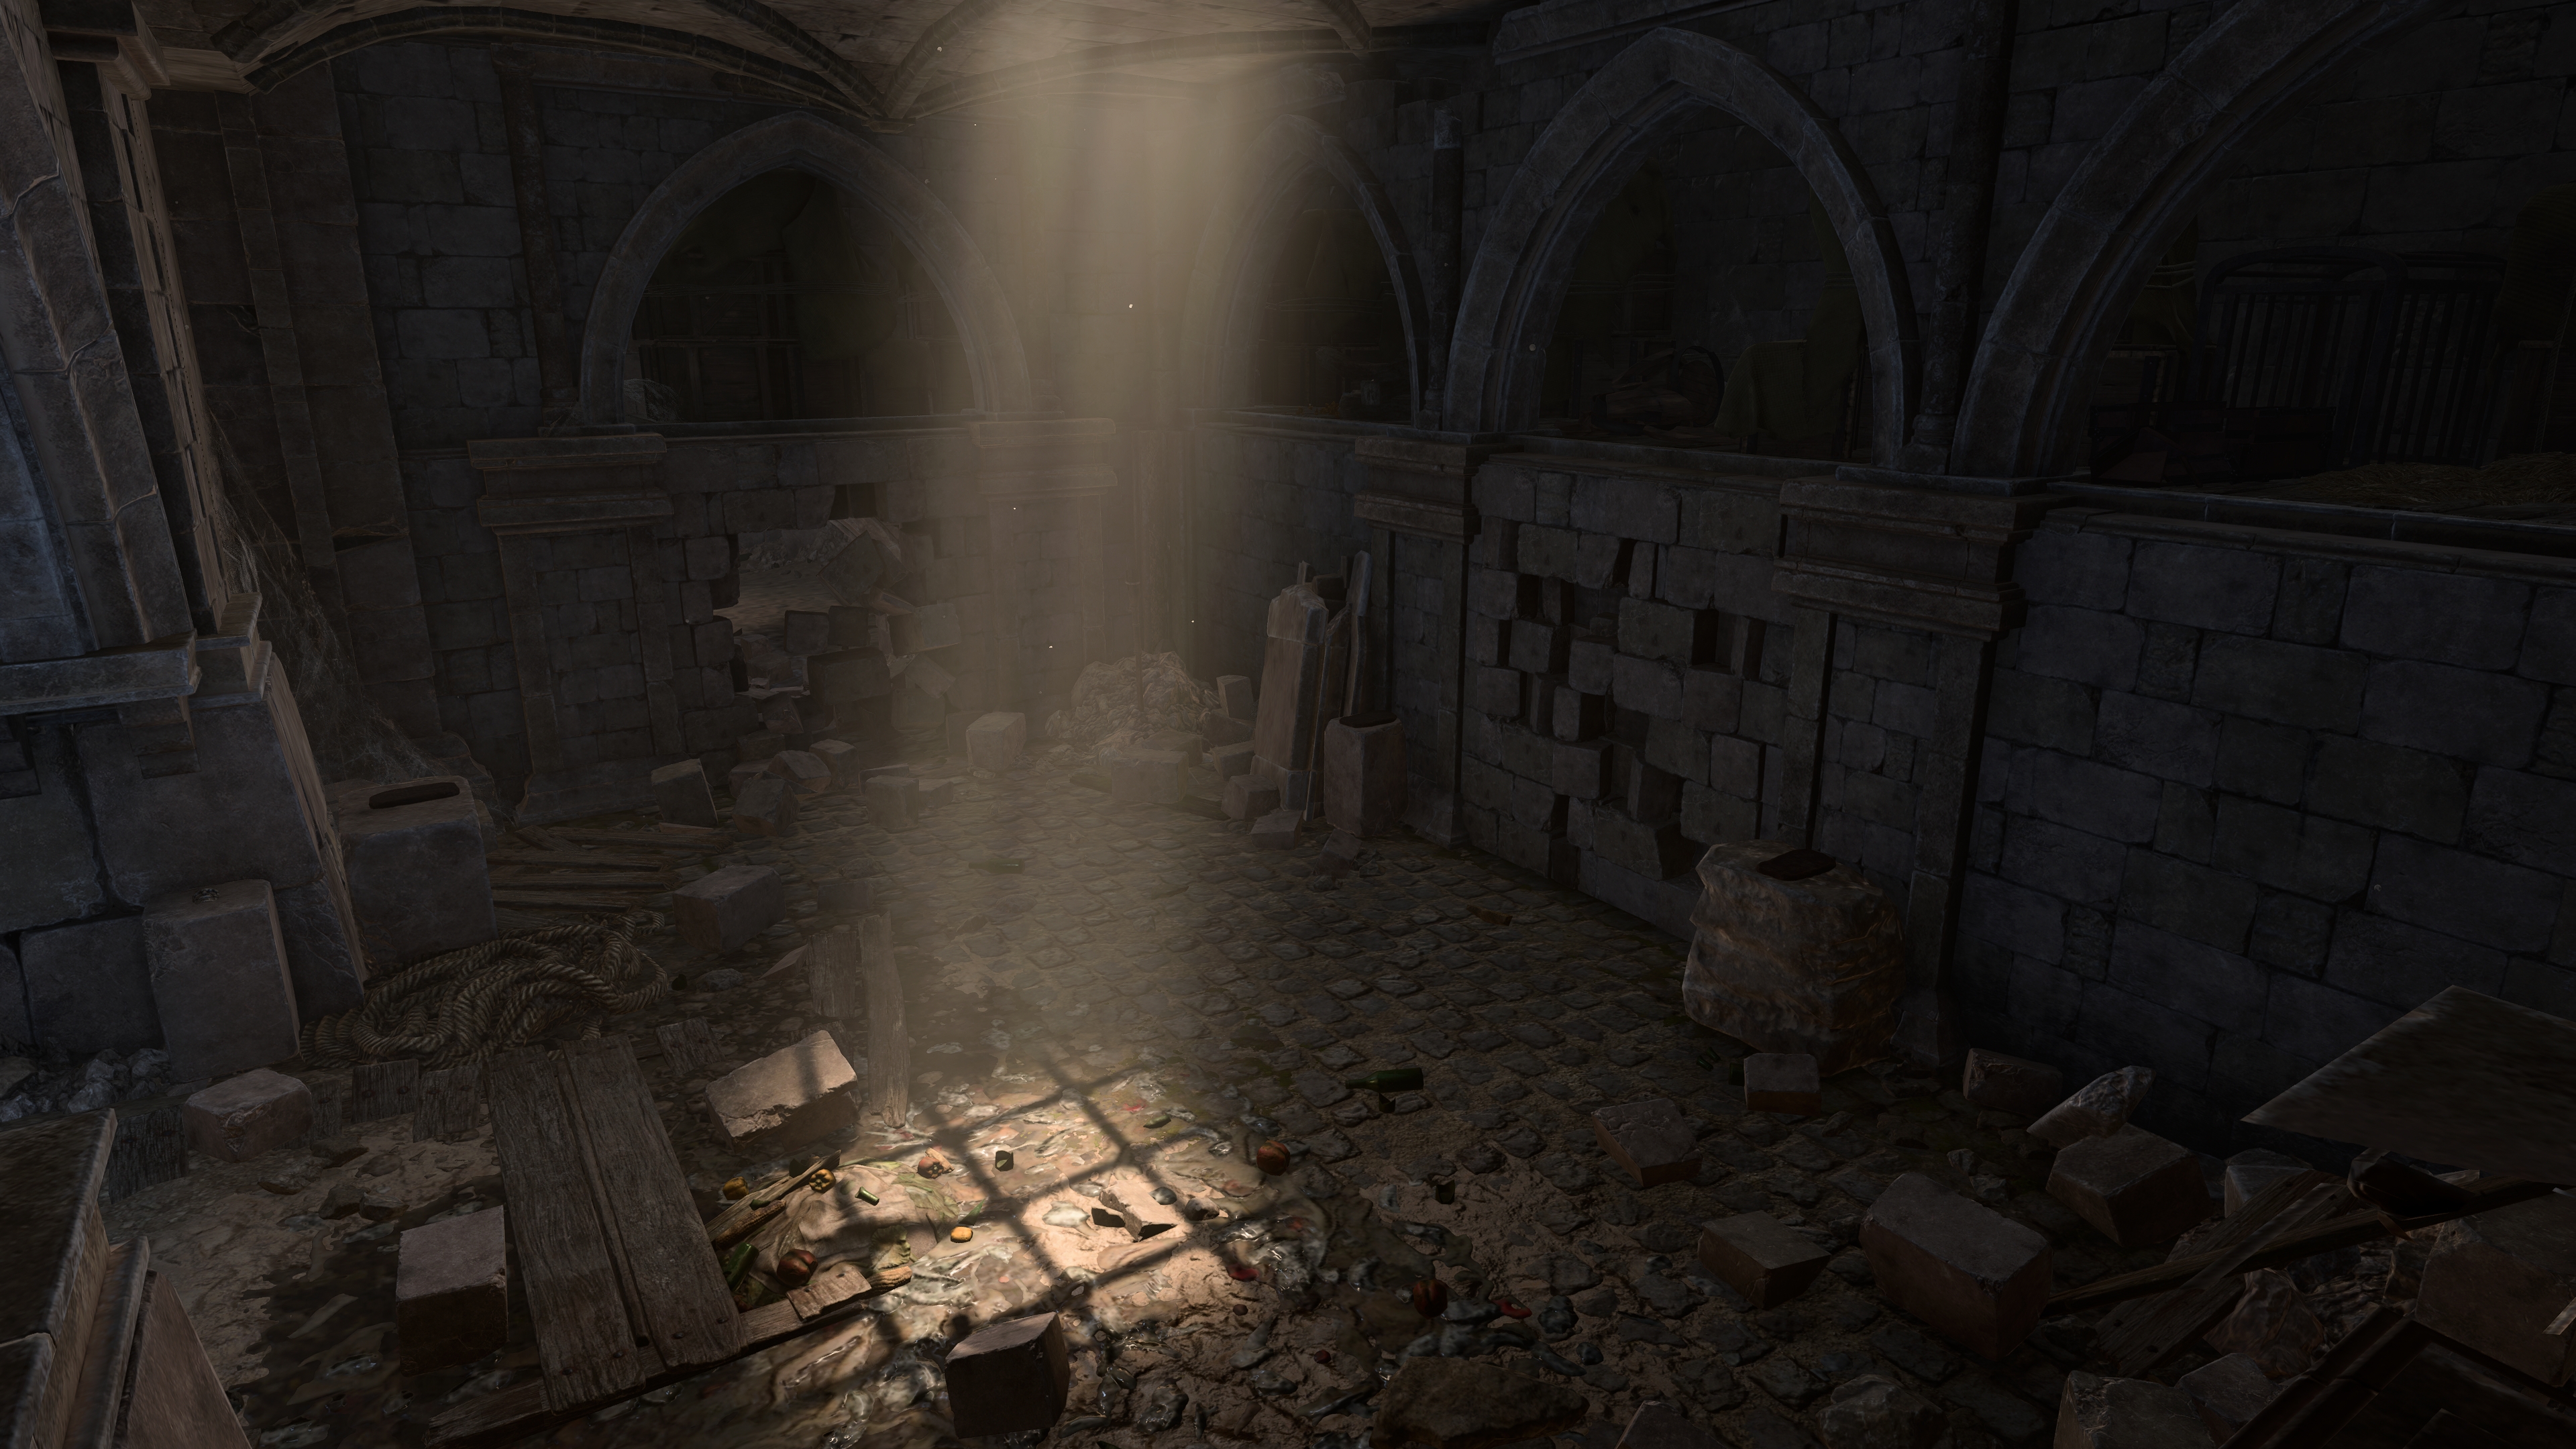
The hideout is an open space with a filth pool and some pipes in the center. The pool is surrounded by a stone-paved gallery with multiple alcoves on both southern and northern sides. The alcoves can be reached by climbing slabs of stones, ladders and rope nettings, or jumping inside.
On the far western side of the hall and above the Vault Door are wooden platforms; the western one has a ladder at X: -283 Y: 878 which leads to the basement of the Lady Jannath's Estate.
Several containers in this hall keep various loot (see below). Also, a pile of treasure in the northwestern corner lies in plain sight. Inside an alcove in the wall in the southwest at X: -279 Y: 858 is a book titled ![]()

Hidden Rooms[edit section | visual editor]
The northern wall of the hideout has loose stones, but they cannot be destroyed by conventional methods.
If Minsc is saved, he remembers 
![]()
- A halfling-sized warhammer, representing

- A turnip for
- A mailed fist for
- A pair of carved wooden wings for
- A cracked wooden mask, representing
All companions comment on each of these artifacts; if Jaheira is present, she speaks of exact names and fates of her and Minsc's former companions. Of all others, only Gale recalls the details of artefacts - for example, he unmistakably defines that the wooden wings depict those which might have belonged to an ![]()
Involvement[edit section | visual editor]


Within the game's events, the main purpose of the Abandoned Cistern is a showdown with the 
![]()
![]()
The state of the hideout and the events in it depend on whether the party have already visited the Counting House and are aware of
- If the Counting House has not been visited yet, all enemies will be in the hideout with the exception of Minsc,


- If the Counting House has been visited, entering the hideout triggers a cutscene where Minsc and 'Jaheira' are making a deal with the leader of the Zhentarim. A tadpole-controlled Minsc notices the party (although depending on how the hideout is entered the party can remain unnoticed).
- If the party enter via the gardener's storage at Lady Jannath's Estate a

- If the party enter via the gardener's storage at Lady Jannath's Estate a


After approaching Minsc, his tadpole prevents him from seeing reason and he immediately attacks the party, along with a number of cultists, including 


If Minsc is successfully freed from the Absolute's control, he runs off and begins smashing through several walls in the eastern part of the cistern. To recruit Minsc, the party must follow him. Another cutscene follows, where Minsc finds his friend Boo and introduces the player character to him. The cultists intentionally severed Boo from Minsc to avoid giving Minsc any remembrances of his former life. Still, they left Boo alive on Orin's orders.[4] In the end of this cutscene, the player character has the option to dismiss Minsc to camp or to replace an active party member.
If Minsc dies, Boo spawns next to him, mourning the loss of his companion.[5].
If Minsc is killed in the fight, or if the player character agrees with the Emperor in its refusal to block Minsc's mind from the Absolute, Jaheira permanently leaves the party. This updates ![]()
![]()
Agreeing with the Emperor when it insists on killing Minsc, or attacking and killing him directly is considered an oathbreaking action for Paladins of the Crown, Ancients' Paladins, and Paladins of Devotion.
Related locations[edit section | visual editor]
Related quests[edit section | visual editor]
Characters[edit section | visual editor]
Notable[edit section | visual editor]


Bhaal Cultists[edit section | visual editor]


Creatures[edit section | visual editor]


Loot[edit section | visual editor]
- At X: Y: a locked Rustic Chest (
- At X: -274 Y: 891 on the floor: a


- In a Gilded Chest:

- In a Wooden Chest:
- At X: -278 Y: 891 a Wooden Chest up in the alcove:


Related literature[edit section | visual editor]
Bugs[edit section | visual editor]
- When approaching the Stone Lord's hideout from the Gardener's Basement, triggering the Blast Mine (and exploding the firewine barrels as a result) covers the room with

- When approaching the Stone Lord's hideout from the sewers, the Valve Door sometimes looks opened but acts as closed for some means of spatial movement, spells and ranged attacks. If this happens, ranged attacks and spells such as


Notes and references[edit section | visual editor]
- ↑ Unlike most other cultists who can be encountered in a playthrough, these three are not named by their ranks in the Bhaal cult. Nevertheless, Barnz has the Reaper of Bhaal archetype, Cilarea is a Night Blade, and Kevo Phogge is a Death's Head of Bhaal.
- ↑ 2.0 2.1 2.2 Roah Moonglow is in the sewers if she survives the events of Act Two. Otherwise, Boss Friol takes her place.
- ↑ It is entirely possible to eliminate the cultists before progressing The High Harper quest to the Counting House, then visit the vaults, and return to the Cistern to finish the quest. In this case, the only difference is false Jaheira's initial phrase in the cutscene about the hideout being compromised.
- ↑ As stated in

- ↑ When Minsc fights against the party being puppeted by the Absolute, he can summon Boo as a familiar (a class action available only to him). After the fight is resolved, and Minsc is knocked out, Boo remains as an enemy and despawns if killed or knocked out as well, to be "found" by Minsc if he is recruited
- ↑ Disguised as
- ↑ Disguised as

- ↑ Disguised as

- ↑ Possibly summoned by Kevo Phogge in the sluice hall.


External links[edit section | visual editor]