Ad placeholder
Confront the Elder Brain
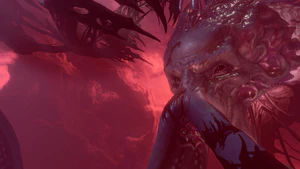
Confront the Elder Brain is a quest in Act Three of Baldur's Gate 3.
Objectives[edit section | visual editor]
Walkthrough[edit section | visual editor]
Allies in the Final Fight[edit section | visual editor]
For a list of possible allies and details on how to recruit them for the final fight, see the quest Gather Your Allies.
Confronting the Elder Brain[edit section | visual editor]
The quest to confront the Elder Brain is acquired at the end of Act Two, after the Chosen Three are revealed to be controlling the Elder Brain as part of their plot to take over Baldur's Gate. However, the quest cannot be meaningfully progressed until the quests Get Gortash's Netherstone and Get Orin's Netherstone have been completed. Orin the Red must be defeated, and Enver Gortash must either be defeated or bargained with as part of the subquest Consider Gortash's Bargain. Defeating both Orin and Gortash causes a vision of the Elder Brain in the Morphic Pool beneath the city. If Gortash is allied with, then he reveals the Elder Brain's location and tells the party to use the boat under the city to meet him there.
The Morphic Pool[edit section | visual editor]
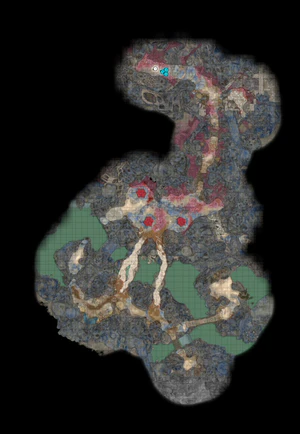
The Morphic Pool Dock is north of the Temple of Bhaal waypoint. Approaching the dock before obtaining all three Netherstones results in a swarm of Cranium Rats attacking.
- Once the party enter the Morphic Pool, they cannot turn back or go to camp. For the rest of the game, they will be unable to long rest,[1] access stored equipment or consumables,[2][3] swap out party members, or respec with Withers.
- Certain items can still be purchased from Koll.
- Companions left at camp still have their dockside interactions after defeating the Netherbrain.
- Astarion, Halsin, Jaheira, and Shadowheart may appear at High Hall as part of the quest Gather Your Allies, but they cannot be added to the active party at this point, as they are no longer treated as companions.
- The party can summon hirelings from Withers in the High Hall, but only if there is empty space in the party.
Arriving at the Morphic Pool, the party members are repeatedly Mindbroken by the Elder Brain and must make several DC 20 Constitution Saving Throws to not be Stunned as well, as the Elder Brain speaks into the party's minds, demanding obedience. As the party move further north, a DC 20 Perception Check reveals an ambush near a cluster of brine pools, which can be avoided by sneaking through the area. The ambush consists of several Intellect Devourers and Intellect Gluttons, and the Emperor remarks that something is corrupting the creatures.
After the ambush, if Gortash is allied with, he can be found in the next area, ready to assist the party with his Netherstone. The party can choose to strike Gortash twice. The first time, he issues a warning and kicks the player character if they react with sarcasm to his complaint. The second time, he turns hostile.
Once the Morphic Pool's waters are reached, the party (and Gortash, if present) take control of the Netherstones to confront the Elder Brain, which has become a Netherbrain, with a number of difficult checks:
- Muster the full might of your physical form - throw it into breaking through the brain's defences. (DC 20)
- Your mind is yours to command - block out all possibility of failure and compel the brain to submit. (DC 20)
- You have survived this far - trust yourself. Dominate the brain. (DC 20)
The brain continues to taunt the party (and Gortash, if present). It says that the Chosen Three controlled it only for as long as it allowed them to, much to Gortash's horror.
- Draw on the power of the Weave and try again. You will not let the Crown slip from your grasp. (DC 25)
- The Crown is an unmissable target - set it in your sights, and trust that you will strike true. (DC 25)
- A first attempt is just that - iteration is key. Aim for the Crown and try again. (DC 25)
- Nothing is immune to influence - determine to master the brain. (DC 25)
- Bow before the glory of the Netherbrain. Submit to domination.
The Netherbrain tells the party that it was the one who informed the Chosen of the Astral Prism and planted fear of what Orpheus could do to their plan. It was the one who let the Emperor slip its leash so that it could retrieve the prism and loosen the Netherstones from the grasps of the Chosen Three.
Panicking, Gortash, if present, swipes the Netherstones from the party, attempting to dominate the Netherbrain himself. The Netherbrain easily resists him and issues a final command to Gortash: "die", which he does.
- You are strong. You are mighty. You will dominate the brain. (DC 30)
- Your resilience will not be shaken - cast the spell again. (DC 30)
- It may not be easy, but it was always supposed to be possible - do it again. (DC 30)
- Bow before the glory of the Netherbrain. Submit to domination.
The Emperor and the companions urge the player character to ignore the Netherbrain's taunts and dominate it. Should the player character instead submit to its domination, then the party members are transformed into mind flayers, resulting in a Game Over.
One final, near-impossible check remains.
- DOMINATE THE BRAIN (DC 99)
- DOMINATE THE BRAIN (DC 99)
- DOMINATE THE BRAIN (DC 99)
- DOMINATE THE BRAIN (DC 99)
- DOMINATE THE BRAIN (DC 99)
- DOMINATE THE BRAIN (DC 99)
- Give up. Allow the brain to dominate you.
A critical success weakens the Netherbrain.[4] It begins the final fight with the Against All Odds debuff, reducing its HP by 20%.
However, regardless of what is done, the brain is too powerful to be defeated here, and the party members are overwhelmed. The Emperor steps in to save them by bringing everyone into the Astral Prism.
The Astral Prism[edit section | visual editor]
The party awaken in the Astral Plane, having benefited from a long rest and losing all "Until Long Rest" duration buffs they may have had, such as elixir effects.[5]
Siding with the Emperor[edit section | visual editor]
Talking to the Emperor reveals that only a mind flayer can hope to take down the Netherbrain in its current form, and that said illithid must consume the power of Prince Orpheus in order to succeed. As a mind flayer, the Emperor says he can do this and asks that the Netherstones be relinquished to him.
If agreeing to the proposal, the Netherstones can be given to the Emperor, who then assimilates Orpheus by devouring his brain. If Lae'zel is in the party and loyal to Orpheus, she is furious at the death of her prince and turns hostile unless pacified by a DC 30 Persuasion Check.
The Emperor then joins the party as an Attached Follower, and they must travel together through a recently opened portal to High Hall.
Freeing Orpheus[edit section | visual editor]
If the party reject the Emperor's proposition, he states that he has no other choice but to reassimilate with the Netherbrain and leaves the party in the Astral Plane. This occurs when selecting "I don't believe a word you just said" followed by "I will never trust you", by asserting the intent to free Orpheus (if the party possesses the Orphic Hammer), by attacking him, or by using the Orphic Hammer to attack the crystals binding Orpheus, regardless of any dialogue. After the Emperor departs, if not already done, the Orphic Hammer must be equipped by a party member, and both binding crystals need to be attacked until destroyed to free Orpheus and advance the quest.
It is possible to spurn the Emperor even if the party do not possess the Hammer. In this case, what happens next depends on previous interactions with Raphael:
- If the party did not accept Raphael's deal and he is still alive, he appears within the Astral Prism. The party must sign a contract to obtain the Orphic Hammer in exchange for the Crown of Karsus. Failing to uphold the bargain means the party's souls are forfeit. Signing the contract starts the quest Fulfill the Deal. Refusing to sign turns the party into mind flayers who assimilate with the Netherbrain, causing a game over.
- If the party made a deal with Raphael and forgot to bring the Orphic Hammer, he appears to deliver the world-saving relic they so negligently misplaced.
- If Raphael is dead and no party member is carrying the Orphic Hammer upon entering the prism, it cannot be retrieved, and a game over ensues: the party are overcome by the Absolute, transformed into mind flayers, and assimilated.
Once Orpheus is freed, he confronts the party on their choices, saying the party should have let his honour guard kill them, so that this whole situation could have been avoided. He also confronts the party if they romanced the Emperor or took the Githyanki Egg in the quest Steal a Githyanki Egg. However, he agrees to stand down and work with the party. He states that the Emperor was correct and the help of a mind flayer is necessary to take down the Netherbrain. Either the player character or Karlach, if present, can make this sacrifice. Only whoever transforms into a mind flayer can wield the netherstones. If no party member makes this sacrifice, Orpheus does it himself, transforming into a mind flayer and joining the party as an Attached Follower. Otherwise, he does not transform but still joins the party. The party must now travel through a recently opened portal to High Hall.
Upper City[edit section | visual editor]

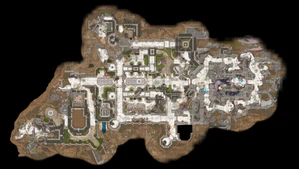
When the party arrive in the Upper City of Baldur's Gate, they find it in shambles. The entire city is a battlefield between several Nautiloids and an army of Red Dragons.
Kith'rak Voss teleports in with a group of githyanki to confront the party. If Orpheus was liberated, Voss offers his aid freely. If the Emperor or a party member consumed Orpheus, Voss is furious, but a DC 30 Persuasion or Deception Check makes him stand down and begrudgingly lend his aid; otherwise, he attacks.
Moving forward, the party can find a building where all of their allies are gathered, along with a Flaming Fist named Beorn Wunterbrood. The characters that appear are based on which factions were successfully recruited as part of the quest Gather Your Allies. These allies grant a new action – Call Forth Allies – that can summon reinforcements, grant useful buffs, or create powerful AoE attacks.
Courtyard[edit section | visual editor]
Upon approaching the courtyard, the party come across the Watchmen Gyordi, Goodge, Fry, and Ebber running away. A passive DC 20 Insight Check followed by a dialogue option with a DC 20 Persuasion, Intimidation, Deception, or Strength Check convinces them to stand and fight, joining the party as allies for the courtyard battle only. On Explorer and Balanced difficulties, there is also a single-use restoration pod that bestows the benefits of a long rest.
Entering the courtyard leads to an all-out battle against various Absolutist cultists, Goblins, Mind Flayers, Illithid Arcanists, Winged Horrors, Intellect Devourers, an Ogre, and a Spectator.
It is possible to bypass this battle by avoiding the main entrance and instead approaching the High Hall through the northern or southern routes with stealth and invisibility.
Upper City Sewers[edit section | visual editor]
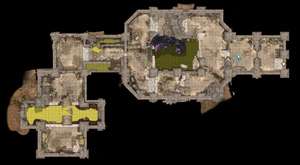
Instead of the courtyard, the party can take a hidden route through the Upper City Sewers. This route features a few goblins, a pair of Cranium Rats, a mind flayer, some Absolutist cultists, Necromites, and a Death Knight named Stalker Svignee. The High Hall Key can be found on the corpse of Merug 'Curly' Dugald, crushed under some debris.
High Hall[edit section | visual editor]
After fighting or sneaking their way through the courtyard or the sewers, the party enter the High Hall proper.
The hall contains intellect devourers, mind flayers, and Banite and Bhaalist cultists. A Nautiloid arrives and bombards areas while summoning mind flayers, intellect devourers, and Intellect Gluttons every turn.
There are two paths to the top. The left path has a Medium Toughness door that must be broken down, lockpicked, or unlocked with the corresponding key. The right path has a high wall that most characters cannot jump up, but a nearby statue can be pushed over (with a Strength Check) to provide a foothold.
At the top of both paths is a door to the stem of the Netherbrain. Approaching the brainstem with any character causes a cutscene in which the bombarding Nautiloid is destroyed. It also ends the fight and teleports the entire party to the brainstem. On Explorer and Balanced difficulties, there is another restoration pod here. The party can proceed by climbing the brainstem up to the top of the Netherbrain.
Possible Gale Decision[edit section | visual editor]
Depending on the choices made before crossing the "point of no return", and if Gale is in the party, interacting with the brainstem can trigger a short conversation between him and the player character. Here, it is possible to let Gale climb the brainstem alone and use his orb to destroy the Netherbrain. Should that happen, then all remaining fights are completely avoided. A cutscene with Gale activating the orb is followed by ending dialogues and the game's epilogue.
Atop the Netherbrain[edit section | visual editor]
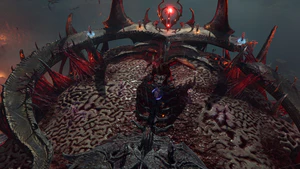
The Netherbrain is guarded by four Illithid Arcanists and a Dominated Red Dragon. There are also 16 Tentacle enemies hidden under the brain's surface that appear if an allied character travels within 3m / 10ft of them.
The party also face additional enemies that vary depending on whether the party chose to side with Orpheus or the Emperor:
- If Orpheus was sided with, the Emperor appears on top of the Netherbrain to stop the party. The Emperor conjures four Dream Guardians to fight alongside him, stating that he knows the party's every weakness.
- If the Emperor was sided with, the Netherbrain itself spawns four Countermeasures, powerful Aberrations that are designed to counter specific classes. The Countermeasures summoned depend on the classes of the current party members.
Staying on the two ridges on either side of the brain prevents Tentacle enemies from appearing and attacking the party.
At the start of the fight, a 4-turn counter begins, after which a Nautiloid ship arrives and begins using the same bombardment attacks seen during the party's ascent of High Hall.
Only an illithid character holding the Netherstones can cast Karsus' Compulsion. To do this, the illithid needs to move within range of the Crown of Karsus and then channel Karsus' Compulsion until their next turn. The party member can be attacked, interrupted, and even killed while attempting to cast this spell. As no other party member can cast the spell in their place, a killed illithid party member must be revived to cast Karsus' Compulsion.
Successfully casting Karsus' Compulsion opens up a portal to the mind of the Netherbrain, where a physical manifestation of the Netherbrain can be attacked.
Mind of the Netherbrain[edit section | visual editor]
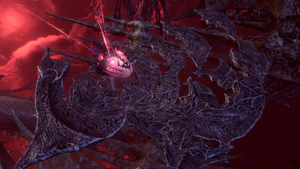
This area contains several loosely connected floating platforms that are breakable. Periodically, a small group of platforms is marked for destruction, and their outlines turn pink. Once a platform is destroyed, any entities on its surface are instantly killed. If the Netherbrain is defeated, then any party members killed here or in the previous area are revived after the fight.
After channelling the spell, the illithid character passes through the portal, and the Netherbrain enters initiative order.[6]
To reach the mind of the Netherbrain, each individual party member must interact with the portal to be brought through. Summoned creatures cannot enter the portal unless they can interact with objects (e.g., Mage Hand).
Upon interacting with the portal, a party member appears on one of the platforms, beginning in the ring farthest away from the Netherbrain, with the last one appearing on the ring below. Once all party members are inside the mind of the Netherbrain (or those outside have all been killed), the creatures outside the mind of the Netherbrain are removed from combat, including summoned creatures.
The Unbreakable Will of the Netherbrain[edit section | visual editor]
When the Netherbrain is added into initiative order, a new counter appears, replacing the prior counter. If the Netherbrain is not killed before the timer ends, a Game Over screen will occur.
If the final DC 99 check at the Morphic Pool to "DOMINATE THE BRAIN" was passed with a critical success, the Netherbrain starts with the Against All Odds debuff, lowering its HP by 20%.
At the start of each of the Netherbrain's turns, it may attempt to use Orb of Negation, which summons multiple entities of the same name and adds each orb to the initiative order. When an orb's turn arrives, any platforms within the orb's aura are destroyed. Any creatures on the platforms are killed.
The first time each round that the Netherbrain takes damage, it may attempt to use Retributive Brainquake, which deals 10d6Psychic damage (or half if an Intelligence Saving Throw is passed) to all creatures within 12 m (40 ft) of the attacking character.
When the Netherbrain reaches 0 HP, it is defeated and a dialogue triggers, allowing the party to choose what to do with the defeated Netherbrain.
Final Choice[edit section | visual editor]
After the Netherbrain has been defeated, the choice must be made to either Control the Elder Brain or Destroy the Elder Brain.
Either option leads to the ending of the game, followed by the Epilogue sequence after a six-month time jump.
Achievements[edit section | visual editor]
- Absolute Power Corrupts
- Reign with terror: take control of the Netherbrain and bend the world to your will.
- Sins of the Father
- Claim your Throne of Blood: take control of the Netherbrain for Bhaal and break the world.
Notes[edit section | visual editor]
- ↑ Though there is one forced pseudo-long rest, as described in #The Astral Prism. Additionally, several Potions of Angelic Slumber can be found throughout High Hall. Two Restoration Pods are also available, except in Honour Mode.
- ↑ If the Orphic Hammer is left in camp and Raphael is dead, Orpheus cannot be freed, and siding against the Emperor results in a game over.
- ↑ It is not possible to leave an active party member back in camp when boarding the boat.
- ↑ The check can technically be passed without a natural 20.
- ↑ Expended item actions which normally refresh on a long rest will still be on cooldown. Examples include Spellcrux Amulet's Spell Slot Restoration and Drakethroat Glaive's Draconic Elemental Weapon. This behavior has been verified as of Patch 8 and is believed to be a bug.
- ↑ If examined, the full name of the Netherbrain's entity is revealed to be "The Unbreakable Will of the Netherbrain", but in the Combat Log and Initiative Order, it is still labelled as "The Netherbrain".


