Ad placeholder
Crèche Y'llek
Overview
The Githyanki that inhabit Crèche Y'llek conquered the area and slaughtered its previous inhabitants, a group of Lathander worshippers. It is used to launch operations along the River Chionthar, serving as a place to store supplies and loot, train new Githyanki warriors, and even hatch eggs. It also has a Planecaster and a Zaith'isk.
Many quests can be progressed in Crèche Y'llek, including Lae'zel's companion quest. There is some internal strife among the Githyanki here, primarily arising from tension between Kith'rak Therezzyn, the Commander of Crèche Y'llek, and Ch'r'ai W'wargaz, a recently arrived Inquisitor of Vlaakith.
Entrances to the Crèche
Monastery Basement Entrance
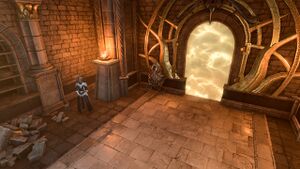
This entrance to the Crèche is located at ![]() X: 1357 Y: -854. To reach it, the party should walk down the stairs across the Statue of Lathander in the depth of the Rosymorn Monastery. The entrance is not guarded from outer side and will lead the party to antechamber of the Crèche.
X: 1357 Y: -854. To reach it, the party should walk down the stairs across the Statue of Lathander in the depth of the Rosymorn Monastery. The entrance is not guarded from outer side and will lead the party to antechamber of the Crèche.
Cliffside Entrance
This entrance to the Crèche is at ![]() X: 453 Y: -825
X: 453 Y: -825
This entry point is to the east of Crèche Y'llek, and is not a named location within the area. One of two Entrances to the Crèche can be accessed via the cliffs to the south of Rosymorn Monastery. Unless using stealth, if the party is visiting the area for the first time, they will trigger a dialogue with Raider G'r'ath or Warrior Qen (whoever sees them first). Passing a Persuasion or Intimidation Skill Check will allow the party to continue into the Crèche without engaging in combat. If the speaking character is githyanki, (or disguised as such) additional dialogues open which will allow the party access without a check.
If attempting a stealthy infiltration into the area, the cliffside entrance is a much less heavily guarded point of entry than the monastery basement entrance.
Entrance hall (antechamber)
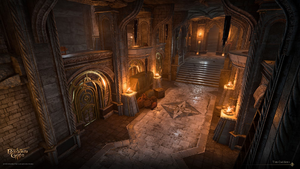
The Entrance hall (antechamber) is an area right next to the Monastery Basement Entrance to the Crèche. It is separated from the rest part of the Crèche by Heavy Oak Doors. Inside the antechamber resides the sentry patrol consisting of Gish Far'aag, Ardent Lin'a'an, Warrior Khunaruth and Raider Ra'gur (the latter is standing at the upper ground to the left from the entrance).
Upon entering, the party will be questioned by Gish Far'aag, and the party will have several options to infiltrate the Crèche past the sentries.
Depending on the outcome of the party's conversation with Kith'rak Voss, the party can have the option to say that they are carrying ![]() "the weapon" he was seeking. This has the benefit of allowing the conversation to conclude without mentioning the presence of any tadpoles in the characters' heads. Far'aag will ask the party to show them the artifact as proof. The response options to this include:
"the weapon" he was seeking. This has the benefit of allowing the conversation to conclude without mentioning the presence of any tadpoles in the characters' heads. Far'aag will ask the party to show them the artifact as proof. The response options to this include:
- Produce the artefact as evidence.
 DC 30 Performance check: I SPEAK AS AN AVATAR OF QUEEN VLAAKITH. YOU WILL LET ME PASS, VIN'IISK.
Githyanki characters have an additional option:
- [Githyanki]
 DC 18 Persuasion check: I will report to your kith'rak as protocol dictates. Do not forget yourself.
Failing either of these checks will cause her and the nearby guards to become hostile.
There is also the option to reveal that they seek a cure for their tadpole. Letting Lae'zel speak for the Party's behalf will also cause her to do the same. One way or another, Far'aag will relent without much convincing to let the players pass and seek out the ghustil in the infirmary, but her speaking tone becomes less friendly.
To the left and to the right sides of the main area of the entrance hall are two areas separated by locked iron gates (both areas and gates are considered to be restricted). The left one has been turned into a makeshift prison. The party can find there several skeletons with small amount of gold and two random alchemical ingredients on them, and also the corpse of Ellyka (if they have spared her in previous meeting near the Mountain Pass). Near one of the skeletons the party can find the ![]() Bloodied Note written by one of the Lathander monks, tortured to death by the githyanki.
Bloodied Note written by one of the Lathander monks, tortured to death by the githyanki.
To the right is another locked chamber with a breach in the far wall, leading to the rocky passage where Jeera's trade post is located.
Main Corridor
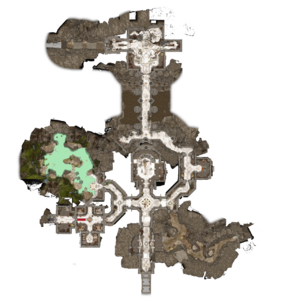
The main corridor of the Crèche starts behind the Heavy Oak Doors, which separate it from the entrance hall. It leads to all notable areas of the Crèche:
- to the west - T-junction that leads to the Infirmary (south-west) and the Hatchery (north-west)
- to the north - the Classroom;
- to the east - yet another T-junction leading to Captain's Quarters (north-east) and rocky passage (south-east) with trade post and another (Cliffside) entrance to the Crèche.
To the west from the entrance stand two githyanki youths, Qun'irel and Tra'an, discussing recent events in the Crèche. The party can talk to both and find out about the atmosphere of uneasiness that looms over the Crèche since the Inquisitor has arrived. With successful DC Intimidation check they will find out that the Inquisitor was sent to the Crèche to locate and acquire an ultimate weapon against ghaik.
At the eastern T-junction there is a waypoint, the only one within the Crèche.
The corridor is constantly patrolled by Warrior Yr'rk and Raider Ahu'u'rag, walking separately, but by the same route: Infirmary door - Hatchery door - Captain's Quarters door. However, once the party approaches the waypoint, Ahu'u'rag stops patrolling and begin speaking with Raider Chy'raagh, who guards the entrance to Captain's Quarters (she will return to her duties once the party enters the Captain's Quarters).
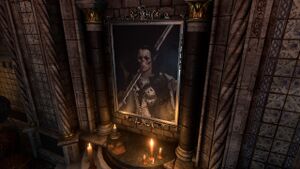
The western T-junction is decorated with the large portrait of Vlaakith, the Queen of all githyanki. Yet another youth, Vis'kiir, stands nearby. If interacting with the portrait and choosing to vandalize it (drawing a new face on it), Vis'kiir will begin to clean it, muttering about what might happen if the elders notice this.
Hatchery
The entrance to the Hatchery is at ![]() X: 1320 Y: -781.
X: 1320 Y: -781.
The Hatchery is located in the north-west end of the Crèche. It is an extensive cave-like room with several cliffs and waterfalls, filled with Acid up to mid-shin. Several small rocky islands rise from acid lake here and there. Right across the entrance there are several iron prison cages with a dead Kobold Scout in one of them.
On the bottom of the acid lake there are gas pits emerging Strange Gas, as well as multiple teleporting traps, which resemble Glyph of Warding: Thunder when identified by party members. If activated, these traps teleport the tresspasser into one of the iron cages. Additionally, cliffs and islands are armed with multiple repulsor mines.
The Hatchery is the primary location for resolving the Steal a Githyanki Egg quest.
In the middle of the room there is a high cliff where Varsh Ko'kuu stands, watching and waiting for the last Githyanki Egg to hatch. The hatchery is guarded by Warrior Vu'un (near the entrance) and Raider Zar'an (on the cliff in the northern part of the cave).
The egg itself is placed on a special holder in the far western part of the cave.
Infirmary and Dormitory
The entrance to the Infirmary is at![]() X: 1319 Y: -806.
X: 1319 Y: -806.
The Infirmary is located at the south-west end of the Crèche. It has four sections with curtain posters, one in each corner, with Bedrolls lying inside. On the left there is a doorway to the Dormitory with several bunk beds. In the opposite end of the room there is a door leading to the Doctor's office.
In the Infirmary the party can encounter githyanki youths Pyrindath (sits kneeled to the right from the entrance), Mirya'al (stands in the section to the left from the entrance), and Dyrr'kas (wandering around the Infirmary, cleaning the floor here and there). Also, a couple of githyanki children, Zel'i and Ra'jak, are honing their skill, shoving a locked Traveller's Chest (![]() DC 18 Sleight of Hald check) back and forth. When being hit, the chest emerges wailing sounds that can be heard far beyond the Infirmary.
DC 18 Sleight of Hald check) back and forth. When being hit, the chest emerges wailing sounds that can be heard far beyond the Infirmary.
In the Dormitory the party can meet three adult githyanki: Gish Umr'a'ac, Raider Jy'ir and Ardent Kur'ashk (a member or Inquisitor's retinue).
Doctor's Office
The entrance to the Doctor's Office is at![]() X: 1289 Y: -809.
X: 1289 Y: -809.
The Doctor's Office is a huge hall in the far south-west end of the Crèche, right beyond the Infirmary. The one to encounter there is Ghustil Stornugoss, the principal healer of the Crèche. The whole area is in fact Stornugoss's study, with several working desks on the opposite sides of the room. In the center of the room, on a low round ramp, stands the Zaith'isk - a mysterious device that is said to cleanse infected githyanki from mind flayer parasites. Approaching and using the zaith'isk is an essential part of the Find a Cure and The Githyanki Warrior quests.
Classroom
The entrance to the Classroom is at ![]() X: 1357 Y: -781.
X: 1357 Y: -781.
The Classroom is the area to the north of the main corridor of the Crèche, opposite to the antechamber. Here the githyanki youths and children are trained, instructed and educated by Sa'varsh Kethk. The room has a sunken area in the center, working as a sparring ground, surrounded by small stairs, and a small gallery along the north wall, partly separated by curtains.
When the party comes into Classroom, Kethk is busy reprimanding and kicking one of his trainees, Youth Varrl. Other students stand around, watching the execution: githyanki youths Rheg'zel, Zar'a'ath, Ba'akreth and Astyl, and also children Gha'an, Jheruth, Ul'mirel and Kyr'das.
As soon as the Kethk's educational process ends one or another way (with the participation of the party), other youths will step down to the sparring ground to proceed with their training. Dependant upon dialogue options chosen, and Ability Checks passed, it is possible to receive ![]() Orpheus, Prince of the Comet, Part Two: Sacrifice as a reward from Varrl. Alternatively, killing him (or having him killed by Kethk or other youth) will allow the party to loot this item from their corpse.
Orpheus, Prince of the Comet, Part Two: Sacrifice as a reward from Varrl. Alternatively, killing him (or having him killed by Kethk or other youth) will allow the party to loot this item from their corpse.
On the gallery in the far end of the Classroom stands Ardent Vraalsith.
Trade post
The Trade post is located in the south-east end of the Creche, at ![]() X: 1392 Y: -776. It is maintained by A'jak'nir Jeera. Around the post Warrior Ith'dul and Raider Add'ath are walking , guarding both the goods and the rocky ascension leading towards the Cliffside Entrance to the Creche. Above the trading post stand two other guards, Raider G'r'ath and Warrior Qen. A breach in the wall to the right of the trade post allows to get into one of the locked areas of the entrance hall.
X: 1392 Y: -776. It is maintained by A'jak'nir Jeera. Around the post Warrior Ith'dul and Raider Add'ath are walking , guarding both the goods and the rocky ascension leading towards the Cliffside Entrance to the Creche. Above the trading post stand two other guards, Raider G'r'ath and Warrior Qen. A breach in the wall to the right of the trade post allows to get into one of the locked areas of the entrance hall.
Captain's Quarters
The entrance to the Captain's Quarters is at ![]() X: 1392 Y: -776
X: 1392 Y: -776
When first entering this area, a cutscene will be triggered, showing an argument between Kith'rak Therezzyn and Ch'r'ai W'wargaz. Therezzyn will dispatch another squad of githyanki to search for the weapon the Inquisitor desires. The squad consists of Raiders Helag and Un'n, Warriors Xon'ar'as and Ch'guth, and Gish Yy'rul. The party cannot speak to any of these characters - as soon as the cutscene ends, they run away down the corridor and disappear.
After W'wargaz leaves for the Inquisitor's Chamber via an archway to the north, Therezzyn activates a barrier using the Githyanki Barrier Disruptor next to the archway. The party will need to deactivate the barrier to explore past the northern exit of this location.
Inside the Captain's Quarters there are Therezzyn, Ardent G'nuril and also two wolves, D'hak and Ur'uth, preying upon corpses of recently captured followers of Cult of the Absolute.
Inquisitor's Chamber
The entrance to the Inquisitor's Chamber is at ![]() X: 1357 Y: -685
X: 1357 Y: -685
This location can only be reached after disabling the Githyanki Barrier Disruptor in the Captain's Quarters.
Behind the barrier there is an long bridge leading to the inner part of the former monastery, adorned with statues of Lathander and githyanki banners amidst them. Near the bridge the party can find a Wooden Chest, two Decorated barrels and also several alchemical ingredients around.
The Chamber itself has a sunken area in the center. On its bottom lies the Planecaster which will be activated after resolving the dialogue with Ch'r'ai W'wargaz, whatever the outcome would be.
On the left and right sides of the Chamber there are narrow corridors. The right one contains several displaying showcases with some precious artefacts that the githyanki collected in the monastery after founding the Crèche. The left one has a displaying case and several Decorated Barrels, too, but also two statues of Lathander. Both have spinning basements, and turning them to the correct position will open the passage to the Secret Chamber of the monastery, where the quest Find the Blood of Lathander might be finished.
In the Chamber there is Inquisitor, Ch'r'ai W'wargaz, and his retinue, consisting of Ardent Qu'uth, Ardent Jhe'rezath, Raider Kyrr'a'ath, and Warrior Brelal'reth. Talking to Ch'r'ai will further Lae'zel's companion quest, as well as Discover the Artefact's Secrets quest.
Points of interest
 Portrait of Vlaakith - Interactive object, hanging on the wall at the T-junction to the Hatchery and Infirmary X: 1330 Y: -795
 Githyanki Barrier Disruptor - Interactive object by the north exit of the Captain's QuartersX: 1390 Y: -757
Connected locations
-
- X: 1357 Y: -854
- X: 453 Y: -825
-
- X: 1291 Y: -661
Waypoints
This location contains the following Waypoints ![]()
Related Quests
Notable NPCs
- A'jak'nir Jeera,
 Merchant. X: 1390 Y: -821
 - Ch'r'ai W'wargaz, Inquisitor of Vlaakith. X: 1358 Y: -664
- Ghustil Stornugoss, Principal Healer of Crèche Y'llek. X: 1286 Y: -801
- Kith'rak Therezzyn, Commander of Crèche Y'llek. X: 1409 Y: -765
- Sa'varsh Kethk, Warfare Instructor. X: 1358 Y: -770
- Varsh Ko'kuu, Custodian of the Hatchery. X: 1289 Y: -759
- Youth Varrl, Trainee. X: 1358 Y: -768
Creatures
Notable items
Notable items obtained in this location, whether looted, purchased, or obtained through dialogue:
Potential Loot
Traded items
Rewards
Story and quest items
Notes
- After reaching the Shadow-Cursed Lands, the party may freely travel back to Crèche Y'llek for much of Act Two depending on the party's choices while visiting the Crèche in Act One.


