Shattered Sanctum
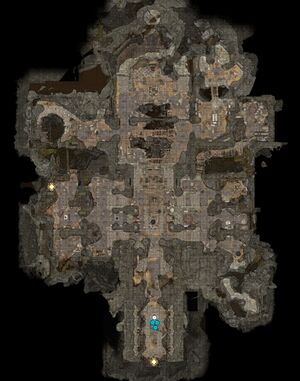
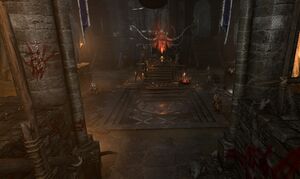
The Shattered Sanctum (also known as The Temple of Selûne) is a location within the Wilderness in Act One. It is the interior area of the Goblin Camp, and leads to the Defiled Temple and Worg Pens.
| Wilderness | ||||
| Shattered Sanctum | ||||
| ↓ | ||||
| Goblin Camp | ||||
Spoiler warning: The following content contains unhidden spoilers. Read at your own risk. |
Overview
Connected locations
![]() Goblin Camp (through Heavy Oak Doors X: 297 Y: -85 or Collapsed Corridor X: 312 Y: -31 (Wall in goblin camp must be broken first)
Goblin Camp (through Heavy Oak Doors X: 297 Y: -85 or Collapsed Corridor X: 312 Y: -31 (Wall in goblin camp must be broken first)
![]() Defiled Temple X: 253 Y: -7
Defiled Temple X: 253 Y: -7
![]() Worg Pens X: 342 Y: 31
Worg Pens X: 342 Y: 31
Entrance Hall
The main entrance from the Goblin Camp leads directly into here. With six goblins guarding here, there is no way to get by them outside of using Invisibility. Approaching will lead to you being questioned by Warrior Trinzas, who can be bypassed through a variety of skill checks found on her page. If you have also progressed Save the Goblin Sazza, she will help you bypass this point.
Entry Hall (centre)
On of the largest sections of the Sanctum where Priestess Gut brands new devotees to the Absolute. Here you can meet the cult leader to get the Brand of the Absolute. If the priestess becomes indisposed for one reason or another, Warlock Greez can brand members of the party.
The hall has side chambers which are split between east and west sides.
Entry Hall (west)
Zhent storeroom
Starting from the southeastern corner, you will find Roah Moonglow, a Zhentarim trader alongside some of her partners. She is a useful Trader who can reappear in Act Two at Moonrise Towers. Behind her is a storeroom holding the cult's large supply of Firewine and Smokepowder Barrels. There is a half a dozen of each, more than enough for setting up an explosive trap. Besides fighting past the guards, one can jump down from the rafters above; alternatively small-sized characters can fit through a Rocky Crevice (X: 255 Y: -42) from the Defiled Temple (Temple coordinates:X: 422 Y: 17). Miscellaneous crates in the room can also be searched for grenades and weapon coatings, and a locked chest (![]() DC 18 Sleight of Hand check) can be picked for several hundred gold.
DC 18 Sleight of Hand check) can be picked for several hundred gold.
Gut's room
Further north is Gut's workroom, where she'll lead a party member as part of her trap. If you don't want to drink her potion, she can be safely killed here so long as she doesn't get the chance to . One way to guarantee this is to literally stymie her screams by casting . There is also a way into the locked storeroom through the rafters here, reachable by someone with decent Strength or mobility spells such as Enhance Leap.
Entry Hall (east)
"Pigeon" cage
Loviatar's lounge
In a chamber on the east side of the initiation hall is a shrine dedicated to Loviatar, occupied by her servant Abdirak. Abdirak can give the player the permanent bonus ![]() Loviatar's Love (see his page for more information).
Loviatar's Love (see his page for more information).
Torture rack
Notable characters
- Abdirak
- Brakkal
- Gribbo
- Dror Ragzlin
- Liam
- Minthara
- Priestess Gut
- Roah Moonglow (Merchant)
- Spike
- Trinzas
- Volo
- Warrior Clack
- Warrior Druk
Related quests
- Remove the Parasite
- Save the Goblin Sazza
- Save the Refugees
- Find the Nightsong
- Save the Goblin Sazza
- The Blade of Frontiers
- Rescue Volo
Points of interest
- Torture Rack X: 336 Y: -34
- Piles of Gold X: 296 Y: 67
Notable loot
Notable items obtained in this location, whether looted, purchased, or obtained as a quest reward:
 Absolute's Talisman
 Absolute's Warboard
 Amulet of Selûne's Chosen
 Assassin's Touch
 Boots of Striding
 Cage Key
 Faithbreaker
 Gloves of the Growling Underdog
 Grubby Key
 Jagged Spear
 Loviatar's Scourge
 Priestess' Key
 Ritual Axe
 Ritual Dagger
 Spidersilk Armour
 Springstep Boots
 The Watersparkers
 Torturer's Key
 Ring of Poison Resistance
 Worgfang
 Xyanyde

