Ad placeholder
The Wyrmway

| Wyrm's Rock Fortress | ||||
| The Dragon's Sanctum | ||||
| ↑ | ||||
| The Wyrmway | → | Wyrm's Rock Prison | ||

“Two centuries walking the streets and I never knew this was under them. What other wonders have I missed...„
Access[edit section | visual editor]
The Wyrmway is a location underneath the Wyrm's Rock Fortress in Act Three.
The entrance to it is hidden in a passage in the western block of the Wyrm's Rock Prison, where two dragon head torches can be found. The party can gain access to the secret passage by first hitting both dragon head torches with any source of ![]()
An alternative way to access the Wyrmway is the Mousehole to Wyrm Rock's Cells, located down on the western shore of Wyrm's Rock Fortress at X: -70 Y: 205. Any creature or entity able to climb up through the mousehole can come adjacent to the wall separating the cave from the prison on the Wyrmway side, and the wall opens in the same manner. The entity in question might be a ![]()
![]()
Normally, information on the very existence of the Wyrmway and on its purpose is given to the party throughout ![]()


Antechamber[edit section | visual editor]
.png)
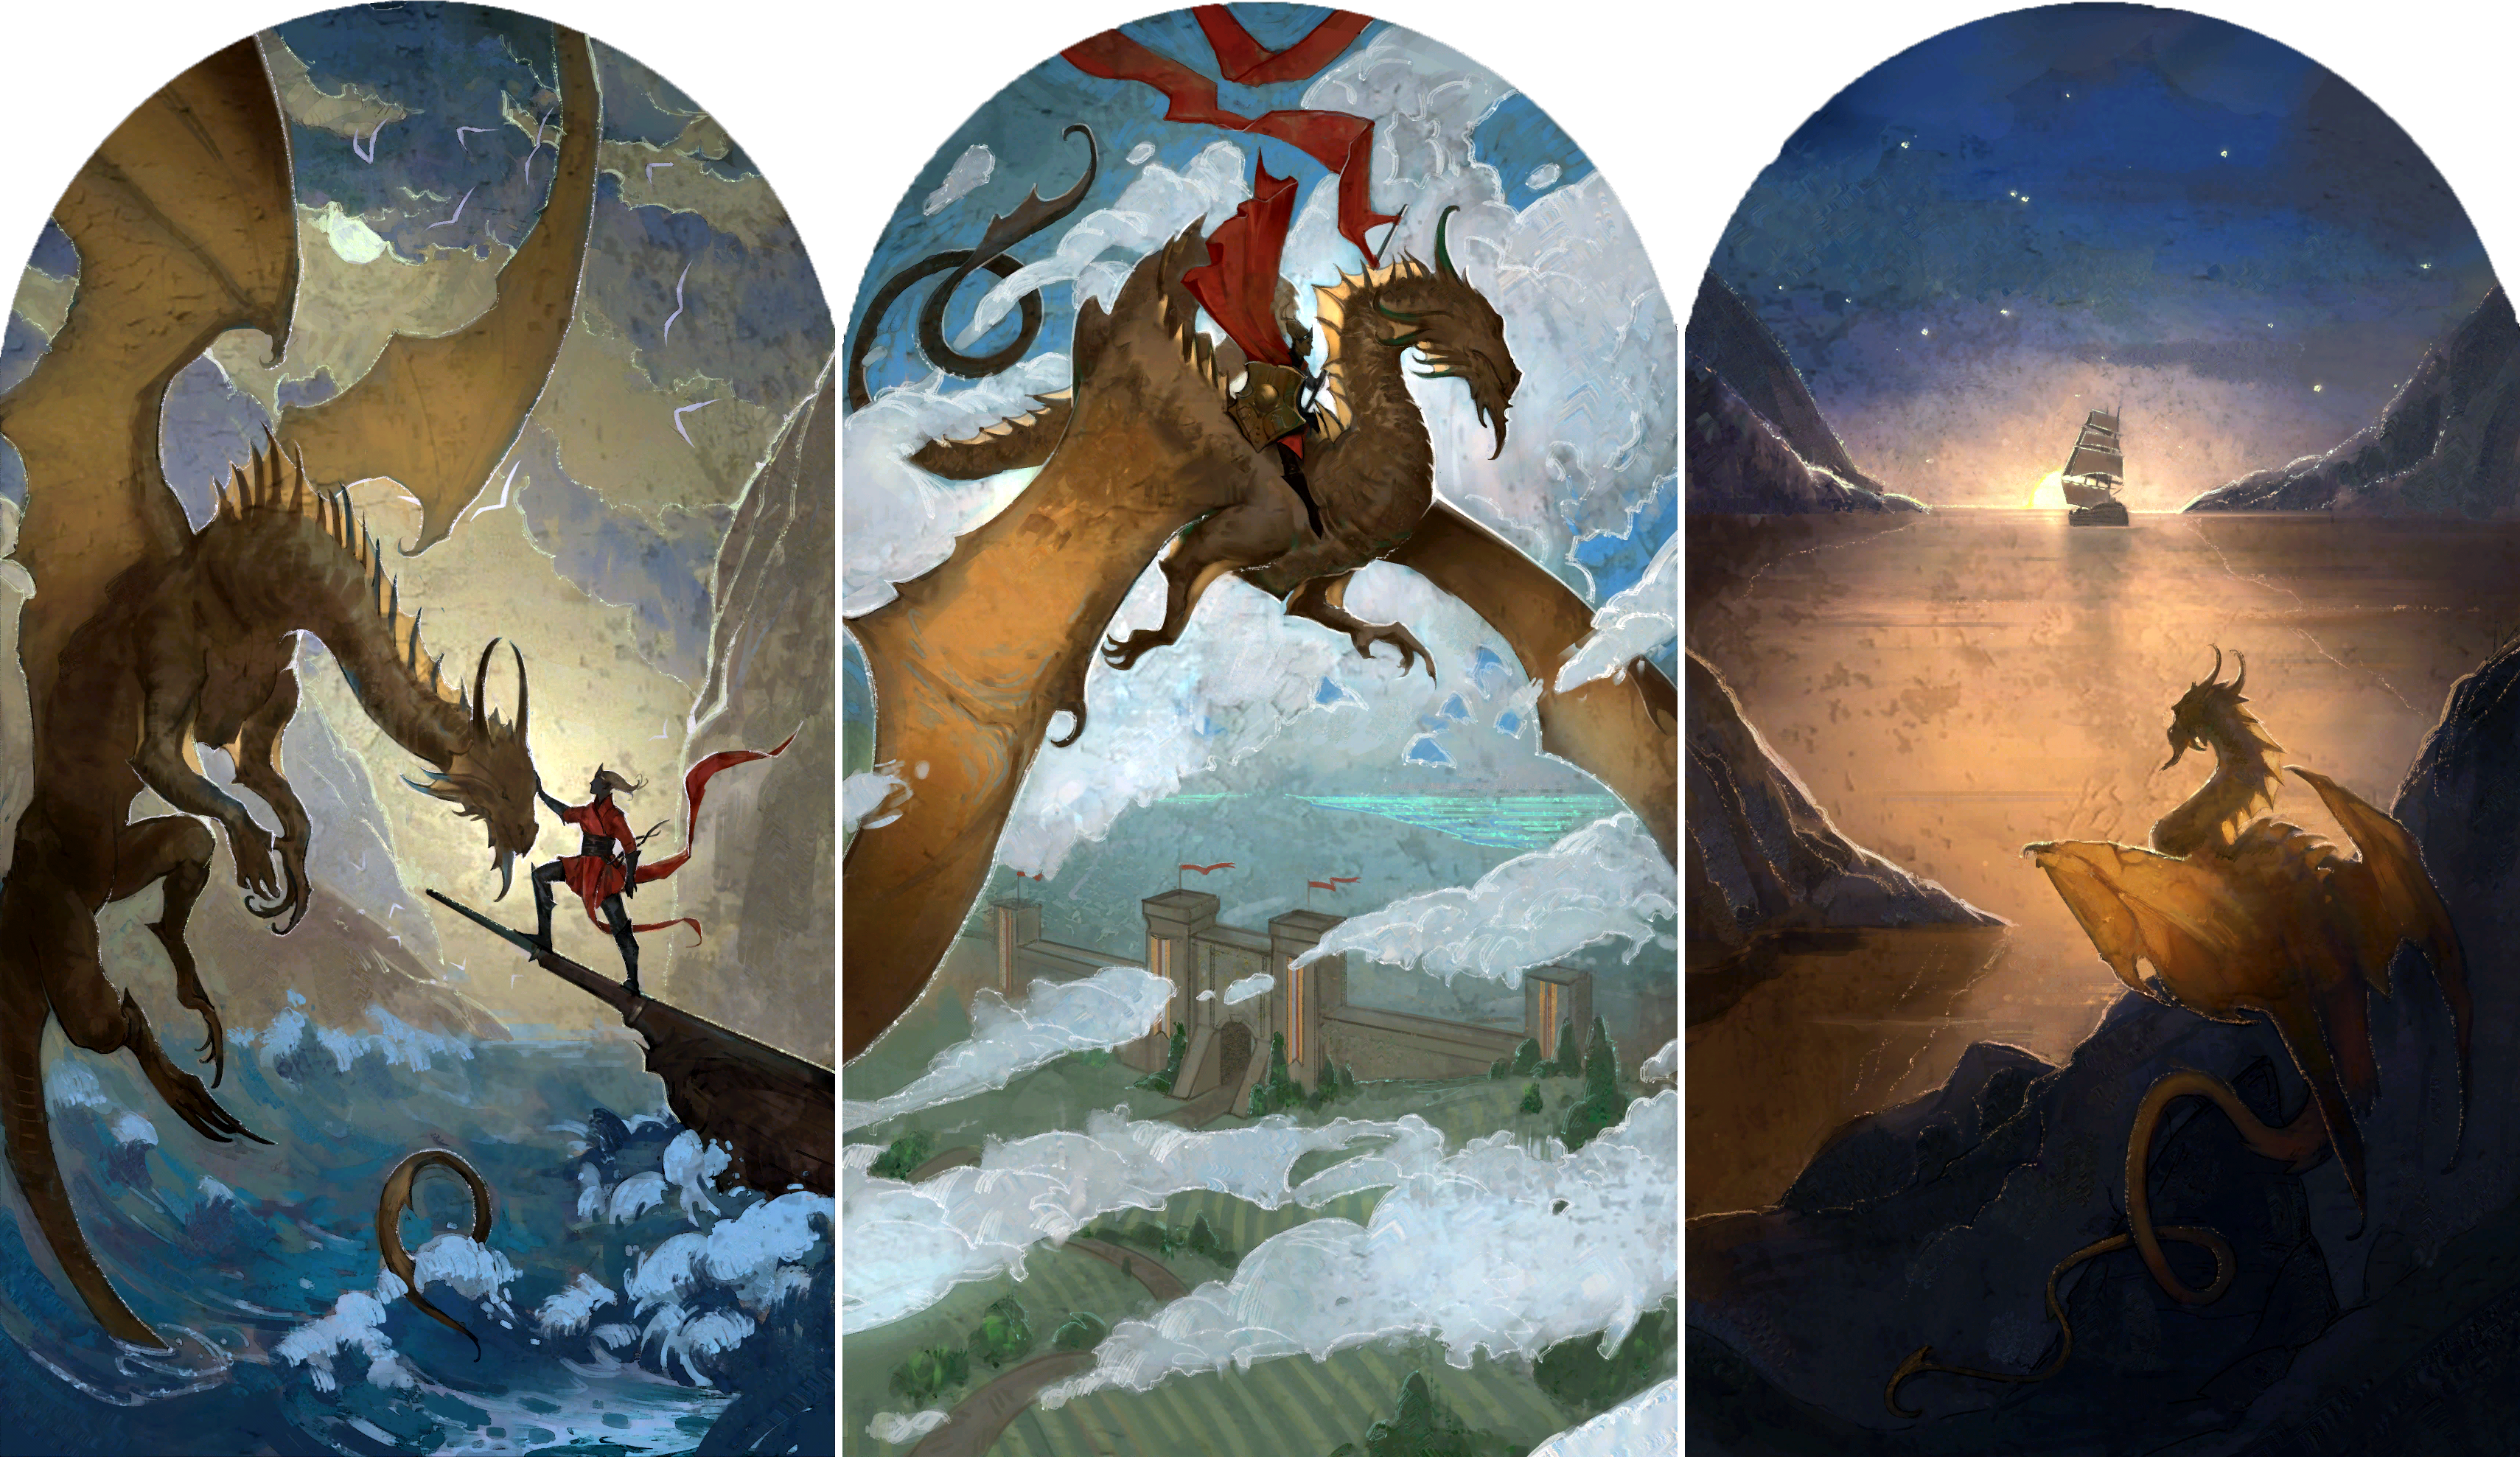
After passing a short spelean corridor and entering an Iron Gate, the party find themselves in an antechamber. Inside, the left wall consists of three murals depicting Ansur's story (as it goes within legends): an alliance with an elf, a collaborative foundation of a settlement, and departure of the elf while the wyrm is left to guard the grown-wide city. Companions might comment on these murals, with a passive 
![]()
Ancient Ansur, hear me: A champion is proclaimed.
The test begins; Let your judgement follow.
At the far end of the antechamber there is a locked door, and a statue of Balduran (resembling those posted throughout the city) beside it. Interacting with either the door or statue enacts a dialogue, where the latter in poetic verses suggests the player character is worthy enough to meet Ansur.
Interacting with the statue enables another passive History check as described above. The check is common with the one rolled at the murals (i.e. it is not rolled again if deciphering murals had been successful, and vice versa). The party can also make an Arcana check to reveal the status has had ![]()
- Examine the statue. What magic might be at work? (DC 15)
On a granite bench lies the ![]()
Trial Chambers[edit section | visual editor]
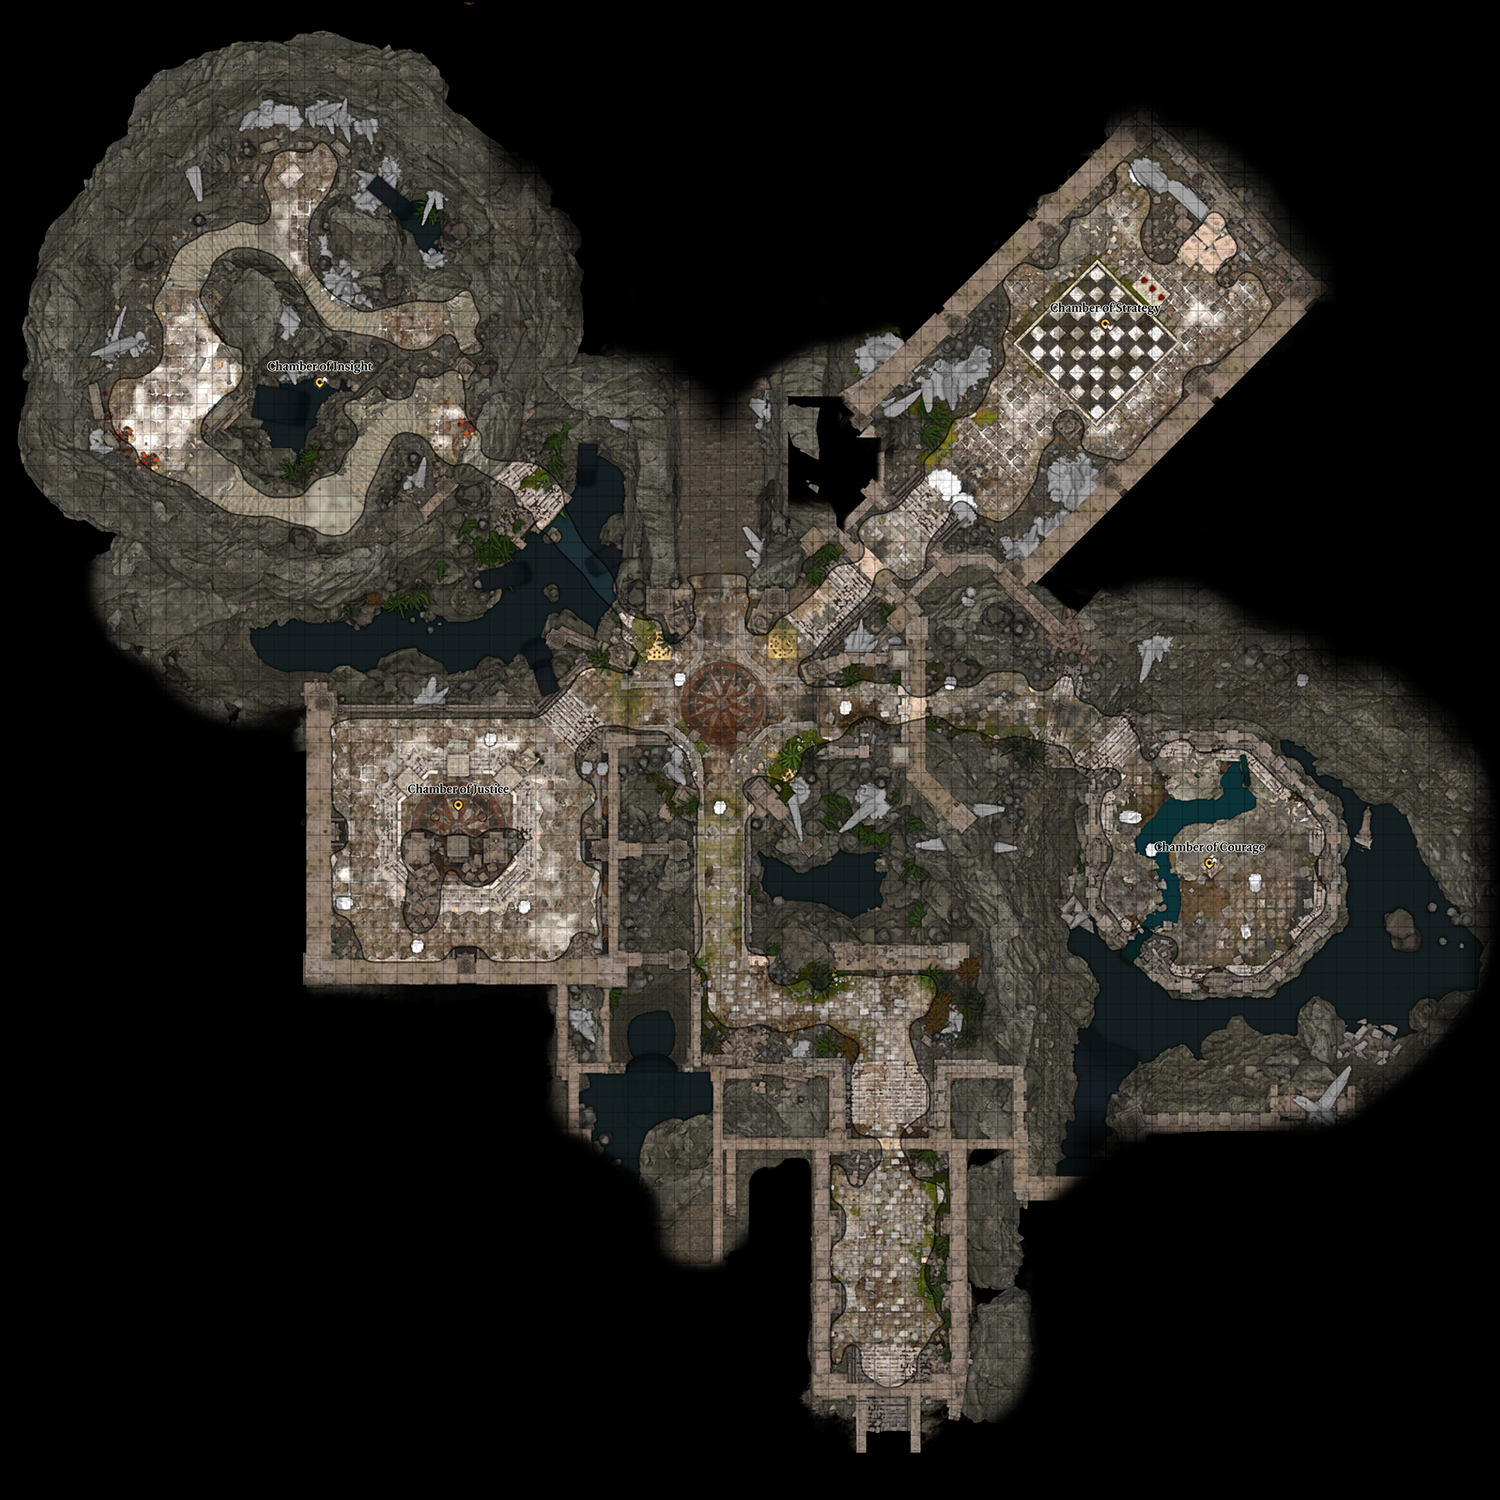
There are four trials that the party must complete to open the Dragon's Sanctum where 
There are four more statues of Balduran standing in a row in the central hall of the Wyrmway. Each depicts the founder of Baldur's Gate holding a symbol of one of the trials: a pair of scales for Justice, a Knight chesspiece for Strategy, a book for Insight, and a sword for Courage. Statues with the corresponding symbols stand also in each trial chamber. Successfully completing a trial causes the matching statue in the central hall to begin glowing.
This article describes the location. Most known strategies that can be used to pass the trials are listed and described on the Wyrmway page, which concerns the actual walkthrough of the relevant quest. Please check out the quest page before adding details to this one. |
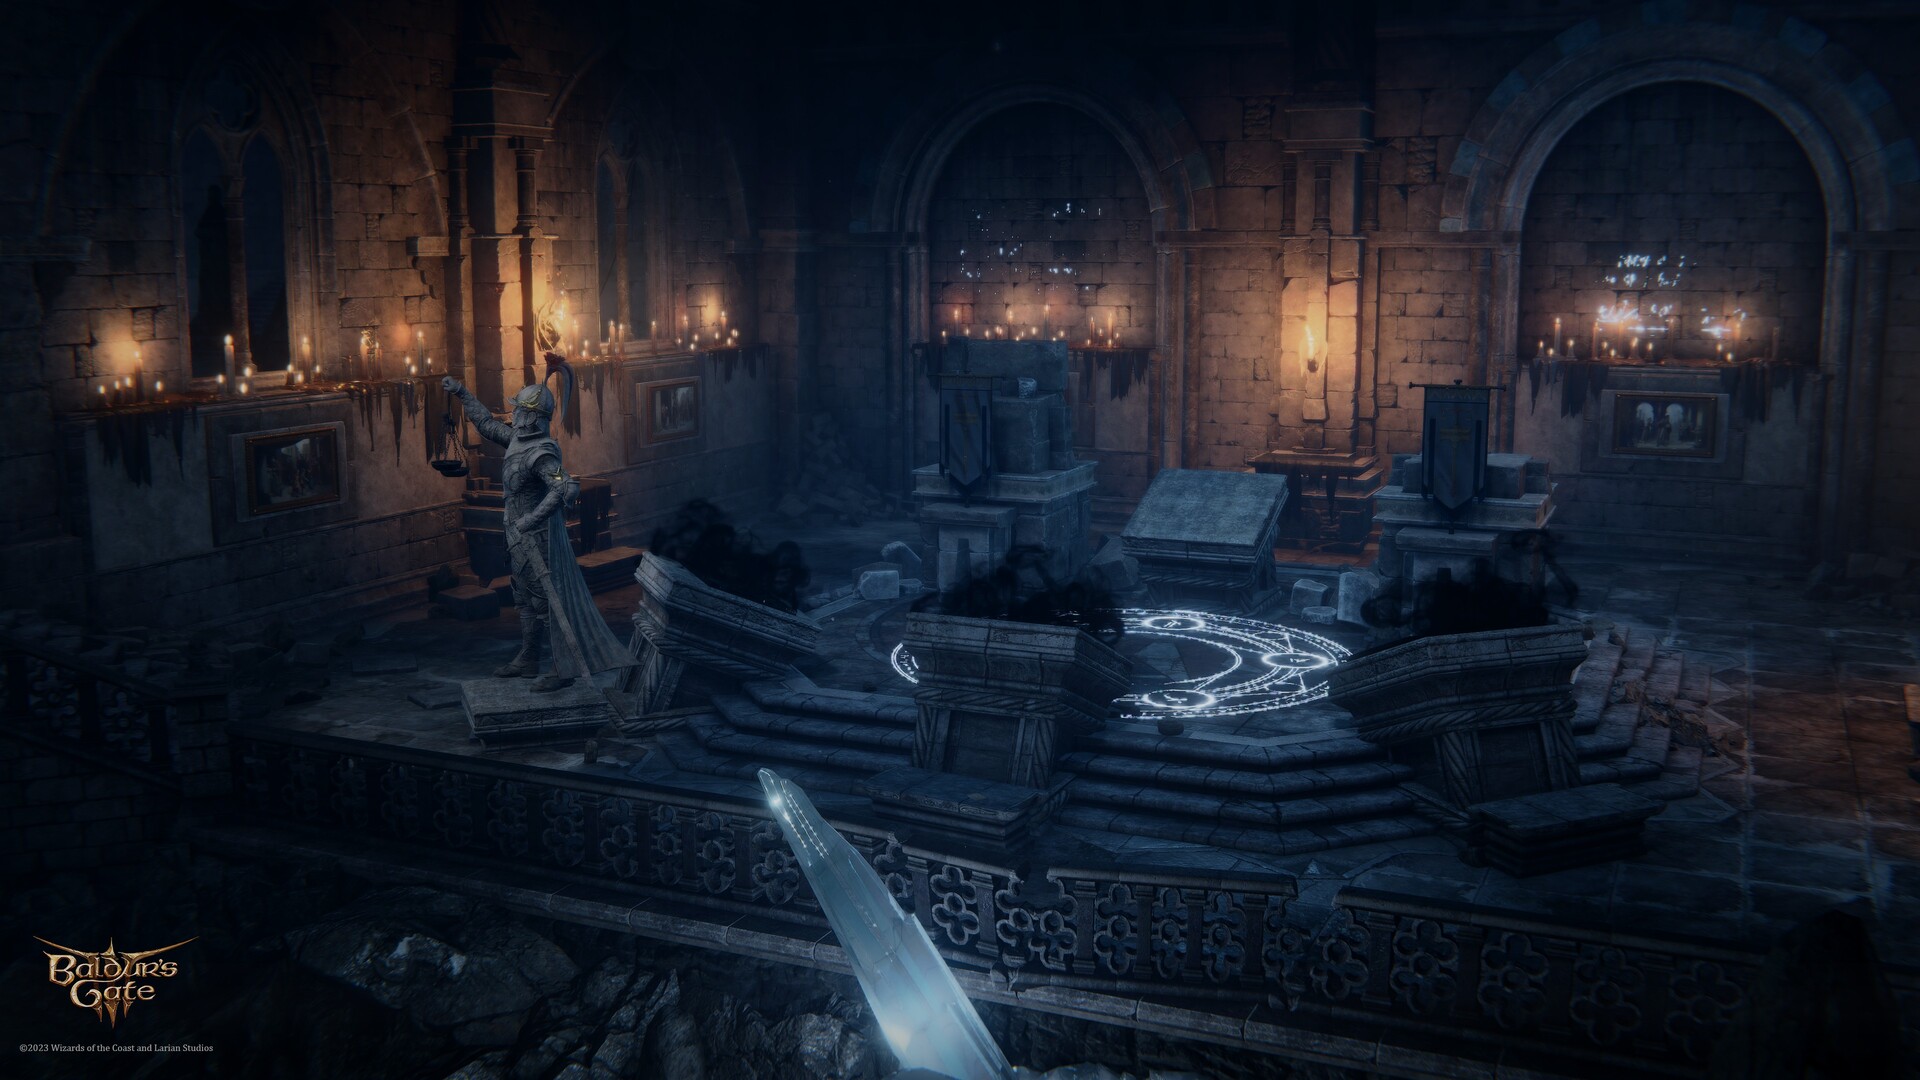
Chamber of Justice[edit section | visual editor]

This trial takes place in the far left area, with no door. On the walls are six paintings starting from "The Apple" and ending with "The Judgement", each described by Narrator if interacted. The paintings depict a man who steals apples to feed urchin children, then is hired to purloin a powerful artifact, chased and detained, and finally judged.
In the middle of the chamber is a stone dais with three more pictures placed on bookstands. These depict possible judgements that may be passed on the culprit by the player character, but are covered in shadow by the dishonourable 
On a granite bench near the shrouded paintings in the chamber ![]()
Chamber of Insight[edit section | visual editor]

The way to this trial lies over a nearly invisible path between the two left-hand statues of Balduran. The chamber itself is a vast cave resembling a library, with a meandering path leading almost back to the entrance, with multiple bookcases arranged along both sides. In the far end of the path there is a stone dais with three blood-red ghosts of the advisors: Paul Amaps, Cristina Suelto, and Alwin Stedd.
There are also several books fluttering around: one at the start of the path, one within the middle widening, and the last close to the end. Catching a fidgety books manually requires a
If 
Attacking Suelto at the end of the chamber results in the party correctly passing this test.
![]()

Chamber of Strategy[edit section | visual editor]

This trial takes place in the lower right-hand room. The way to the actual trial is blocked by a bunch of Attuned Crystals, which may be destroyed, walked around (from the left side) or jumped / flown over.
In this trial a lanceboard problem must be solved (a chess-like game common within Forgotten Realms) by delivering checkmate to the Black in two moves only.
There are three possible lanceboard problems, which might be offered to the party to solve. The particular setup is defined randomly (presumably at the beginning of the game), so it is not possible to re-enter the Wyrmway to change it.
There are three attempts to finish this trial correctly, the reminder indicated by the number of red heart-shared crystals left at the top of the board; each failed attempt results in one "heart" shattering. Additionally, whenever interacting with one of the lanceboard pieces, there is a pointed notification to show where the pieces can move, according to the ![]() .
.
If 
![]()
The ![]()
For more information on lanceboard game, see ![]()
Chamber of Courage[edit section | visual editor]
This trial takes place in the right most chamber. It is a cave with a roundish ground crossed by a water stream, and a Statue of Balduran in the centre. At the statue's feet stands a ![]()
This is a fighting trial which lasts 4 turns. Throughout it, one of party members holds the torch in their hand (equipped as a weapon) and must withstand the elements' attacks to pass the test. The party member interacting with the Balduran statue becomes the "torch carrier" for the trial. They must survive (stay alive and not ![]()
The Attuned Crystals that grow in clusters around the area can be shattered during the battle to give any nearby character resistance to elemental damage for 2 turns, granting them ![]()
On the stone edge in the southern part of the chamber the ![]()
The Dragon’s Sanctum[edit section | visual editor]
After successfully completing all four trials (or failing any of them and defeating all the spawned undead) the door in the main hall is unlocked, granting access to The Dragon's Sanctum, where
Related locations[edit section | visual editor]
Related quests[edit section | visual editor]
Characters[edit section | visual editor]


Creatures[edit section | visual editor]


Loot[edit section | visual editor]
Notable items obtained in this location, whether looted, purchased, or obtained as a quest reward:


Related literature[edit section | visual editor]


