Lae'zel: Difference between revisions
m (copyedit gameplay section) |
No edit summary |
||
| (247 intermediate revisions by 58 users not shown) | |||
| Line 1: | Line 1: | ||
[[ | {{PageSeo | ||
| | | title = Lae'zel | ||
| | | description = Lae'zel is an Origin character and companion in Baldur's Gate 3. She is a githyanki Fighter with the Soldier background. | ||
| | | image = Laezel.png | ||
| | }} | ||
| | {{SpoilerWarning}} | ||
| | {{CompanionTab|Lae'zel}} | ||
}}]] | {{Infobox character | ||
| name = Lae'zel | |||
| image = Laezel.png | |||
| imagesize = 0.8 | |||
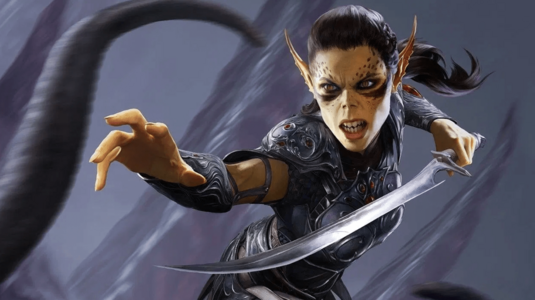
| image_alt_text = Cover artwork of Lae'zel from Baldur's Gate 3. | |||
| voice = Devora Wilde | |||
| creator = Kevin Vanord | |||
| role = [[Origins|Origin character]], [[companion]] | |||
| race = [[Githyanki]] | |||
| class = [[Fighter]] | |||
| background = [[Soldier]] | |||
| hometown = [[Astral Plane]] | |||
}} | |||
'''Lae'zel''' of crèche K'liir is an [[Origin]] character and a recruitable [[companion]] with the [[Soldier]] background. She is a [[githyanki]] and a [[Fighter]] first appearing during the [[Prologue]]. | |||
A ferocious warrior zealously devoted to the [[Vlaakith|Lich Queen]], she will do whatever is necessary to end the terror of the [[Illithid]] and prove herself to her queen. She can be first found on the [[Nautiloid]] during the prologue where she serves as a temporary companion, and properly recruited at the start of Act 1 and romanced by characters of any gender. | |||
{{NoExcerpt|{{Q|Who am I? Your only chance of survival.|Lae'zel introduces herself.|align=center}}}} | |||
{{TOC|limit=3}} | |||
== Overview == | |||
{{hatnote|For a full overview of Lae'zel's starting features, see the articles [[Fighter]] and [[githyanki]].}} | |||
=== Background === | |||
A fierce warrior from crèche K'liir, Lae'zel is a follower of Vlaakith, the Lich Queen of the githyanki. Sworn to obey her queen and serve as a blade against the Illithid, she was captured on her quest to present a Mind Flayer head to her queen. Now, tadpoled and with few options at hand, she must find a way to rid herself of the parasite and finally prove herself as a worthy warrior to the Undying Queen. How she does it, and whether or not she remains loyal to Vlaakith, is something she can decide throughout the game. | |||
=== Starting class === | |||
Lae'zel starts as a Fighter, with a focus on two-handed weapons as is githyanki tradition. Upon reaching level 3, she will default to the [[Battle Master]] subclass, allowing her to control the battlefield and subdue foes with great martial skills. | |||
=== Special features === | |||
Lae'zel does not have any special features unique to her. Being the only githyanki companion, she can, however, make the most out of all the githyanki exclusive passives and abilities from their [[Githyanki#Exclusive equipment|racial equipment]] found throughout the game. | |||
=== Personal quest === | |||
Lae'zel's personal quest is [[The Githyanki Warrior]], spanning all acts of the game. In it, she will explore the strong feelings of duty for her people and her zealous devotion to her queen, and begin questioning where her loyalties should truly lie. | |||
Lae'zel's companion quest ties into two further, separate quests. In [[Free Lae'zel]], the party finds her trapped in a cage by a pair of tieflings, and must decide how to proceed. During [[Help Kith'rak Voss]], Lae'zel must consider a proposition that promises to change the fate of her people forever. | |||
===Recruitment=== | |||
{{infobox statistics | |||
| name = Recruitment statistics | |||
| level = 1 | |||
| race = [[Githyanki]] | |||
| class = [[Fighter]] | |||
| size = Medium | |||
| type = Humanoid | |||
| armour_class = 16 | |||
| hit_points = 12 | |||
| movement_speed_meters = 9 | |||
| movement_speed_feet = 30 | |||
| weight_kg = 75 | |||
| weight_lb = 150 | |||
| str = 17 | |||
| dex = 13 | |||
| con = 15 | |||
| int = 10 | |||
| wis = 12 | |||
| cha = 8 | |||
| str_save_proficiency = yes | |||
| con_save_proficiency = yes | |||
| feature1_name = Great Weapon Fighting | |||
| feature1_description = Reroll once when landing a 1 or 2 on [[Damage#Damage rolls|damage rolls]] with two-handed melee weapons. | |||
| feature2_name = Martial Prodigy | |||
| feature2_description = Gain additional [[Proficiency|proficiencies]]. | |||
| feature3_name = Opportunity Attack | |||
| feature3_description = Automatically attack an enemy moving out of your reach. | |||
}} | |||
Lae'zel can be recruited as a temporary companion during the [[Prologue]] on the [[Nautiloid]] by agreeing to fight with her when encountered. She can then become a permanent companion during [[Act One]]. | |||
==== Prologue ==== | |||
* Lae'zel is first encountered on the nautiloid during the prologue. While escaping from the ship, she joins the party as a temporary companion. She leaves the party after successfully escaping. If Lae'zel is chosen as an Origin, she will be accompanied by [[Losiir]] in this encounter instead. | |||
==== Act One ==== | |||
* Lae'zel is encountered again a second time in the [[Wilderness]] near the [[Roadside Cliffs]] at {{Coords|242|370}}. She has been captured in a wooden cage by two [[Tiefling|tieflings]], [[Damays]] and [[Nymessa]]. If the party is able to free her, she can be invited to join the party. | |||
* If she dies aboard the Nautiloid, her body will be found at the beach starting area. She can be brought back to life and recruited. | |||
* If the party progress further into the game, she will break out of her cage and disappear, killing Damays and Nymessa if they are still alive. She can then be found later on and be recruitable again. She can still be found in the cage even if the party progresses to the [[Emerald Grove]] and trigger the initial attack scene at the gates. | |||
* After breaking out of the cage if she has been refused from joining up with the party until this point, she will show up when the party encounters the githyanki near the [[Mountain Pass]]. If she doesn't turn hostile during the encounter she can be recruited at the end of the battle. If she dies during it as an ally or neutral, she can be resurrected and still join. | |||
* If the party miss all the recruitment opportunities above, or refuse her, she can be found again one final time near the first waypoint in the [[Rosymorn Monastery Trail]] where the [[Crèche Y'llek|crèche]] is located for a final recruitment opportunity. | |||
Should the party proceed inside the crèche without having recruited Lae'zel, she will disappear from the mountain pass. When the party proceed to the [[Shadow-Cursed Lands]], they will find her as an [[Undead]] there, having went the wrong way when trying to find the crèche. | |||
=== Approval === | |||
{{main|Lae'zel/approval}}[[File:Lae'zel Approval.png|50px|left|alt=Lae'zel Approves|link=|Lae'zel Approves]] | |||
Lae'zel prefers direct approaches and is focused on quickly finding a solution to the tadpole infection, without wasting any time. She approves of direct solutions to problems, as well as not getting involved in petty issues unnecessarily. Displaying feats of martial skill and being resolute also sit well with her. | |||
Lae'zel dislikes acts of mercy and compassion, showing submission, respect or diplomacy when force is also an option. She doesn't agree with helping others for the sake of benevolence, despises showing weakness and will vehemently disapprove of any form of neutral or positive interaction with Illithid of any sort. | |||
=== Romance === | |||
{{main|Lae'zel/romance}} | |||
Lae'zel can be romanced by characters of any gender. At first only about sex, the relationship will eventually turn more serious as Lae'zel starts seeing them first as an equal, then as a partner. | |||
== Description == | |||
===Appearance=== | |||
Lae'zel has yellowish-green skin, with black accents below her ochre eyes, cheeks and neck. Her scars, most prominent of all one that runs from her nose to her chin, give her the mean look of a seasoned warrior. Black bumpy mottles adorn her face on her cheeks and like all githyanki, she has a small nose and her ears are long and pointed, with ridges protruding on the outer edges. Her hair, kept shoulder-length, is brown and straight, with a few adorned braids running along the side of her head and a small bun on her back. Though shorter than the rest of the companions, and with a wiry, muscled frame, she stands proud and intimidating. | |||
===Personality=== | |||
Lae'zel is depicted as xenophobic, arrogant, and quick to anger. Proud of her race, she frequently makes comments to the party detailing githyanki customs and the nature of her people, often as a means to illustrate githyanki superiority. She can be rough in her expressions and often cares little for the feelings of others. In her mission to remove her mind flayer parasite, she does not hesitate to intimidate or harm those who would step in her way. She is fiercely loyal to her queen Vlaakith, desperately seeking to prove her worth to the Lich Queen. Over time with the party, she becomes more accepting of her companions, though never losing her biting edge. Despite her often brutish behaviour, she is keenly observant and frequently understands the feelings of party members. Lae'zel isn't above pragmatism either, willing to go along with a plan she disagrees with or work together with someone she dislikes, as long as the party stand to benefit. Still juvenile to her people, she also shows some youthful stubbornness at times. | |||
When romanced, Lae'zel will slowly begin to soften up to her partner, and start enjoying the small things together with them, even seeing worth in Faerûn as a place to live in. | |||
== History == | |||
===Crèche K'liir=== | |||
Lae'zel is reserved when it comes to herself, and shares only fragments of her past before the conflict against the [[Absolute]]. | |||
She hails from crèche K'liir, also known as Stardock,{{ref|[[Baldur's Gate]], party banter between Lae'zel and Minthara.<br>''Minthara: "I would like to visit your home one day, Lae'zel. Where is K'liir?"<br>Lae'zel: "You may know it as Stardock. An asteroid, one of the Tears of Selûne. It's tunnels are home to all manner of creatures to hunt."''}} a githyanki enclave on an asteroid in the Tears of Selûne, an asteroid cluster near the namesake moon.{{ref|name=kliir|[[Campsite]], lines spoken by Lae'zel when asked about her hometown.<br>''"Next time you're able, look to the sky, watch the moon cross it. The Tears follow it. Rocky bodies tumbling through the Sea of Night. One of them is my crèche: K'liir."''}} There, Lae'zel received the customary githyanki martial education, with lessons on how to battle, raid and plunder in the name of Vlaakith. This brutal training instilled a hatred for illithid in her, as well as turn her into an ruthless warrior who would do anything to accomplish her missions. The indoctrination further gave her a racial superiority complex, and contempt for races other than githyanki. | |||
During her time in the creche, she and her clutch battled beholders in a nearby asteroid and infiltrated a neogi spelljammer, slaying its entire crew.{{ref|Campsite, lines spoken by Lae'zel when asked about her hometown.<br>''"My entire clutch battled beholders within the Eye of the Sky's tunnels. We infiltrated a neogi spelljammer and laid waste to its crew."''}} Tested by battle, but still considered a youngling by her people, she sought to prove herself to Vlaakith as a worthy warrior, and be welcomed to the [[Astral Plane]] among her kin.{{ref|name=worth|[[Mind Flayer Colony]], party banter between Lae'zel and Wyll.<br>''Wyll: "Lae'zel - did you ever fight illithid creatures in your training days?"<br>Lae'zel: "Never. The ghaik aboard the nautiloid was the first I ever witnessed in flesh."<br>Wyll: "Really? I figured you would have joined your fellow gith in a colony raid."<br>Lae'zel: "A young warrior is expected to fight their first ghaik with their cousins - kin hatched from the same clutch. The ones who triumph earn a place in githyanki society. The one's who don't, perish."''}} Thus, she set out in search of mind flayers, until then only heard in stories, to battle and present her queen a severed illithid head as proof of worth.{{ref|name=worth}}{{ref|name=illihead|Various locations, party banter between Lae'zel and Gale.<br>''Gale: "Tell me, Lae'zel, what is it like on the Astral Plane? Your home realm intrigues me."<br>Lae'zel: "Githyanki lay their eggs on other planes. They cannot mature in the Astral. I will only be welcomed once I obtain a mind flayer's head."''}} Lae'zel is captured by the nautiloid during this mission, tadpoled in a cruel mockery of their ancestral feud. Kept in a pod, she awaited [https://forgottenrealms.fandom.com/wiki/Ceremorphosis ceremorphosis], doomed to her fate. | |||
== Involvement == | |||
=== Prologue === | |||
Lae'zel can be encountered during the battle aboard the nautiloid. Having escaped her pod, she will ambush the party as they attempt to find an exit. Seeing as they are free from illithid influence just like her, she proposes a temporary alliance until they find a way out. After the ship crashes at the [[Ravaged Beach]], she disappears leaving the party to fend on their own. | |||
'''Lae'zel | === The Githyanki Warrior === | ||
[[File:Laezel Icon.png|right|125px]] | |||
{{Hatnote|See main article: [[The Githyanki Warrior]]}} | |||
''The Githyanki Warrior'' is Lae'zel's personal quest. It is added to the journal upon recruiting her and spans all three acts of the game. | |||
== | ====Act One==== | ||
Once properly recruited into the party, Lae'zel discloses that her people know a way of getting rid of tadpoles and that they must find a creche. As the party explores the [[Wilderness]], they eventually find a tiefling named [[Zorru]] in the [[Druid Grove]] who confesses to having run into a group of githyanki near the [[Mountain Pass]]. When reaching this location, the party will find a group of githyanki led by [[Voss|Kith'rak Voss]] skirmishing against a squad of [[Flaming Fist]]. Quickly dispatched by [[Qudenos]], Voss' mighty red dragon, the commander turns to the party and interrogates them on the whereabouts of a [[Mysterious Artefact]]. [[Shadowheart]] and Lae'zel's presence can influence the outcome of this encounter, but regardless of the outcome, Lae'zel will be angry that they're no closer to a cure for their parasites. | |||
Back at camp, Lae'zel will confront Shadowheart over her artefact she carries. Shadowheart is reluctant to part ways with the object, and mockingly suggests a duel at dawn. Later that night, the party will be woken up by a struggle between Shadowheart and Lae'zel, the latter pinned to the ground with a knife at her neck. The argument can be defused, in which case both parties agree to set their differences aside for the moment. | |||
The clues left by the githyanki and the corpses of their victims point to [[Creche Y'llek]] in the nearby mountains. Upon reaching the [[Rosymorn Monastery]], the party finds githyanki dealing with looters, indicating that they're in the right place. Once inside, exploring the creche can lead to an encounter with [[Stornugoss|Ghustil Stornugoss]] at the infirmary. She quickly diagnoses the party as being infected with tadpoles, and prompts them to use the nearby zaith'isk, a device used not for healing, but rather purification through death. The machine ultimately fails and Stornugoss flees to inform the inquisitor. An audience is then granted with [[W'wargaz|Ch'r'ai W'wargaz]], an inquisitor dispatched to the creche to help them find the mysterious object Voss was after. The inquisitor quickly reveals that he knows about the party and that they hold the artefact the githyanki are after. Whatever the outcome of this encounter, Vlaakith herself will appear through a projector and reveal that the object is an Astral Prism designed to contain somebody. She demands they kill the prism's inhabitant and earn her gratitude, opening the way inside. Within the prism, the party finally faces the [[Dream Visitor]] and must make the decision to spare or kill them. Upon exiting, if W'wargaz remains alive, he will turn on the party at the behest of Vlaakith, along the rest of the creche. | |||
At camp, Lae'zel can be found mulling over the events at the creche. Betrayed by her people, she believes it must be a test of faith from Vlaakith, yet seeds of doubt have been planted in her mind. Voss will appear shortly after, asking to be heard. If given the chance, he will reveal that Vlaakith is a pretender and that the true son and heir of [[Gith]], [[Orpheus]], still lives. Voss leaves not long after, but not before asking the party to meet him at [[Sharess' Caress]] in [[Baldur's Gate]]. Lae'zel can be guided down one of two paths here: remain loyal to Vlaakith, or reject the Lich Queen and find Orpheus. Whatever her choice, the next stop is Baldur's Gate. | |||
=== | ==== Act Two ==== | ||
At the end of Act 2, the party will be ambushed at their camp by githyanki monks. The Dream Visitor explains that they are under attack, and opening a portal to the prism, urges the party to aid them. Inside, they find a [[Mind Flayer]] attacked by the same githyanki monks, the illithid quickly reaches out to the party, revealing that ''it'' is the Dream Visitor. Forced to aid it, the party dispatches the githyanki and the mind flayer shares that it used the guise of the Dream Visitor to support them in their travels. Calling itself the [[Emperor]], he explains that the githyanki assaulted the prism in order to liberate its prisoner: Orpheus. Orpheus' power, combined with that of the Emperor, are everything keeping the party from becoming mindless thralls to the [[Netherbrain]], as such, they have no other option but to side with him for the moment. Lae'zel will share her disbelief, explaining that all githyanki have been told that the Gith's son died to battle thousands of years ago, another one of Vlaakith's lies. | |||
====Act Three==== | |||
Arriving at Baldur's Gate, the party can proceed to meet with Voss at Sharess' Caress as pacted. There, they will find Voss pleading with [[Raphael]], the latter simply dismissing him. Raphael will then explain that he has the means to free Orpheus and that he is willing to assist Lae'zel and the party, for a price. Raphael's deal can be agreed to, in which case he will give the party the [[Orphic Hammer]]. Alternatively, he can be refused and his home, the [[House of Hope]], can be raided in order to find the hammer. Whatever path chose, Voss will await in the [[Lower City Sewers]] for news of the hammer. | |||
At some point in camp, Vlaakith will appear once more before Lae'zel, commanding her to bow before her and accept her decree to kill Orpheus. If she previously rejected her, Lae'zel can be convinced to kneel to her queen and accept her once more. Lae'zel can also be inspired to remain true to herself and reject the Lich Queen for good, siding with the true heir of the Gith. | |||
With the hammer at hand, the party must bide their time until they can access the Astral Prism and Orpheus once more, as the Emperor refuses entry. This opportunity presents itself when confronting the Netherbrain at the [[Morphic Pool]]. Attempts to control it fail, and the Emperor pulls the party inside the prism in order to save them. Here, they can decide the Prince of the Comet's fate: staying loyal to Vlaakith and allying with the Emperor will result in the mind flayer consuming Orpheus' brains in order to absorb his essence. The party will then confront the Netherbrain with the Emperor as an ally. Alternatively, the party may reject the Emperor's offer, causing him to join the Netherbrain, and free Orpheus. Orpheus will be initially hostile, but sensing the dire situation the world is in, will join the party. He can furthermore decide to sacrifice himself to become illithid, or remain githyanki due to the sacrifice of a party member. Whatever the case, Orpheus will join the party against the Netherbrain in the final battle for Baldur's Gate. | |||
== | === Endings === | ||
====War against Vlaakith==== | |||
If Lae'zel betrayed Vlaakith, allied with Voss and freed Orpheus, she will join the revolutionaries and bring the fight to Vlaakith. Should Orpheus have become illithid, and was given a mercy killing, Lae'zel will call Quulos, one of Orpheus' dragons, and join Voss as they prepare to battle the Lich Queen. In the Epilogue, when spoken through her astral projection, she will mention that she and Voss are soon meeting [https://forgottenrealms.fandom.com/wiki/Zaerith_Menyar-Ag-Gith Zaerith Menyar-Ag-Gith], leader of the [[githzerai]], and is hopeful they can form an alliance and unify the Gith once more. | |||
Lae'zel | ====Ascension==== | ||
Should Lae'zel remain loyal to Vlaakith, and fulfilled her decree to slay Orpheus, she will be welcomed back to Tu'narath, the Lich Queen's seat of power. There, she is ascended by the queen herself, a ritual reserved for only the mightiest heroes of the githyanki. A scene shows Vlaakith on her throne, welcoming Lae'zel nonchalant. From the shadows, githyanki zombies stare lifelessly as Lae'zel approaches and the queen uses her psionic powers to force Lae'zel to kneel using her silver sword, grinning as she does. The camera slowly leaves the chamber as the doors close, Lae'zel's fate sealed. Withers can be asked her whereabouts in the Epilogue, to which he will reply that she has ascended as she wished, but he can sense her presence no longer. He implies that she may have been consumed by the queen, as the rumours go, yet he cannot be certain. | |||
== | ====Life in Faerûn==== | ||
{{UnderConstruction|section}} | |||
{{ | == Quest rewards == | ||
* {{MdRarityItem|Silver Sword of the Astral Plane}} — granted by Voss for showing him the [[Orphic Hammer]] as part of the quest [[Help Kith'rak Voss]]. | |||
== Interactions == | |||
===Companion interactions=== | |||
Lae'zel has unique dialogue interactions as a companion available after certain events. Whenever one is available, she will have a floating [ ! ] icon above her. | |||
==== Act One==== | |||
* When first encountering Voss, if Lae'zel reveals she is infected with a tadpole, Voss will sentence her to death. After dealing with the githyanki, Lae'zel will express her anger at Voss, and double-down on finding the nearby crèche. | |||
* After Vlaakith names Lae'zel a traitor upon returning from the first visit to the [[Mysterious Artefact|Astral Prism]], she will be distraught at her queen's betrayal. Lae'zel can be comforted or told that it might be a test from Vlaakith. | |||
=== | ==== Act Two ==== | ||
* Once Orpheus is revealed to be the being trapped in the Astral Prism, Lae'zel can be spoken to. She'll share her disbelief, and tell the party more about the long thought dead Prince of the Comets. | |||
==== Act Three ==== | |||
=== | ===Unique interactions=== | ||
Either as an origin, or in the party as a companion, Lae'zel has unique interactions and special dialogue with the following characters, listed by the act they are first encountered in. | |||
* | ====Act One==== | ||
* [[Shadowheart]] | |||
* [[Voss|Kith'rak Voss]] | |||
* | * [[Vlaakith]] | ||
* | |||
=== | ====Act Two==== | ||
====Act Three==== | |||
* [[Qudenos]] | |||
* [[Orpheus]] | |||
== Loot == | |||
Lae'zel can be killed and looted. She will have the same items as her starting equipment except for her underwear. | |||
== | === Starting equipment === | ||
{{div col}} | |||
*{{MdRarityItem|Camp Supply Sack}} | |||
*{{MdRarityItem|Keychain}} | |||
*{{MdRarityItem|Alchemy Pouch}} | |||
*{{MdRarityItem|Longsword}} | |||
*{{MdRarityItem|Shortbow}} | |||
*{{MdRarityItem|Githyanki Half Plate}} | |||
*{{MdRarityItem|Githyanki Boots}} | |||
*{{MdRarityItem|Lae'zel's Clothes}} | |||
*{{MdRarityItem|Lae'zel's Underwear}} | |||
*{{MdRarityItem|Tasteful Boots|uid=ARM_Camp_Shoes_Wyll}} | |||
*{{MdRarityItem|Scroll of Revivify}} | |||
*{{MdRarityItem|Potion of Healing}} x2 | |||
{{div col end}} | |||
== Achievements == | |||
{{Achievement|The Lich-Queen's Wrath}} | |||
== Gallery == | == Gallery == | ||
<gallery heights="200px" mode="packed"> | |||
File:Lae'zel Unarmed Model.webp|Base model. | |||
File:Lae'zel Camp Model.webp|Camp clothing model. | |||
File:Lae'zel Underwear Model.webp|Underwear model. | |||
Laezel EA Model.png|Early Access model. | |||
File:Lae'zel-artbook-concept.png|Digital Artbook concept. | |||
File:Lae'zel-character-creator.png|Appearance in the character creator. | |||
File:Edward-vanderghote-laezel.jpg|Portrait by Edward Vanderghote. | |||
File:Lae'zel-intro-cinematic.png|During the intro cinematic. | |||
File:Laezel.png|Cover artwork. | |||
File:Laezel-beta.png|Appearence pre-release. | |||
File:Laezel-ea.jpg|During Early Access. | |||
File:Laezel-promotional.png|Promotional art. | |||
File:Lae'zel-artbook-concept1.png|Digital Artbook armor concepts. | |||
</gallery> | |||
== Related literature == | |||
{{UnderConstruction|section}} | |||
== Notes == | |||
{{notebegin}} | |||
* Can be spoken to with {{SAI|Speak with Dead}}. | |||
{{noteend}} | |||
==References== | |||
{{div col}}{{reflist}}{{div col end}} | |||
== External links == | |||
* {{FRWiki|Lae'zel|long}} | |||
* [https://media.dndbeyond.com/compendium-images/claims/bg3/char-sheets/BG3-LaeZel-Sheet.pdf Lae'zel's official 5E D&D Character Sheet on D&D Beyond] (PDF) | |||
[[Category: Githyanki]] | {{NavCompanions}} | ||
[[Category: Fighters]] | [[Category:Humanoids]] | ||
[[Category: | [[Category:Githyanki]] | ||
[[Category:Origins]] | |||
[[Category:Companions]] | |||
[[Category:Fighters]] | |||
[[Category:Characters in Act 1]] | |||
[[Category:Available to Speak with Dead]] | |||
Latest revision as of 18:24, 8 April 2024
Spoiler warning: The following content contains unhidden spoilers. Read at your own risk. |
| Overview | Approval | Banter | Romance |
| Lae'zel | |
|---|---|
 | |
| Role | Origin character, companion |
| Created by | Kevin Vanord |
| Voiced by | Devora Wilde |
| Information | |
| Race | Githyanki |
| Class | Fighter |
| Background | Soldier |
| Hometown | Astral Plane |
Lae'zel of crèche K'liir is an Origin character and a recruitable companion with the Soldier background. She is a githyanki and a Fighter first appearing during the Prologue.
A ferocious warrior zealously devoted to the Lich Queen, she will do whatever is necessary to end the terror of the Illithid and prove herself to her queen. She can be first found on the Nautiloid during the prologue where she serves as a temporary companion, and properly recruited at the start of Act 1 and romanced by characters of any gender.
Overview[edit | edit source]
Background[edit | edit source]
A fierce warrior from crèche K'liir, Lae'zel is a follower of Vlaakith, the Lich Queen of the githyanki. Sworn to obey her queen and serve as a blade against the Illithid, she was captured on her quest to present a Mind Flayer head to her queen. Now, tadpoled and with few options at hand, she must find a way to rid herself of the parasite and finally prove herself as a worthy warrior to the Undying Queen. How she does it, and whether or not she remains loyal to Vlaakith, is something she can decide throughout the game.
Starting class[edit | edit source]
Lae'zel starts as a Fighter, with a focus on two-handed weapons as is githyanki tradition. Upon reaching level 3, she will default to the Battle Master subclass, allowing her to control the battlefield and subdue foes with great martial skills.
Special features[edit | edit source]
Lae'zel does not have any special features unique to her. Being the only githyanki companion, she can, however, make the most out of all the githyanki exclusive passives and abilities from their racial equipment found throughout the game.
Personal quest[edit | edit source]
Lae'zel's personal quest is The Githyanki Warrior, spanning all acts of the game. In it, she will explore the strong feelings of duty for her people and her zealous devotion to her queen, and begin questioning where her loyalties should truly lie.
Lae'zel's companion quest ties into two further, separate quests. In Free Lae'zel, the party finds her trapped in a cage by a pair of tieflings, and must decide how to proceed. During Help Kith'rak Voss, Lae'zel must consider a proposition that promises to change the fate of her people forever.
Recruitment[edit | edit source]
| Recruitment statistics | |||||||||||||
|---|---|---|---|---|---|---|---|---|---|---|---|---|---|
| Medium Humanoid | |||||||||||||
| Level 1 Fighter Githyanki | |||||||||||||
| Stats | |||||||||||||
| Armour Class | 16 | ||||||||||||
| Hit points | 12 | ||||||||||||
| Movement speed | 9 m (30 ft) | ||||||||||||
| Weight | 75 kg (150 lb) | ||||||||||||
| Initiative | +1 | ||||||||||||
| Ability scores | |||||||||||||
| |||||||||||||
| Proficiency bonus | +2 | ||||||||||||
| Saving throws |
| ||||||||||||
| Features | |||||||||||||
| Reroll once when landing a 1 or 2 on damage rolls with two-handed melee weapons. | |||||||||||||
| Gain additional proficiencies. | |||||||||||||
| Automatically attack an enemy moving out of your reach. | |||||||||||||
Lae'zel can be recruited as a temporary companion during the Prologue on the Nautiloid by agreeing to fight with her when encountered. She can then become a permanent companion during Act One.
Prologue[edit | edit source]
- Lae'zel is first encountered on the nautiloid during the prologue. While escaping from the ship, she joins the party as a temporary companion. She leaves the party after successfully escaping. If Lae'zel is chosen as an Origin, she will be accompanied by Losiir in this encounter instead.
Act One[edit | edit source]
- Lae'zel is encountered again a second time in the Wilderness near the Roadside Cliffs at X: 242 Y: 370. She has been captured in a wooden cage by two tieflings, Damays and Nymessa. If the party is able to free her, she can be invited to join the party.
- If she dies aboard the Nautiloid, her body will be found at the beach starting area. She can be brought back to life and recruited.
- If the party progress further into the game, she will break out of her cage and disappear, killing Damays and Nymessa if they are still alive. She can then be found later on and be recruitable again. She can still be found in the cage even if the party progresses to the Emerald Grove and trigger the initial attack scene at the gates.
- After breaking out of the cage if she has been refused from joining up with the party until this point, she will show up when the party encounters the githyanki near the Mountain Pass. If she doesn't turn hostile during the encounter she can be recruited at the end of the battle. If she dies during it as an ally or neutral, she can be resurrected and still join.
- If the party miss all the recruitment opportunities above, or refuse her, she can be found again one final time near the first waypoint in the Rosymorn Monastery Trail where the crèche is located for a final recruitment opportunity.
Should the party proceed inside the crèche without having recruited Lae'zel, she will disappear from the mountain pass. When the party proceed to the Shadow-Cursed Lands, they will find her as an Undead there, having went the wrong way when trying to find the crèche.
Approval[edit | edit source]

Lae'zel prefers direct approaches and is focused on quickly finding a solution to the tadpole infection, without wasting any time. She approves of direct solutions to problems, as well as not getting involved in petty issues unnecessarily. Displaying feats of martial skill and being resolute also sit well with her.
Lae'zel dislikes acts of mercy and compassion, showing submission, respect or diplomacy when force is also an option. She doesn't agree with helping others for the sake of benevolence, despises showing weakness and will vehemently disapprove of any form of neutral or positive interaction with Illithid of any sort.
Romance[edit | edit source]
Lae'zel can be romanced by characters of any gender. At first only about sex, the relationship will eventually turn more serious as Lae'zel starts seeing them first as an equal, then as a partner.
Description[edit | edit source]
Appearance[edit | edit source]
Lae'zel has yellowish-green skin, with black accents below her ochre eyes, cheeks and neck. Her scars, most prominent of all one that runs from her nose to her chin, give her the mean look of a seasoned warrior. Black bumpy mottles adorn her face on her cheeks and like all githyanki, she has a small nose and her ears are long and pointed, with ridges protruding on the outer edges. Her hair, kept shoulder-length, is brown and straight, with a few adorned braids running along the side of her head and a small bun on her back. Though shorter than the rest of the companions, and with a wiry, muscled frame, she stands proud and intimidating.
Personality[edit | edit source]
Lae'zel is depicted as xenophobic, arrogant, and quick to anger. Proud of her race, she frequently makes comments to the party detailing githyanki customs and the nature of her people, often as a means to illustrate githyanki superiority. She can be rough in her expressions and often cares little for the feelings of others. In her mission to remove her mind flayer parasite, she does not hesitate to intimidate or harm those who would step in her way. She is fiercely loyal to her queen Vlaakith, desperately seeking to prove her worth to the Lich Queen. Over time with the party, she becomes more accepting of her companions, though never losing her biting edge. Despite her often brutish behaviour, she is keenly observant and frequently understands the feelings of party members. Lae'zel isn't above pragmatism either, willing to go along with a plan she disagrees with or work together with someone she dislikes, as long as the party stand to benefit. Still juvenile to her people, she also shows some youthful stubbornness at times.
When romanced, Lae'zel will slowly begin to soften up to her partner, and start enjoying the small things together with them, even seeing worth in Faerûn as a place to live in.
History[edit | edit source]
Crèche K'liir[edit | edit source]
Lae'zel is reserved when it comes to herself, and shares only fragments of her past before the conflict against the Absolute.
She hails from crèche K'liir, also known as Stardock,[1] a githyanki enclave on an asteroid in the Tears of Selûne, an asteroid cluster near the namesake moon.[2] There, Lae'zel received the customary githyanki martial education, with lessons on how to battle, raid and plunder in the name of Vlaakith. This brutal training instilled a hatred for illithid in her, as well as turn her into an ruthless warrior who would do anything to accomplish her missions. The indoctrination further gave her a racial superiority complex, and contempt for races other than githyanki.
During her time in the creche, she and her clutch battled beholders in a nearby asteroid and infiltrated a neogi spelljammer, slaying its entire crew.[3] Tested by battle, but still considered a youngling by her people, she sought to prove herself to Vlaakith as a worthy warrior, and be welcomed to the Astral Plane among her kin.[4] Thus, she set out in search of mind flayers, until then only heard in stories, to battle and present her queen a severed illithid head as proof of worth.[4][5] Lae'zel is captured by the nautiloid during this mission, tadpoled in a cruel mockery of their ancestral feud. Kept in a pod, she awaited ceremorphosis, doomed to her fate.
Involvement[edit | edit source]
Prologue[edit | edit source]
Lae'zel can be encountered during the battle aboard the nautiloid. Having escaped her pod, she will ambush the party as they attempt to find an exit. Seeing as they are free from illithid influence just like her, she proposes a temporary alliance until they find a way out. After the ship crashes at the Ravaged Beach, she disappears leaving the party to fend on their own.
The Githyanki Warrior[edit | edit source]
The Githyanki Warrior is Lae'zel's personal quest. It is added to the journal upon recruiting her and spans all three acts of the game.
Act One[edit | edit source]
Once properly recruited into the party, Lae'zel discloses that her people know a way of getting rid of tadpoles and that they must find a creche. As the party explores the Wilderness, they eventually find a tiefling named Zorru in the Druid Grove who confesses to having run into a group of githyanki near the Mountain Pass. When reaching this location, the party will find a group of githyanki led by Kith'rak Voss skirmishing against a squad of Flaming Fist. Quickly dispatched by Qudenos, Voss' mighty red dragon, the commander turns to the party and interrogates them on the whereabouts of a Mysterious Artefact. Shadowheart and Lae'zel's presence can influence the outcome of this encounter, but regardless of the outcome, Lae'zel will be angry that they're no closer to a cure for their parasites.
Back at camp, Lae'zel will confront Shadowheart over her artefact she carries. Shadowheart is reluctant to part ways with the object, and mockingly suggests a duel at dawn. Later that night, the party will be woken up by a struggle between Shadowheart and Lae'zel, the latter pinned to the ground with a knife at her neck. The argument can be defused, in which case both parties agree to set their differences aside for the moment.
The clues left by the githyanki and the corpses of their victims point to Creche Y'llek in the nearby mountains. Upon reaching the Rosymorn Monastery, the party finds githyanki dealing with looters, indicating that they're in the right place. Once inside, exploring the creche can lead to an encounter with Ghustil Stornugoss at the infirmary. She quickly diagnoses the party as being infected with tadpoles, and prompts them to use the nearby zaith'isk, a device used not for healing, but rather purification through death. The machine ultimately fails and Stornugoss flees to inform the inquisitor. An audience is then granted with Ch'r'ai W'wargaz, an inquisitor dispatched to the creche to help them find the mysterious object Voss was after. The inquisitor quickly reveals that he knows about the party and that they hold the artefact the githyanki are after. Whatever the outcome of this encounter, Vlaakith herself will appear through a projector and reveal that the object is an Astral Prism designed to contain somebody. She demands they kill the prism's inhabitant and earn her gratitude, opening the way inside. Within the prism, the party finally faces the Dream Visitor and must make the decision to spare or kill them. Upon exiting, if W'wargaz remains alive, he will turn on the party at the behest of Vlaakith, along the rest of the creche.
At camp, Lae'zel can be found mulling over the events at the creche. Betrayed by her people, she believes it must be a test of faith from Vlaakith, yet seeds of doubt have been planted in her mind. Voss will appear shortly after, asking to be heard. If given the chance, he will reveal that Vlaakith is a pretender and that the true son and heir of Gith, Orpheus, still lives. Voss leaves not long after, but not before asking the party to meet him at Sharess' Caress in Baldur's Gate. Lae'zel can be guided down one of two paths here: remain loyal to Vlaakith, or reject the Lich Queen and find Orpheus. Whatever her choice, the next stop is Baldur's Gate.
Act Two[edit | edit source]
At the end of Act 2, the party will be ambushed at their camp by githyanki monks. The Dream Visitor explains that they are under attack, and opening a portal to the prism, urges the party to aid them. Inside, they find a Mind Flayer attacked by the same githyanki monks, the illithid quickly reaches out to the party, revealing that it is the Dream Visitor. Forced to aid it, the party dispatches the githyanki and the mind flayer shares that it used the guise of the Dream Visitor to support them in their travels. Calling itself the Emperor, he explains that the githyanki assaulted the prism in order to liberate its prisoner: Orpheus. Orpheus' power, combined with that of the Emperor, are everything keeping the party from becoming mindless thralls to the Netherbrain, as such, they have no other option but to side with him for the moment. Lae'zel will share her disbelief, explaining that all githyanki have been told that the Gith's son died to battle thousands of years ago, another one of Vlaakith's lies.
Act Three[edit | edit source]
Arriving at Baldur's Gate, the party can proceed to meet with Voss at Sharess' Caress as pacted. There, they will find Voss pleading with Raphael, the latter simply dismissing him. Raphael will then explain that he has the means to free Orpheus and that he is willing to assist Lae'zel and the party, for a price. Raphael's deal can be agreed to, in which case he will give the party the Orphic Hammer. Alternatively, he can be refused and his home, the House of Hope, can be raided in order to find the hammer. Whatever path chose, Voss will await in the Lower City Sewers for news of the hammer.
At some point in camp, Vlaakith will appear once more before Lae'zel, commanding her to bow before her and accept her decree to kill Orpheus. If she previously rejected her, Lae'zel can be convinced to kneel to her queen and accept her once more. Lae'zel can also be inspired to remain true to herself and reject the Lich Queen for good, siding with the true heir of the Gith.
With the hammer at hand, the party must bide their time until they can access the Astral Prism and Orpheus once more, as the Emperor refuses entry. This opportunity presents itself when confronting the Netherbrain at the Morphic Pool. Attempts to control it fail, and the Emperor pulls the party inside the prism in order to save them. Here, they can decide the Prince of the Comet's fate: staying loyal to Vlaakith and allying with the Emperor will result in the mind flayer consuming Orpheus' brains in order to absorb his essence. The party will then confront the Netherbrain with the Emperor as an ally. Alternatively, the party may reject the Emperor's offer, causing him to join the Netherbrain, and free Orpheus. Orpheus will be initially hostile, but sensing the dire situation the world is in, will join the party. He can furthermore decide to sacrifice himself to become illithid, or remain githyanki due to the sacrifice of a party member. Whatever the case, Orpheus will join the party against the Netherbrain in the final battle for Baldur's Gate.
Endings[edit | edit source]
War against Vlaakith[edit | edit source]
If Lae'zel betrayed Vlaakith, allied with Voss and freed Orpheus, she will join the revolutionaries and bring the fight to Vlaakith. Should Orpheus have become illithid, and was given a mercy killing, Lae'zel will call Quulos, one of Orpheus' dragons, and join Voss as they prepare to battle the Lich Queen. In the Epilogue, when spoken through her astral projection, she will mention that she and Voss are soon meeting Zaerith Menyar-Ag-Gith, leader of the githzerai, and is hopeful they can form an alliance and unify the Gith once more.
Ascension[edit | edit source]
Should Lae'zel remain loyal to Vlaakith, and fulfilled her decree to slay Orpheus, she will be welcomed back to Tu'narath, the Lich Queen's seat of power. There, she is ascended by the queen herself, a ritual reserved for only the mightiest heroes of the githyanki. A scene shows Vlaakith on her throne, welcoming Lae'zel nonchalant. From the shadows, githyanki zombies stare lifelessly as Lae'zel approaches and the queen uses her psionic powers to force Lae'zel to kneel using her silver sword, grinning as she does. The camera slowly leaves the chamber as the doors close, Lae'zel's fate sealed. Withers can be asked her whereabouts in the Epilogue, to which he will reply that she has ascended as she wished, but he can sense her presence no longer. He implies that she may have been consumed by the queen, as the rumours go, yet he cannot be certain.
Life in Faerûn[edit | edit source]
This page is in the process of being constructed or reformatted. You are welcome to contribute as well. Last edited on 2024-04-08. If multiple days have passed since, this template should be removed. |
Quest rewards[edit | edit source]
 Silver Sword of the Astral Plane — granted by Voss for showing him the Orphic Hammer as part of the quest Help Kith'rak Voss.
Interactions[edit | edit source]
Companion interactions[edit | edit source]
Lae'zel has unique dialogue interactions as a companion available after certain events. Whenever one is available, she will have a floating [ ! ] icon above her.
Act One[edit | edit source]
- When first encountering Voss, if Lae'zel reveals she is infected with a tadpole, Voss will sentence her to death. After dealing with the githyanki, Lae'zel will express her anger at Voss, and double-down on finding the nearby crèche.
- After Vlaakith names Lae'zel a traitor upon returning from the first visit to the Astral Prism, she will be distraught at her queen's betrayal. Lae'zel can be comforted or told that it might be a test from Vlaakith.
Act Two[edit | edit source]
- Once Orpheus is revealed to be the being trapped in the Astral Prism, Lae'zel can be spoken to. She'll share her disbelief, and tell the party more about the long thought dead Prince of the Comets.
Act Three[edit | edit source]
Unique interactions[edit | edit source]
Either as an origin, or in the party as a companion, Lae'zel has unique interactions and special dialogue with the following characters, listed by the act they are first encountered in.
Act One[edit | edit source]
Act Two[edit | edit source]
Act Three[edit | edit source]
Loot[edit | edit source]
Lae'zel can be killed and looted. She will have the same items as her starting equipment except for her underwear.
Starting equipment[edit | edit source]
Achievements[edit | edit source]

The Lich-Queen's Wrath
Ally with Voss against the githyanki God-Queen. Good luck.
Gallery[edit | edit source]
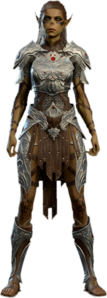
Base model.
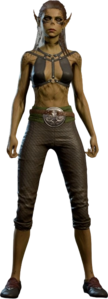
Camp clothing model.
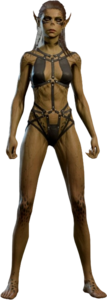
Underwear model.
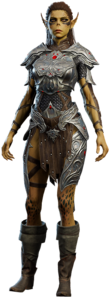
Early Access model.
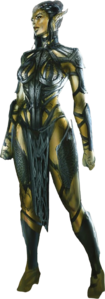
Digital Artbook concept.
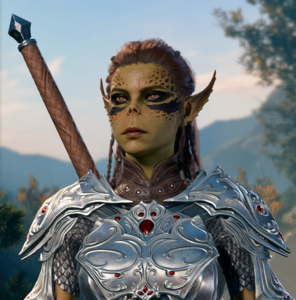
Appearance in the character creator.

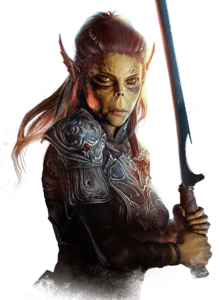
Portrait by Edward Vanderghote.
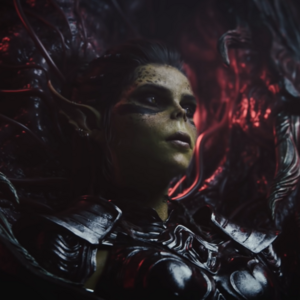
During the intro cinematic.
Cover artwork.

Appearence pre-release.

During Early Access.
Promotional art.
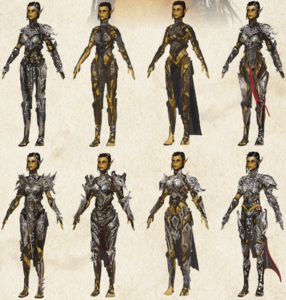
Digital Artbook armor concepts.


Related literature[edit | edit source]
This page is in the process of being constructed or reformatted. You are welcome to contribute as well. Last edited on 2024-04-08. If multiple days have passed since, this template should be removed. |
Notes[edit | edit source]
- Can be spoken to with
 .
.
References[edit | edit source]
- ↑ Baldur's Gate, party banter between Lae'zel and Minthara.
Minthara: "I would like to visit your home one day, Lae'zel. Where is K'liir?"
Lae'zel: "You may know it as Stardock. An asteroid, one of the Tears of Selûne. It's tunnels are home to all manner of creatures to hunt." - ↑ Campsite, lines spoken by Lae'zel when asked about her hometown.
"Next time you're able, look to the sky, watch the moon cross it. The Tears follow it. Rocky bodies tumbling through the Sea of Night. One of them is my crèche: K'liir." - ↑ Campsite, lines spoken by Lae'zel when asked about her hometown.
"My entire clutch battled beholders within the Eye of the Sky's tunnels. We infiltrated a neogi spelljammer and laid waste to its crew." - ↑ 4.0 4.1 Mind Flayer Colony, party banter between Lae'zel and Wyll.
Wyll: "Lae'zel - did you ever fight illithid creatures in your training days?"
Lae'zel: "Never. The ghaik aboard the nautiloid was the first I ever witnessed in flesh."
Wyll: "Really? I figured you would have joined your fellow gith in a colony raid."
Lae'zel: "A young warrior is expected to fight their first ghaik with their cousins - kin hatched from the same clutch. The ones who triumph earn a place in githyanki society. The one's who don't, perish." - ↑ Various locations, party banter between Lae'zel and Gale.
Gale: "Tell me, Lae'zel, what is it like on the Astral Plane? Your home realm intrigues me."
Lae'zel: "Githyanki lay their eggs on other planes. They cannot mature in the Astral. I will only be welcomed once I obtain a mind flayer's head."