Ad placeholder
Grand Mausoleum: Difference between revisions
m (Added notes section mentioning Glutted Catacombs condition.) |
|||
| (20 intermediate revisions by 3 users not shown) | |||
| Line 1: | Line 1: | ||
{{Location page | |||
| prefix = The | |||
| name = Grand Mausoleum | |||
| alt name = | |||
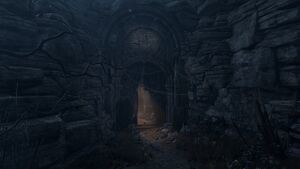
| | | image = Grand Mausoleum Front Door.jpg | ||
| | | image description = Entrance of the Grand Mausoleum | ||
| | | act = two | ||
|north | | summary = It is the Thorm family mausoleum, and final resting place of {{CharLink|Ketheric Thorm|Ketheric Thorm's}} wife, Melodia. | ||
|west | | region = Reithwin Town | ||
|east | | north = Gauntlet of Shar | ||
| west = | |||
| east = | |||
| south = Reithwin Town | |||
}} | }} | ||
==Overview== | ==Overview== | ||
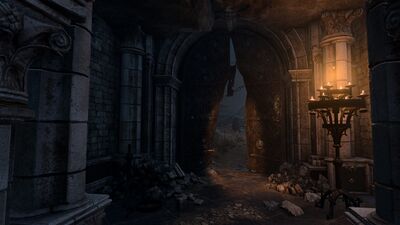
[[File:Grand Mausoleum Vestibule.jpg|thumb|right|400px|Foyer of the Grand Mausoleum]] | |||
===Exterior=== | ===Exterior=== | ||
{{CharLink|Raphael}} waits for the party near the entrance, practising his monologue for the party. If {{CharLink|Astarion}} is present, he asks Raphael about his back markings. Raphael says he will help Astarion in return for killing someone in the Mausoleum for him. Either way, this begins the quest {{Quest|Kill Raphael's Old Enemy}}. | |||
Down the cliffs just northeast of the Grand Mausoleum, a band of [[Cursed Kuo-Toa]] led by [[Cursed Kuo-Toa Chief]] ×1-2 guard the waterside. The chiefs each drop | Down the cliffs just northeast of the Grand Mausoleum, a band of [[Cursed Kuo-Toa]] led by [[Cursed Kuo-Toa Chief]] ×1-2 guard the waterside. The chiefs each drop {{SmRarityItem|Lightning Jabber|Lightning Jabbers}}. Further along the riverbank is the entrance to the [[House of Healing Morgue#Ominous crevice|Ominous Crevice]]. | ||
===Interior=== | ===Interior=== | ||
Past the iron fence is a talking skull asking for | Past the iron fence is a talking skull asking for {{CharLink|Nere}}, {{CharLink|Z'rell}}, and {{CharLink|Minthara}} to leave. Interacting with it does nothing. | ||
Melodia Thorm's sarcophagus rests centrally in the room, as well as {{SmRarityItem|Diary of Ketheric Thorm, Vol 1}}. In the west wing, the bones of additional Thorm relatives are desecrated, shaped into profane sculptures. {{SmRarityItem|Diary of Ketheric Thorm, Vol 2}} can be found among these. | |||
The eastern wing has a symbol of Myrkul ({{Ability check|Religion|18}}) and a locked Traveller’s Chest at {{Coords|-259|-882}}. It can be opened with a {{Ability check|Sleight of Hand|14}} and contains the {{SmRarityItem|Vivacious Cloak}}. A {{SmRarityItem|Stained Book (Thorm Mausoleum)|alias=Stained Book}} and the {{SmRarityItem|Diary of Ketheric Thorm, Vol 3}} can be found in this wing. | |||
The northern wing has a plaque which reveals that {{CharLink|Isobel Thorm}} is Ketheric’s daughter and that the tomb here belongs to her. Passing a {{Ability check|Perception|10}} here reveals traps on the vents and tiles on the floor, as well as gargoyle heads on the walls. However, traipsing haphazardly across the traps does not have any ill consequences, revealing that they were previously disarmed. The party can still disarm them again. | |||
To move further in the mausoleum, the buttons below the three paintings around the room have to to pressed in the right order. A miniature portrait of Ketheric Thorm's personal journey "from splendour, to tragedy, to infamy," in the {{SmRarityItem|Stained Book (Thorm Mausoleum)}} hints, how to to do: | |||
# "Moonrise Towers" painting, representing his origin as a worshipper of {{CharLink|Selûne}} | |||
# "Grief" painting, representing the loss of his family | |||
# "General" painting, representing his rise as a crusader for {{CharLink|Shar}} | |||
This opens up the walls beside the Ketheric Thorm painting, revealing a lift with a glowing Traversal Gem. Successfully solving this puzzle grants the [[Inspiration|Inspirational Event]] '''History Never Forgets''' ([[Sage]] background). A buried chest containing minor random loot can be found by passing a ({{Ability check|Survival|18}}) at {{Coords|273|818}}. Interacting with the Traversal Gem on the lift will take the party to the Gauntlet of Shar. | |||
==Waypoints== | |||
This location contains the following waypoint: | |||
:{{WpCo|Grand Mausoleum|-173 |80}} | |||
==Related locations== | |||
*{{Loc|Gauntlet of Shar}} | |||
*{{Loc|Reithwin Town}} | |||
== | ==Related quests== | ||
* | * {{Quest|Find the Nightsong}} | ||
* {{Quest|Find Ketheric Thorm's Relic}} | |||
* {{Quest|Infiltrate Moonrise Towers}} | |||
* {{Quest|Kill Raphael's Old Enemy}} | |||
* {{Quest|The Pale Elf}} | |||
== | ==Notable Characters== | ||
* | * {{MdCharLink|Raphael}} | ||
== Creatures== | |||
* | * {{MdCharLink|Cursed Kuo-Toa Chief}} | ||
* | * {{MdCharLink|Cursed Kuo-Toa (melee)}} | ||
* | * {{MdCharLink|Cursed Kuo-Toa (ranged)}} | ||
==Notable loot== | ==Notable loot== | ||
Notable items obtained in this location, whether looted, purchased, or obtained as a quest reward: | Notable items obtained in this location, whether looted, purchased, or obtained as a quest reward: | ||
* {{RarityItem|Lightning Jabber}} - dropped from the [[Cursed Kuo-Toa Chief]] at {{Coords|-137|123}} | |||
* {{RarityItem|Vivacious Cloak}} | * {{RarityItem|Vivacious Cloak}} | ||
==Notes== | ==Notes== | ||
* All party members will have {{cond|Glutted Catacombs}} while inside the Grand Mausoleum, allowing them to cast {{SAI|Animate Dead: Skeleton}} without consuming a corpse. | * All party members will have {{cond|Glutted Catacombs}} while inside the Grand Mausoleum, allowing them to cast {{SAI|Animate Dead: Skeleton}} without consuming a corpse. | ||
[[Category:Locations]][[Category:Act Two Locations]] | {{Shadow-Cursed Lands}} | ||
[[Category:Locations]] | |||
[[Category:Act Two Locations]] | |||
Latest revision as of 12:32, 11 January 2025
| Reithwin Town | ||||
| Gauntlet of Shar | ||||
| ↑ | ||||
| Grand Mausoleum | ||||
| ↓ | ||||
| Reithwin Town | ||||
Overview[edit | edit source]
Exterior[edit | edit source]
Raphael waits for the party near the entrance, practising his monologue for the party. If Astarion is present, he asks Raphael about his back markings. Raphael says he will help Astarion in return for killing someone in the Mausoleum for him. Either way, this begins the quest .
Down the cliffs just northeast of the Grand Mausoleum, a band of Cursed Kuo-Toa led by Cursed Kuo-Toa Chief ×1-2 guard the waterside. The chiefs each drop ![]() Lightning Jabbers. Further along the riverbank is the entrance to the Ominous Crevice.
Lightning Jabbers. Further along the riverbank is the entrance to the Ominous Crevice.
Interior[edit | edit source]
Past the iron fence is a talking skull asking for Nere, Z'rell, and Minthara to leave. Interacting with it does nothing.
Melodia Thorm's sarcophagus rests centrally in the room, as well as ![]() Diary of Ketheric Thorm, Vol 1. In the west wing, the bones of additional Thorm relatives are desecrated, shaped into profane sculptures.
Diary of Ketheric Thorm, Vol 1. In the west wing, the bones of additional Thorm relatives are desecrated, shaped into profane sculptures. ![]() Diary of Ketheric Thorm, Vol 2 can be found among these.
Diary of Ketheric Thorm, Vol 2 can be found among these.
The eastern wing has a symbol of Myrkul (![]() DC 18 Religion check) and a locked Traveller’s Chest at X: -259 Y: -882. It can be opened with a
DC 18 Religion check) and a locked Traveller’s Chest at X: -259 Y: -882. It can be opened with a ![]() DC 14 Sleight of Hand check and contains the
DC 14 Sleight of Hand check and contains the ![]() Vivacious Cloak. A
Vivacious Cloak. A ![]() Stained Book and the
Stained Book and the ![]() Diary of Ketheric Thorm, Vol 3 can be found in this wing.
Diary of Ketheric Thorm, Vol 3 can be found in this wing.
The northern wing has a plaque which reveals that Isobel Thorm is Ketheric’s daughter and that the tomb here belongs to her. Passing a ![]() DC 10 Perception check here reveals traps on the vents and tiles on the floor, as well as gargoyle heads on the walls. However, traipsing haphazardly across the traps does not have any ill consequences, revealing that they were previously disarmed. The party can still disarm them again.
DC 10 Perception check here reveals traps on the vents and tiles on the floor, as well as gargoyle heads on the walls. However, traipsing haphazardly across the traps does not have any ill consequences, revealing that they were previously disarmed. The party can still disarm them again.
To move further in the mausoleum, the buttons below the three paintings around the room have to to pressed in the right order. A miniature portrait of Ketheric Thorm's personal journey "from splendour, to tragedy, to infamy," in the ![]() Stained Book (Thorm Mausoleum) hints, how to to do:
Stained Book (Thorm Mausoleum) hints, how to to do:
- "Moonrise Towers" painting, representing his origin as a worshipper of Selûne
- "Grief" painting, representing the loss of his family
- "General" painting, representing his rise as a crusader for Shar
This opens up the walls beside the Ketheric Thorm painting, revealing a lift with a glowing Traversal Gem. Successfully solving this puzzle grants the Inspirational Event History Never Forgets (Sage background). A buried chest containing minor random loot can be found by passing a (![]() DC 18 Survival check) at X: 273 Y: 818. Interacting with the Traversal Gem on the lift will take the party to the Gauntlet of Shar.
DC 18 Survival check) at X: 273 Y: 818. Interacting with the Traversal Gem on the lift will take the party to the Gauntlet of Shar.
Waypoints[edit | edit source]
This location contains the following waypoint:
Related locations[edit | edit source]
Related quests[edit | edit source]
Notable Characters[edit | edit source]
Creatures[edit | edit source]
Notable loot[edit | edit source]
Notable items obtained in this location, whether looted, purchased, or obtained as a quest reward:
 Lightning Jabber - dropped from the Cursed Kuo-Toa Chief at X: -137 Y: 123
 Vivacious Cloak
Notes[edit | edit source]
- All party members will have while inside the Grand Mausoleum, allowing them to cast without consuming a corpse.

