Shattered Sanctum
More actions

| Wilderness | ||||
| Worg Pens | ||||
| ↑ | ||||
| Defiled Temple | ← | Shattered Sanctum | ||
| ↓ | ||||
| Goblin Camp | ||||

“This ruin's dedicated to Selûne. Vile moon witch... For once, the goblins' decorations are an improvement.„
Overview edit

The Shattered Sanctum is the inner part of a former temple dedicated to ![]() Selûne. It consists of a long entryway, a main nave which has side premises to the east and west, and the northern part, divided from the other areas and thus resembling a chancel. Beneath the northern part of the sanctum is a cave used by goblins as a spider pit.
Selûne. It consists of a long entryway, a main nave which has side premises to the east and west, and the northern part, divided from the other areas and thus resembling a chancel. Beneath the northern part of the sanctum is a cave used by goblins as a spider pit.
Above the sanctum are rafters which provide a convenient way to navigate the temple unnoticed. Several iron ladders in different parts of the sanctum lead up to rafters and to upper stone perches and wooden scaffolds they connect. At least five chests can be found here, containing minor loot (mainly silver tableware, which might have been looted by the goblins in the former temple).
War Drums are scattered throughout the ruined temple and turn the entire population hostile if any goblin plays them. For the party members, these are red-outlined, and attempting to use them is considered theft. Four tall statues along the sides of the main nave can be destroyed, and can be used if a battle is commenced.
Entryway edit
The main entrance from the Goblin Camp leads directly into the entryway. It resembles a long archway with two galleries on both sides. Six goblins guard here, led by ![]() Warrior Trinzas, two of them are up on the galleries. There is no way to pass by them by crouching or using
Warrior Trinzas, two of them are up on the galleries. There is no way to pass by them by crouching or using ![]() Invisibility. However, the entryway may be bypassed altogether, breaking the Crumbling Wall above the main entrance at X: Y: . Once the party get inside the temple, they can pass the entrance guards in any direction without being questioned.
Invisibility. However, the entryway may be bypassed altogether, breaking the Crumbling Wall above the main entrance at X: Y: . Once the party get inside the temple, they can pass the entrance guards in any direction without being questioned.
Upon approaching, Trinzas tries to shoo them off to the celebration in the outer camp. To proceed, she must be convinced through a variety of skill checks. However, drow characters (or characters ![]() disguised as such) can pass without any checks. If the party progressed
disguised as such) can pass without any checks. If the party progressed ![]() Save the Goblin Sazza,
Save the Goblin Sazza, ![]() Sazza helps bypass this point.
Sazza helps bypass this point.
Acquiring access into the temple grants the inspiration event ![]() Very Important Parasite to party members with the
Very Important Parasite to party members with the ![]() Charlatan background, if it has not been granted before.
Charlatan background, if it has not been granted before.
Heavy Oak Doors behind the goblin guard lead to another archway and then to the main nave of the former temple.
edit
The altar to Absolute edit
Goblin cult leader ![]() Priestess Gut initially stays on a wooden dais in front of the altar. Several goblins wandering around the hall come to her from time to time to receive the Brand of the Absolute. Any party member can obtain it, too, by speaking with Gut. If the priestess becomes indisposed,
Priestess Gut initially stays on a wooden dais in front of the altar. Several goblins wandering around the hall come to her from time to time to receive the Brand of the Absolute. Any party member can obtain it, too, by speaking with Gut. If the priestess becomes indisposed, ![]() Warlock Greez can brand members of the party.
Warlock Greez can brand members of the party.
Throughout the dialogue with Gut, the player character sees a vision of her taking orders from one of the Chosen of the Absolute. If they choose to delve deeper in Gut's mind through their tadpole, she feels this and suggests continuing in her private chapel (see below). If the player character agrees, Gut leaves the hall, proceeds westwards to her room and stays there.
From the upper gallery at X: 314 Y: -32 a collapsed corridor leads to the open ground above the main entrance. Initially it is blocked and needs to be destroyed from the outer camp side.
Spider pit edit
Behind the Priestess Gut's shrine stairs lead down to the large cave-like spider pit, with the entrance crossed with a lever-operated iron grate. Inside a ![]() Larger Giant Spider and a
Larger Giant Spider and a ![]() Smaller Giant Spider are kept. Initially they crawl around the far wall of the pit. Upon approaching, they can see two of the goblins shoving a prisoner
Smaller Giant Spider are kept. Initially they crawl around the far wall of the pit. Upon approaching, they can see two of the goblins shoving a prisoner ![]() Smythin down into the pit. Lured by close prey, the spiders approach the grate and can be spoken with from outside. Regardless of which spider is chosen, only the Larger Giant Spider responds. She can then be convinced to spare the party and attack the goblins instead. Opening the grate stealthily leads to a fight between the goblins in the main nave and the spiders. If no means of concealment are used, both goblins and spiders become hostile to the party.
Smythin down into the pit. Lured by close prey, the spiders approach the grate and can be spoken with from outside. Regardless of which spider is chosen, only the Larger Giant Spider responds. She can then be convinced to spare the party and attack the goblins instead. Opening the grate stealthily leads to a fight between the goblins in the main nave and the spiders. If no means of concealment are used, both goblins and spiders become hostile to the party.
Convincing the spiders to attack the goblins instead of the party earns the inspiration event ![]() A Better Offer for party members with the
A Better Offer for party members with the ![]() Charlatan background.
Charlatan background.
Also, Smythin can still be saved from falling into the pit by carefully timed actions. If saved, the inspiration event ![]() Saved by a Thread is granted to party members with the
Saved by a Thread is granted to party members with the ![]() Folk Hero background.
Folk Hero background.
A cave passage deep within the pit, which is initially blocked by the destroyable Cracked Tiles, connects to the prison cell in the Defiled Temple.
West edit
Zhentarim storeroom edit
At the southeastern corner, the Zhentarim trader ![]() Roah Moonglow can be found with her bodyguards
Roah Moonglow can be found with her bodyguards ![]() Erna and
Erna and ![]() Yerle. She is a Trader with many useful items. If surviving here, she reappears in Moonrise Towers in Act Two. Behind her is a storeroom holding the cult's large supply of
Yerle. She is a Trader with many useful items. If surviving here, she reappears in Moonrise Towers in Act Two. Behind her is a storeroom holding the cult's large supply of ![]() Firewine Barrels and
Firewine Barrels and ![]() Smokepowder Barrels. There are six of each, more than enough for setting up an explosive trap. Besides fighting past the guards, a party member can jump into the storeroom from the rafters above. Alternatively, small-sized characters can fit through a rocky crevice at X: 255 Y: -42 from the Defiled Temple at X: 422 Y: 17. Miscellaneous crates in the room contain Grenades and weapon coatings, and a locked chest (
Smokepowder Barrels. There are six of each, more than enough for setting up an explosive trap. Besides fighting past the guards, a party member can jump into the storeroom from the rafters above. Alternatively, small-sized characters can fit through a rocky crevice at X: 255 Y: -42 from the Defiled Temple at X: 422 Y: 17. Miscellaneous crates in the room contain Grenades and weapon coatings, and a locked chest (![]() DC 18 Sleight of Hand check) can be picked for several hundred Gold.
DC 18 Sleight of Hand check) can be picked for several hundred Gold.
Roah is pleased having goblins as business partners. If starting a fight with the goblins, she and her bodyguards are likely to join the battle siding with goblins against the party.
Gut's chapel edit
Farther north is Gut's workroom, where she is waiting for the party after initial conversation near the altar. Should the party agree to her proposition to help them eliminate the "dark shadows in the head", Gut gives them a potion to drink, as part of her trap. The party members then fall unconscious and come to their senses in the Defiled Temple (see below). If refusing to drink her potion, Gut can be safely killed here as long as she does not get the chance to ![]() Call for Help. It is possible to stymie her call for help by casting
Call for Help. It is possible to stymie her call for help by casting ![]() Silence. Allowing Gut to call for aid or to leave the room makes the whole temple hostile.
Silence. Allowing Gut to call for aid or to leave the room makes the whole temple hostile.
There is also a route into the locked storeroom through the rafters, reachable by someone with decent Strength or mobility spells such as ![]() Enhance Leap or
Enhance Leap or ![]() Misty Step. Also, Gut's room can be accessed by jumping over the demolished part of the wall in its northern end. The locked door in the far end of the room leads to the Defiled Temple, Gut's private rooms and her personal prison.
Misty Step. Also, Gut's room can be accessed by jumping over the demolished part of the wall in its northern end. The locked door in the far end of the room leads to the Defiled Temple, Gut's private rooms and her personal prison.
Brakkal's cage edit
This is a small area divided from Gut's chapel by a chasm, and connected to ![]() Dror Ragzlin's throne room by an archway. Here two goblin warriors guard
Dror Ragzlin's throne room by an archway. Here two goblin warriors guard ![]() Brakkal - a priest of the goblin deity
Brakkal - a priest of the goblin deity ![]() Maglubiyet. He is held in a wooden cage with trapped door, suspended over the chasm. Imprisoned for his refusal to abandon his worship of Maglubiyet in favor of the Absolute, Brakkal curses his guards, promising them a sticky end for abandoning their "true" god.[1]
Maglubiyet. He is held in a wooden cage with trapped door, suspended over the chasm. Imprisoned for his refusal to abandon his worship of Maglubiyet in favor of the Absolute, Brakkal curses his guards, promising them a sticky end for abandoning their "true" god.[1]
Freeing Brakkal makes his guards hostile and all others, should the fight with them spill out the room. Brakkal, however, does not side with the party and remains neutral; he can be safely freed after cleaning up the temple. Passing a ![]() DC 7 Religion check during dialogue with Brakkal and subsequently freeing him grants the inspiration
DC 7 Religion check during dialogue with Brakkal and subsequently freeing him grants the inspiration ![]() Saving the Heretic to party members with the
Saving the Heretic to party members with the ![]() Acolyte background.
Acolyte background.
Further to the west is another cave-like room with a breach in the floor. By jumping down below, both the spiders' pit and the Defiled Temple prison cell can be accessed.
East edit
"Pigeon" cage edit
![]() Gribbo keeps her "pigeon"
Gribbo keeps her "pigeon" ![]() Volo locked in a cage at X: 332 Y: -9. The party can talk to Gribbo convince her to release him or give the them the key by passing various ability checks. When the cage is opened, Volo uses a
Volo locked in a cage at X: 332 Y: -9. The party can talk to Gribbo convince her to release him or give the them the key by passing various ability checks. When the cage is opened, Volo uses a ![]() Potion of Invisibility and immediately heads to the party's Campsite. Saving him earns the following inspirational events:
Potion of Invisibility and immediately heads to the party's Campsite. Saving him earns the following inspirational events:
 A Man of Many Talents for party members with
  Noble background (granted immediately)
- The Bard with Nine Lives for party members with
 Folk Hero background (granted after speaking to Volo at the campsite)
North of this room is a rickety wooden walkway leading to the Worg Pens antechamber, guarded by three goblins. An iron ladder on the west side of this room leads to ![]() Minthara's headquarters. Also, a skeleton in an open sarcophagus at X: 338 Y: 14 can be looted for a
Minthara's headquarters. Also, a skeleton in an open sarcophagus at X: 338 Y: 14 can be looted for a ![]() Ring of Poison Resistance.
Ring of Poison Resistance.
Bloodied shrine edit
In a chamber on the east side of the initiation hall is a makeshift shrine dedicated to Loviatar, occupied by her cleric ![]() Abdirak. He can give the player character the permanent bonus
Abdirak. He can give the player character the permanent bonus ![]() Loviatar's Love, provided they subject themselves to his sadomasochistic religious ritual. The buff is granted upon passing
Loviatar's Love, provided they subject themselves to his sadomasochistic religious ritual. The buff is granted upon passing ![]() Intimidation or
Intimidation or ![]() Performance checks (three in a row each), or upon failing three
Performance checks (three in a row each), or upon failing three ![]() Constitution checks in a row.
Constitution checks in a row.
If the player character has preemptively read the book titled ![]() On Receiving Her Grace lying on the table nearby, they also have an additional option to choose a weapon which Abdirak should use on them which alters the type of damage dealt by Abdirak. Finally, the player character participating in the ritual can also remove their armour to gain the
On Receiving Her Grace lying on the table nearby, they also have an additional option to choose a weapon which Abdirak should use on them which alters the type of damage dealt by Abdirak. Finally, the player character participating in the ritual can also remove their armour to gain the ![]() Ardent Apostle condition, which grants a [+4] bonus to Intimidation and Performance checks for the duration of the ritual.
Ardent Apostle condition, which grants a [+4] bonus to Intimidation and Performance checks for the duration of the ritual.
Successful participating in the ritual grants the following inspiration:
- A Kiss Without Mercy for party members with
 Acolyte background
 - The Art of Agony for party members with
 Entertainer background
Torture chamber edit
The southmost room in the eastern nave of the temple is a torture chamber. ![]() Liam, the unfortunate straggler from
Liam, the unfortunate straggler from ![]() Aradin's adventuring party, is tied to a rack inside. Upon approaching,
Aradin's adventuring party, is tied to a rack inside. Upon approaching, ![]() Torturer Spike is interrupted in the middle of the gruesome process and a dialogue starts automatically.
Torturer Spike is interrupted in the middle of the gruesome process and a dialogue starts automatically.
The player character can choose either to manipulate Spike and his aide ![]() Lookout Grush into shirking his duties, or to torture Liam themselves. If convinced to stop, Spike and Gresh leave to Abdirak's room. If the player character successfully tortures the prisoner, he reveals the location of the Emerald Grove. Spike leaves to report this information to
Lookout Grush into shirking his duties, or to torture Liam themselves. If convinced to stop, Spike and Gresh leave to Abdirak's room. If the player character successfully tortures the prisoner, he reveals the location of the Emerald Grove. Spike leaves to report this information to ![]() Minthara, and the party can talk to Liam and choose to free him. The
Minthara, and the party can talk to Liam and choose to free him. The ![]() Dark Urge has unique dialogue options when torturing the prisoner.
Dark Urge has unique dialogue options when torturing the prisoner. ![]() Drow and
Drow and ![]() Drow Half-Elf characters, as well as characters
Drow Half-Elf characters, as well as characters ![]() disguised as a drow, do not have a chance of actually torture Liam, as Spike allows them to do as they wish without any checks and leaves the room.[verify]
disguised as a drow, do not have a chance of actually torture Liam, as Spike allows them to do as they wish without any checks and leaves the room.[verify]
If freed, Liam runs to the far end of the room and jumps over a small chasm there, showing the way to a hidden tunnel at X: 343 Y: -62 which leads to the edge of the outer Goblin Camp to X: -51 Y: 476. This passage cannot be opened from outside, but once explored, it provides an additional covert way to enter the Shattered Sanctum. However, the path outside is trapped with three Blast Mines. The narrow stone bridge leads from there to the outskirts of the Blighted Village.
Freeing Liam grants the inspirational event ![]() Fate Worse Than Death for party members with
Fate Worse Than Death for party members with ![]() Folk Hero background, while torturing him grants
Folk Hero background, while torturing him grants ![]() Grabbing the Poker with Both Hands for the
Grabbing the Poker with Both Hands for the ![]() Dark Urge. In the latter case, the Dark Urge does not need to be the one who maims Liam.
Dark Urge. In the latter case, the Dark Urge does not need to be the one who maims Liam.
Subjecting Liam to a torture is considered an oathbreaking action for ![]() Paladins of any Oath subclass.
Paladins of any Oath subclass.
North edit
Ragzlin's throne edit
![]() Dror Ragzlin's throne room lies at the north side of the temple. It has a wooden dais where Ragzlin's throne stands, and an upper gallery along the far wall of the room. Two iron ladders at both sides of the gallery lead to shadowed rafters, which allow for high-ground ambushing.
Dror Ragzlin's throne room lies at the north side of the temple. It has a wooden dais where Ragzlin's throne stands, and an upper gallery along the far wall of the room. Two iron ladders at both sides of the gallery lead to shadowed rafters, which allow for high-ground ambushing.
The hobgoblin warlord is surrounded by a group of goblins who listen to his proselytizations of battle, as well as two non-goblin bodyguards ![]() Kagran and
Kagran and ![]() Narvass patrolling about. A mind flayer corpse lies in front of the dais, dragged from the Nautiloid wreckage. When approached by the party, Ragzlin uses
Narvass patrolling about. A mind flayer corpse lies in front of the dais, dragged from the Nautiloid wreckage. When approached by the party, Ragzlin uses ![]() Speak with Dead on it. Throughout the automated dialogue he orders the player character to take part in the interrogation, and they have a chance to subtly take hobgoblin's mind under control and thus rig the results of the ritual, which requires passing a
Speak with Dead on it. Throughout the automated dialogue he orders the player character to take part in the interrogation, and they have a chance to subtly take hobgoblin's mind under control and thus rig the results of the ritual, which requires passing a ![]() DC 10 Wisdom check. In this case, the only question which raises high Ragzlin's suspicions towards the party is "Who is the Absolute?".
DC 10 Wisdom check. In this case, the only question which raises high Ragzlin's suspicions towards the party is "Who is the Absolute?".
If refusing to participate, Ragzlin does not release the party and continues the ritual anyway.
Otherwise, the party can let Ragzlin cast the spell himself, but in this case they take the risk of being revealed in the mind flayer's memories as its killer. If done, they must placate the hobgoblin by passing a ![]() DC 15 Persuasion check. Failing this results in Ragzlin and the whole goblin camp becoming hostile to the party. Successfully avoiding suspicion grants the
DC 15 Persuasion check. Failing this results in Ragzlin and the whole goblin camp becoming hostile to the party. Successfully avoiding suspicion grants the ![]() Devil's Advocate inspiration to party members with the
Devil's Advocate inspiration to party members with the ![]() Charlatan background.
Charlatan background.
If successfully finishing the interrogating , Ragzlin orders the party to report the (null) result to the goblin horde's other leader, the drow ![]() Minthara. If the player character twice refuses to do so, Ragzlin takes this as treachery and attacks the party, which results in almost all characters in the Shattered Sanctumn becoming hostile.
Minthara. If the player character twice refuses to do so, Ragzlin takes this as treachery and attacks the party, which results in almost all characters in the Shattered Sanctumn becoming hostile.
If dispatching Ragzlin before he has a chance to interrogate the dead mind flayer, the party can cast ![]() Speak with Dead on the mind flayer's corpse themselves afterwards. In this case the corpse provides answers to five questions as usual - unlike the ritual where it endures only three. Among other things, it may reveal information about the Cult of the Absolute and the purpose of the tadpoling process.
Speak with Dead on the mind flayer's corpse themselves afterwards. In this case the corpse provides answers to five questions as usual - unlike the ritual where it endures only three. Among other things, it may reveal information about the Cult of the Absolute and the purpose of the tadpoling process.
At the far north end of the room, behind a locked iron gate which can be opened by lockpicking (![]() DC 18 Sleight of Hand check) or using
DC 18 Sleight of Hand check) or using ![]() Dror Ragzlin's Key a glittering pile of loot and treasure lies, which contains the
Dror Ragzlin's Key a glittering pile of loot and treasure lies, which contains the ![]() Gloves of the Growling Underdog, the
Gloves of the Growling Underdog, the ![]() Springstep Boots and a piece of
Springstep Boots and a piece of ![]() Infernal Iron. Also a fair amount of Camp Supplies can be picked up, as well as two more
Infernal Iron. Also a fair amount of Camp Supplies can be picked up, as well as two more ![]() Smokepowder Barrels behind Ragzlin's throne in crates and boxes.
Smokepowder Barrels behind Ragzlin's throne in crates and boxes.
Minthara's headquarters edit
Minthara and the goblin bosses ![]() Zurga,
Zurga, ![]() Skrut, and
Skrut, and ![]() Rozzak reside in the room directly east of the throne room. The room is split across by a chasm, covered with a rickety wooden bridge. It is held up by destructible supports, and patrolled by a
Rozzak reside in the room directly east of the throne room. The room is split across by a chasm, covered with a rickety wooden bridge. It is held up by destructible supports, and patrolled by a ![]() Scrying Eye which broadcasts activity to the Cult of the Absolute's shadowy leadership. Near the entrance of Minthara's room, an iron ladder allows traversement to both the rafters above the main nave and (via jumping) above the Ragzlin's throne room. Adjacent to Minthara's headquarters is the antechamber to the Worg Pens, which can be reached by climbing the wooden ladder on the east side of the room.
Scrying Eye which broadcasts activity to the Cult of the Absolute's shadowy leadership. Near the entrance of Minthara's room, an iron ladder allows traversement to both the rafters above the main nave and (via jumping) above the Ragzlin's throne room. Adjacent to Minthara's headquarters is the antechamber to the Worg Pens, which can be reached by climbing the wooden ladder on the east side of the room.
Minthara is planning to assault the Emerald Grove, as she believes that the mysterious "weapon" the Absolute wants to obtain is hidden there. However, she lacks its exact location, and the scouts she sent out have not yet returned. They seem to have been encountered and slain by Druids within the Underground Passage, except Sazza, who was captured.
The player character must ultimately choose amoungst three options here:
- Helping Minthara launch a raid on the grove by telling her its location directly, or additionally wresting it from Liam via torture. This option may also be used to double-cross Minthara, luring her forces away from the camp and then betraying her at the grove gate.
- Protecting the grove by obscuring the party's memories by passing a
 DC 15 Intelligence check or a DC 20 Intimidation check. [verify][2]
 - Attacking Minthara, thereby preventing her from performing the raid.
If saved earlier, ![]() Sazza tries to deflect blame by implicating the party for her failures and reveals the location of the druid grove - provided she is not taken away through the ensuing dialogue to be thrown into spider pit
Sazza tries to deflect blame by implicating the party for her failures and reveals the location of the druid grove - provided she is not taken away through the ensuing dialogue to be thrown into spider pit
Revealing the Emerald Grove's location by any means initiates ![]() Raid the Emerald Grove. Minthara and her troops then leave the goblin camp, and the raid takes place after the next Long Rest. If Minthara is killed before leaving, the raid does not occur, but if she is only knocked out, it still does.
Raid the Emerald Grove. Minthara and her troops then leave the goblin camp, and the raid takes place after the next Long Rest. If Minthara is killed before leaving, the raid does not occur, but if she is only knocked out, it still does.
Allying with Minthara to raid the grove grants the ![]() Slaughter's Prize inspirational event for party members with
Slaughter's Prize inspirational event for party members with ![]() Criminal background.
Criminal background.
Killing Minthara, Dror Ragzlin and Priestess Gut earns the ![]() A Headless Horde inspiration for party members with
A Headless Horde inspiration for party members with ![]() Soldier background regardless of whether the
Soldier background regardless of whether the ![]() Defeat the Goblins quest has been started or not. The inspiration is also granted if Minthara is instead knocked out.
Defeat the Goblins quest has been started or not. The inspiration is also granted if Minthara is instead knocked out.
Revealing the Emerald Grove's location to Minthara (or letting her to read the player character's mind to find it out) is considered an oathbreaking action for ![]() Paladins of any Oath subclass.
Paladins of any Oath subclass.
From the locked gilded chest behind Minthara's makeshift study ![]() The Watersparkers can be taken. Also, on her table there is a
The Watersparkers can be taken. Also, on her table there is a ![]() War Map, which adds a map marker for a buried treasure in the Forest at X: 79 Y: 347; the
War Map, which adds a map marker for a buried treasure in the Forest at X: 79 Y: 347; the ![]() Fleetfingers can be looted from this stash.
Fleetfingers can be looted from this stash.
Related locations edit
 Goblin Camp
- Through Heavy Oak Doors at X: 297 Y: -85
- Through Collapsed Corridor at X: 312 Y: -31 (The wall in goblin camp must be broken first.)
- Defiled Temple
- Through Priestess's Chambers at X: 253 Y: -7
- Through Cave Mouth at X: 283 Y: 15
- Worg Pens at X: 342 Y: 31
Related quests edit
Characters edit
 Abdirak
 Brakkal
 Dror Ragzlin
 Gribbo
 Liam
Liam Minthara
 Priestess Gut
 Roah Moonglow (Trader)
 Sazza (conditionally)
 Smythin
 Torturer Spike
 Warrior Trinzas
 Volo
Volo
Loot edit
Notable items obtained in this location, whether looted, purchased, or obtained as a quest reward:
| Item | Location |
|---|---|
| Looted from Priestess Gut | |
| Carried by Priestess Gut | |
| In the treasure crates at X: 297 Y: 68 | |
| Rewarded for completing Save the Goblin Sazza, upon speaking to Minthara | |
| Carried by Minthara | |
| Carried by Dror Ragzlin | |
| In the treasure crates at X: 297 Y: 68 | |
| In the treasure crates at X: 297 Y: 68 | |
| Standing up by the torture rack at X: 336 Y: -34 | |
| Carried by Abdirak at X: 338 Y: -22 | |
| On a table beside Abdirak at X: 337 Y: -26 | |
| On a table beside Abdirak at X: 337 Y: -26 | |
| On a skeleton in a sarcophagus without a lid at X: 338 Y: 15 in the antechamber of the Worg Pens[3] | |
| Carried by Minthara | |
| In the treasure crates at X: 297 Y: 68 | |
| In a gilded chest at X: 339 Y: 41 | |
| Carried by Minthara |
Related Literature edit
Gallery edit
-
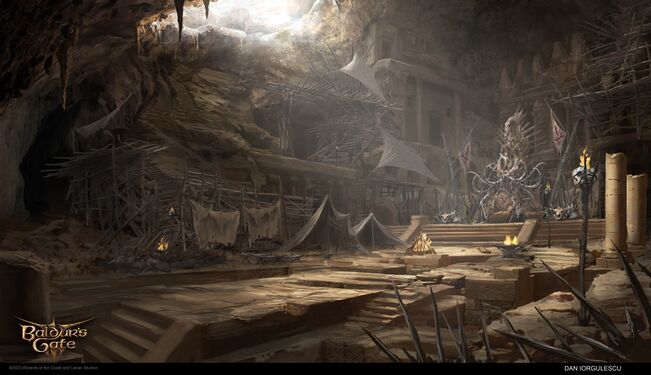 Concept art by Dan Iorgulescu

Notes edit
- ↑ Brakkal's unyielding faith to Maglubiyet in the face of imprisonment and his promise that his brethren will meet an unhappy end is arguably prescient, given what follows if the party side with the tieflings to
 Defeat the Goblins.
- ↑ The party members know the location of the grove, even if they have not been there.
- ↑ This can be easily missed, as this skeleton is not highlighted when showing item labels.