Emerald Grove: Difference between revisions
(style) |
|||
| Line 9: | Line 9: | ||
|east = Secluded Cove | |east = Secluded Cove | ||
}} | }} | ||
The '''Emerald Grove''', also known as '''Silvanus' Grove''' and '''Druid's Grove''', is | The '''Emerald Grove''', also known as '''Silvanus' Grove''' and '''Druid's Grove''', is [[location]] in the [[Wilderness]] of [[Act One]] of [[Baldur's Gate 3]]. It encompasses the large cavern known as the [[The Hollow]] and the [[Sacred Pool]]. | ||
The Druids of the Emerald Grove are led by [[Kagha]] who serves as the leader of the druids in First Druid [[Halsin]]'s abscence. They are providing a temporary refuge for the [[Tiefling Refugees]] from [[Elturel]], though tensions are high. The Grove is on high alert due to the aggression of nearby [[goblin]]s. Kagha has ordered the [[Rite of Thorns]] be preformed to shut the grove off, which would displace the Tieflings. | The Druids of the Emerald Grove are led by [[Kagha]] who serves as the leader of the druids in First Druid [[Halsin]]'s abscence. They are providing a temporary refuge for the [[Tiefling Refugees]] from [[Elturel]], though tensions are high. The Grove is on high alert due to the aggression of nearby [[goblin]]s. Kagha has ordered the [[Rite of Thorns]] be preformed to shut the grove off, which would displace the Tieflings. | ||
| Line 15: | Line 15: | ||
The fate of the Emerald Grove and the [[Tiefling Refugees]] is in the hands of the player. | The fate of the Emerald Grove and the [[Tiefling Refugees]] is in the hands of the player. | ||
== | == Overview == | ||
[[File:Emerald Grove Map.png|300px|thumb|The area of the map known as '''Emerald Grove'''.]] | [[File:Emerald Grove Map.png|300px|thumb|The area of the map known as '''Emerald Grove'''.]] | ||
===Waypoints=== | |||
This location contains the following {{SmIconLink|Waypoint Map Icon.png|Waypoint}}: | |||
*Emerald Grove Environs {{Coords|246|423}} | |||
=== Locations === | === Locations === | ||
* [[The Hollow]] | * [[The Hollow]] | ||
| Line 30: | Line 34: | ||
* [[Underground Passage]] | * [[Underground Passage]] | ||
=== Adjacent | === Adjacent areas === | ||
* [[Wilderness]] | * [[Wilderness]] | ||
* [[Secluded Cove]] | * [[Secluded Cove]] | ||
| Line 73: | Line 77: | ||
{{clear}} | {{clear}} | ||
== | == Notable characters == | ||
{{ | {{div col}} | ||
* [[Kagha]] | * [[Kagha]] | ||
* [[Nettie]] | * [[Nettie]] | ||
| Line 115: | Line 93: | ||
* [[Auntie Ethel]] | * [[Auntie Ethel]] | ||
* [[Volo]] | * [[Volo]] | ||
{{div col end}} | |||
== | == Related quests == | ||
{{div col}} | |||
{{ | |||
* [[Remove the Parasite]] | * [[Remove the Parasite]] | ||
** [[Get Help from Healer Nettie]] | ** [[Get Help from Healer Nettie]] | ||
| Line 146: | Line 114: | ||
* [[Return the Locket]] | * [[Return the Locket]] | ||
* [[The Hellion's Heart]] | * [[The Hellion's Heart]] | ||
{{div col end}} | |||
== Notable interactions == | |||
{{SpoilerWarning}} | |||
The following are unique interactions that appear when the player first visits the Emerald Grove: | |||
* When approaching the Ramparts, Aradin and his fellow adventurers will be running for the gates, chased by Goblins. [[Wyll]] appears to help fight. | |||
* After the fight, several tieflings will be processing the death of [[Kanon]]. If you head there immediately, you may be able to speak to his sister [[Arka]] but she leaves for the [[Makeshift Prison]] soon after his death. Other tieflings will come to grieve too. Speak to any them to enact a cutscene. | |||
* [[Aradin]] and [[Zevlor]] will get into an argument, which may come to blows unless the player intervenes. Aradin's location might vary depending on this outcome. | |||
* A [[bugbear]] [[assassin]] is headed for [[Nadira]] on the hill to the east of the ramparts. | |||
* Looking through the telescope by Nadira to see the dragon. | |||
* [[Volo]] is found interviewing a bear in the [[Sacred Pool]] | |||
== History == | |||
{{Q|By claw and tooth, from root to thorn, | |||
The Old Oak's grove, to wildlings sworn. | |||
The forest rose with claw and tooth, | |||
To tear the darkness from its roots. | |||
In darkest hour, a concord made, | |||
Twixt harp and wild against the shade. | |||
The towers siezed, the battle done, | |||
The moonrise broke the Darkest One|Inner Sanctum Plaques}} | |||
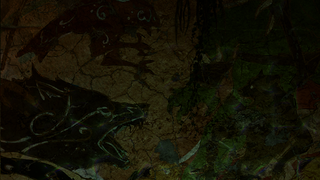
The frescos in the [[Inner Sanctum]] depict the legacy of the Emerald Grove. The first mural shows beasts and druids driving monsters out from their lands. With the monsters driven out, the druids claimed the grove in the name of [[Silvanus]], god of nature. | |||
However, it seems that their strife was not over. Referred to as the 'Darkest Hour', the druids entered a concord with the [[Harpers]] to fight "the shade" (The Shadow Curse). Their opponents were [[Ketheric Thorm]]'s [[Shar]]ran army. The final victory fresco shows a Sharran helmet broken at their feet. The [[Moonrise Towers]] were lost that day. | |||
<gallery> | |||
Fresco 1 wild.png|A fresco in the Inner Sanctum depicting druids and beasts fighting together against monsters... | |||
Fresco 2 Wellspring.png|...a group of druids gathered in Silvanus' name... | |||
Fresco 3 Union.png|...the druids alongside Harpers... | |||
Fresco 4 Moonrise.png|...a broken [[Dark Justiciar]] helmet at the feet of the druids. | |||
</gallery> | |||
==Notable | ==Notable loot== | ||
=== Quest | === Quest items === | ||
* {{MdRarityItem|Idol of Silvanus}} | * {{MdRarityItem|Idol of Silvanus}} | ||
* {{MdRarityItem|Rune of the Wolf}} | * {{MdRarityItem|Rune of the Wolf}} | ||
=== Quest | === Quest rewards === | ||
* {{MdRarityItem|Komira's Locket}} | * {{MdRarityItem|Komira's Locket}} | ||
* {{MdRarityItem|Hellrider's Pride}} | * {{MdRarityItem|Hellrider's Pride}} | ||
| Line 171: | Line 178: | ||
* {{MdRarityItem|Wyvern Poison}} | * {{MdRarityItem|Wyvern Poison}} | ||
==Hidden | ==Hidden treasure== | ||
* {{MdRarityItem|Amulet of Silvanus}} is hidden under a rock {{Coords|262|481}} near [[Ormn]]. | * {{MdRarityItem|Amulet of Silvanus}} is hidden under a rock {{Coords|262|481}} near [[Ormn]]. | ||
* {{MdRarityItem|Cap of Curing}} in a locked gilded chest behind a pillar {{Coords|289|488}} near [[Alfira]]. | * {{MdRarityItem|Cap of Curing}} in a locked gilded chest behind a pillar {{Coords|289|488}} near [[Alfira]]. | ||
| Line 182: | Line 189: | ||
</gallery> | </gallery> | ||
==External | ==External links== | ||
{{FRWiki|Emerald Grove|long}} | {{FRWiki|Emerald Grove|long}} | ||
[[Category:Locations]] | [[Category:Locations]] | ||
[[Category:Act One Locations]] | [[Category:Act One Locations]] | ||
{{NavEmeraldGrove|nocat=1}} | {{NavEmeraldGrove|nocat=1}} | ||
Revision as of 12:02, 19 November 2023

| Wilderness | ||||
| Forest | ← | Emerald Grove | → | Secluded Cove |
| ↓ | ||||
| Roadside Cliffs | ||||
The Emerald Grove, also known as Silvanus' Grove and Druid's Grove, is location in the Wilderness of Act One of Baldur's Gate 3. It encompasses the large cavern known as the The Hollow and the Sacred Pool.
The Druids of the Emerald Grove are led by Kagha who serves as the leader of the druids in First Druid Halsin's abscence. They are providing a temporary refuge for the Tiefling Refugees from Elturel, though tensions are high. The Grove is on high alert due to the aggression of nearby goblins. Kagha has ordered the Rite of Thorns be preformed to shut the grove off, which would displace the Tieflings.
The fate of the Emerald Grove and the Tiefling Refugees is in the hands of the player.
Overview

Waypoints
This location contains the following ![]() :
:
- Emerald Grove Environs X: 246 Y: 423
Locations
Adjacent areas
Emerald Grove Ramparts

The south of the Emerald Grove is protected by ramparts. The thick gate can be only be opened by the nearby gate winch. A war horn allows the defenders to rally should the Grove come under attack. To the east of the ramparts is a tall hill, where Nadira has set up with her telescope. The player may intervene to save her. A path winds down north from the hill towards the elevator to the Sacred Pool. Until Tuffet the bear can be convinced to move, the Elevator is inoperable.
A couple of the tieflings have set up a small camp to the west. Should any of the tieflings die, they may end up buried in the small clearing to the west.
The Hollow

For more information see: The Hollow
The Hollow is a cavernous location in the northwest of the Emerald Grove. The majority of the Tiefling refugees can be found here. There are multiple traders in this area, and companions may be acquired here, depending on the player's story choices.
This location contains entrances to the Secluded Chamber, Underground Passage and the Tiefling Hideout. It is north of the Ramparts, and northwest of the Sacred Pool.
Sacred Pool

For more information see: Sacred Pool
The Sacred Pool is at the heart of the Emerald Grove. The Idol of Silvanus is at the centre of the Sacred Pool. It is the site where the Rite of Thorns is being preformed by the druids. A couple druids stand guard at the bottom of the stairs to the Hollow, preventing most outsiders from entering the Sacred Pool during the rite.
The Sacred Pool connects to the Inner Sanctum via the Stone Door X: 25 Y: -10, and to The Hollow via the stairs to the north, the Secluded Cove to the northeast. An elevator leads to the Emerald Cove ramparts in the south.
Inner Sanctum

For more information see: Inner Sanctum
The Inner Sanctum is a subterranean location accessed through the Stone Door in the Sacred Pool. There are four frescos in the Inner Sanctum, depicting the history of the Emerald Grove. Kagha, the acting leader of the druids, can be found in the Inner Sanctum.
The Servant Quarters can be found to the North-East, and the Druids' Chambers to the North. The Healer Nettie can be found in the Druid's Chamber, and is capable of unlocking the entrance to the Enclave Library.
Notable characters
Related quests
Notable interactions
Spoiler warning: The following content contains unhidden spoilers. Read at your own risk. |
The following are unique interactions that appear when the player first visits the Emerald Grove:
- When approaching the Ramparts, Aradin and his fellow adventurers will be running for the gates, chased by Goblins. Wyll appears to help fight.
- After the fight, several tieflings will be processing the death of Kanon. If you head there immediately, you may be able to speak to his sister Arka but she leaves for the Makeshift Prison soon after his death. Other tieflings will come to grieve too. Speak to any them to enact a cutscene.
- Aradin and Zevlor will get into an argument, which may come to blows unless the player intervenes. Aradin's location might vary depending on this outcome.
- A bugbear assassin is headed for Nadira on the hill to the east of the ramparts.
- Looking through the telescope by Nadira to see the dragon.
- Volo is found interviewing a bear in the Sacred Pool
History
By claw and tooth, from root to thorn,The Old Oak's grove, to wildlings sworn.
The forest rose with claw and tooth,
To tear the darkness from its roots.
In darkest hour, a concord made,
Twixt harp and wild against the shade.
The towers siezed, the battle done,
The moonrise broke the Darkest One— Inner Sanctum Plaques
The frescos in the Inner Sanctum depict the legacy of the Emerald Grove. The first mural shows beasts and druids driving monsters out from their lands. With the monsters driven out, the druids claimed the grove in the name of Silvanus, god of nature.
However, it seems that their strife was not over. Referred to as the 'Darkest Hour', the druids entered a concord with the Harpers to fight "the shade" (The Shadow Curse). Their opponents were Ketheric Thorm's Sharran army. The final victory fresco shows a Sharran helmet broken at their feet. The Moonrise Towers were lost that day.
A fresco in the Inner Sanctum depicting druids and beasts fighting together against monsters...
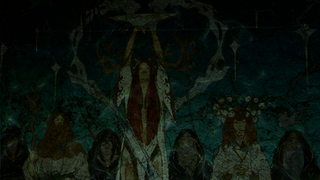
...a group of druids gathered in Silvanus' name...
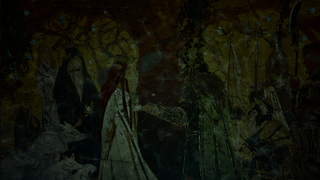
...the druids alongside Harpers...
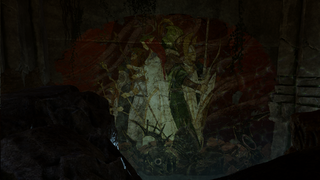
...a broken Dark Justiciar helmet at the feet of the druids.


Notable loot
Quest items
Quest rewards
Other
 Gloves of Power
 Broodmother's Revenge (Dropped by Kagha.)
 Amulet of Elemental Torment
 Corellon's Grace
 Dragon's Grasp
 Robe of Summer (Found in a crate in the Hidden Vault within the Inner Sanctum)
 Rain Dancer
 Soul Coin
 Sorrow ((Found on an alter in the Hidden Vault within the Inner Sanctum)
 The Whispering Promise
 Wyvern Poison
Hidden treasure
 Amulet of Silvanus is hidden under a rock X: 262 Y: 481 near Ormn.
 Cap of Curing in a locked gilded chest behind a pillar X: 289 Y: 488 near Alfira.
- A buried chest on the cliffs east of NadiraX: 262 Y: 467, containing 3
 Potion of Healing. Survival Check 12 to locate dig spot.
Gallery

North East
South East

