Ad placeholder
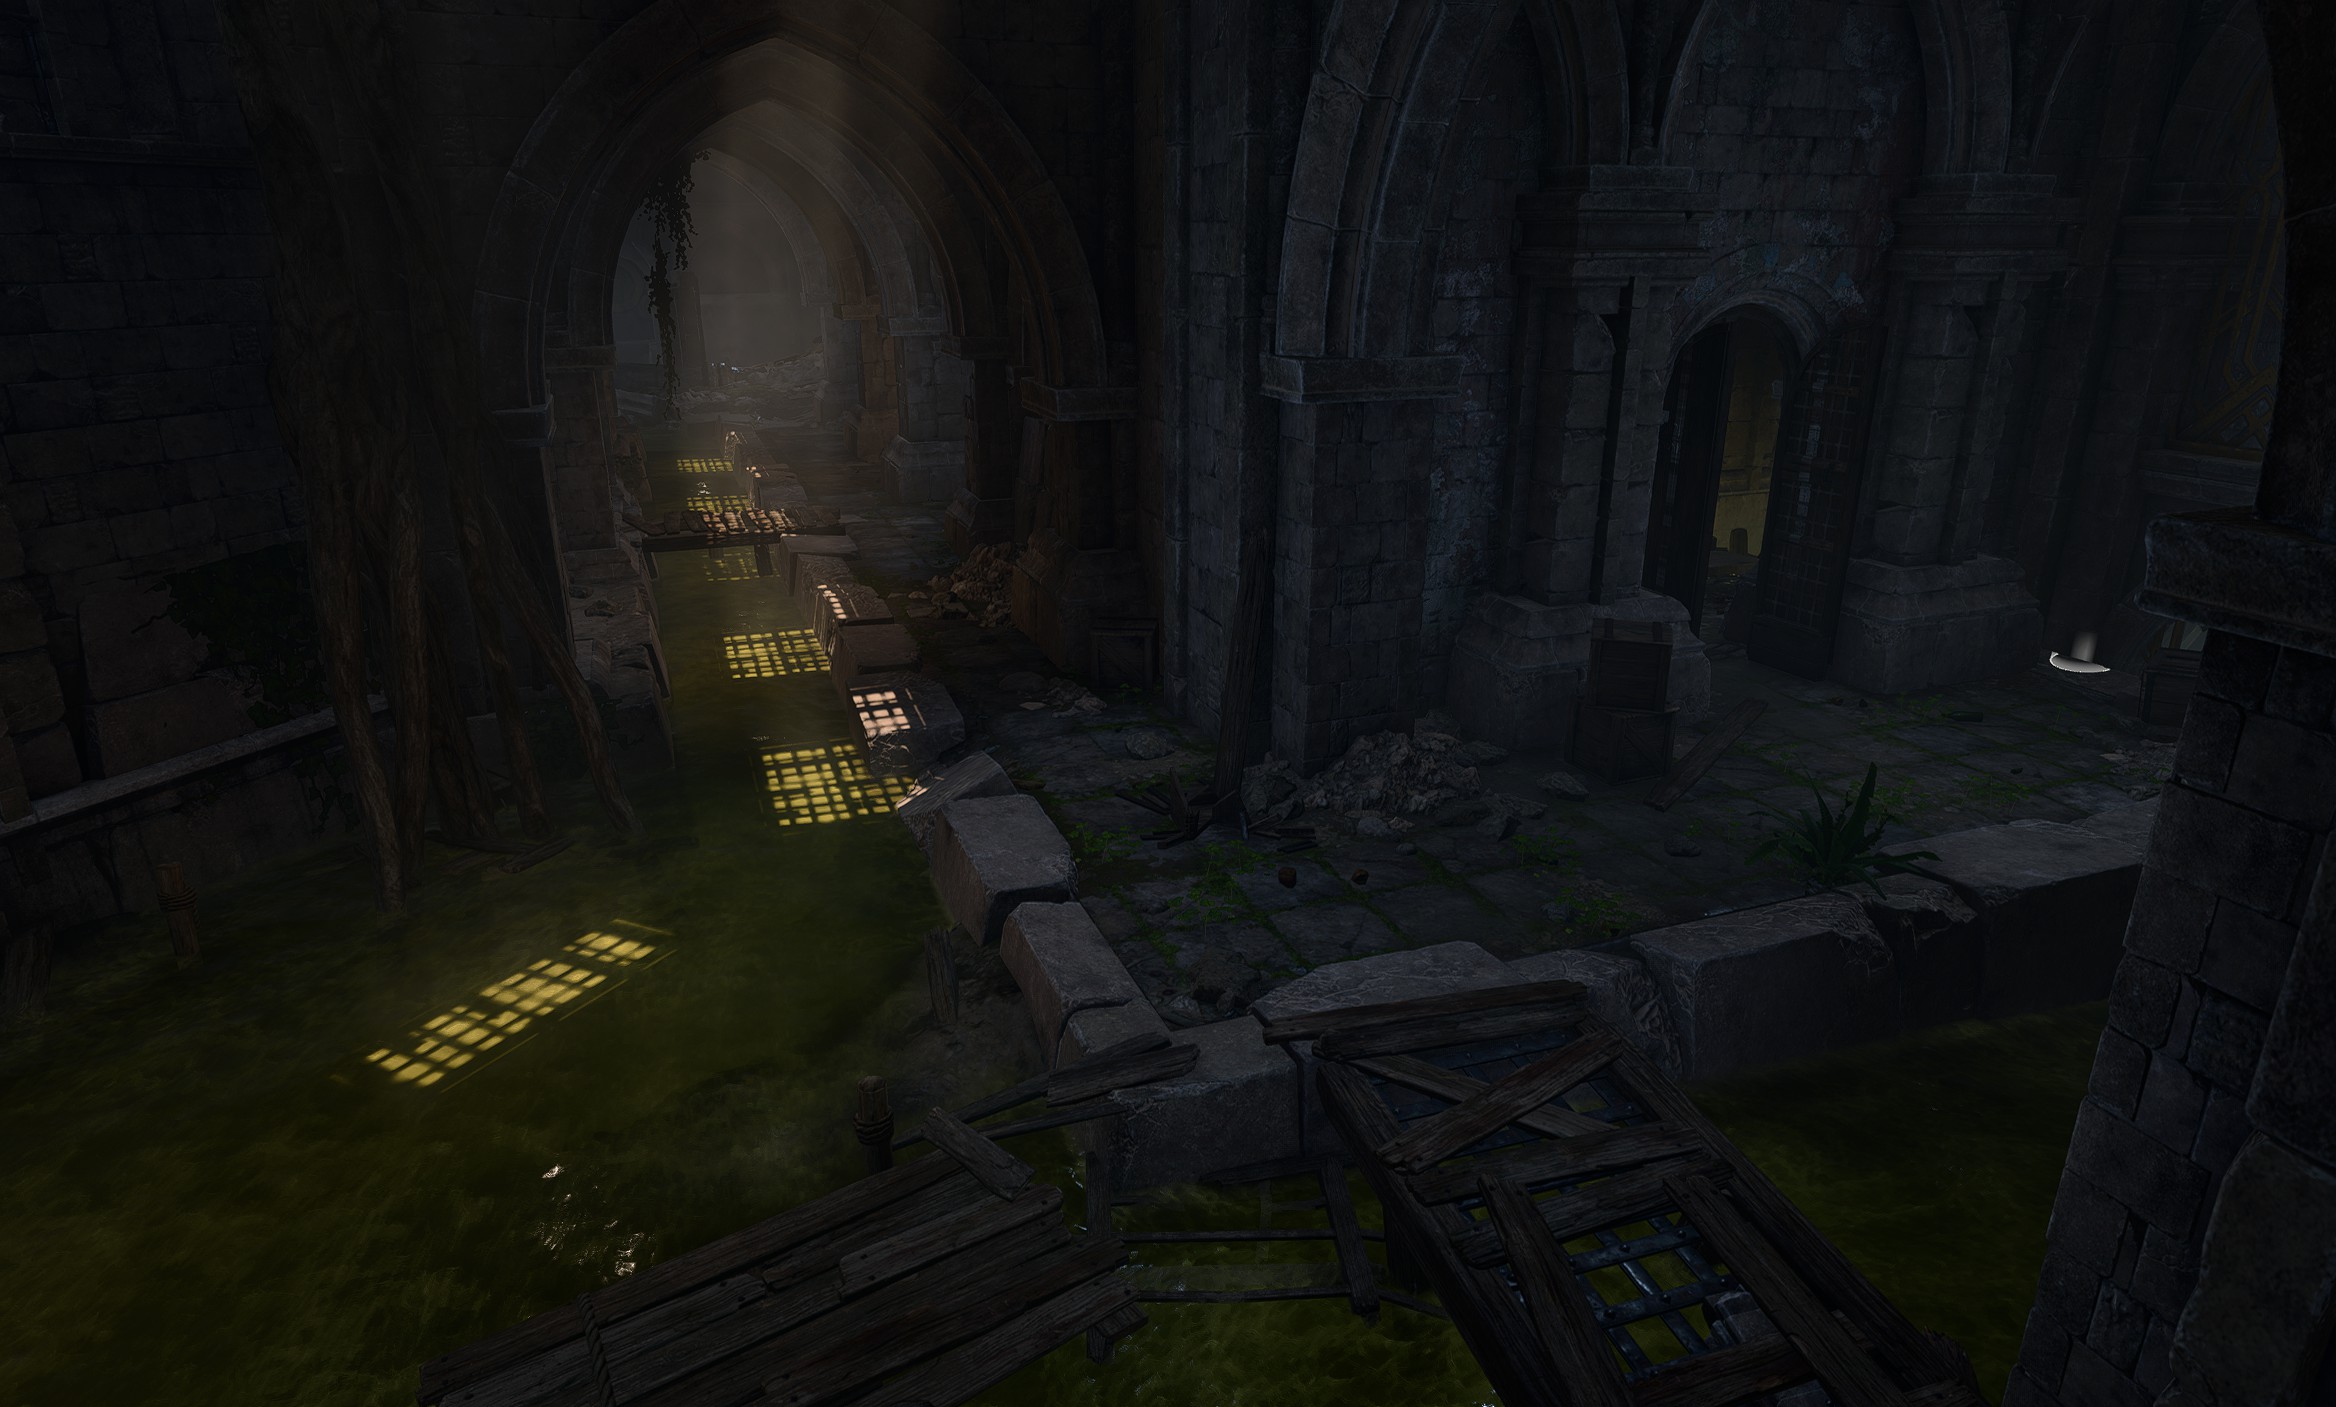
Lower City Sewers

| Undercity | ||||
| Undercity Ruins | ||||
| ↑ | ||||
| Abandoned Cistern | ← | Lower City Sewers | → | Cazador's Dungeon |
| ↓ | ||||
| Guildhall | ||||

Overview[edit section | visual editor]

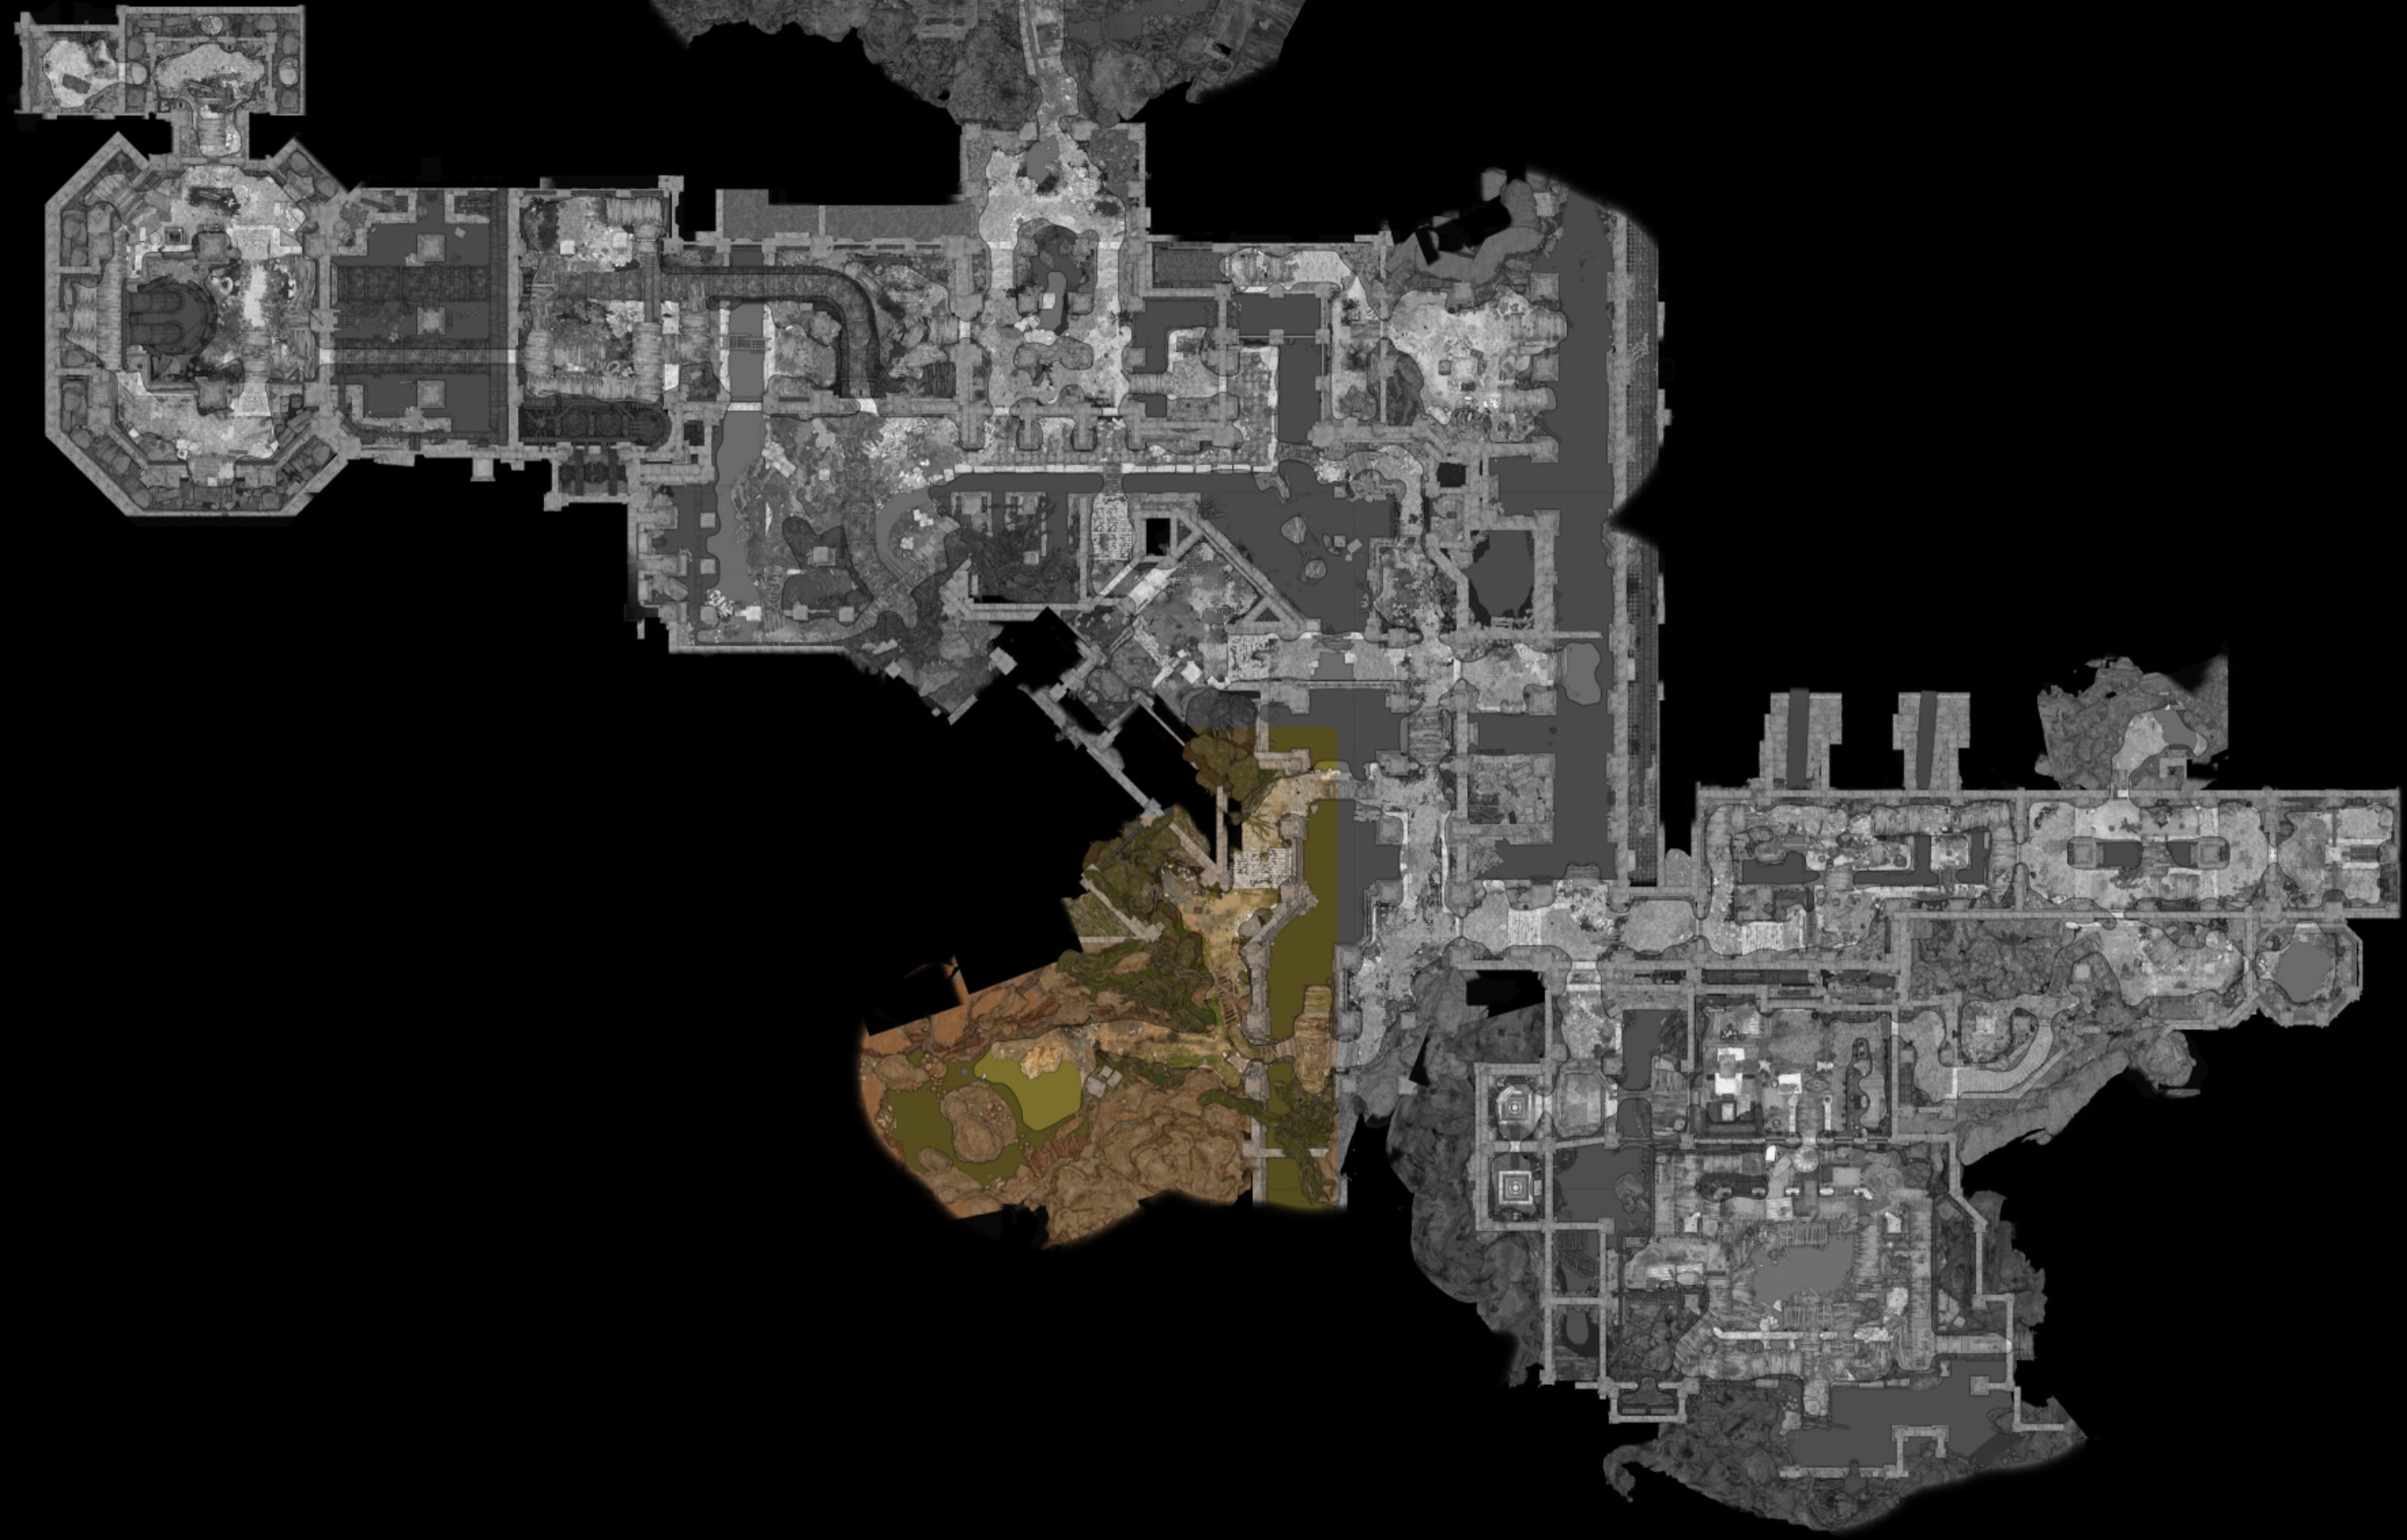
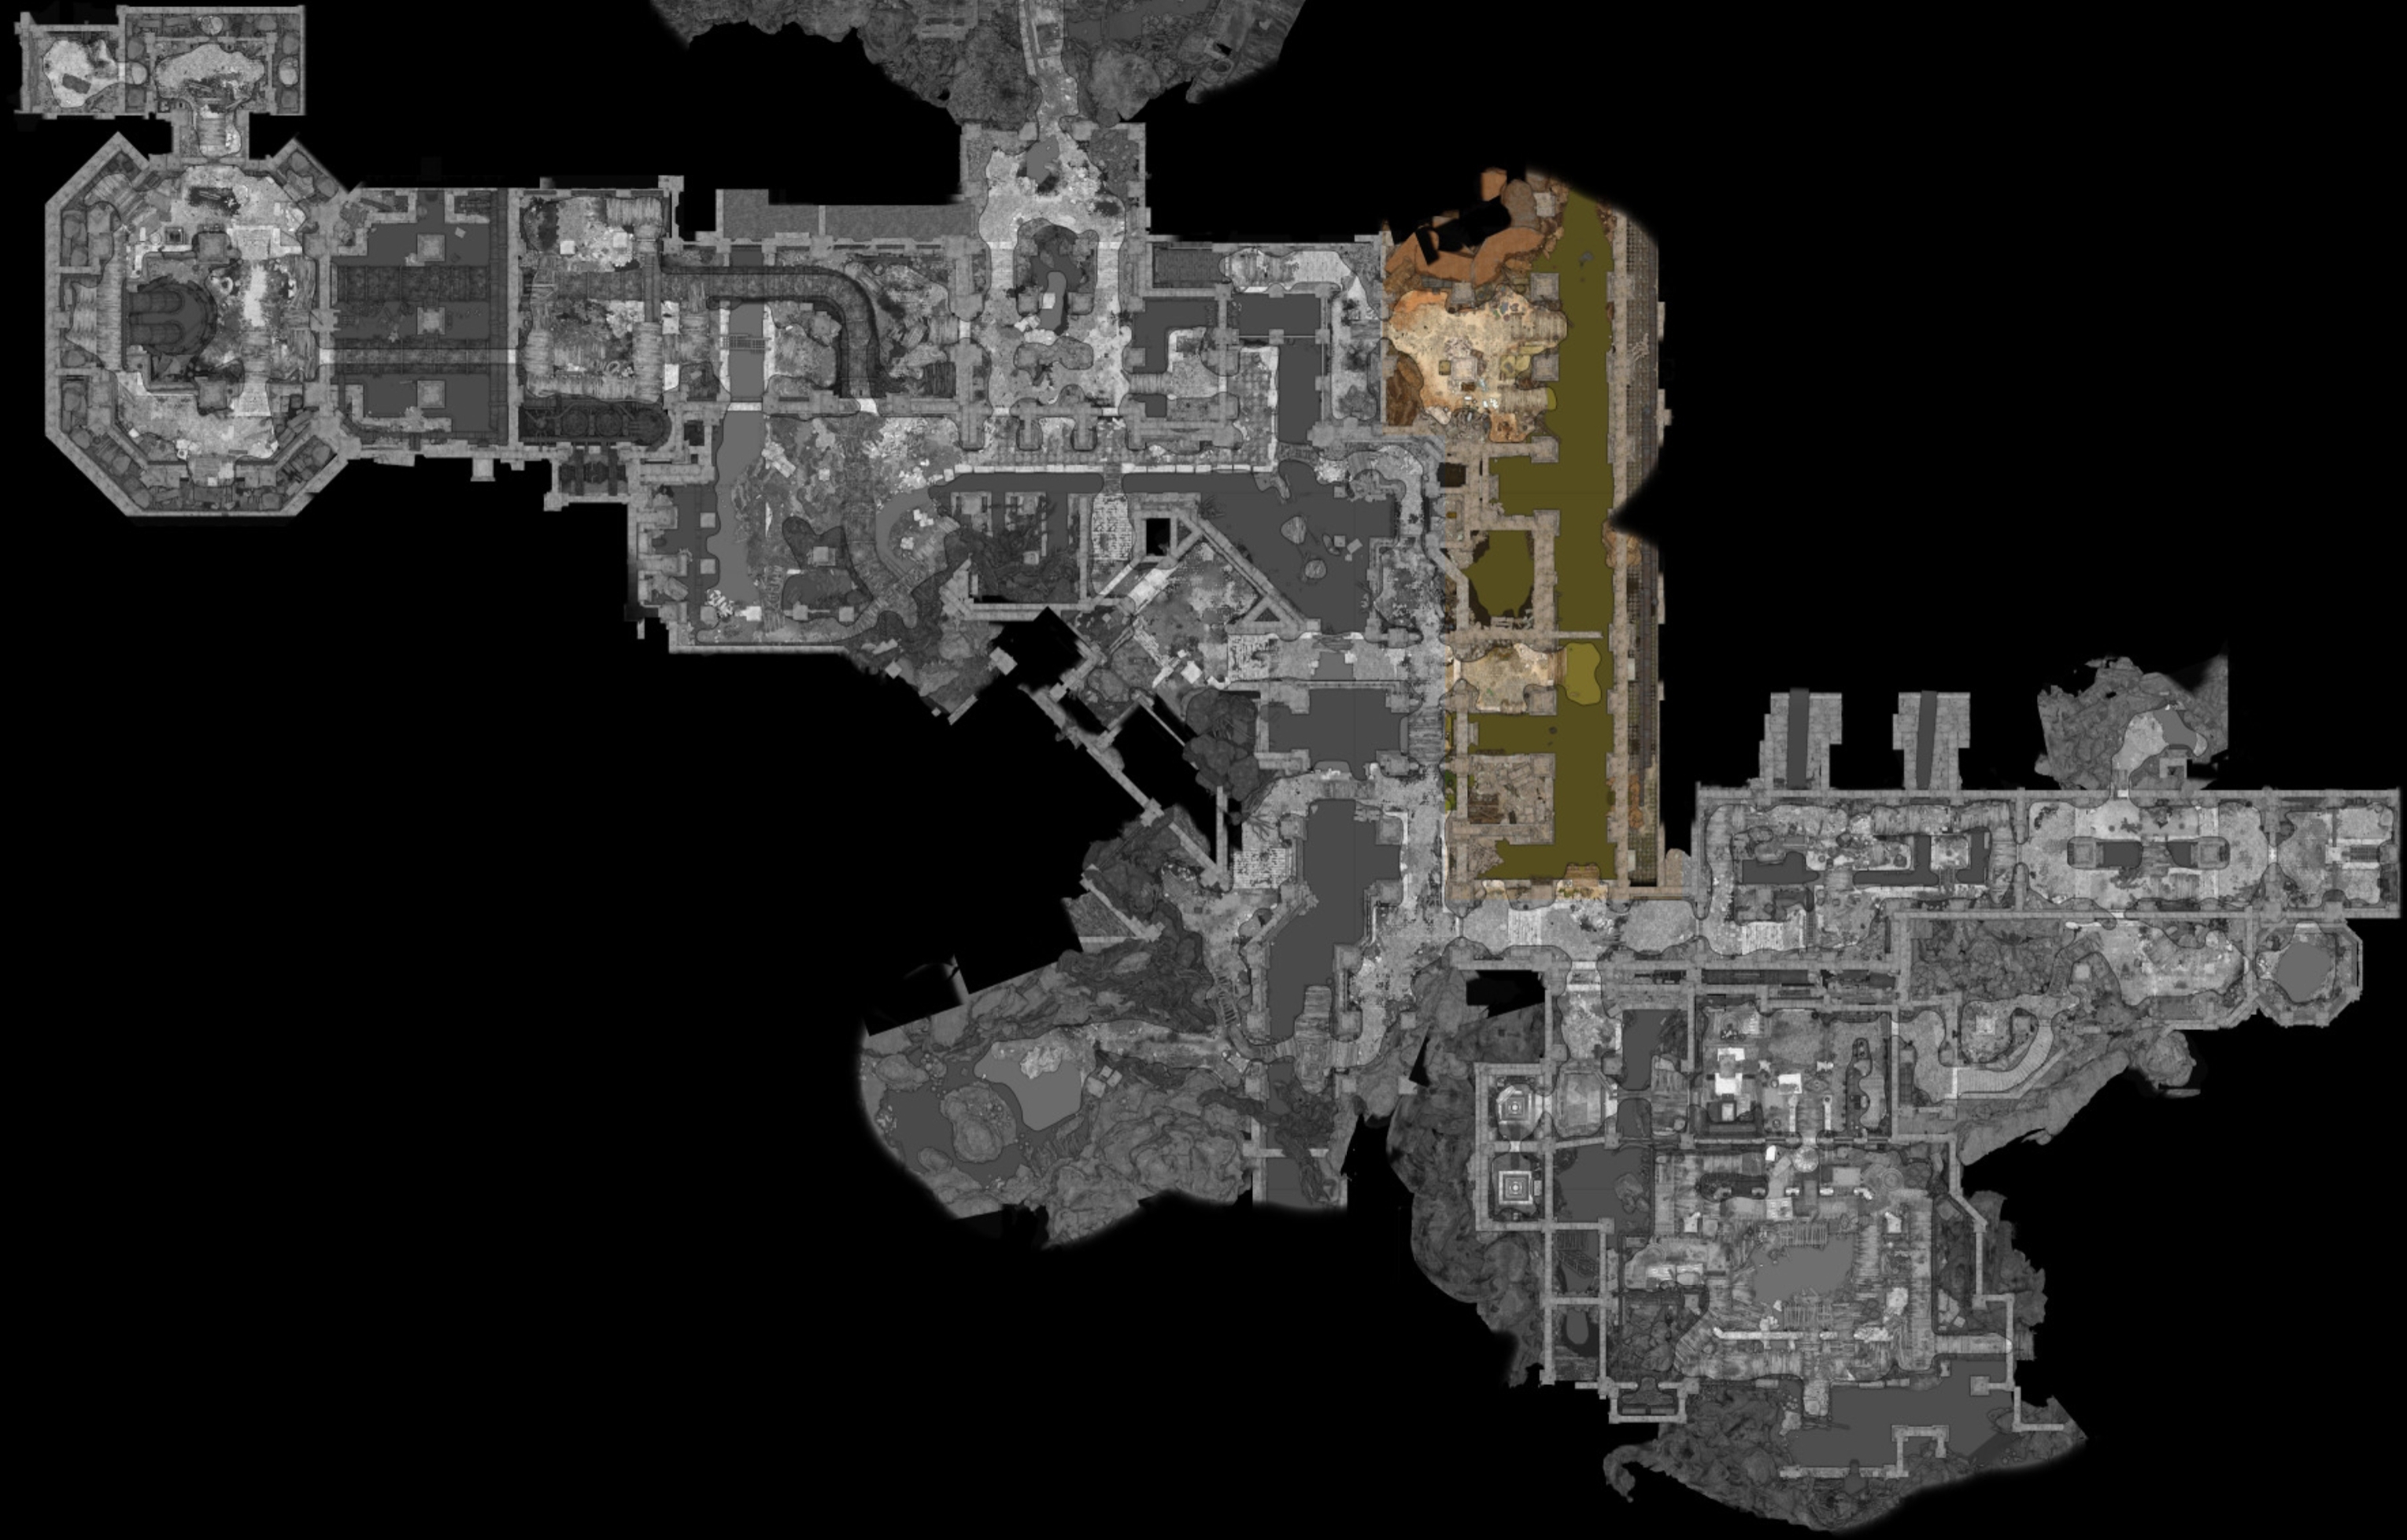
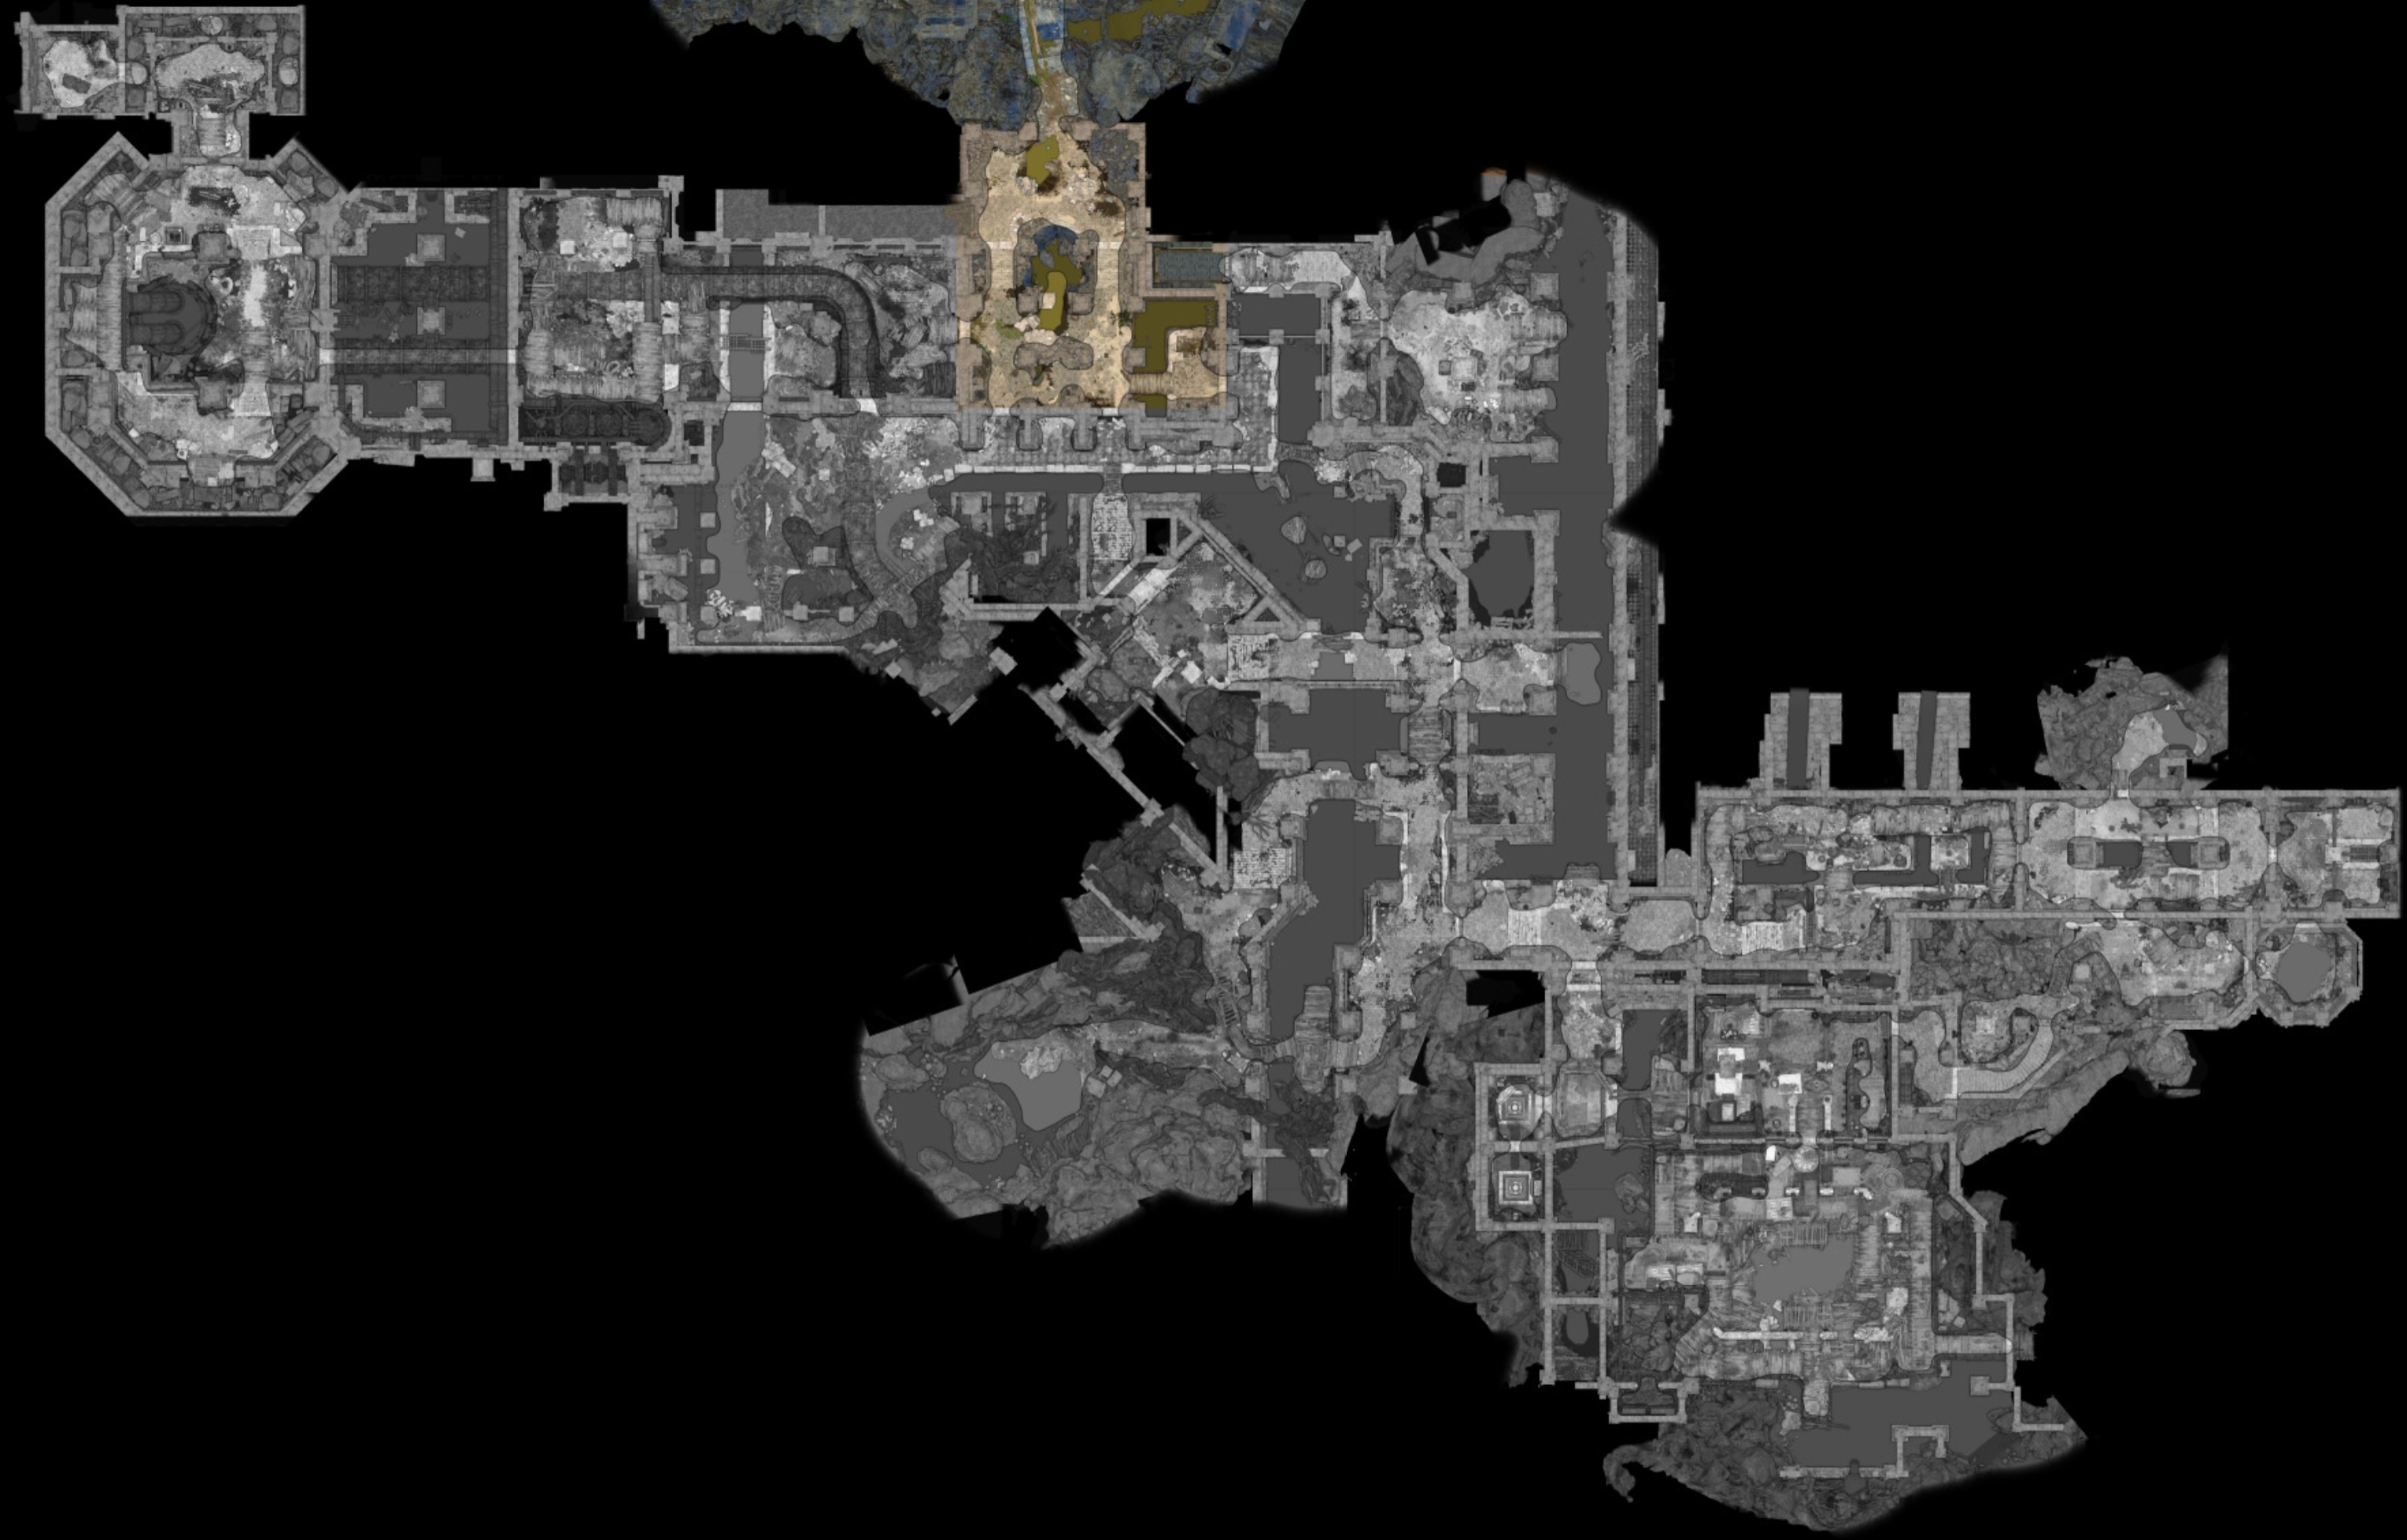
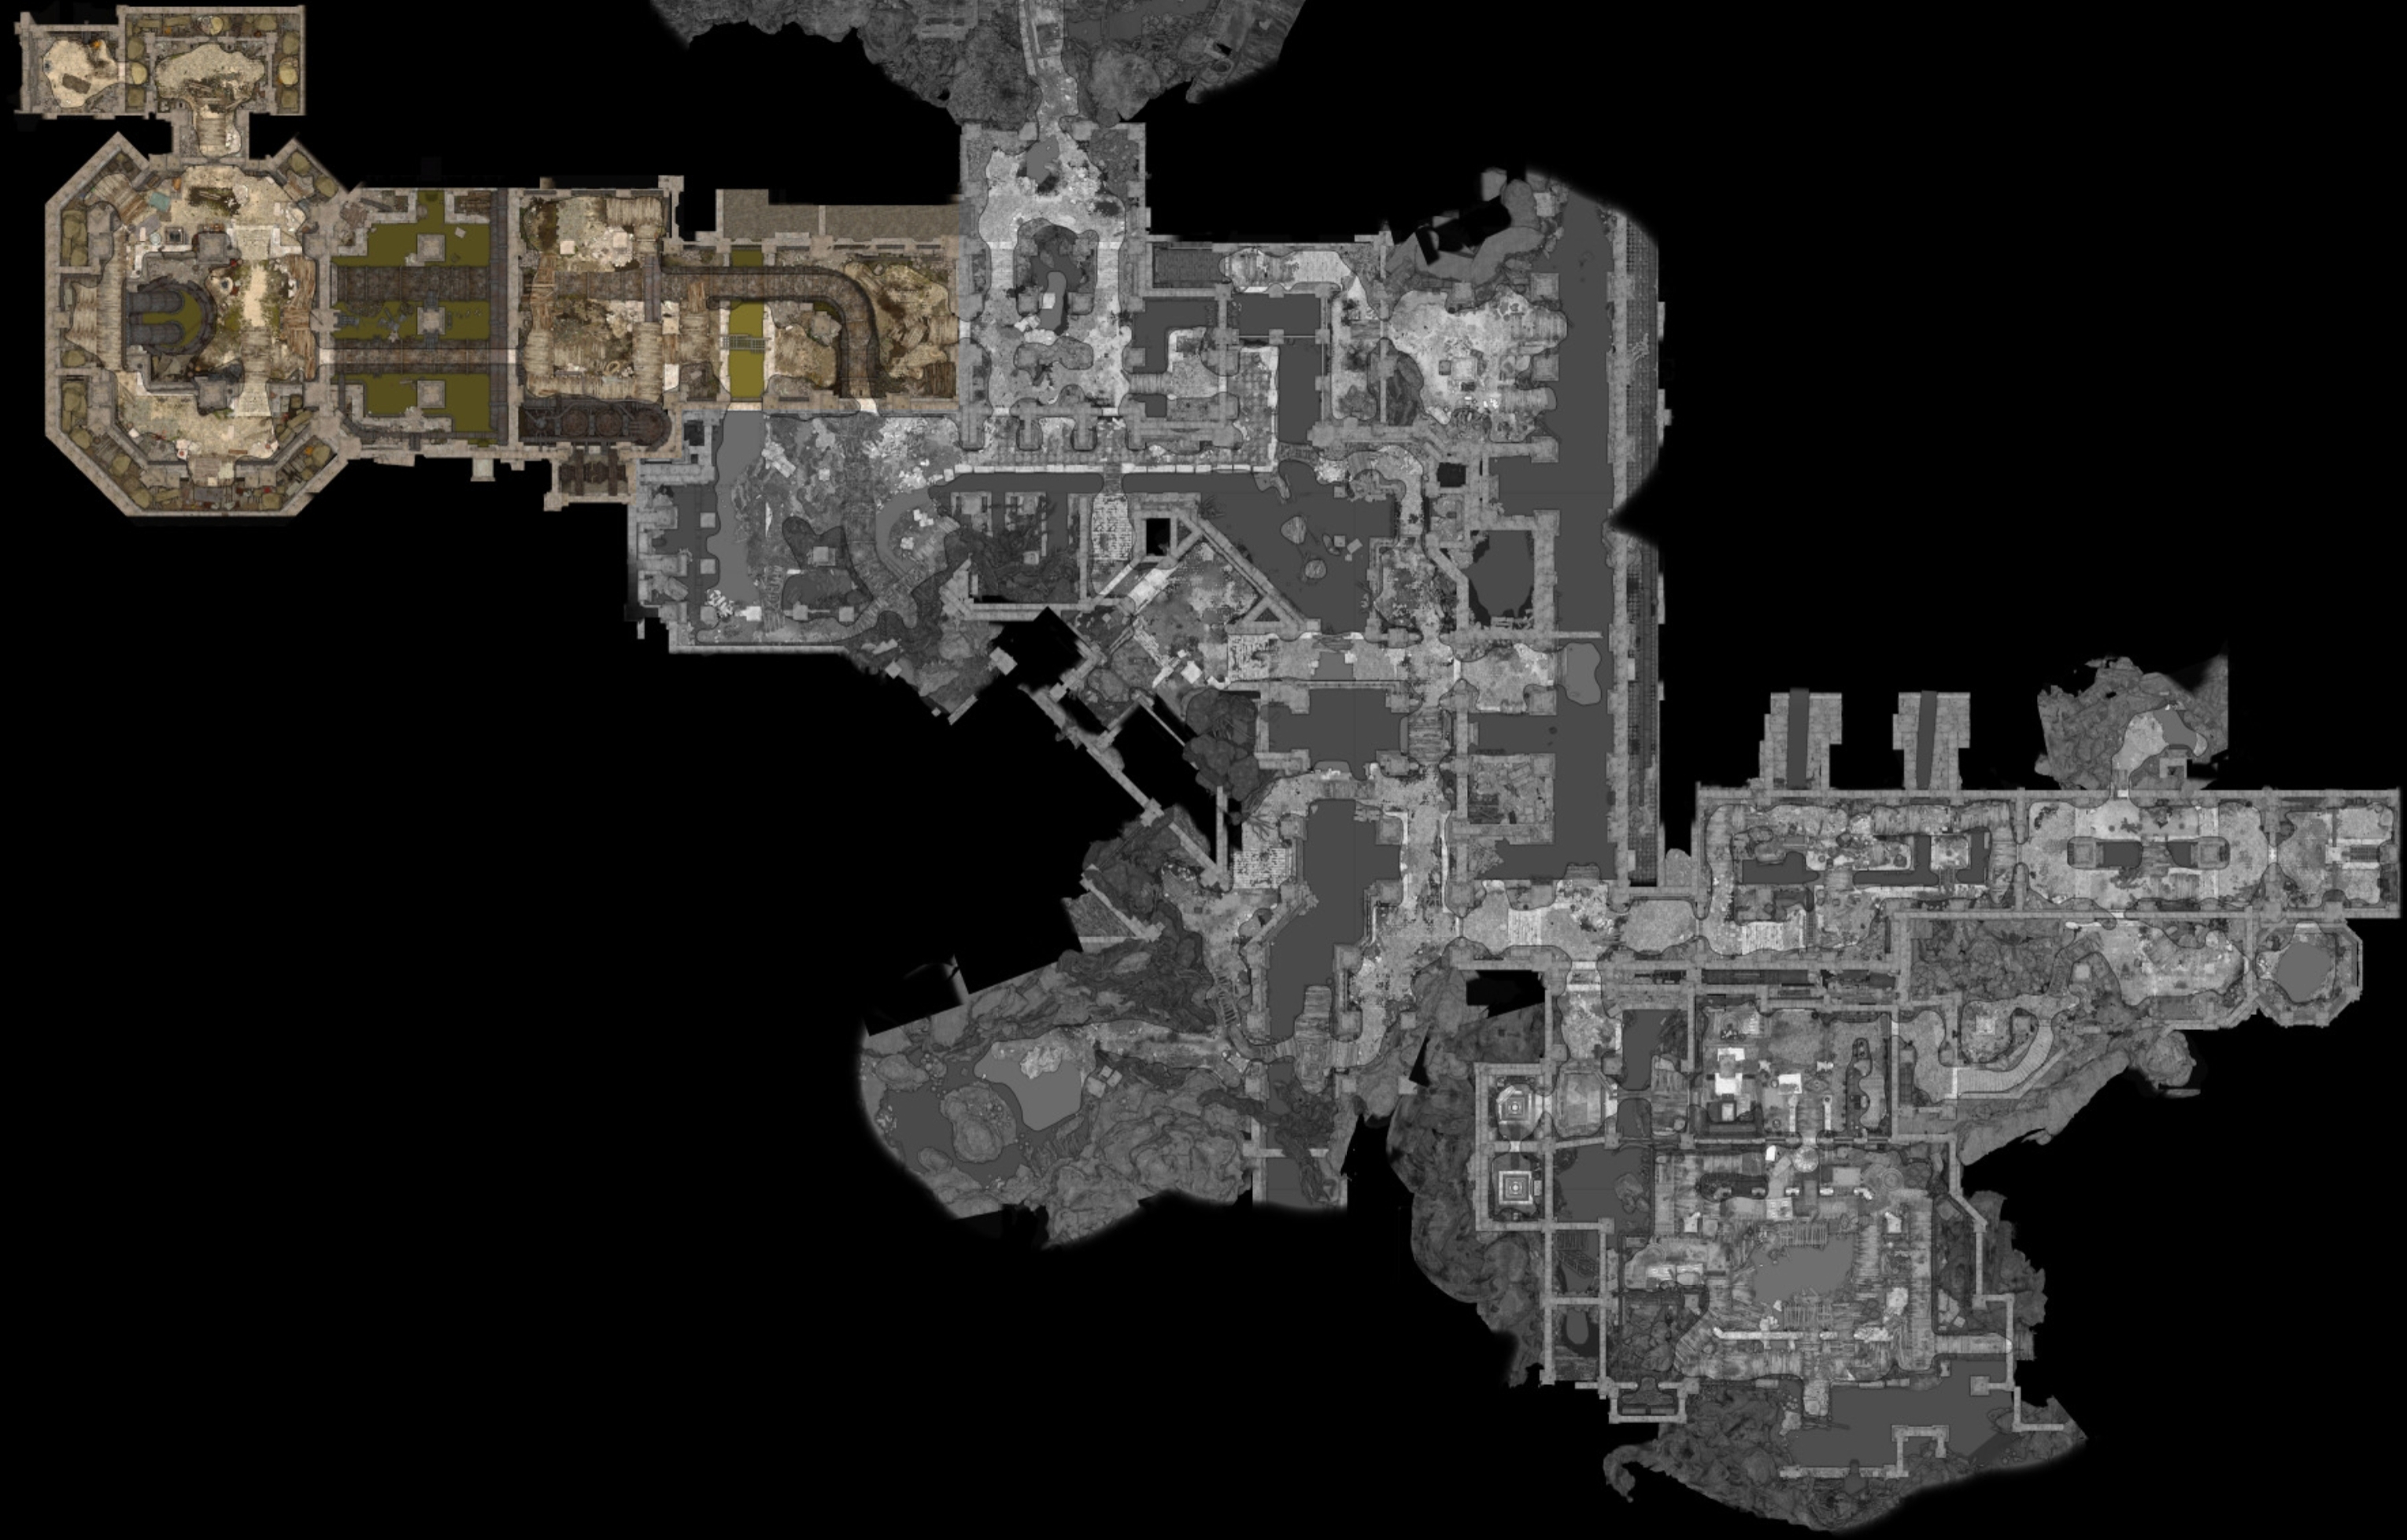
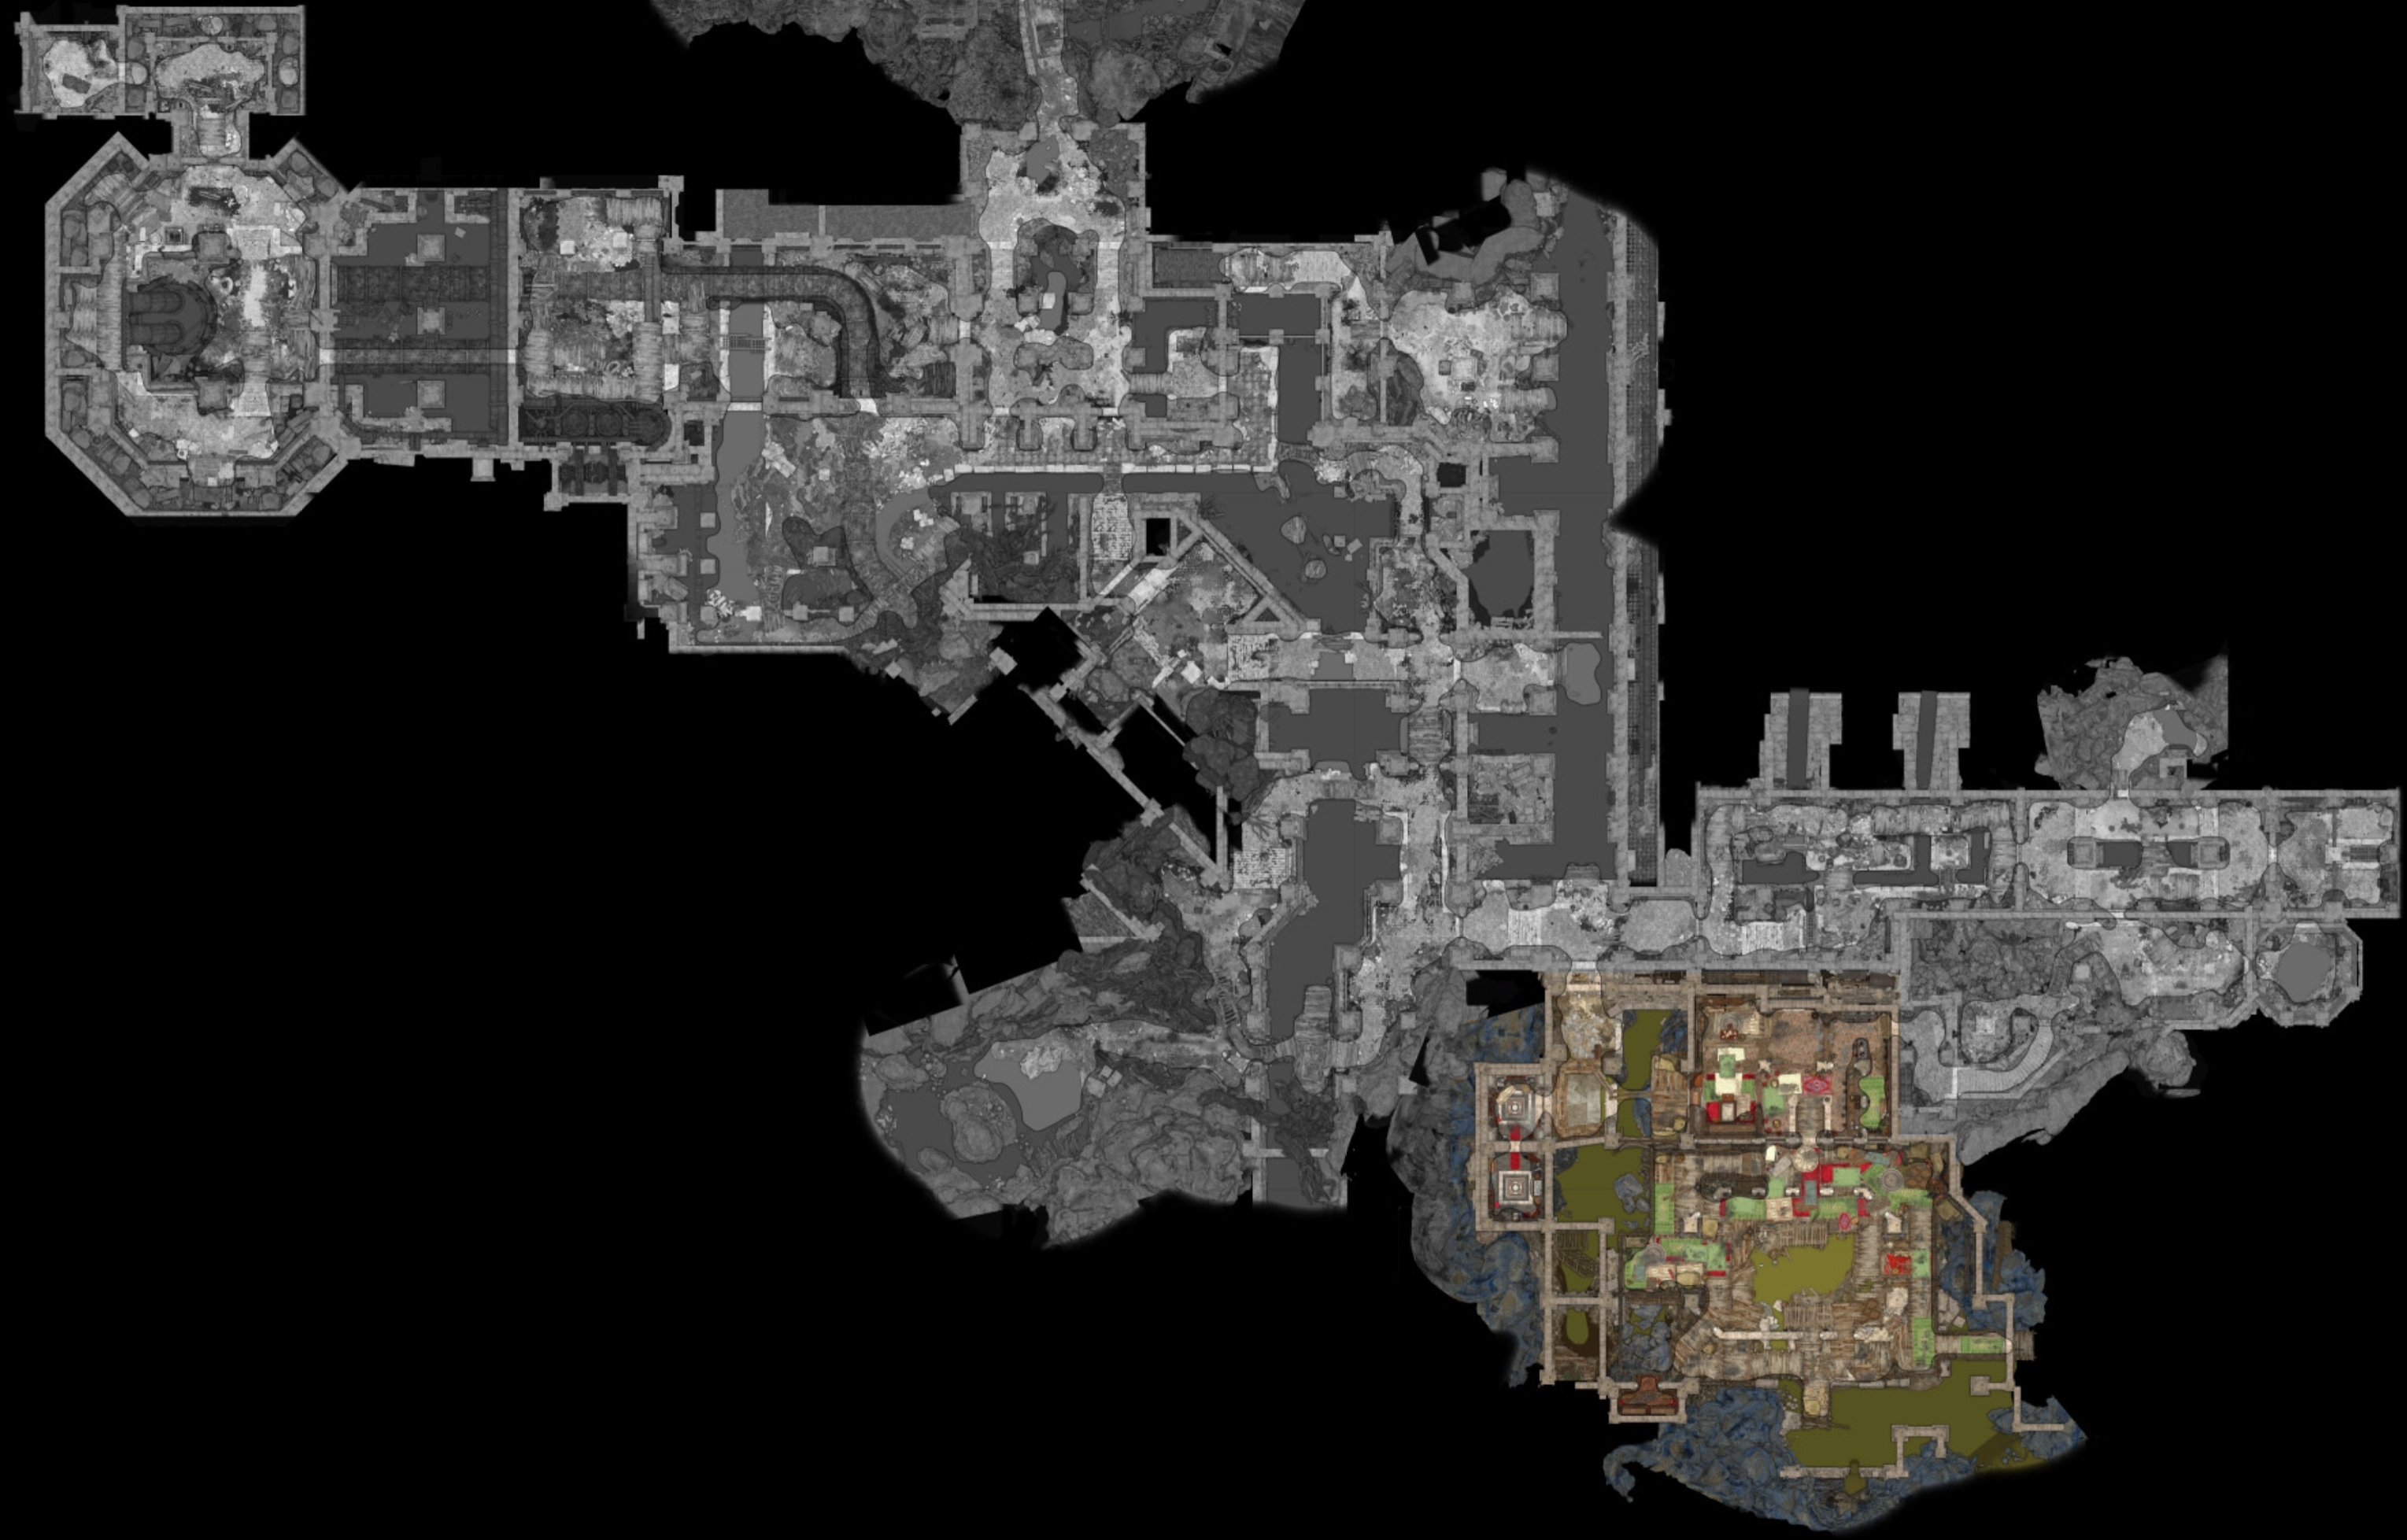
The Lower City Sewers is a large expansive area covering much of the Undercity. It also serves as the main access point into nearby Undercity Ruins.
The boundaries of the Sewers are ambiguous because several areas share a similar aesthetic, but are marked as separate locations, namely the Abandoned Cistern and the Guildhall. See the correspondent pages for more detailed descriptions of the two noted locations.
The names of other subsections are reference designations derived from the notable characters and / or objects encountered in any particular area. For clarity, this article distinguishes between areas based on their geographical situation according to cardinal directions, with some of them having conventional borders.
Historically a tribe of gutter kobolds was contracted to maintain free flow in the sanitation tunnels, but as of late they appear to have been slain or driven away by forces or circumstances unknown[1].
The sewers can be accessed through numerous manhole covers on the surface, and connects to almost every other location of the Undercity except the Murder Tribunal.
Entrances[edit section | visual editor]
There are several points from which the sewers can be entered. Most are outside somewhere in the Lower City and a few are from indoor locations.
| Entrance | General Area | Location Sewers | Location Outside | Access from Outside |
|---|---|---|---|---|
| Dripping Pipe | Eastern Tunnels | X: 27 Y: 822 | X: -1262 Y: 740 Heapside Prison |
Through the Manhole located in Heapside Prison |
| Ladder | Eastern Tunnels | X: 46 Y: 780 | X: 128 Y: -30 Lower City |
Through the Manhole located between Stormshore Tabernacle and Basilisk Gate Barracks |
| Ladder | Sarin's Funeral | X: -82 Y: 843 | X: -161 Y: -61 Lower City |
Through the Manhole located in front of Golbraith's Cellar |
| Ladder | Eastern Tunnels | X: 52 Y: 793 | X: -753 Y: 592 Knights of the Shield Hideout |
Through the Hatch located in the Knights of the Shield Hideout in the basement of the Elfsong Tavern |
| Ladder | Abandoned Cistern | X: -283 Y: 879 | X: -251 Y: -87 Lower City |
Through the Ornate Wooden Hatch located in the Gardener's Basement through the wooden door labeled as "Keep Out" |
| A greasy, smelly climb up | Treasure Room | X: -158 Y: 835 | X: -1097 Y: 335 Flymm Cargo |
Through A greasy, smelly climb down located in the basement of Flymm Cargo |
| Gloomy Descent | Sewage Raft | X: -111 Y: 886 | X: -1981 Y: 843 Cazador's Dungeon |
Through Gloomy Ascent after unlocking a Crypt Gate in Cazador's Dungeon[2] - cannot be entered from the sewers side until used from the dungeon side |
| No Entry - No Exit door | Guildhall | X: -14 Y: 772 | X: -14 Y: 772 Lower City Sewers |
Through the headquarters of the Guild, behind the bar |
| Hidden door | Secret Sewer Vault | X: -60 Y: 784 | X: -60 Y: 784 Lower City Sewers |
Through the hallway next to the Secret Sewer Vault which can be accessed from  |
In addition to this list, the iron grate in the lowest corner of the Beehive General Goods' basement was reported to be interactable in earlier versions of the game, presumably providing an additional entrance to the Lower City Sewers. This was discarded by the current version of the game.
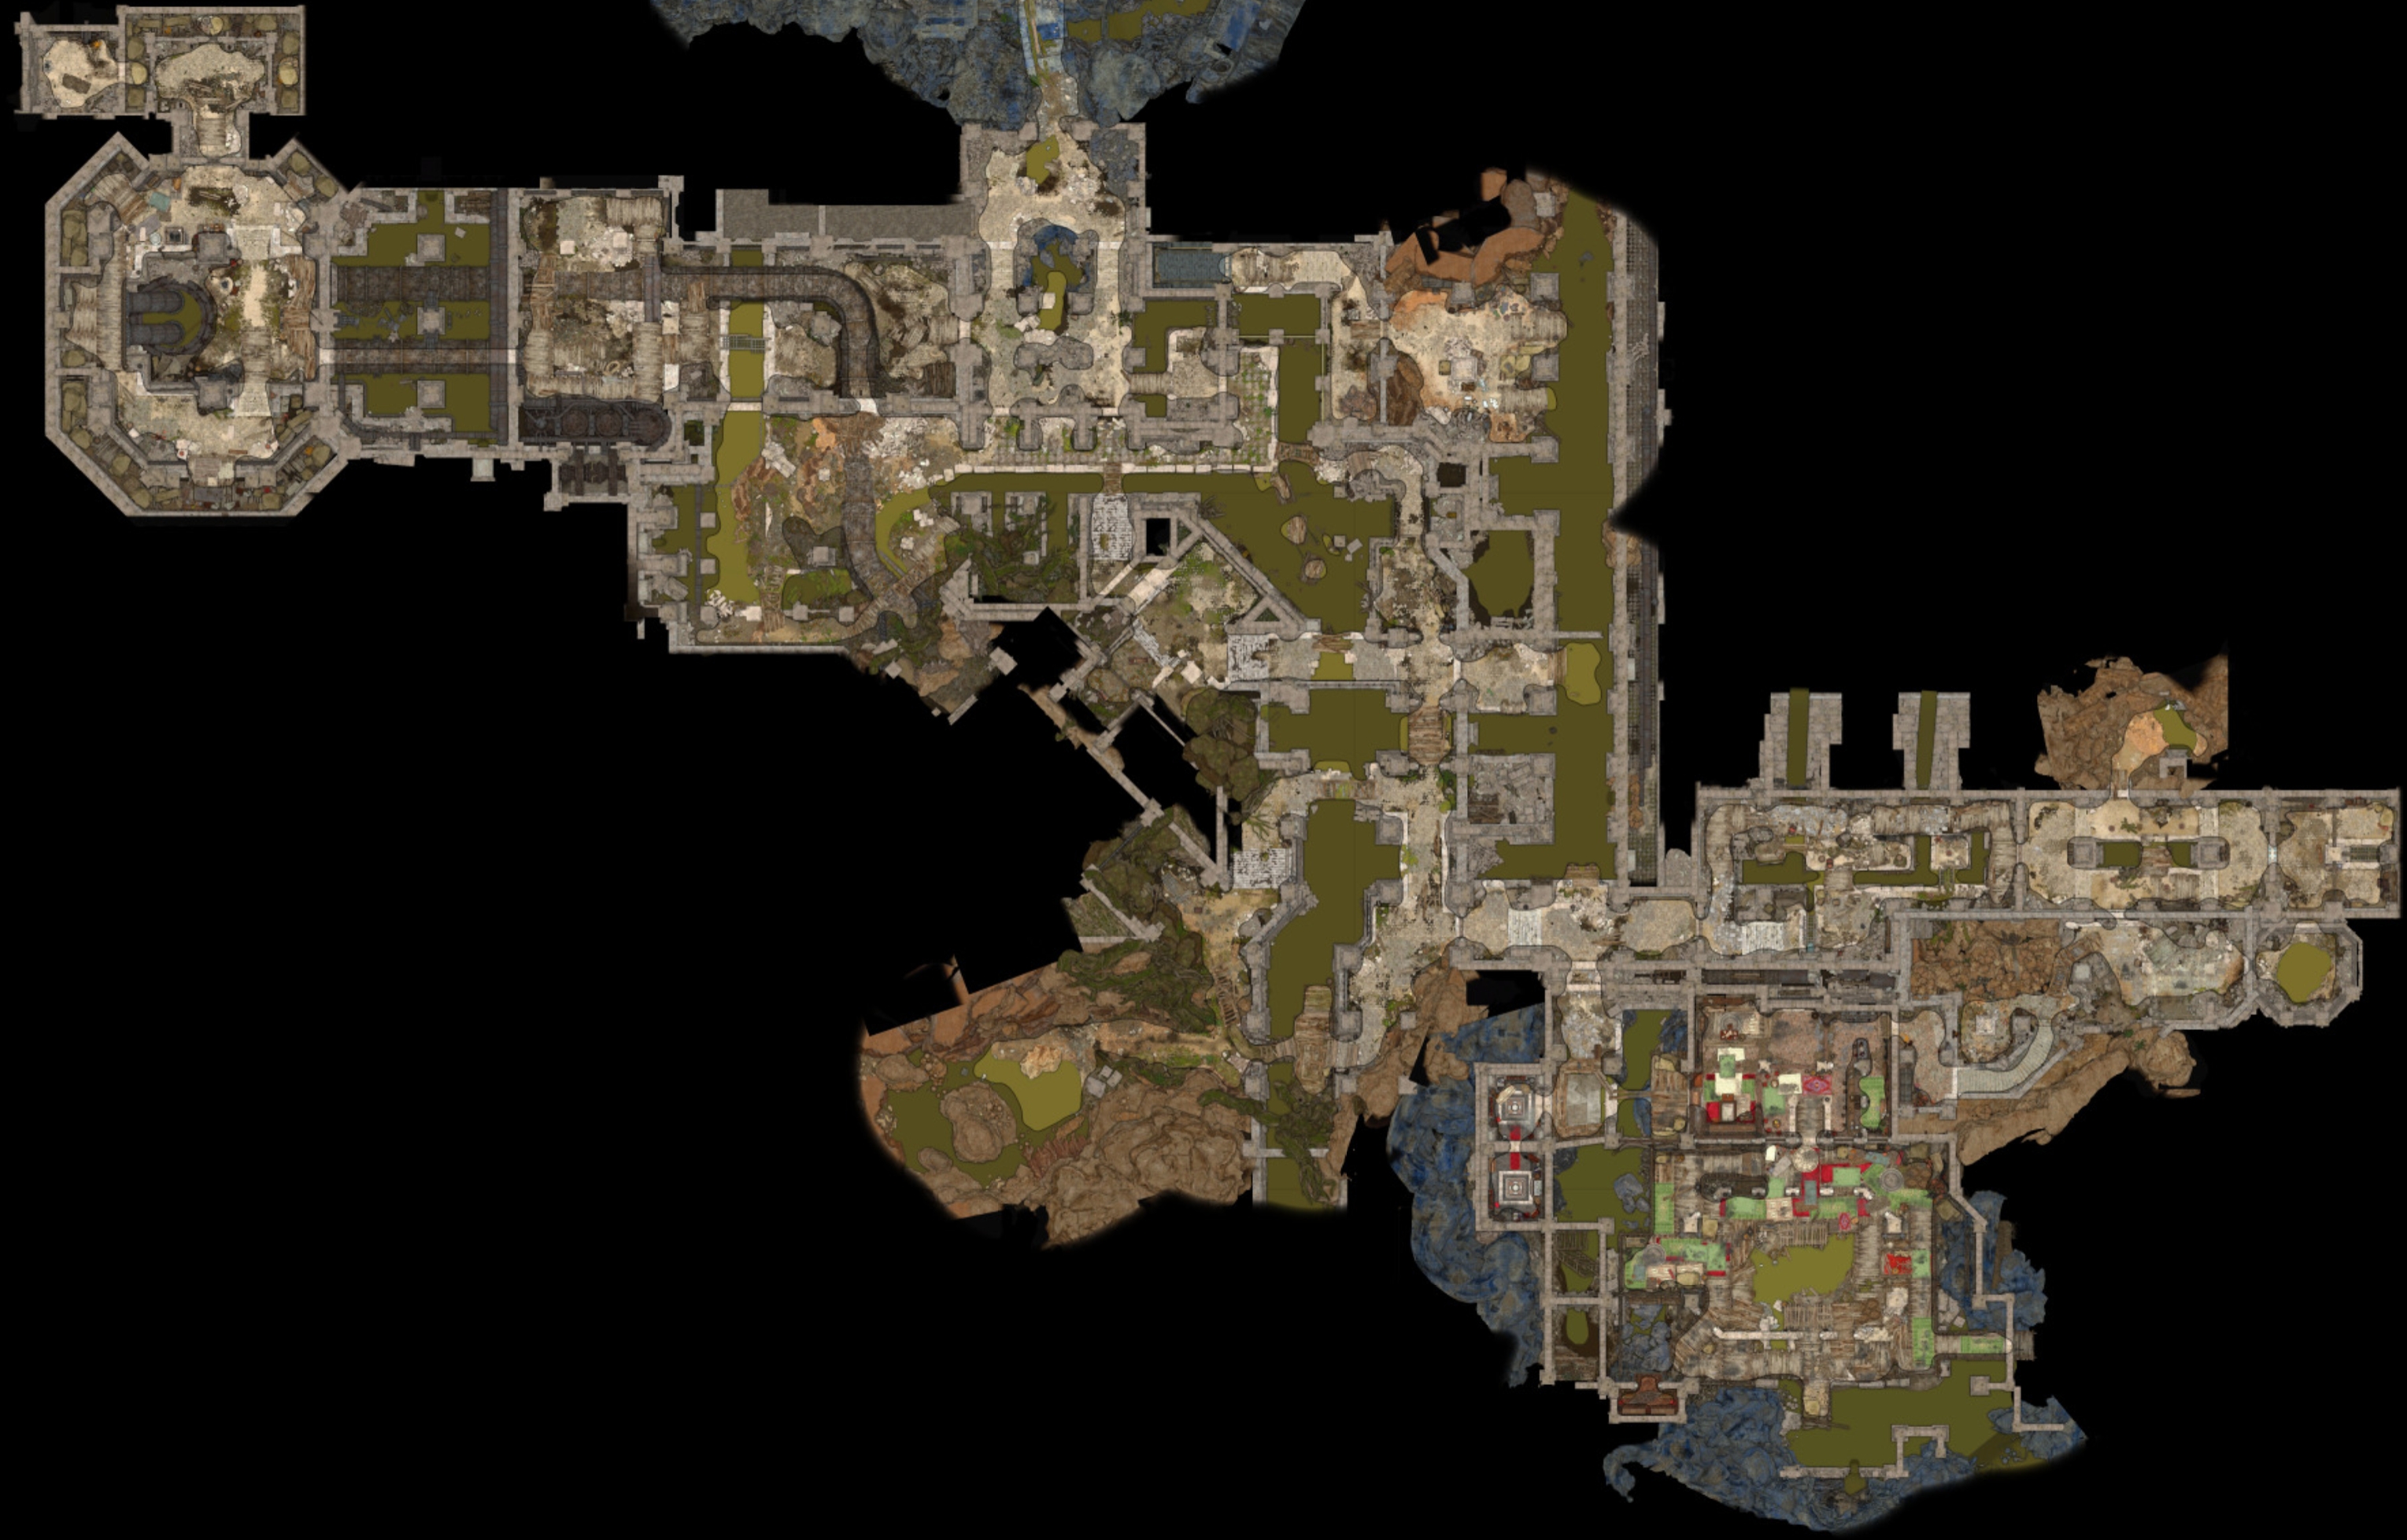
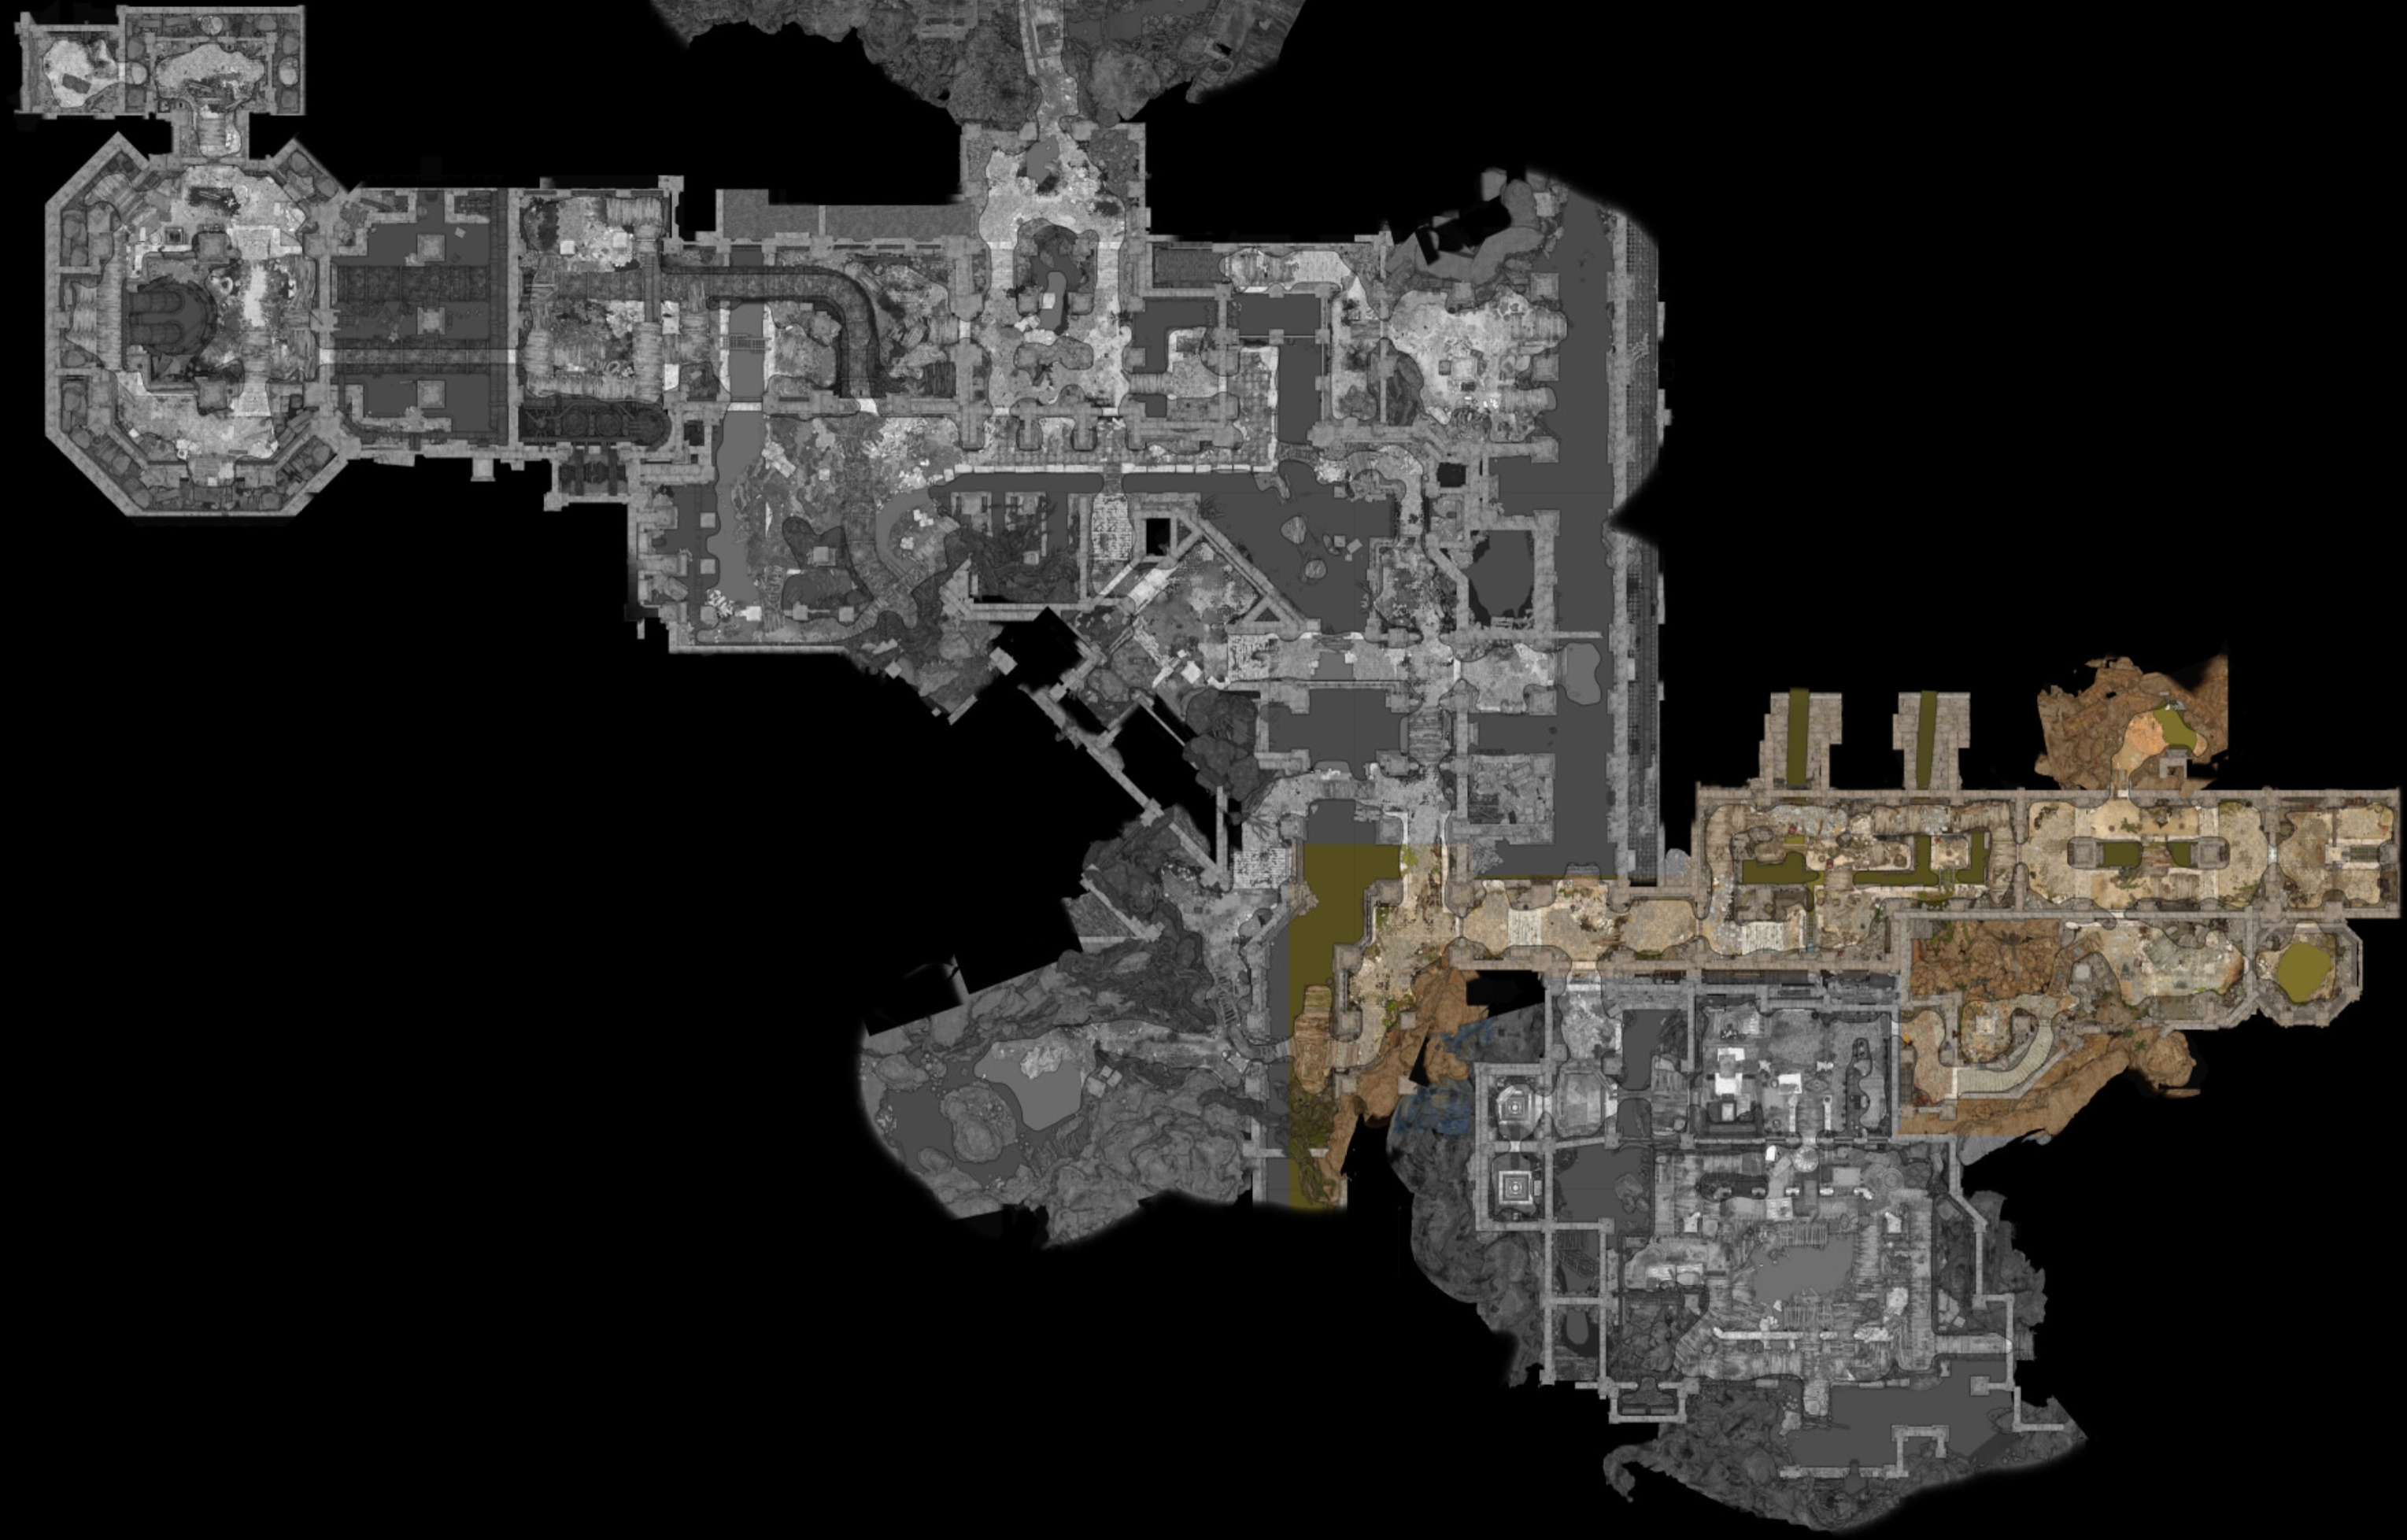
Main system locations[edit section | visual editor]
The sewers are a vast network of tunnels and rooms which connect several places within Baldur's Gate. A subdivision is made of area's of interest inside the sewers.
Eastern Tunnels[edit section | visual editor]

The eastern tunnels of the sewers can be entered from Lower City in three ways, all located in the Eastway district of the city:
- Descending through the pit latrine in the Heapside Prison
- Climbing down a hatch in the Knights of the Shield Hideout
- Climbing down a manhole located in an alley between Stormshore Tabernacle and Basilisk Gate Barracks
The descent from the prison leads into a cavern with a wall breach to the sewers, with nothing remarkable inside.
The entrance connected to the Knights of the Shield Hideout leads to a small storeroom. Numerous Traveller's Chests on the shelves at X: 56 Y: 796, as well as Wooden Chest in the opposite corner, contain gold, random Valuables, potions and / or spell scrolls up to Very rare grade. In the southwestern corner is a table with a journal describing 
![]()
The entrance from the manhole initially leads to a room without an exit, but a wall at X: 39 Y: 783 is highlighted with a 
All three outside entrances end up at the same tunnel with the middle part filled with ![]()
![]()
The door at X: 6 Y: 800 opens into the next part of the tunnels. Here cultists of ![]()

In the middle of this room are several vents with a Noxious Fumes trap. It triggers when weight is applied to a Granitic Rock at X: -22 Y: 805 and is disabled with a lever at X: -35 Y: 805.
If the party choose to stand up to the refugees and defeat the cultists, the refugees flee through the doors at X: -42 Y: 789 to the next hallway. Unless disarmed prior, three Tripwires planted there trigger explosions which kill the refugees. Each trap requires
At X: -60 Y: 784 in this hallway is a hidden door leading into
Continuing the path further west leads to another locked door (![]()
Arabella's Cave[edit section | visual editor]

To the west of the waypoint an improvised bridge leads up to a natural cave where 
![]()
The party can catch up with Arabella, and also ask her about the dead bodies strewn around her – the thugs (


![]()
On the way to Arabella at X: -127 Y: 772, a
To the north of Arabella's cave the ground is covered in ![]()
![]()
![]()
Sewage Raft[edit section | visual editor]

One of the sewers' gutters has a raft line which can be used to travel north and south. The small wooden raft moving along it has two levers, each indicating to which side it will move. The raft moves between three piers, passing them one at a time (its initial position is at the middle pier). Levers on the piers (on the nearby wall for the southern pier) work as call buttons for the raft.
- The southern pier at X: -60 Y: 796 is adjacent to the Eastern Tunnels, the door connecing to it with the main part of the sewers is locked (requires

- The middle pier X: -66 Y: 827 is by the locked door to the

- The northern pier at X: -78 Y: 827 meets the end of the raft line. A locked door near it leads to the Gloomy Descent – the subterranean entrance to the Cazador's Dungeon, which can only be opened from inside the dungeon itself.
Use of the sewage raft together with careful movement (i.e., hiding or entering Turn based mode) allow the party to walk around the middle part of the sewers, where a mad sorcerer resides, without triggering an encounter with him.
Mad sorcerer's lair[edit section | visual editor]

The middle part of the sewers ground is partly covered in ![]()
![]()

Placating Aelis requires various ability checks; if successful, Aelis allows safe passage through his lair. However, speaking with him again or re-entering this part of sewers still turns him hostile. A full list of available ability checks is on Aelis's page.
In the middle of Aelis' lair is a red-outlined, locked Grated Iron Door which can be unlocked with a ![]()
![]()
Multiple 


![]()
![]()


To the north of the lair at X: -146 Y: 864 is a room where four Loose Stones can be spotted with successful ability checks:
- One check is always successful at X: -146 Y: 902
Minor loot is hidden under each stone, except the last one, which contains a ![]()

Several documents are around the room (including stashes under loose stones): ![]()
![]()
![]()

![]()
Going further north brings the party to the entry way towards the Undercity Ruins and its related ![]()
Treasure Room[edit section | visual editor]

The treasure room is a large open area which features a large pipe which goes straight through the room and ends at an entry point for the sewers. Atop the slippery hill at the end of the pipe is a passageway called A greasy, smelly climb up... which links the sewers to the basement of Flymm Cargo.
On a piece of land surrounded by flowing sewage 
![]()
![]()
![]()
A 


The actual treasure is in the northernmost dirt mound at X: -178 Y: 862. From it the Marked Chest: Dragon (trapped as well) emerges, which requires a
Following the large pipe in this room leads to the Abandoned Cistern. The cistern can also be accessed by going through a broken gate inside the streaming sewage on the west.
Specific Adjacent locations[edit section | visual editor]
Abandoned Cistern[edit section | visual editor]

The Abandoned Cistern lies underneath Baldur's Gate and is part of its Undercity. It is the westernmost part of the Lower City Sewers and shares similar aesthetics. It serves as mud-setting pit for the sewer filth, separated from the other drainage by a system of sluice gates and valves.
The area is divided into two rooms; the eastern one with the large pipe is guarded by a group of Bhaalist cultists. Unlocking the westernmost requires solving a puzzle or passing a
During the game the Abandoned Cistern serves as a hideout for the leader of a newly-sprung bandit gang, who goes by the name of the 

Guildhall[edit section | visual editor]

The Guildhall is the underground headquarters of 
During the game's events, the Guild (and by extension the Guildhall) is run by the Guildmaster
There are two places where the Guildhall connects to the Lower City Sewers.
- A locked door called No Entry - No Exit at X: -14 Y: 772 leads to the back of the bar. It requires a


- A hidden door which can only be opened from inside the Guildhall near the Secret Sewer Vault.

Once opened, either of these entrances can serve as an additional access point to the Lower City Sewers through the Guildhall entrance in the back alleys of the Brampton district of Baldur's Gate.
Undercity Ruins[edit section | visual editor]
Undercity Ruins is the northernmost part of the vast Undercity beneath the streets of Baldur's Gate. It can only be accessed through the Lower City Sewers, where at approximately X: -138 Y: 907 the minimap location changes to "Undercity Ruins" after walking north through a stone archway, and the ![]()
The Undercity Ruins holds the darkest secrets of Baldur's Gate: the Ancient Lair of a powerful 
![]()
To the west at X: -180 Y: 935 is a passageway which leads to the Ancient Lair. Aside it stands 
![]()
Involvement[edit section | visual editor]

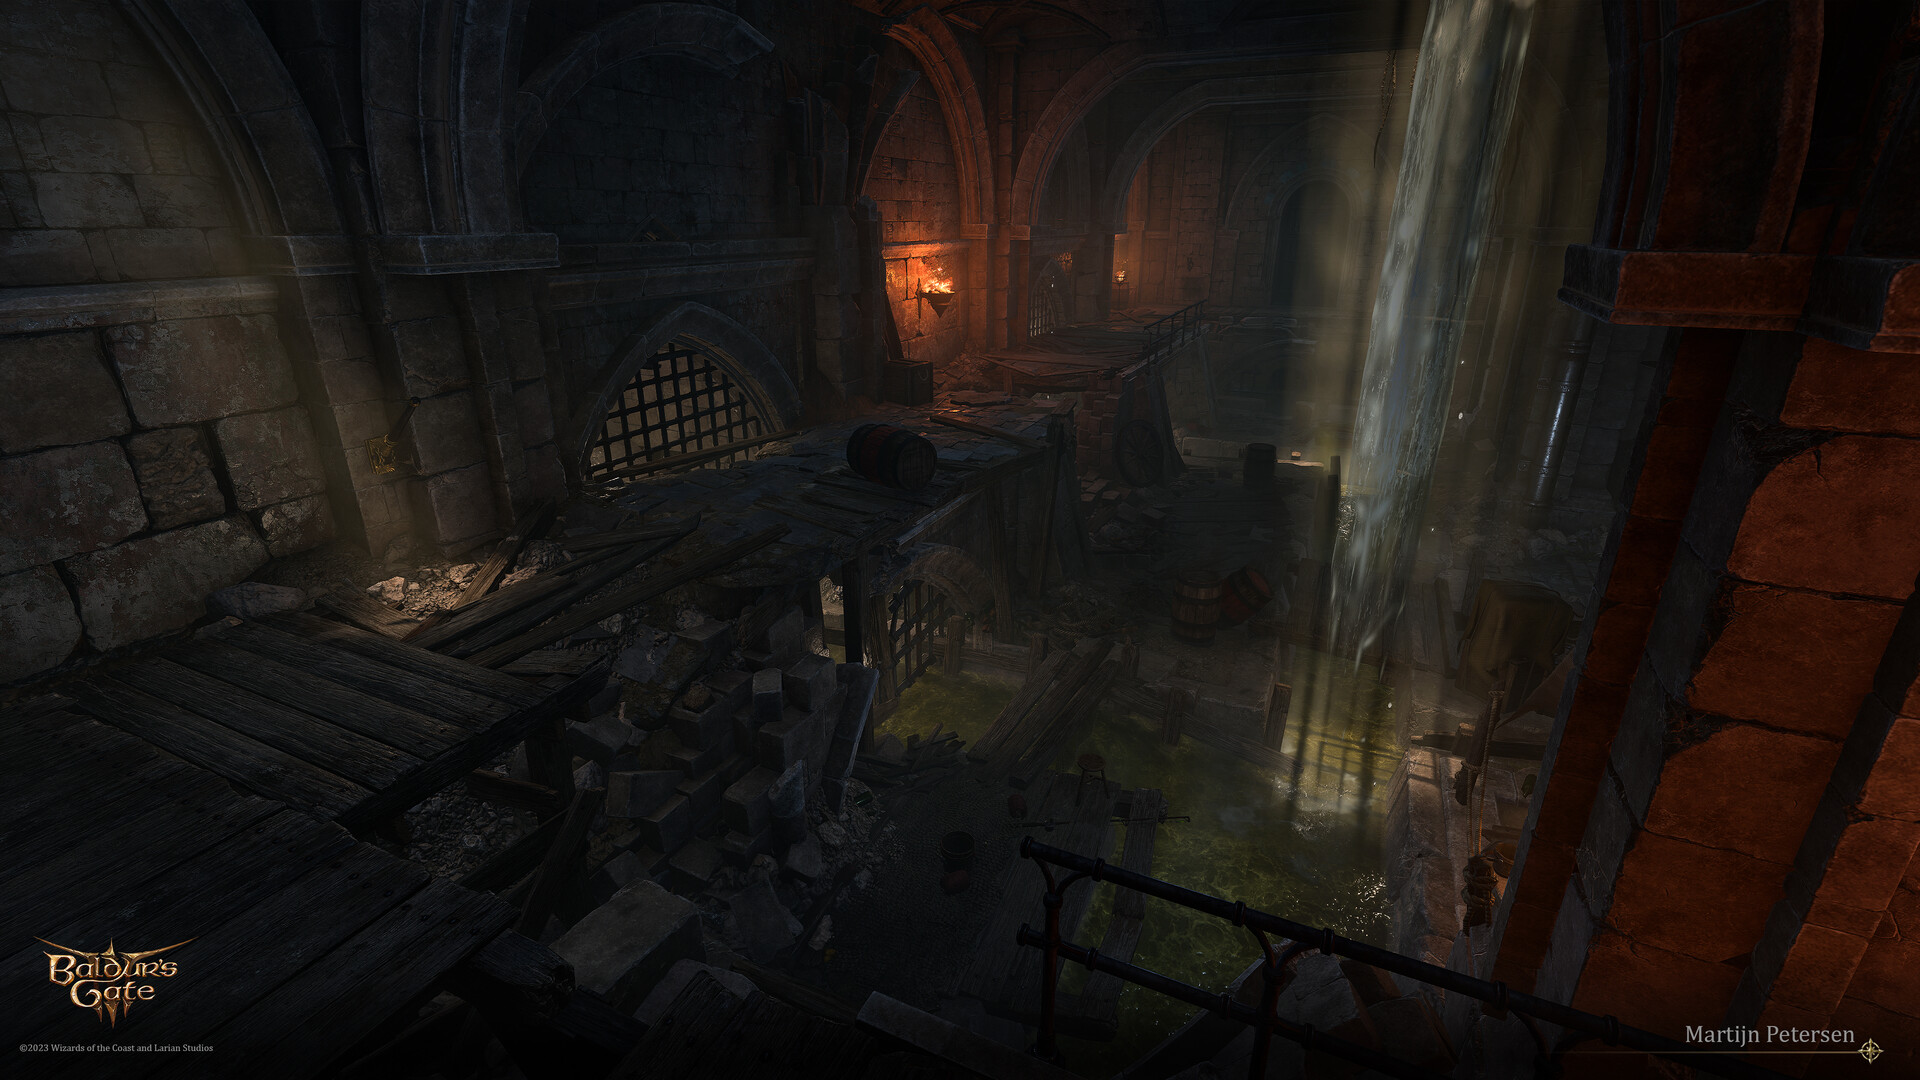
(by Martijn Petersen)

“– What's the name of that river down there?
– Wizard called it the Soo-Errr.
– Whatever it's called, it's impressive. And it tastes great.„
The Lower City Sewers is a location where several major quests can be started and / or updated. Also, there are lesser encounters which show the hidden life of the city's Underbelly and generally add flavour to the playthrough. The encounters which take place in separate sublocations of the Undercity like Abandoned Cistern, the Guildhall or Undercity Ruins, are not listed here.
Encounter with Orin[edit section | visual editor]
If ![]()
In this case, the event is mostly the same for each person – Orin approaches the party disguised as any of their companions she has abducted. The kidnapped victim appears grievously injured and begs the party to run away, explaining how they were brutally tortured by Orin. Regardless of the answer, Orin reveals herself and her kidnapping plot. She demands the party kill 
Encounter with Kith'rak Voss[edit section | visual editor]
Depending on the state of ![]()


![]()
![]()


![]()
The party can also speak to Qudenos and pass a
If the party attack either of them, both try to teleport away on their first turn, even if restrained, silenced, or incapacitated. However, both can still be killed within that single turn. In this case, the sword can be looted from Voss.
Encounter with Gandrel[edit section | visual editor]
If 

![]()
![]()
![]()


Strange date in the sewers[edit section | visual editor]
On the northern pier of the sewage raft stands 
If
The area around the pier is littered with broken mirrors, various silverware and missing child posters, all referencing the children of the Gur tribe abducted by Astarion on 
Sarin's Funeral[edit section | visual editor]
In the middle of Aelis Siryasius' lair is a coffin with a headless glowing skeleton inside. The skeleton has an interactable slot to reattach ![]()
Combining the skull and the skeleton itself does not make Aelis (if still alive) hostile. Once the skull is returned to the skeleton, Sarin's ghost appears again (now with her head in its place), bows and rewards the party with ![]()
Waypoints[edit section | visual editor]
This location contains the following Waypoints![]()
Related locations[edit section | visual editor]
Related quests[edit section | visual editor]
Characters[edit section | visual editor]
Characters located in the Guildhall and in the Abandoned Cistern are listed on the correspondent location pages.
Notable[edit section | visual editor]


Bhaal Cultists[edit section | visual editor]


Other[edit section | visual editor]


Creatures[edit section | visual editor]


Loot[edit section | visual editor]
Related literature[edit section | visual editor]


Gallery[edit section | visual editor]
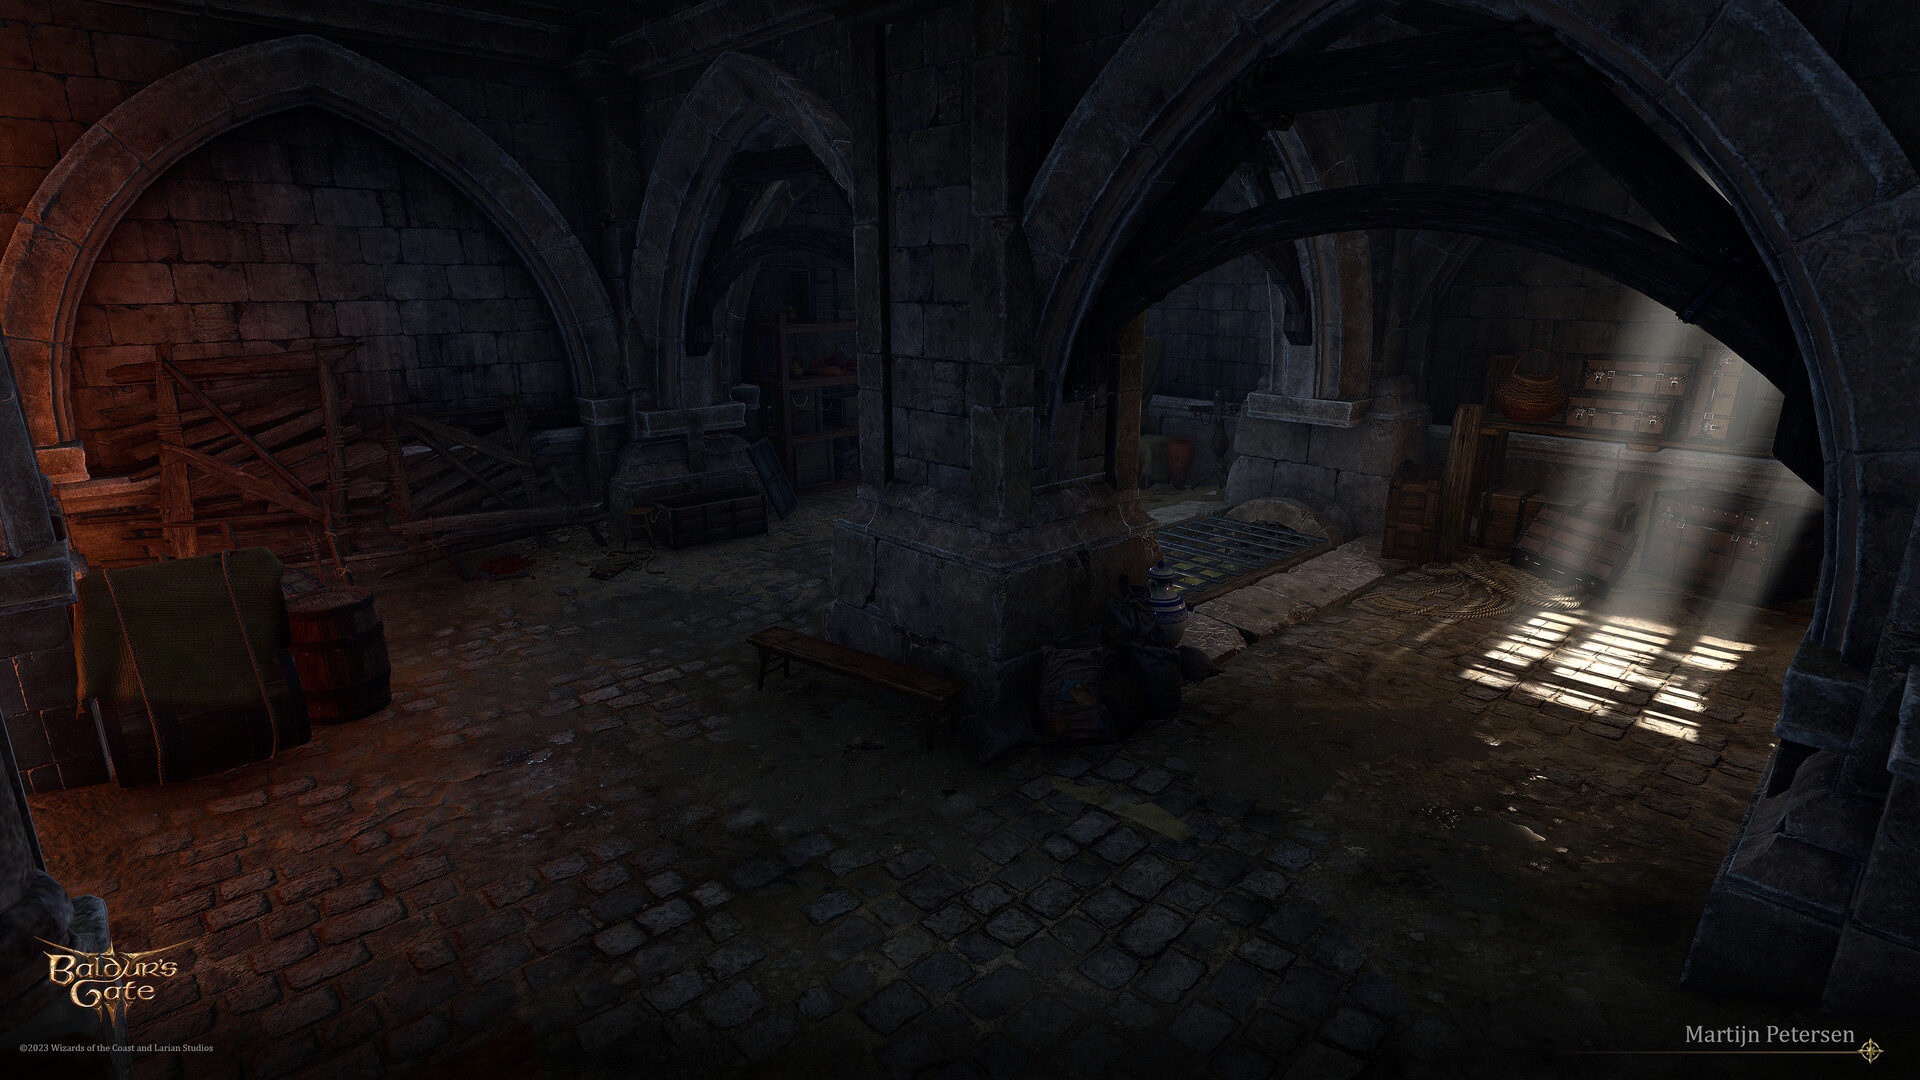
-
Entrance area to the sewers
(by Martijn Petersen) -
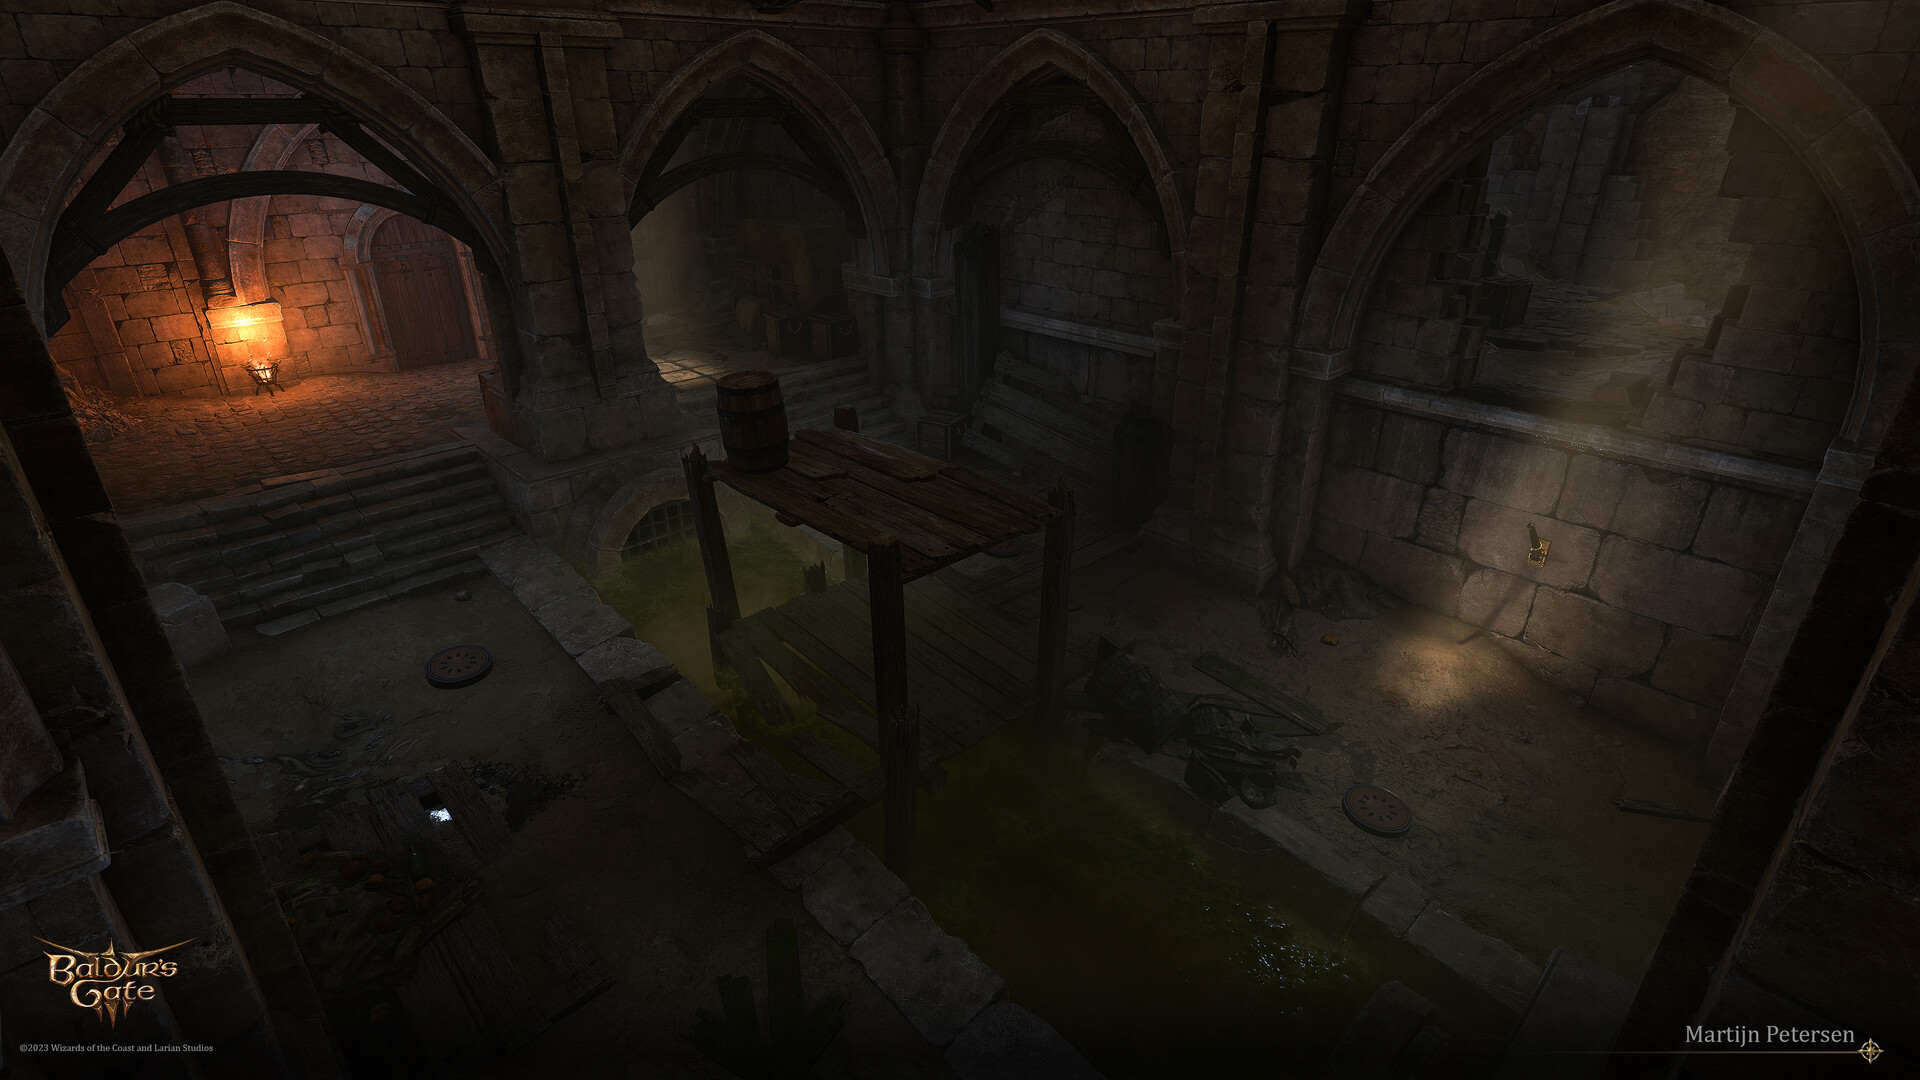
Eastern tunnel with fumes
(by Martijn Petersen) -
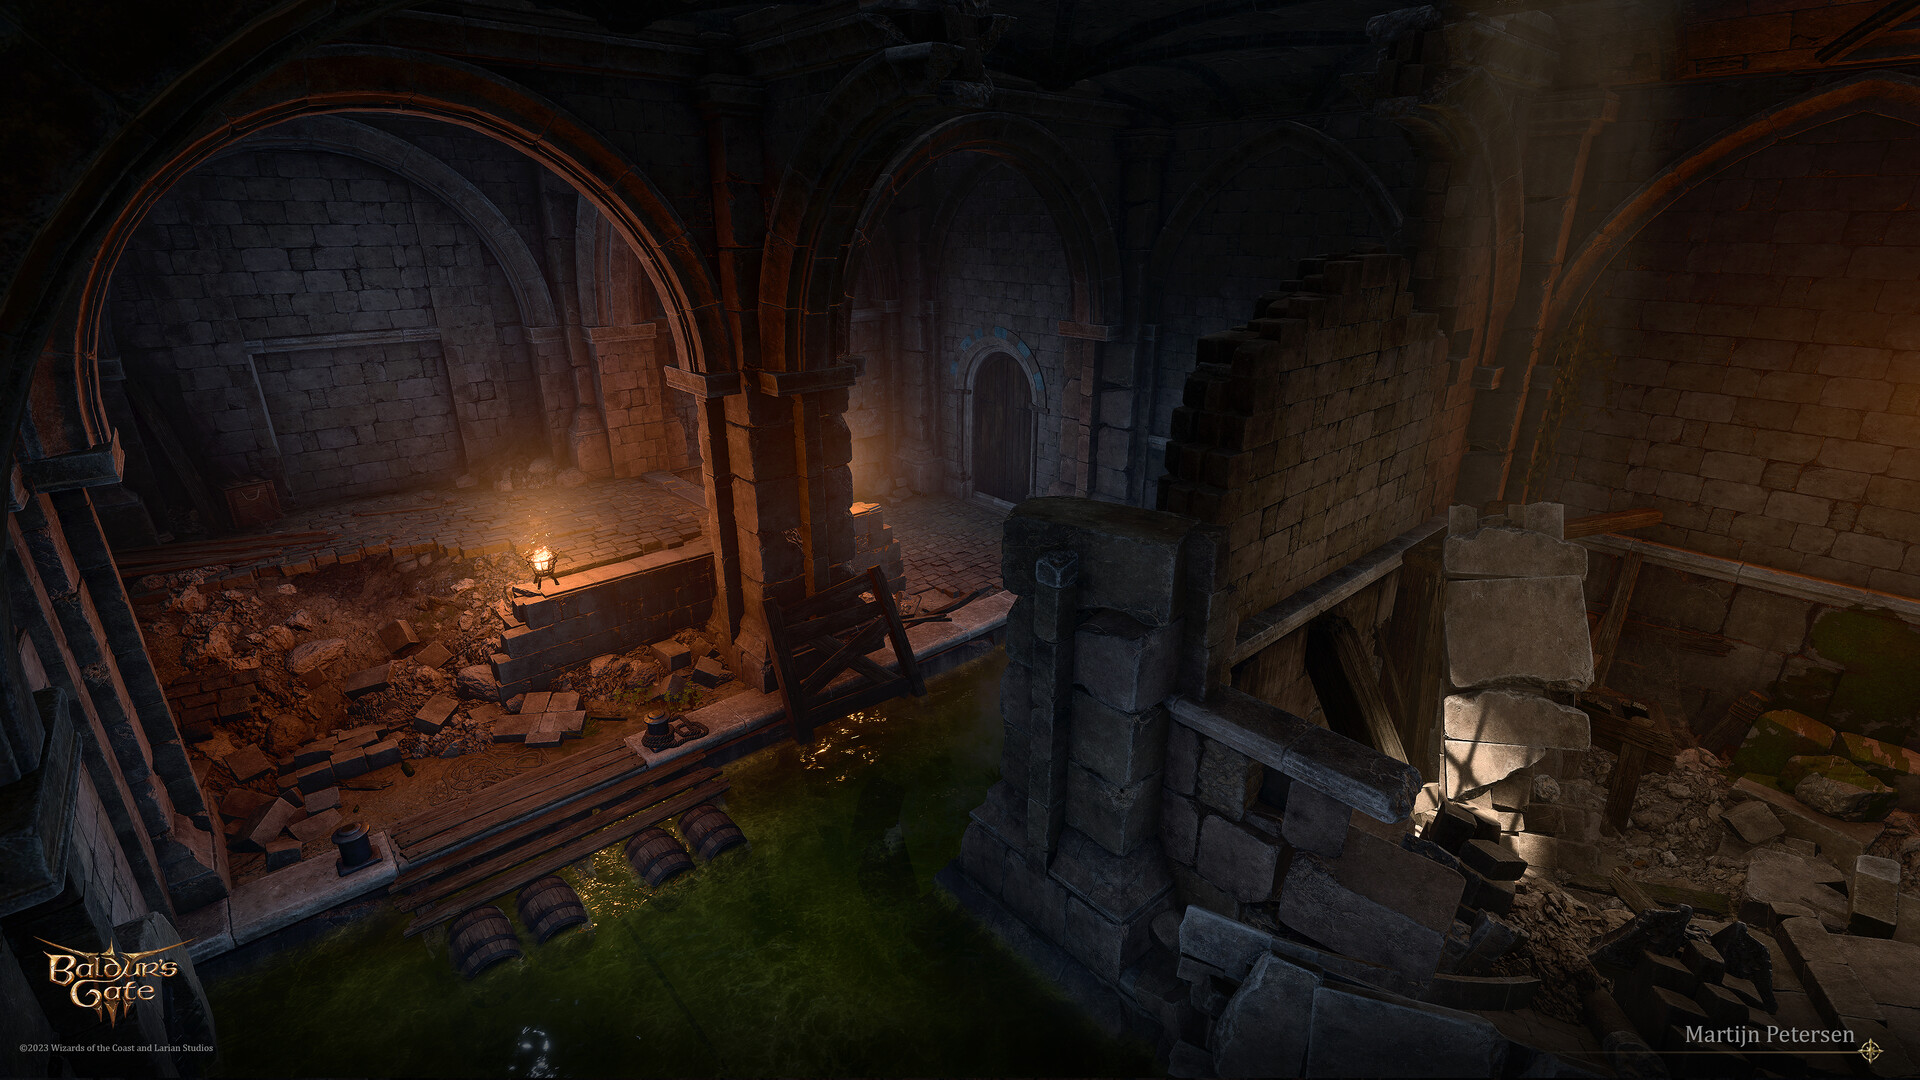
Pier for the sewage raft
(by Martijn Petersen)


Notes and references[edit section | visual editor]
- ↑ As described in


- ↑ Requires

- ↑ 3.0 3.1 3.2 Shows up if Gandrel survived it into Act Three and the vampire spawn in Cazador's captivity are freed.
- ↑ Given by

- ↑ 5.0 5.1 Dropped by
External links[edit section | visual editor]
