Ad placeholder
Emerald Grove: Difference between revisions
| (41 intermediate revisions by 4 users not shown) | |||
| Line 1: | Line 1: | ||
{{ | {{Location page | ||
| | | prefix = The | ||
| name = Emerald Grove | |||
| alt name prefix = the | |||
|region = | | alt name = Druid's Grove | ||
| | | image = Emerald Enclave.webp | ||
| | | image description = Symbol of Silvanus | ||
|west | | act = one | ||
|east | | summary = It encompasses the large cavern known as [[The Hollow]] and the [[Sacred Pool]]. | ||
| region prefix = the | |||
| region = Wilderness | |||
| north = | |||
| west = Forest | |||
| east = Secluded Cove | |||
| south = Roadside Cliffs | |||
}} | }} | ||
== Overview == | == Overview == | ||
[[File:Emerald Grove Map.png | [[File:Emerald Grove Map.png|thumb|The area of the map known as the Emerald Grove.]] | ||
The Druids of the Emerald Grove are led by {{CharLink|Kagha}} who serves as the | The Druids of the Emerald Grove are led by {{CharLink|Kagha}} who serves as their leader in the absence of {{CharLink|Halsin|First Druid Halsin}}. They are providing temporary refuge for the [[Tiefling Refugees]] from [[Elturel]], though tensions are strained between the two groups. The Grove is on high alert due to the aggression of nearby [[Goblin]]s, which Kagha believes is worsened by the [[Tiefling|Tieflings']] presence. To protect the Grove, Kagha has ordered the Druids to perform the [[Rite of Thorns (ritual)|Rite of Thorns]], which would shut the Grove off and displace the Tieflings. | ||
The fate of the Emerald Grove and the Tiefling Refugees is in the hands of the party. | |||
Entering this area grants the party 10 [[Experience|XP]] at level 2, 30 XP at level 3, and 40 XP at level 4. | |||
=== Emerald Grove ramparts === | |||
[[File:Silvanus' Grove SW.png|thumb|The Emerald Grove's defensive ramparts.]] | |||
The entrance to the Emerald Grove is protected by a gate that can only be opened with a nearby winch. The winch is located on the ramparts above the gate next to a war horn that {{SAI|Rally|rallies}} defenders if the Grove is attacked. Several Tieflings have set up camp west of the ramparts. If any Tieflings die during the events of Act One, their remains may be found in the burial site by the camp at {{Coords|180|445}}. | |||
When the party arrive at the Emerald Grove, they find {{CharLink|Aradin Beno|Aradin}}, {{CharLink|Barth}}, and {{CharLink|Remira}} rushing toward the gate, pursued by a band of Goblins. The Goblins kill the gatekeeper {{CharLink|Kanon}}, trapping the three adventurers outside and forcing them and the party into combat. {{CharLink|Wyll}} enters the fray, leaping from the ramparts to help defend the Grove. If all allied defenders survive, [[File:Inspiration Icon.png|21x21px|link=]][[Inspiration|No One Left Behind]] is awarded for those with the [[Soldier]] background. | |||
Upon entering the Grove, several Tieflings gather atop the ramparts, mourning the death of Kanon. If the party head to the ramparts immediately, they can speak with his sister {{CharLink|Arka}}. Regardless of whether the party interact with her, Arka will rush to the [[Makeshift Prison]] with {{CharLink|Memnos}} in close pursuit. | |||
{{CharLink| | On the path leading into [[The Hollow]] within the Grove, Aradin and {{CharLink|Zevlor}} argue about the missing First Druid Halsin and the pack of Goblins that attacked. The party can decide whether to intervene. Aradin's later location will vary depending on this outcome. After the argument, Zevlor thanks the party for defending the Grove and asks them to speak with Kagha to prevent the {{SmRarityItem|Rite of Thorns (ritual)|Rite of Throns|override_icon=BOOK Generic Druid Rite Unfaded Icon.png|override_rarity=1}}. This initiates {{Quest|Save the Refugees}}. If the party has not yet initiated the subquest {{Quest|Get Help from Healer Nettie}}, they may learn of {{CharLink|Nettie}} through Zevlor, which adds this subquest under {{Quest|Find a Cure}}. | ||
Near the main entrance of the Grove, {{CharLink|Nadira}} can be found on the hill east of the ramparts at {{Coords|242|451}}. She is being stalked by a {{CharLink|Bugbear Assassin}} and will be murdered if the party fail to rescue her. Interacting with Nadira's telescope provides the party with a glimpse of a nearby [[Red Dragon]]. | |||
From Nadira's location on the east hill, a path winds north from the hill toward an elevator to the [[Sacred Pool]]. However, this elevator is initially blocked by {{CharLink|Tuffet}} the bear, who must be convinced to move. Near the upper level of the elevator is an aggressively territorial squirrel named {{CharLink|Timber}} at {{Coords|239|467}}. The party can decide whether to placate or kill the squirrel. If the player character is the [[The Dark Urge|Dark Urge]], they will automatically punt the squirrel into the nearby rocks, with lethal consequences. The Dark Urge can only control this choice if {{SAI|Speak with Animals}} is active. Killing Timber in this way awards [[File:Inspiration Icon.png|21x21px|link=]][[Inspiration|Indulge Thine Appetites]] for the [[Haunted One]]. | |||
=== The Hollow === | === The Hollow === | ||
[[File:Silvanus' Grove NW.png | [[File:Silvanus' Grove NW.png|thumb|Looking across The Hollow towards the Makeshift Prison.]] | ||
{{Main|The Hollow}} | |||
The Hollow is a cavernous location north of the ramparts and northwest of the Sacred Pool. This location contains entrances to the [[Secluded Chamber]], [[Underground Passage]], and the [[Tiefling Hideout]]. The majority of the Tiefling Refugees are gathered here. Multiple traders and potential companions are scattered throughout the area. | |||
This location contains entrances to the [[Secluded Chamber]], [[Underground Passage]] and the [[Tiefling Hideout]]. | |||
Of particular note, the party can encounter the {{CharLink|Strange Ox}} for the first time near {{Coords|220|540}}. {{CharLink|Zorru}} can be found near {{Coords|195|575}} as part of {{Quest|Find the Githyanki Crèche}} and {{CharLink|Dammon}} can be found near {{Coords|180|560}} as part of {{Quest|The Hellion's Heart}}. | |||
=== Sacred Pool === | === Sacred Pool === | ||
[[File:Sacred Pool.png | [[File:Sacred Pool.png|thumb|Overview of the Sacred Pool, showing the stairs leading down, the stone circle, and the adjacent areas.]] | ||
{{Main|Sacred Pool}} | |||
The Sacred Pool lies in the heart of the Emerald Grove. The {{SmRarityItem|Idol of Silvanus}} rests at the centre of the Sacred Pool, surrounded by Druids performing the {{SmRarityItem|Rite of Thorns (ritual)|Rite of Throns|override_icon=BOOK Generic Druid Rite Unfaded Icon.png|override_rarity=1}}. Several Druids guard the bottom of the stairs leading into the Sacred Pool from the Hollow, preventing most outsiders from entering during the rite. | |||
The | |||
{{CharLink|Volo}} is | Near the guards, {{CharLink|Volo}} is interviewing a bear in the Sacred Pool. He serves as a [[Traders|Trader]], carrying {{SmRarityItem|The Whispering Promise}} among his wares. | ||
The Sacred Pool | The Sacred Pool leads to the [[Inner Sanctum]] via the stone door at {{Coords|25|-10}}. The Hollow can be accessed via the stairs to the north and the [[Secluded Cove]] can be reached via a path to the northeast. Toward the south of the Sacred Pool, an elevator leads to the Emerald Grove ramparts, which is initially blocked by |Tuffet. | ||
=== Inner Sanctum === | === Inner Sanctum === | ||
[[File:Emerald Grove.jpg | [[File:Emerald Grove.jpg|thumb|The Inner Sanctum]] | ||
{{Main|Inner Sanctum}} | |||
The Inner Sanctum is a subterranean location accessed through the Stone Door in the Sacred Pool. Four frescos line the Inner Sanctum, depicting the history of the Grove. Kagha, the acting leader of the Druids, resides in the Inner Sanctum. | |||
The | |||
The Servant Quarters | The Servant Quarters are north-east of Kagha while the [[Druids' Chambers]] lie north. Nettie can be found in the Druids' Chamber, tending to an injured creature. She can unlock the entrance to the [[Enclave Library]]. | ||
{{clear}} | |||
== History == | == History == | ||
{{ | {{blockquote| | ||
<poem> | |||
By claw and tooth, from root to thorn, | |||
The Old Oak's grove, to wildlings sworn. | The Old Oak's grove, to wildlings sworn. | ||
The forest rose with claw and tooth, | The forest rose with claw and tooth, | ||
To tear the darkness from its roots. | To tear the darkness from its roots. | ||
In darkest hour, a concord made, | In darkest hour, a concord made, | ||
Twixt harp and wild against the shade. | Twixt harp and wild against the shade. | ||
The towers seized, the battle done, | The towers seized, the battle done, | ||
The moonrise broke the Darkest One. | |||
</poem> | |||
|Inner Sanctum Plaques}} | |||
The | The frescos in the [[Inner Sanctum]] depict the legacy of the Emerald Grove. The first mural shows [[Beast|Beasts]] and [[Druid]]s driving monsters out from their lands. With the monsters driven out, the Druids claim the Grove in the name of [[Silvanus]], god of nature. | ||
However, their strife was not over. Referred to as the 'Darkest Hour', the Druids enter a concord with the [[Harpers]] to fight "the shade" (The Shadow Curse). Together, they battle against {{CharLink|Ketheric Thorm|Ketheric Thorm's}} [[Shar|Sharran]] army. The final victory fresco depicts a Sharran helmet lying broken at their feet. The [[Moonrise Towers]] were lost that day. | |||
<gallery perrow="2" heights="250px" style="margin:0 auto;"> | |||
However, | Fresco 2 Wellspring.png|Druids gathered in Silvanus' name. | ||
<gallery> | Fresco 1 wild.png|Druids and Beasts fighting together against monsters | ||
Fresco 1 wild.png| | </gallery> | ||
<gallery perrow="2" heights="250px" style="margin:0 auto;"> | |||
Fresco 3 Union.png| | Fresco 3 Union.png|Druids alongside Harpers | ||
Fresco 4 Moonrise.png| | Fresco 4 Moonrise.png|A broken Sharran helmet at the feet of the druids | ||
</gallery> | </gallery> | ||
==Waypoints== | == Waypoints == | ||
This location contains the following {{SmIconLink|Waypoint Map Icon.png|Waypoint}}: | This location contains the following {{SmIconLink|Waypoint Map Icon.png|Waypoint}}: | ||
*Emerald Grove Environs | * {{WpCo|Emerald Grove Environs|246|423}} | ||
== Locations == | == Locations == | ||
{{div col}} | {{div col}} | ||
* | * {{Loc|Inner Sanctum}} | ||
** | ** {{SubLoc|Druids' Chambers}} | ||
** {{SubLoc|Enclave Library}} | |||
** | ** {{SubLoc|Hidden Vault}} | ||
** | ** {{SubLoc|Servant's Quarters}} | ||
* | * {{Loc|Sacred Pool}} | ||
* | * {{Loc|The Hollow}} | ||
** | ** {{SubLoc|Makeshift Prison}} | ||
** | ** {{SubLoc|Secluded Chamber}} | ||
** | ** {{SubLoc|Tiefling Hideout}} | ||
* | * {{Loc|Underground Passage}} | ||
{{div col_end}} | {{div col_end}} | ||
== Notable characters == | == Notable characters == | ||
{{div col}} | {{div col}} | ||
* {{ | * {{MdCharLink|Alfira}} | ||
* {{ | * {{MdCharLink|Arabella}} | ||
* {{ | * {{MdCharLink|Aradin Beno}} | ||
* {{ | * {{MdCharLink|Kagha}} | ||
* {{ | * {{MdCharLink|Mol}} | ||
* {{ | * {{MdCharLink|Nettie}} | ||
* {{ | * {{MdCharLink|Pandirna}} | ||
* {{ | * {{MdCharLink|Volo}} | ||
* {{ | * {{MdCharLink|Wyll}} | ||
* {{ | * {{MdCharLink|Zevlor}} | ||
* {{ | * {{MdCharLink|Zorru}} | ||
{{div col end}} | {{div col end}} | ||
=== Traders === | === Traders === | ||
{{div col}} | {{div col}} | ||
* {{ | * {{MdCharLink|Arron}} | ||
* {{ | * {{MdCharLink|Auntie Ethel|icon=Portrait Ethel Human.png}} | ||
* {{ | * {{MdCharLink|Dammon}} | ||
* {{ | * {{MdCharLink|Mattis}} | ||
* {{ | * {{MdCharLink|Mol}} | ||
* {{MdCharLink|Volo}} | |||
{{div col end}} | {{div col end}} | ||
=== Speak with Dead === | |||
* {{MdCharLink|Ned'Cirannis|icon=Portrait_Ghost.png}} in the [[Enclave Library]] {{Coords|-444|15}} | |||
== Related quests == | == Related quests == | ||
| Line 154: | Line 148: | ||
* {{Quest|Save the Goblin Sazza}} | * {{Quest|Save the Goblin Sazza}} | ||
* {{Quest|Save the Refugees}} | * {{Quest|Save the Refugees}} | ||
** {{SubQuest|Defeat the Goblins}} | |||
** {{SubQuest|Investigate Kagha}} | ** {{SubQuest|Investigate Kagha}} | ||
** {{SubQuest|Kill Kagha}} | ** {{SubQuest|Kill Kagha}} | ||
** {{SubQuest|Raid the Grove}} | ** {{SubQuest|Raid the Grove}} | ||
** {{SubQuest|Save the First Druid}} | ** {{SubQuest|Save the First Druid}} | ||
* {{Quest|Steal the Sacred Idol}} | * {{Quest|Steal the Sacred Idol}} | ||
| Line 164: | Line 158: | ||
==Notable loot== | ==Notable loot== | ||
*{{MdRarityItem|Broodmother's Revenge}} | *{{MdRarityItem|Broodmother's Revenge}} carried by {{MdCharLink|Kagha}} | ||
*{{MdRarityItem|Gloves of Power}} | *{{MdRarityItem|Gloves of Power}} carried by {{MdCharLink|Za'krug}} | ||
*{{MdRarityItem|Key of the Ancients}} | *{{MdRarityItem|Key of the Ancients}} carried by {{MdCharLink|Nettie}} and {{MdCharLink|Findal}} | ||
*{{MdRarityItem|Robe of Summer}} | *{{MdRarityItem|Robe of Summer}} in a {{MdRarityItem|Wooden Crate}} in the [[Hidden Vault]] | ||
*{{MdRarityItem|Shapeshifter's Boon Ring}} | *{{MdRarityItem|Shapeshifter's Boon Ring}} carried by {{MdCharLink|Strange Ox}} | ||
*{{MdRarityItem|Sorrow}} | *{{MdRarityItem|Sorrow}} on an altar in the Hidden Vault | ||
*{{MdRarityItem|Soul Coin}} | *{{MdRarityItem|Soul Coin}} carried by {{MdCharLink|Nadira}} | ||
=== | ===Traders=== | ||
====[[Arron]]==== | ====[[Arron]]==== | ||
*{{MdRarityItem|Dragon's Grasp}} | *{{MdRarityItem|Dragon's Grasp}} | ||
| Line 182: | Line 176: | ||
====[[Auntie Ethel]]==== | ====[[Auntie Ethel]]==== | ||
*{{MdRarityItem|Corellon's Grace}} | *{{MdRarityItem|Corellon's Grace}} | ||
====[[Dammon]]==== | ====[[Dammon]]==== | ||
*{{MdRarityItem|Hunting Shortbow}} | *{{MdRarityItem|Hunting Shortbow}} | ||
*{{MdRarityItem|Safeguard Shield}} | *{{MdRarityItem|Safeguard Shield}} | ||
====[[Volo]]==== | |||
*{{MdRarityItem|The Whispering Promise}} | |||
===Quest items=== | ===Quest items=== | ||
| Line 193: | Line 187: | ||
===Quest rewards=== | ===Quest rewards=== | ||
*{{MdRarityItem|Hellrider's Pride}} | |||
*{{MdRarityItem|Komira's Locket}} | *{{MdRarityItem|Komira's Locket}} | ||
*{{MdRarityItem|Pale Oak}} | *{{MdRarityItem|Pale Oak}} | ||
*{{MdRarityItem|Ring of Protection}} | |||
*{{MdRarityItem|Wapira's Crown}} | *{{MdRarityItem|Wapira's Crown}} | ||
==Hidden treasure== | ==Hidden treasure== | ||
*{{MdRarityItem|Amulet of Silvanus}} | *{{MdRarityItem|Amulet of Silvanus}} hidden under a rock near {{CharLink|Ormn}} {{Coords|262|481}} | ||
*{{MdRarityItem|Cap of Curing}} | *{{MdRarityItem|Cap of Curing}} near {{CharLink|Alfira}} in a locked {{MdRarityItem|Gilded Chest}} behind a pillar {{Coords|289|488}} | ||
* {{MdRarityItem|Nature's Snare}} in a locked and trapped | *{{MdRarityItem|Nature's Snare}} in a locked and trapped {{MdRarityItem|Heavy Chest}} near Rune of the Eagle | ||
* | *{{MdRarityItem|Wooden Chest}} buried along the cliffs east of {{CharLink|Nadira}} {{Coords|262|467}} | ||
==Gallery== | ==Gallery== | ||
| Line 209: | Line 203: | ||
Silvanus' Grove NE.png|North East | Silvanus' Grove NE.png|North East | ||
Silvanus' Grove SE.png|South East | Silvanus' Grove SE.png|South East | ||
Dan-iorgulescu-baldur-s-gate-3-ranger-camp-alt-1-dan-iorgulescu.jpg|Concept art by Dan Iorgulescu | |||
Dan-iorgulescu-ranger-camp-dan-iorgulescu.jpg|Concept art by Dan Iorgulescu | |||
</gallery> | </gallery> | ||
==Notes== | |||
* Several things are mentioned to have happened "yesterday", the day before the player arrives at the grove. Sazza was captured<ref>Arka: Someone's going to pay for this. | |||
Player: Anyone in particular? | |||
Arka: A goblin we captured yesterday.</ref>, and Rikka killed a goblin.<ref>Rikka: How do you drow do that - find pleasure in killing? I got a goblin myself, yesterday. Shot her through the throat.</ref> | |||
==External links== | ==External links== | ||
{{FRWiki|Emerald Grove|long}} | {{FRWiki|Emerald Grove|long}} | ||
{{Emerald Grove}} | |||
[[Category:Locations]] | [[Category:Locations]] | ||
[[Category:Act One Locations]] | [[Category:Act One Locations]] | ||
Latest revision as of 23:20, 20 November 2024

| Wilderness | ||||
| Forest | ← | Emerald Grove | → | Secluded Cove |
| ↓ | ||||
| Roadside Cliffs | ||||
Overview[edit | edit source]

The Druids of the Emerald Grove are led by Kagha who serves as their leader in the absence of First Druid Halsin. They are providing temporary refuge for the Tiefling Refugees from Elturel, though tensions are strained between the two groups. The Grove is on high alert due to the aggression of nearby Goblins, which Kagha believes is worsened by the Tieflings' presence. To protect the Grove, Kagha has ordered the Druids to perform the Rite of Thorns, which would shut the Grove off and displace the Tieflings.
The fate of the Emerald Grove and the Tiefling Refugees is in the hands of the party.
Entering this area grants the party 10 XP at level 2, 30 XP at level 3, and 40 XP at level 4.
Emerald Grove ramparts[edit | edit source]

The entrance to the Emerald Grove is protected by a gate that can only be opened with a nearby winch. The winch is located on the ramparts above the gate next to a war horn that ![]() defenders if the Grove is attacked. Several Tieflings have set up camp west of the ramparts. If any Tieflings die during the events of Act One, their remains may be found in the burial site by the camp at X: 180 Y: 445.
defenders if the Grove is attacked. Several Tieflings have set up camp west of the ramparts. If any Tieflings die during the events of Act One, their remains may be found in the burial site by the camp at X: 180 Y: 445.
When the party arrive at the Emerald Grove, they find Aradin, Barth, and Remira rushing toward the gate, pursued by a band of Goblins. The Goblins kill the gatekeeper Kanon, trapping the three adventurers outside and forcing them and the party into combat. Wyll enters the fray, leaping from the ramparts to help defend the Grove. If all allied defenders survive, ![]() No One Left Behind is awarded for those with the Soldier background.
No One Left Behind is awarded for those with the Soldier background.
Upon entering the Grove, several Tieflings gather atop the ramparts, mourning the death of Kanon. If the party head to the ramparts immediately, they can speak with his sister Arka. Regardless of whether the party interact with her, Arka will rush to the Makeshift Prison with Memnos in close pursuit.
On the path leading into The Hollow within the Grove, Aradin and Zevlor argue about the missing First Druid Halsin and the pack of Goblins that attacked. The party can decide whether to intervene. Aradin's later location will vary depending on this outcome. After the argument, Zevlor thanks the party for defending the Grove and asks them to speak with Kagha to prevent the ![]() Rite of Throns. This initiates
Rite of Throns. This initiates ![]() . If the party has not yet initiated the subquest
. If the party has not yet initiated the subquest ![]() , they may learn of Nettie through Zevlor, which adds this subquest under
, they may learn of Nettie through Zevlor, which adds this subquest under ![]() .
.
Near the main entrance of the Grove, Nadira can be found on the hill east of the ramparts at X: 242 Y: 451. She is being stalked by a Bugbear Assassin and will be murdered if the party fail to rescue her. Interacting with Nadira's telescope provides the party with a glimpse of a nearby Red Dragon.
From Nadira's location on the east hill, a path winds north from the hill toward an elevator to the Sacred Pool. However, this elevator is initially blocked by Tuffet the bear, who must be convinced to move. Near the upper level of the elevator is an aggressively territorial squirrel named Timber at X: 239 Y: 467. The party can decide whether to placate or kill the squirrel. If the player character is the Dark Urge, they will automatically punt the squirrel into the nearby rocks, with lethal consequences. The Dark Urge can only control this choice if ![]() is active. Killing Timber in this way awards
is active. Killing Timber in this way awards ![]() Indulge Thine Appetites for the Haunted One.
Indulge Thine Appetites for the Haunted One.
The Hollow[edit | edit source]

The Hollow is a cavernous location north of the ramparts and northwest of the Sacred Pool. This location contains entrances to the Secluded Chamber, Underground Passage, and the Tiefling Hideout. The majority of the Tiefling Refugees are gathered here. Multiple traders and potential companions are scattered throughout the area.
Of particular note, the party can encounter the Strange Ox for the first time near X: 220 Y: 540. Zorru can be found near X: 195 Y: 575 as part of ![]() and Dammon can be found near X: 180 Y: 560 as part of
and Dammon can be found near X: 180 Y: 560 as part of ![]() .
.
Sacred Pool[edit | edit source]

The Sacred Pool lies in the heart of the Emerald Grove. The ![]() Idol of Silvanus rests at the centre of the Sacred Pool, surrounded by Druids performing the
Idol of Silvanus rests at the centre of the Sacred Pool, surrounded by Druids performing the ![]() Rite of Throns. Several Druids guard the bottom of the stairs leading into the Sacred Pool from the Hollow, preventing most outsiders from entering during the rite.
Rite of Throns. Several Druids guard the bottom of the stairs leading into the Sacred Pool from the Hollow, preventing most outsiders from entering during the rite.
Near the guards, Volo is interviewing a bear in the Sacred Pool. He serves as a Trader, carrying ![]() The Whispering Promise among his wares.
The Whispering Promise among his wares.
The Sacred Pool leads to the Inner Sanctum via the stone door at X: 25 Y: -10. The Hollow can be accessed via the stairs to the north and the Secluded Cove can be reached via a path to the northeast. Toward the south of the Sacred Pool, an elevator leads to the Emerald Grove ramparts, which is initially blocked by |Tuffet.
Inner Sanctum[edit | edit source]

The Inner Sanctum is a subterranean location accessed through the Stone Door in the Sacred Pool. Four frescos line the Inner Sanctum, depicting the history of the Grove. Kagha, the acting leader of the Druids, resides in the Inner Sanctum.
The Servant Quarters are north-east of Kagha while the Druids' Chambers lie north. Nettie can be found in the Druids' Chamber, tending to an injured creature. She can unlock the entrance to the Enclave Library.
History[edit | edit source]
| “ |
|
„ |
| — Inner Sanctum Plaques |
The frescos in the Inner Sanctum depict the legacy of the Emerald Grove. The first mural shows Beasts and Druids driving monsters out from their lands. With the monsters driven out, the Druids claim the Grove in the name of Silvanus, god of nature.
However, their strife was not over. Referred to as the 'Darkest Hour', the Druids enter a concord with the Harpers to fight "the shade" (The Shadow Curse). Together, they battle against Ketheric Thorm's Sharran army. The final victory fresco depicts a Sharran helmet lying broken at their feet. The Moonrise Towers were lost that day.
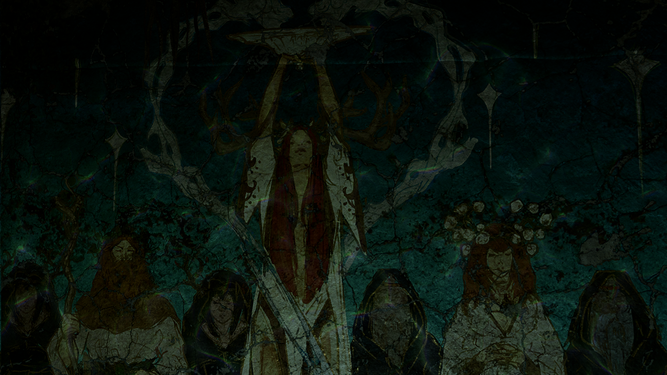
Druids gathered in Silvanus' name.
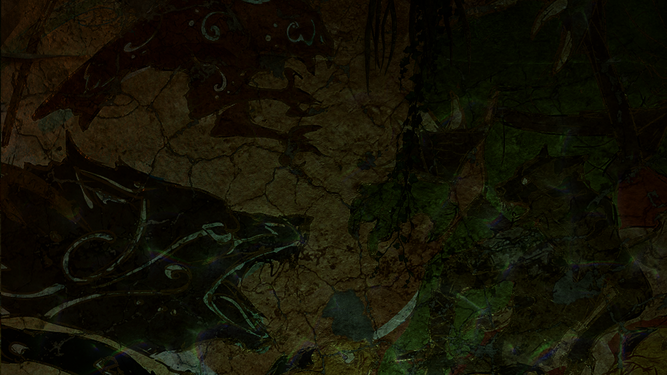
Druids and Beasts fighting together against monsters


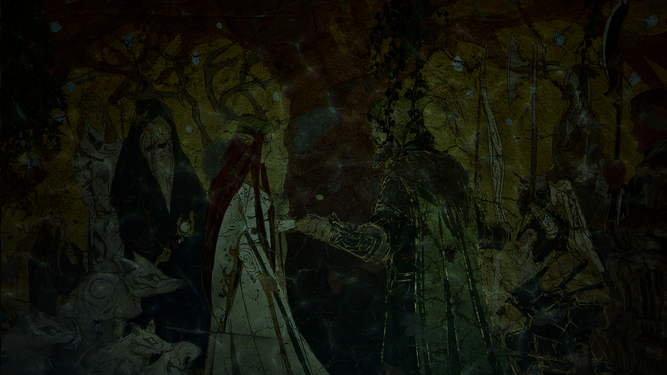
Druids alongside Harpers
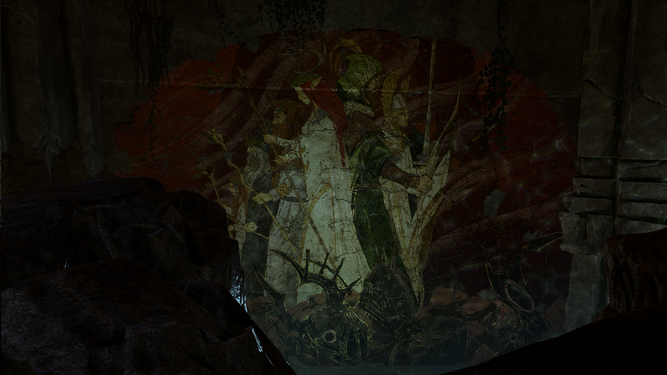
A broken Sharran helmet at the feet of the druids


Waypoints[edit | edit source]
This location contains the following ![]() :
:
 Emerald Grove Environs X: 246 Y: 423
Locations[edit | edit source]
Notable characters[edit | edit source]
Traders[edit | edit source]
Speak with Dead[edit | edit source]
- Ned'Cirannis in the Enclave Library X: -444 Y: 15
Related quests[edit | edit source]
Notable loot[edit | edit source]
 Broodmother's Revenge carried by Kagha
 Gloves of Power carried by Za'krug
 Key of the Ancients carried by Nettie and Findal
 Robe of Summer in a
  Wooden Crate in the Hidden Vault
 Shapeshifter's Boon Ring carried by Strange Ox
 Sorrow on an altar in the Hidden Vault
 Soul Coin carried by Nadira
Traders[edit | edit source]
Arron[edit | edit source]
 Dragon's Grasp
 Gloves of Missile Snaring
 Hedge Wanderer Armour
 Rain Dancer
 Ring of Flinging
 Spellthief
Auntie Ethel[edit | edit source]
Dammon[edit | edit source]
Volo[edit | edit source]
Quest items[edit | edit source]
Quest rewards[edit | edit source]
Hidden treasure[edit | edit source]
 Amulet of Silvanus hidden under a rock near Ormn X: 262 Y: 481
 Cap of Curing near Alfira in a locked
  Gilded Chest behind a pillar X: 289 Y: 488
 Nature's Snare in a locked and trapped
  Heavy Chest near Rune of the Eagle
 Wooden Chest buried along the cliffs east of Nadira X: 262 Y: 467
Gallery[edit | edit source]

North East
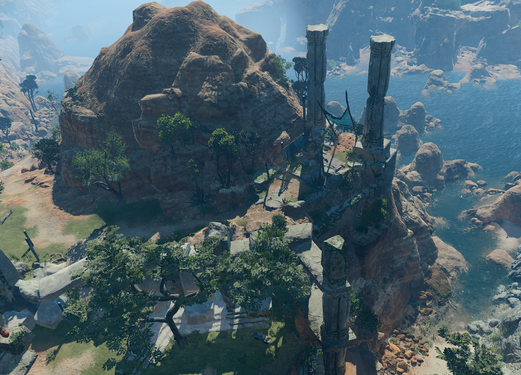
South East
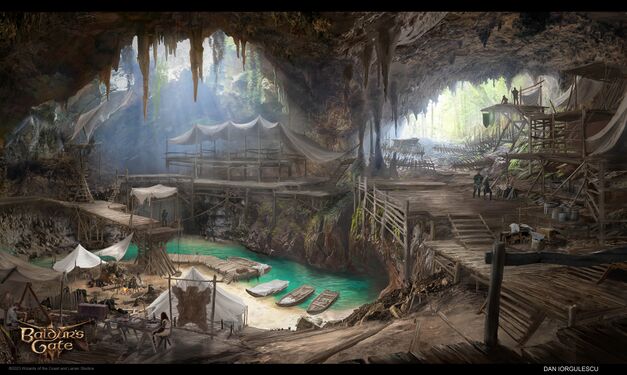
Concept art by Dan Iorgulescu
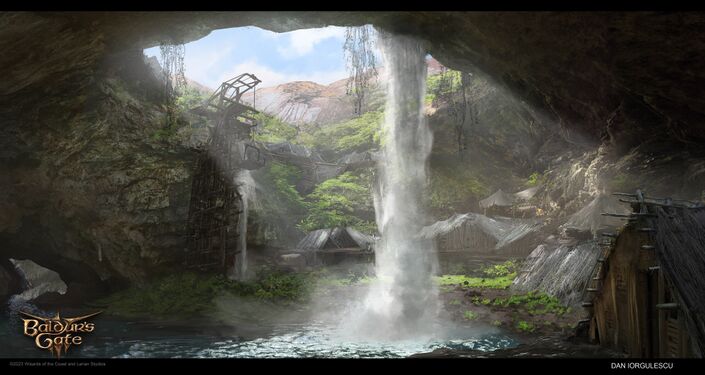
Concept art by Dan Iorgulescu


Notes[edit | edit source]
- Several things are mentioned to have happened "yesterday", the day before the player arrives at the grove. Sazza was captured[1], and Rikka killed a goblin.[2]