Lady Jannath's Estate: Difference between revisions
| (One intermediate revision by the same user not shown) | |||
| Line 15: | Line 15: | ||
==== Haunting ==== | ==== Haunting ==== | ||
The estate exists in various states of haunting, depending on the status of the {{Quest|Free the Artist}} quest. If {{CharLink|Oskar Fevras}} was spoken to in [[Act One]] and the quest is active, {{CharLink|Tarhun Mnemonis}} will warn the party that the manor has been taken over by | The estate exists in various states of haunting, depending on the status of the {{Quest|Free the Artist}} quest. If {{CharLink|Oskar Fevras}} was spoken to in [[Act One]] and the quest is active, {{CharLink|Tarhun Mnemonis}} will warn the party that the manor has been taken over by Poltergeists. If Oskar died in Act One, the house will still be haunted but Mnemonis will say that {{CharLink|Jannath|Lady Jannath}} is in mourning. Otherwise, the manor is not noticeably haunted and instead hosts an opulent art show. | ||
=== Ground floor === | === Ground floor === | ||
The ground floor is entered via the foyer, where floating furniture makes it immediately clear that something is amiss. Two large stairs on either side lead up to the first floor. Past these are a larder and kitchen on the west and east sides of the structure, respectively, each occupied by three | The ground floor is entered via the foyer, where floating furniture makes it immediately clear that something is amiss. Two large stairs on either side lead up to the first floor. Past these are a larder and kitchen on the west and east sides of the structure, respectively, each occupied by three Poltergeists. | ||
Beyond these, at the north side of the structure, is a large stairwell connecting all the floors. Ascending this way can be treacherous due to the numerous enemies that aggro from above. | Beyond these, at the north side of the structure, is a large stairwell connecting all the floors. Ascending this way can be treacherous due to the numerous enemies that aggro from above. | ||
| Line 25: | Line 25: | ||
This level can be reached by the interior stairs or by an exterior balcony on the south side of the structure, which leads to the library. | This level can be reached by the interior stairs or by an exterior balcony on the south side of the structure, which leads to the library. | ||
Entering from the foyer stairs leads to a balcony guarded by two | Entering from the foyer stairs leads to a balcony guarded by two Poltergeists. Double doors lead to a stair to the second floor. | ||
In a small library to the west, a {{SmRarityItem|Contractor's Record}} can be spotted on the desk (Perception DC 0). A locked (DC 15) strongbox contains a {{SmRarityItem|Hand Crossbow +2}}, six {{SmRarityItem|Arrow of Fiend Slaying|Arrows of Fiend Slaying}}, and six {{SmRarityItem|Arrow of Aberration Slaying|Arrows of Aberration Slaying}}. | In a small library to the west, a {{SmRarityItem|Contractor's Record}} can be spotted on the desk (Perception DC 0). A locked (DC 15) strongbox contains a {{SmRarityItem|Hand Crossbow +2}}, six {{SmRarityItem|Arrow of Fiend Slaying|Arrows of Fiend Slaying}}, and six {{SmRarityItem|Arrow of Aberration Slaying|Arrows of Aberration Slaying}}. | ||
| Line 33: | Line 33: | ||
=== Third floor (armory) === | === Third floor (armory) === | ||
This floor is occupied by three [[Cursed Skull|Cursed Skulls]] and two | This floor is occupied by three [[Cursed Skull|Cursed Skulls]] and two Poltergeists. Weapons of mundane and +1 quality can be found here, which the Poltergeists are happy to use against the party. A {{SmRarityItem|Scroll of See Invisibility}} can also be found on a nearby table. | ||
=== Fourth floor/Oskar's Atelier === | === Fourth floor/Oskar's Atelier === | ||
This studio is filled with numerous interactable portraits. The portrait of | This studio is filled with numerous interactable portraits. The portrait of Oskar Fevras can be combined with the easel here to open the door to a secret room. Combining the other portraits with the easel summons a [[Tormented Soul]]. Inside a Rustic Chest can be found {{SmRarityItem|Letter to Oskar Fervas}}. | ||
== Related Quests == | == Related Quests == | ||
Latest revision as of 13:42, 6 July 2024
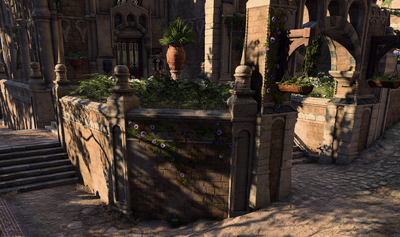
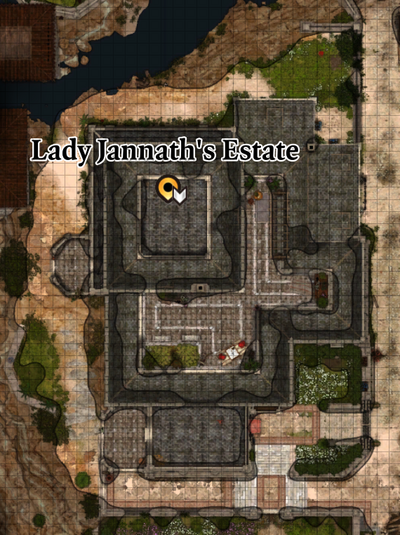
Lady Jannath's Estate is a large manor located in the Lower City of Baldur's Gate in Chapter Three. It is found on the west side of town, south of the House of Grief.
Overview[edit | edit source]
Lady Jannath's Estate consists of four floors.
Throughout this area, there will be hostile Poltergeists, which have natural invisibility, can throw objects, fly, and perform ranged shove attacks. Other hazards include Cursed Skulls. The skulls deal thunder damage and knock back the party. Use Silence to stop the skulls from casting their spells and then utilize remove curse or simply use throw a "thrown" bludgeoning weapon at them, which will destroy them in one attack.
Additionally, Golden Candelabrum scattered throughout are haunted by Vengeful Souls and Tormented Souls. These afflict negative auras on nearby characters, and the candelabrum will unleash the soul when destroyed.
Haunting[edit | edit source]
The estate exists in various states of haunting, depending on the status of the quest. If Oskar Fevras was spoken to in Act One and the quest is active, Tarhun Mnemonis will warn the party that the manor has been taken over by Poltergeists. If Oskar died in Act One, the house will still be haunted but Mnemonis will say that Lady Jannath is in mourning. Otherwise, the manor is not noticeably haunted and instead hosts an opulent art show.
Ground floor[edit | edit source]
The ground floor is entered via the foyer, where floating furniture makes it immediately clear that something is amiss. Two large stairs on either side lead up to the first floor. Past these are a larder and kitchen on the west and east sides of the structure, respectively, each occupied by three Poltergeists.
Beyond these, at the north side of the structure, is a large stairwell connecting all the floors. Ascending this way can be treacherous due to the numerous enemies that aggro from above.
First floor[edit | edit source]
This level can be reached by the interior stairs or by an exterior balcony on the south side of the structure, which leads to the library.
Entering from the foyer stairs leads to a balcony guarded by two Poltergeists. Double doors lead to a stair to the second floor.
In a small library to the west, a ![]() Contractor's Record can be spotted on the desk (Perception DC 0). A locked (DC 15) strongbox contains a
Contractor's Record can be spotted on the desk (Perception DC 0). A locked (DC 15) strongbox contains a ![]() Hand Crossbow +2, six
Hand Crossbow +2, six ![]() Arrows of Fiend Slaying, and six
Arrows of Fiend Slaying, and six ![]() Arrows of Aberration Slaying.
Arrows of Aberration Slaying.
Second floor[edit | edit source]
Oskar Fevras and Lady Jannath can be found here.
Third floor (armory)[edit | edit source]
This floor is occupied by three Cursed Skulls and two Poltergeists. Weapons of mundane and +1 quality can be found here, which the Poltergeists are happy to use against the party. A ![]() Scroll of See Invisibility can also be found on a nearby table.
Scroll of See Invisibility can also be found on a nearby table.
Fourth floor/Oskar's Atelier[edit | edit source]
This studio is filled with numerous interactable portraits. The portrait of Oskar Fevras can be combined with the easel here to open the door to a secret room. Combining the other portraits with the easel summons a Tormented Soul. Inside a Rustic Chest can be found ![]() Letter to Oskar Fervas.
Letter to Oskar Fervas.
Related Quests[edit | edit source]
Notable Loot[edit | edit source]
 After Death Do Us Part - possibly left by Oskar Fevras
 Hand Crossbow +2 - In the strongbox (safe)
 High Security Vault n°2 Key - Stolen or looted from Lady Jannath
 Till Death Do Us Part - Stolen or looted from Lady Jannath
Related NPCs[edit | edit source]
Creatures[edit | edit source]
These creatures are only present if is in progress:

