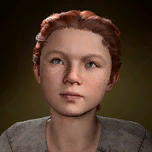
Lora is a desperate mother searching for her lost daughter.
Save Vanra is a Quest in Act Three of Baldur's Gate 3. It can be started by speaking with Lora Bergauz in the Lower City. This quest is only available if Save Mayrina was completed in Act One.
"Mayrina told us that a hag has kidnapped a child. The mother, Lora, can be found at Basilisk Gate. We should speak to her."
Investigate The Blushing Mermaid.
"At Basilisk Gate, we met a distraught Lora. She claimed her daughter Vanra is missing, and that she vanished when the pair were in The Blushing Mermaid. She begged us for help."
"The Blushing Mermaid bartender told us that Lora was behaving strangely - she even pulled a knife on him. The owner of the tavern, Captain Grisly, had to throw Lora out. We should speak to Captain Grisly about it."
"We spoke to Captain Grisly, who told us that Lora doesn't have a child - never did. She also claims Lora is a dangerous pirate who attacked her and her staff. The Captain has asked us to kill Lora, before she hurts anyone else. We said we'd think about it."
"The cellar of The Blushing Mermaid looks just like a hag's lair. We need to speak to the owner, Captain Grisly, about this."
"Mayrina was right about a hag being involved - The Blushing Mermaid's cellar looks just like a hag's lair. We need to speak to the owner, Captain Grisly, about this."
"We found a note in The Blushing Mermaid addressed to 'Auntie' - a term for a hag. We need to speak to the owner, Captain Grisly, about this."
Kill Lora.
"We spoke to Captain Grisly, who told us that Lora doesn't have a child - never did. She also claims Lora is a dangerous pirate who attacked her and her staff. The Captain has asked us to kill Lora, before she hurts anyone else. We agreed."
Report to Captain Grisly.
"Lora is dead. Captain Grisly will be pleased."
"We knocked Lora out, and now she's nowhere to be found. We should inform Captain Grisly."
Fulfill the deal with Auntie Ethel.
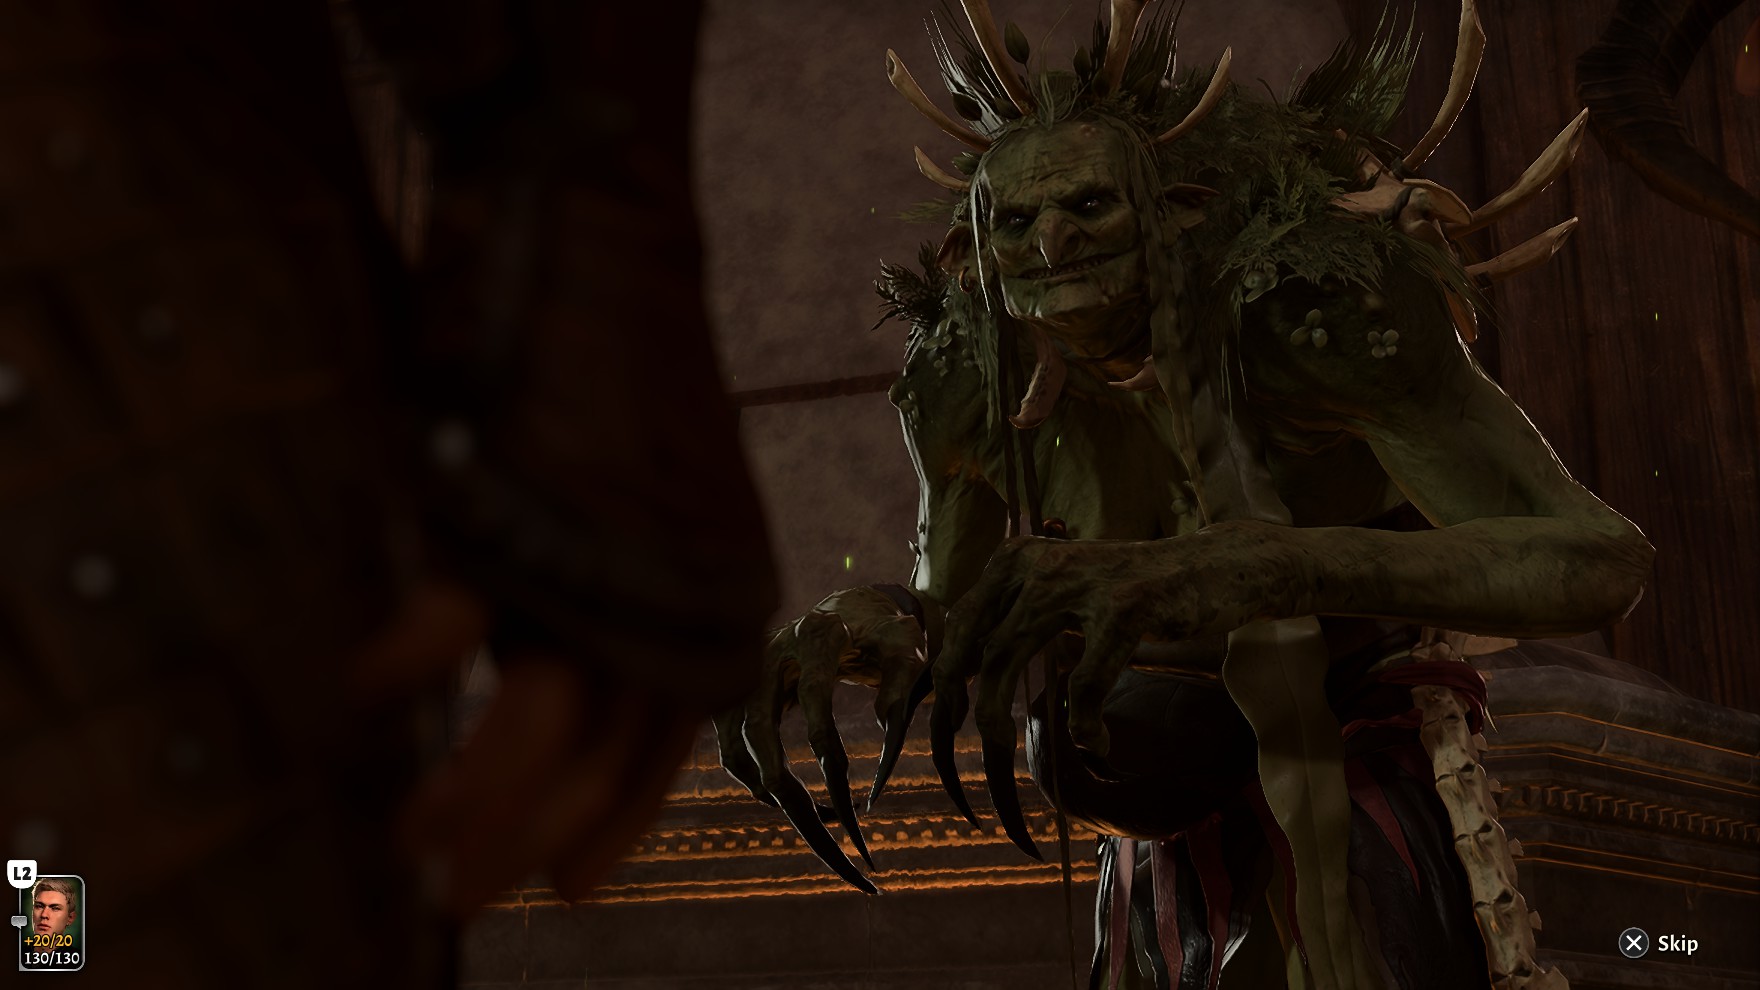
"Captain Grisly transformed - into Auntie Ethel! She was shocked and thrilled that we killed Lora for her. She admitted to eating little Vanra alive as she intends to transform the girl into a hag. We struck a deal with the hag - in exchange for leaving her alone, she will aid us in the fight to come."
Find Auntie Ethel.
"Captain Grisly transformed - into Auntie Ethel! She admitted to eating little Vanra alive as she intends to transform the girl into a hag. She fled, but not before claiming that if we kill her, we'll kill Vanra too."
Save Vanra before killing Auntie Ethel.
"We attacked Auntie Ethel, breaking our bargain with her."
"We found Auntie Ethel hiding in the Blushing Mermaid cellar. We have to be careful - if we kill her, then Vanra will die too. There must be a way to save Vanra."
"We found a book written by a woman who discovered a way to force a child out of a hag's stomach - without harming them. We need to craft something called the Hag's Bane and then throw it at the hag."
"We found Auntie Ethel hiding in the Blushing Mermaid cellar. With the Hag's Bane, we can save Vanra."
Check on Vanra.
"While the hag was unconscious, we cut Vanra out of her stomach. We should make sure Vanra is all right."
"We threw the Hag's Bane at Auntie Ethel, and it worked. She vomited Vanra up. We should speak to Vanra."
Visit Lora and Vanra.
"Vanra, shaken by what happened, could barely speak and ran away. She likely returned home to her mother. We should visit them."
Quest Complete
"We couldn't save Vanra - she's dead."
"We saved Vanra, but with her mother gone she has no home to return to."
"Lora was grateful to us for bringing her daughter home. She thanked us with a small token."
"We left the Lower City behind - leaving Vanra to her fate."
"We kept our deal with Auntie Ethel and left Vanra in her hands. In return, Auntie Ethel will help us in the fight to come."
"We left the Lower City without killing Lora."
"We saved Vanra, but Lora is angry with us."
"Vanra, shaken by what happened, fled. At least she's safe from the hag."
Lora, a distressed mother, is in the Basilisk Gate Barracks at X: 155 Y: -14, angrily shouting at Blaze Liara Portyr. If a party member asks what is going on, Lora explains that her daughter, Vanra has gone missing and the Flaming Fist said she had a lead. She vents her frustration however, as she has explained it to Liara several times.
A passive DC 15 ArcanaCheck reveals a faint trace of magic around Liara. Passing another Arcana check reveals that her memory has been magically tampered with, making her immediately forget why Lora is there at all:
[ARCANA] Examine the Flaming Fist. (DC 18)
Regardless of option chosen, the party can choose to help Lora find her daughter, beginning the quest. Then Lora describes Vanra and adds that she was last seen at the Blushing Mermaid.
After speaking to Lora, the party must investigate the Blushing Mermaid and speak to Captain Grisly, who was present during Vanra's abduction. If Lora has not been spoken to, then Grisly does not speak to the party and says she is too hungover to talk. Speaking to Grisly about Vanra's disappearance, she claims Lora has gone mad and is dangerous, threatening her customers. She states Vanra is not real, and is a delusion that Lora cooked up. Believing Lora to be a threat, she intends to put a hit out on her, and offers 3000 gp to the party if they are willing to take her out. Rogues can ask Grisly to double the monetary reward and she agrees. If the party performs the deed and kills Lora, the quest is concluded with the amount of gold agreed and Ethel reveals herself.
Ethel reveals herself.
If, after being given Grisly's offer, the party choose "Absolutely not - I refuse to do your dirty work." then 'Grisly' drops the act and reveals herself to be Auntie Ethel, a hag. Grisly's true identity can also be exposed by finding a note in the Blushing Mermaid which contains a report on Old Garlow's, using terms like 'Auntie.' The note is inside a rosewood desk in the same room as Grisly at X: -123 Y: -93. Alternatively, the party can find their way to the Hag's Basement, which looks like a Hag's Lair, and find the real Captain Grisly. Afterwards, the party can confront Grisly with the information they found and she instantly drops the act. The hag also drops the act if the party attacks one of the Tipplesome Patrons at the top floor of The Blushing Mermaid.
After Ethel's identity is revealed, she tells the party that she ate Vanra, and the girl sits in her belly, slowly transforming into a new hag. She also tells the party that she would fight them, but does not want to exert herself while she is 'pregnant' - demanding they instead walk away and let her make a new hag. The party can tell her off, ask her to make a better offer, or walk away as she demands.
If a party member "tells her off", she warns them not to tangle with her and that Vanra will die if they do, while she will resurrect again. Then, she disappears to her lair and several bar patrons transform into hostile redcaps. It is recommended to avoid killing any bystanders with AOE attacks during this fight, as this may trigger guards to join in against the party. If the party agrees to walk away, Ethel disappears, and the bar does not turn hostile. If a party member attempts to deal with Ethel by stating "make me an offer," then Ethel only deals with them if they did not kill her (or humiliate her by getting Auntie Ethel's Hair) during Save Mayrina. Otherwise, she says they lost that privilege when they killed her.
If the party kills Lora, the Amulet of Windrider can be found on her corpse. By agreeing with Ethel's request to stay out of her business and not go after her, Ethel pledges her support to fight alongside the party in the final battle and is added to Gather Your Allies. She also provides 3000 gold for "her favorite mommy-killer" as was previously agreed upon.
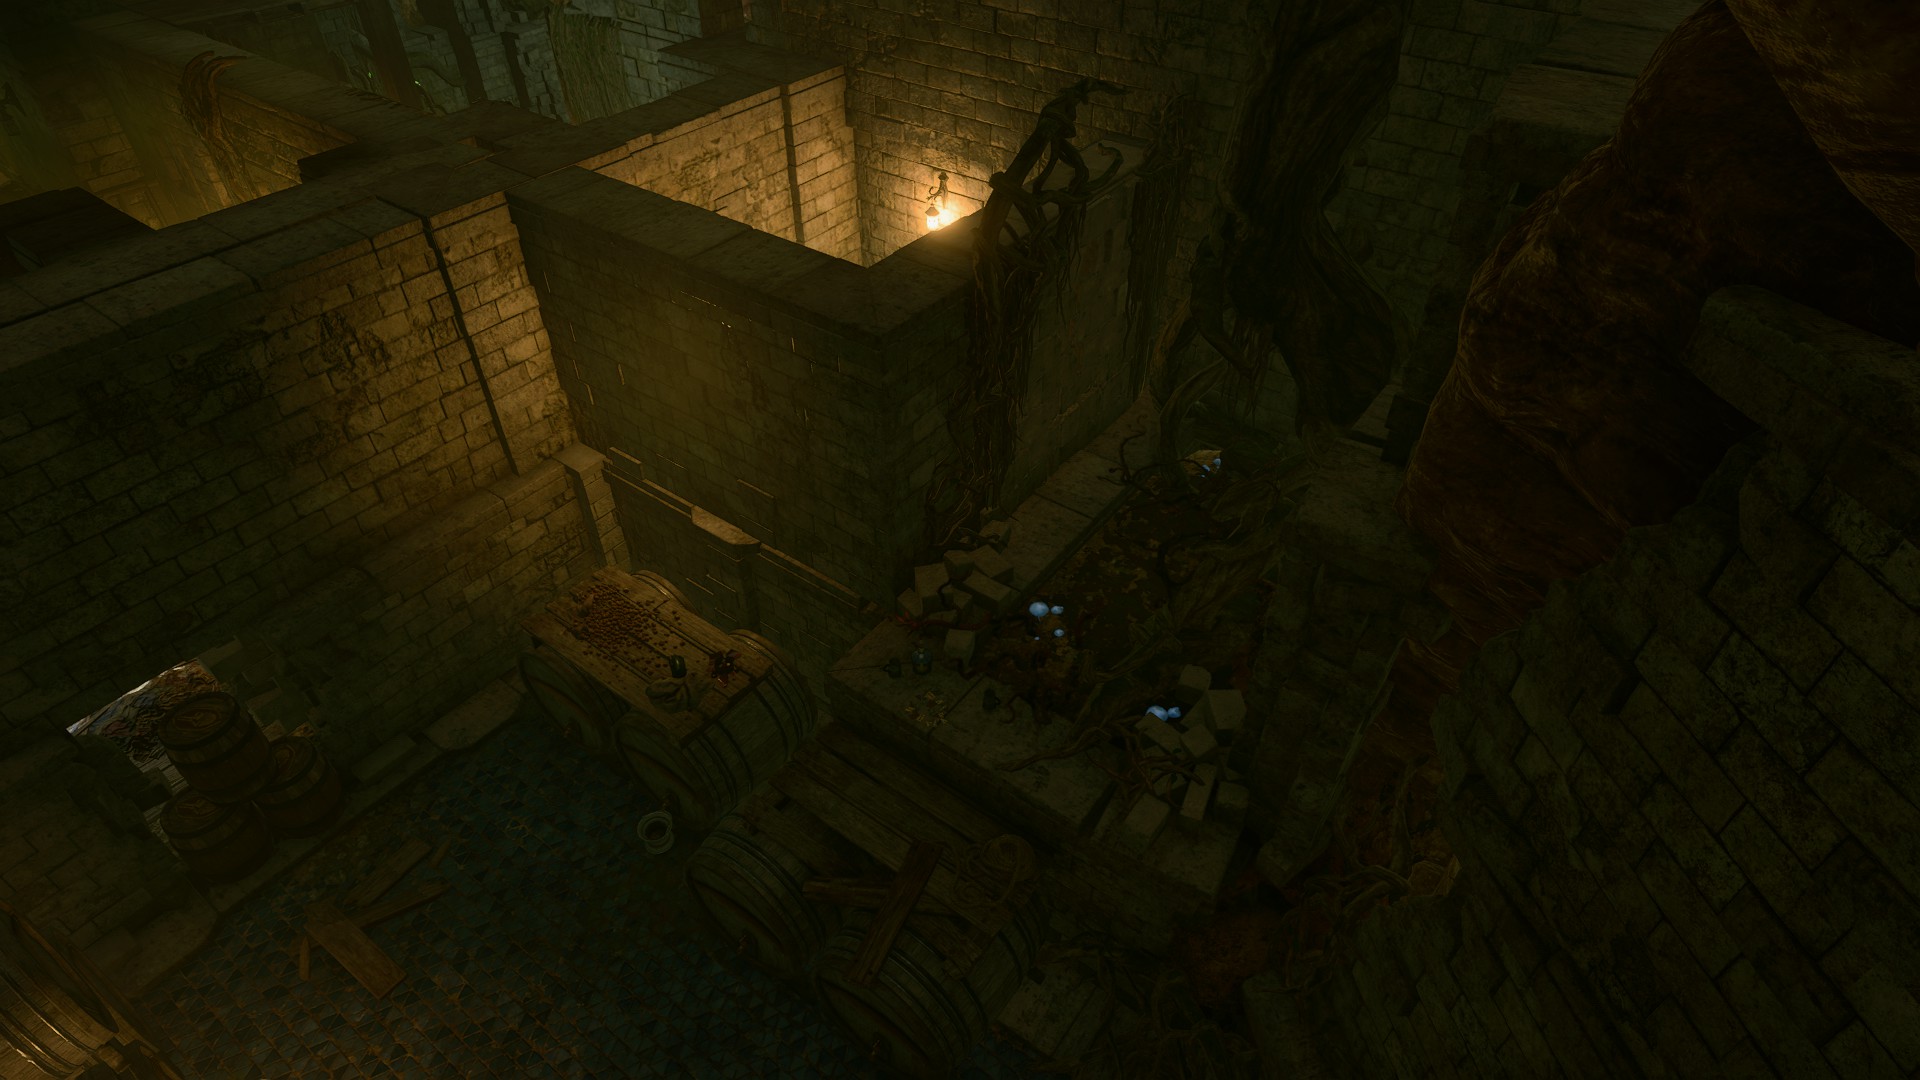
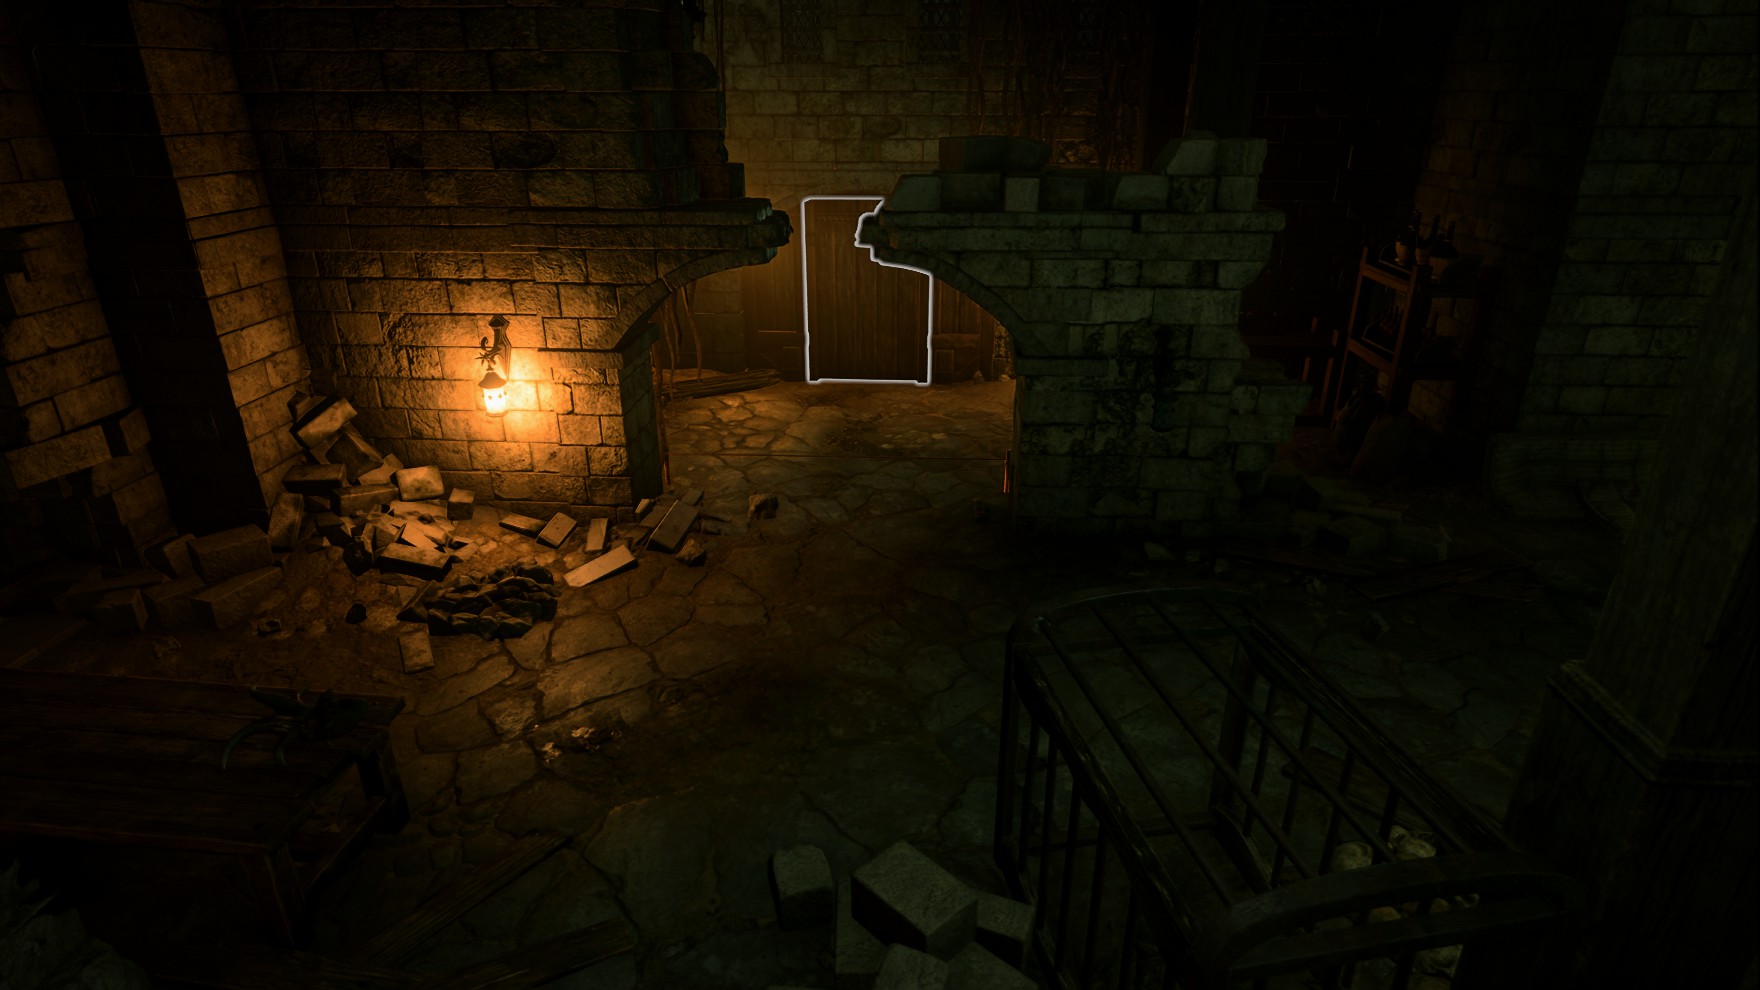
The Hag's basement can be found by entering either the old oak door near the entrance to the Blushing Mermaid or the cellar door down the stairs in the same room Grisly was wandering. Jumping up on top of the alcohol barrels and moving towards the small passage starts an Investigation check. Succeeding reveals that the wall is an illusion the party can simply walk through, climb down a ladder, and through a set of double doors which can be unlocked with Auntie Ethel's Lair Key or by lockpicking the door.
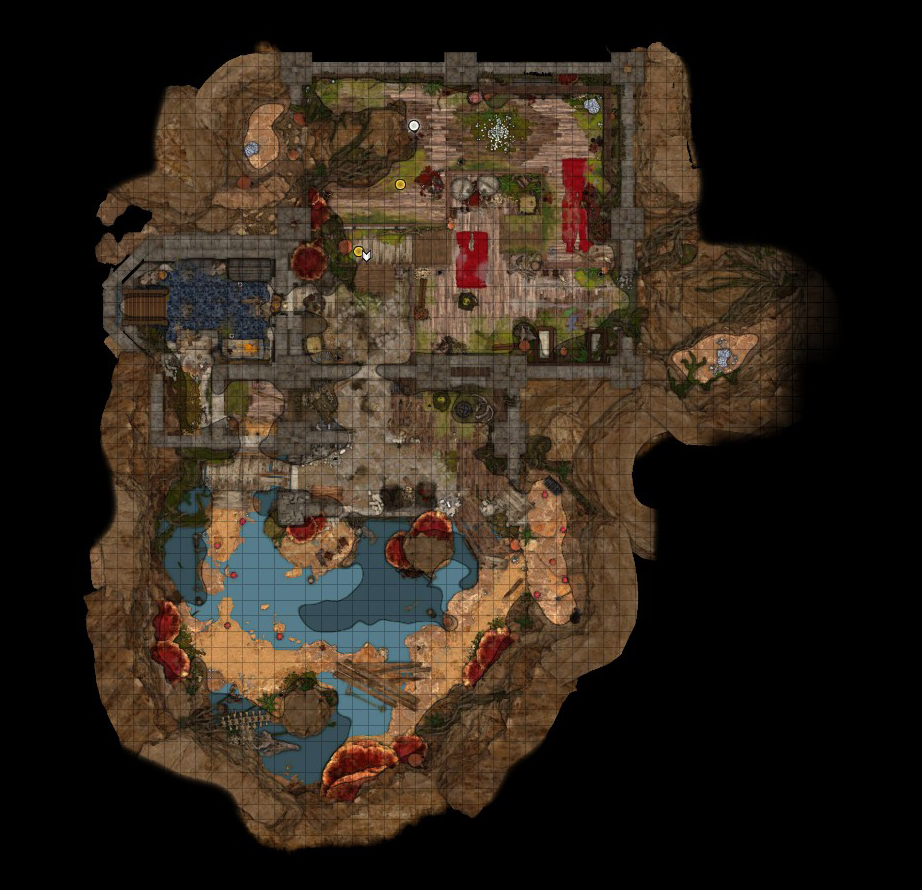
Hag Basement map.The wooden wall door.
To the south of the double doors are several explosive traps, as well as four masked victims who become hostile if they detect the party. If the party instead moves east towards a door in the wooden wall ( DC 20 Sleight of HandCheck), they can avoid fighting these victims. Continuing past the wooden wall, the party can encounter Ethel, if her identity was revealed. She becomes hostile and tells the party to die. If Ethel did not reveal herself, then this area is empty, allowing the party time to investigate. In this instance, Ethel does not appear unless a party member destroys one of her Pearlspore Bells.
Ashes of Dried Fey Flower is not marked as Story Item, and thus can be easily used by mistake while preparing any other alchemical solution which requires ashes as a secondary component. For this reason, if a party member wants to use Hag's Bane on Ethel, it is recommended to brew it immediately once the special component is obtained. The recipe for Hag's Bane falls into Grenades category of the Alchemy menu.
When fighting against Ethel, throwing the Hag's Bane at her gives her the Nauseous condition, and she throws up Vanra. Using the potion must be done before Ethel is defeated, otherwise Vanra dies.
Alternately, the Hag's Bane can be thrown at "Captain Grisly" while she is still in the Blushing Mermaid. She then transforms into Ethel, throws up Vanra, and teleports away, triggering the same redcap fight. Talking to Vanra after the fight results in her running home, completing the quest.
Within the Hag's basement, there are three Pearlspore Bells. These bells are the source of Ethel's life force, and allow her to resurrect after death. Unless all three Bells are destroyed, Ethel continues to resurrect herself. The Bells also fully heal themselves during their turn, if they are not destroyed before then.
The three Pearlspore Bells are at their respective locations:
On a cliff near the southeast corner of the room at X: -2307 Y: -116
In the northeastern corner of the room at X: -2320 Y: -92
On a cliff in the northwestern corner of the room, north of the gilded chest at X: -2351 Y: -96
If Hag's Bane has not been crafted, it is still possible to save Vanra by cutting her out of Ethel's stomach. This is achieved by toggling non-lethal damage and defeating Ethel with fists or melee weapons. After Ethel is knocked out, there is an option to cut Vanra free of the hag.
Using the Hag's Bane or cutting out Vanra results in Save Vanra being successfully completed, granting the inspiration Child Protection Agents for characters with the Acolyte background.
Grisly recounts her experience with Ethel if she is saved.
The same as her last hag den, Ethel has a number of humans of enthralled via their masks. Most of these individuals are too far gone to properly save, and simply mutter about their curses if Ethel is slain. However, one of them can be saved - the real Captain Grisly, who is forced to attack the party if they fight against Ethel, like the other servants. If Grisly is left alive after Ethel's defeat, she is freed from Ethel's influence and removes her mask. This can be done by ignoring her during the combat or by knocking her out and taking a Long Rest. Upon speaking to Grisly after Ethel's demise she is immensely grateful to the party for liberating her, and proclaims that the Blushing Mermaid is as much as the party's home as hers.
Completing the quest without previously speaking to Lora (just following the hag survival group path) seems to lock the rewards (Lora does not give the rapier or the amulet - the amulet can be pickpocketed, but there is no weapon).


