Ad placeholder
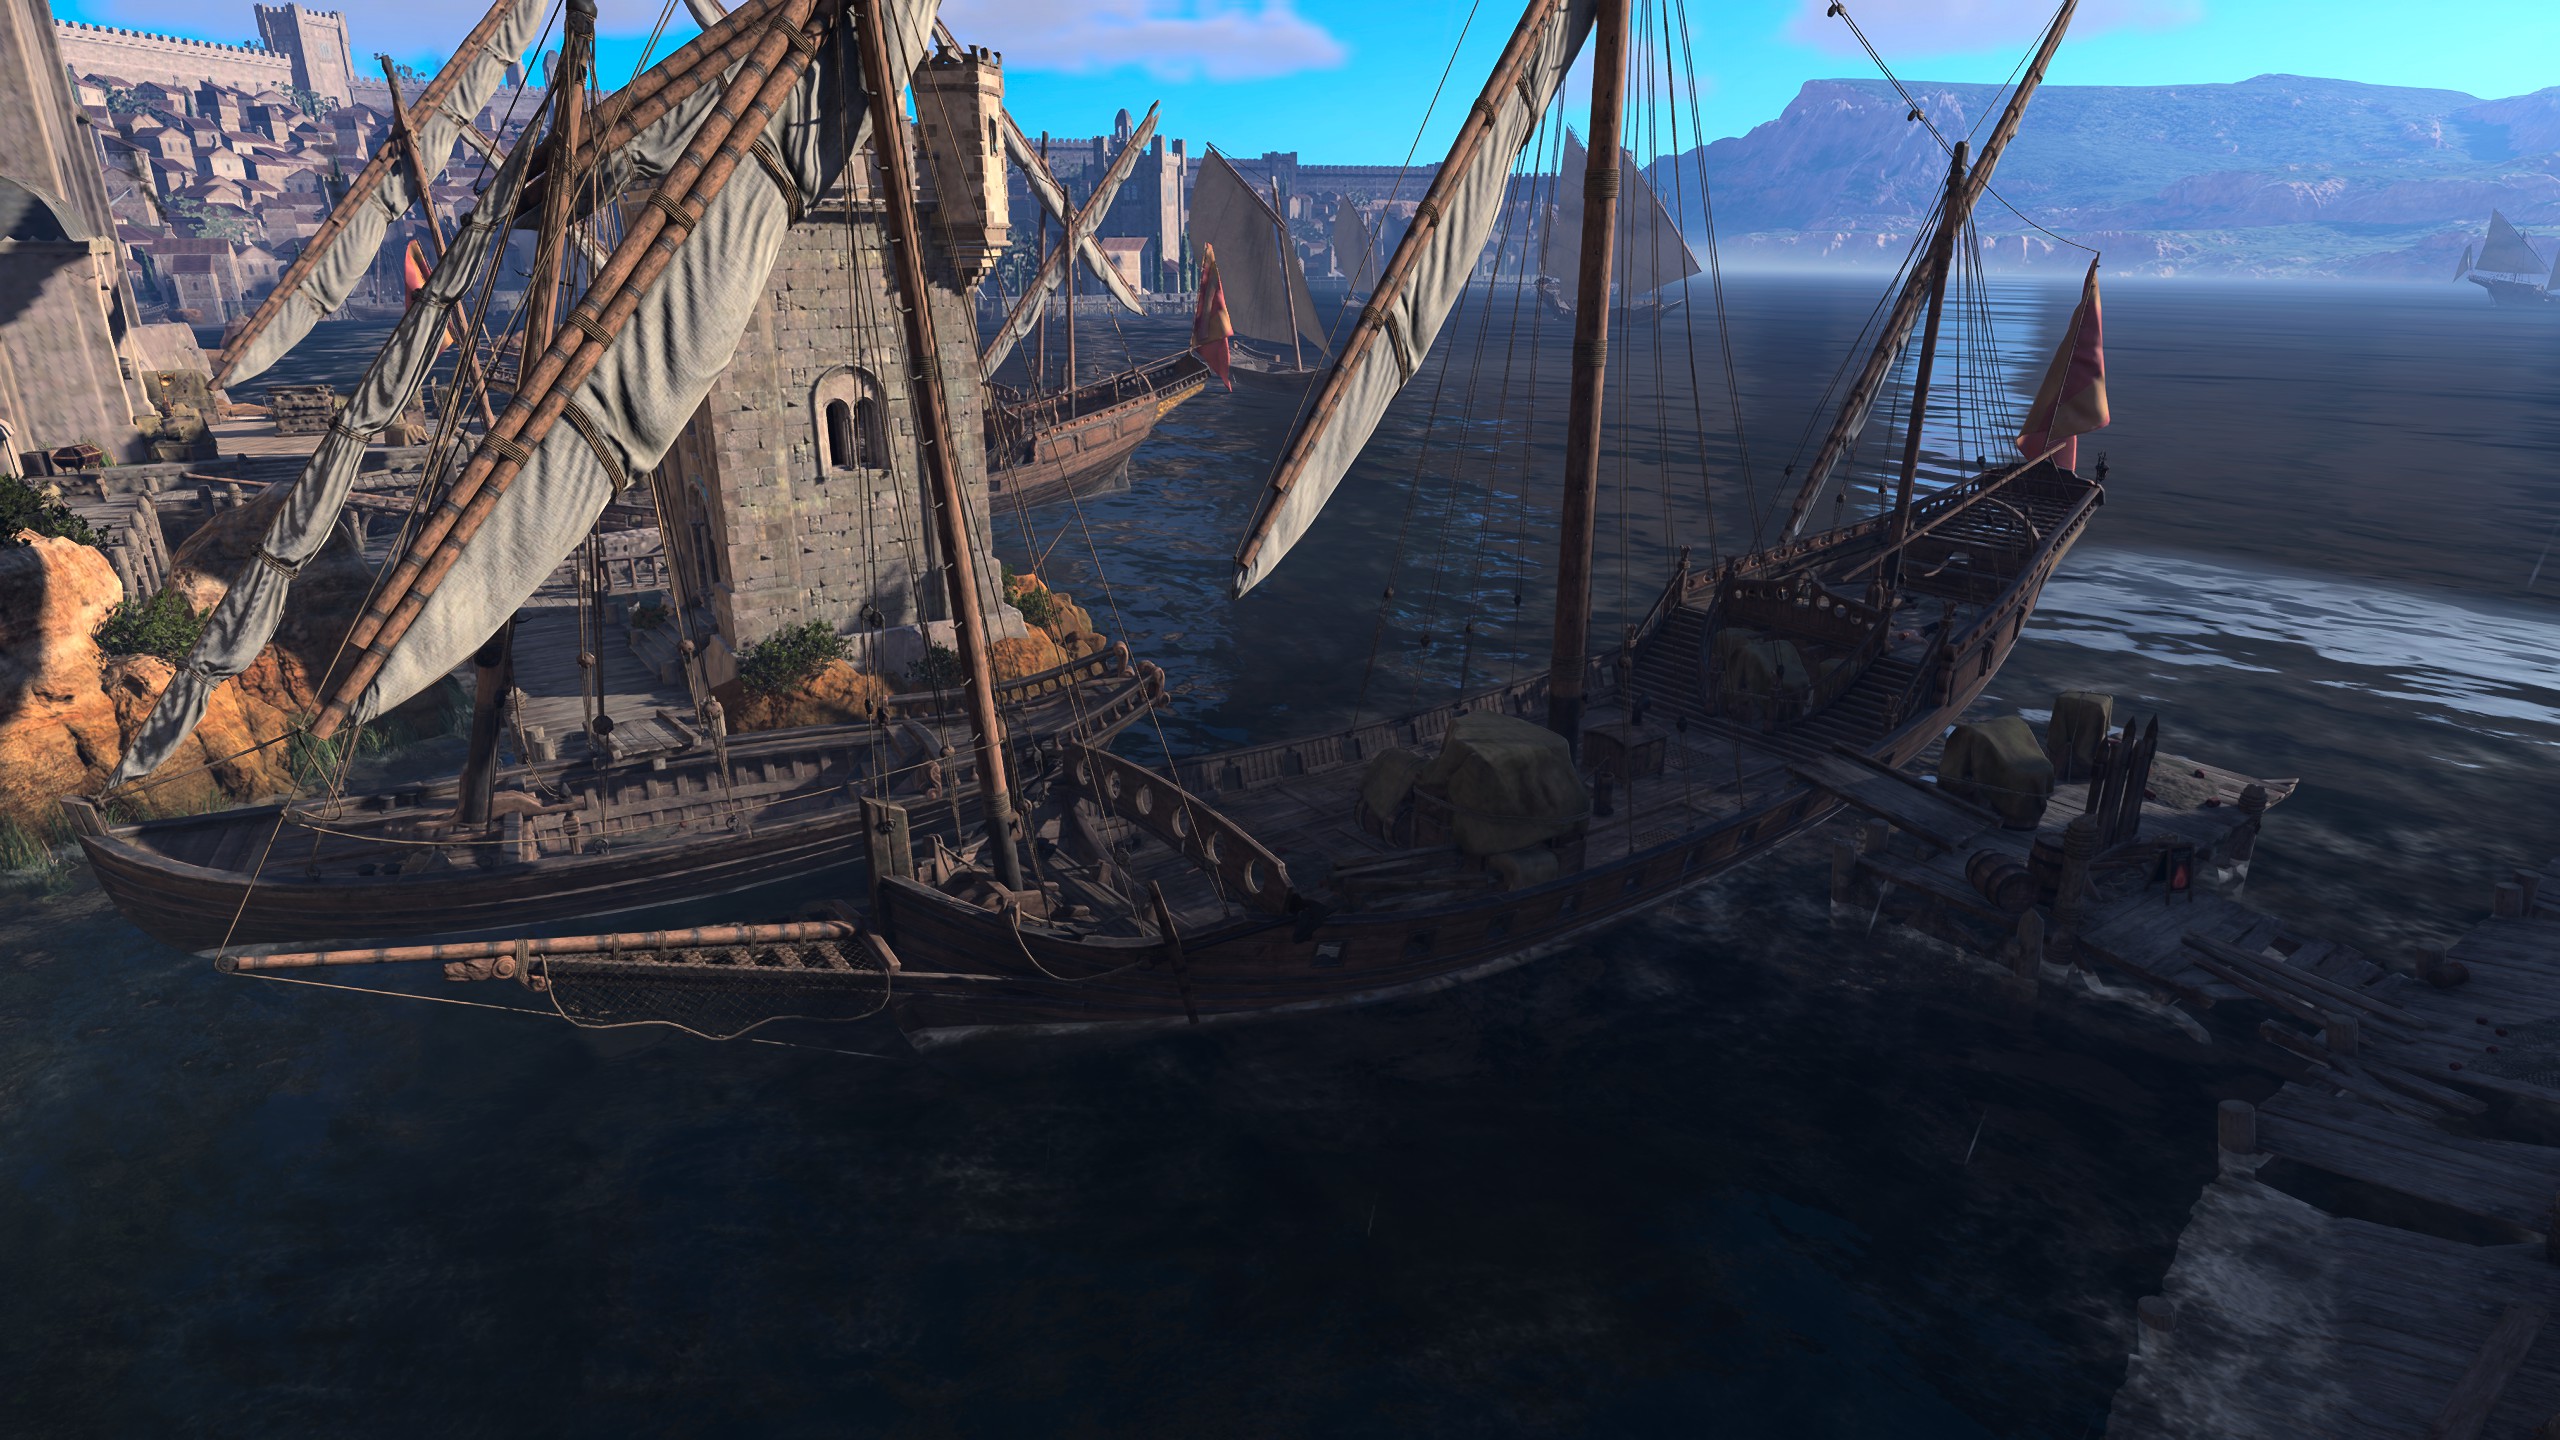
Grey Harbour Docks

| Lower City | ||||
| The Lodge | ||||
| ↑ | ||||
| Steel Watch Foundry | ← | Grey Harbour Docks | → | The Counting House |
| ↓ | ||||
| Water Queen's House | ||||

“I have no love for the sea, but the city would not be what it is without these ships. That lends them a kind of beauty, I suppose.„
Overview[edit section | visual editor]

This area consists of several docks and ships, with several locations that are considered restricted throughout Act Three, but can still be entered and explored. The major points of interest in the location are as described below (listed from the bottom-left corner, up and right, along the piers' line).
Locations[edit section | visual editor]
Lustrous Lass[edit section | visual editor]

The Lustrous Lass is a quarantined ship that can be found at X: -193 Y: -233 with its dead crew on it. It has been towed into the docks for investigation.
Passenger dock pier[edit section | visual editor]
The dock pier can be found at X: -208 Y: -188. Upon visiting the docks for the first time, the party can find a citizen named 

If successfully resolving the conflict, after a long rest another group of characters can be encountered: 


The far end of the pier has wooden stairs leading to the Water Queen's House entrance at X: -229 Y: -199.
Grey Harbour Docks Waypoint[edit section | visual editor]
Near it, at the pier, at X: -219 Y: -155, the party can find two sailors, brother and sister 

![]()

Loading dock of the Steel Watch Foundry (secured)[edit section | visual editor]
The ship moored at this pier at X: -208 Y: -134 is guarded by two 

![]()
![]()

![]()
Stairs to the Steeps district[edit section | visual editor]
This is one of several possible points to approach the Docks for the first time. If the party come to the Docks for the first time down from Lady Jannath's Estate, approximately at X: -230 Y: -145 they are engaged in the dialogue with 

![]()
![]()
Letting Churg Elvek and his gang execute Volo is considered an oathbreaking action for Vengeance Paladins and Paladins of Devotion.
Smugglers' corner[edit section | visual editor]
This point of interest can be approached either by the ladder near the end of the railroad track or by walking along the high stone-paved embankment directly below the Society of Brilliance Lodge. At the end of the embankment is a ladder which leads down to the smugglers' boats. Near the ladder, approximately at X: -221 Y: -109, the automated dialogue with 
Embankment under the balcony of the Lodge[edit section | visual editor]
Walking along the embankment, party members passing a ![]()
![]()
![]()
![]()
Fishermen pier[edit section | visual editor]
The pier is the footway forming the right bank of the docks. All containers here are red-outlined. However, at X: -179 Y: -101 between two interactable Drying Racks lies Pile of Rotten Fish (a unique type of Dirt Mound). It can be spotted as an interactable object by passing a ![]()
![]()
Flymm Cargo[edit section | visual editor]
The Flymm Cargo building is a large warehouse with several entrances, all locked and restricted (red-outlined). However, getting inside is crucial for accomplishing several quests, among them ![]()
![]()
Watchtower[edit section | visual editor]
The Watchtower environs are considered a restricted area, and are directly connected to the Counting House docks to the east. Unlocking the tower allows access to its roof and an excellent view of the docks and the river Chionthar, along with two ![]()

Dock cranes[edit section | visual editor]
One of these is standing near the stairs to the Steeps on the left bank, and two more near the Flymm Cargo building. All of these have Metal Crates clutched in their hooks. Despite being ![]()
Waypoints[edit section | visual editor]
This location contains the following ![]()
Related locations[edit section | visual editor]
Related quests[edit section | visual editor]
Characters[edit section | visual editor]
Churg Elvek's gang[edit section | visual editor]


Onlookers[edit section | visual editor]


Sailors and dockworkers[edit section | visual editor]


Civilians[edit section | visual editor]


Flaming Fist[edit section | visual editor]


The Guild[edit section | visual editor]


Creatures[edit section | visual editor]


Loot[edit section | visual editor]


- Guild smugglers' cargo [5]
External links[edit section | visual editor]

Notes and references[edit section | visual editor]
- ↑ 1.0 1.1 1.2 1.3 1.4 Can be found on the quarantined ship
- ↑ 2.0 2.1 2.2 2.3 This character shows up once all three Netherstones have been collected by the party.
- ↑ 3.0 3.1 3.2 Appears only after the Steel Watch Foundry is destroyed
- ↑ Eight barrels on the Volo's cart may detonate throughout the fight with Churg Elvek's gang
- ↑ See Big Huido's page for contents