Ad placeholder
The Adamantine Forge
The Adamantine Forge is a Quest in Act One of Baldur's Gate 3 in Grymforge. It is initiated by learning of the forge of the same name by reading ![]() The Great Furnace of Grymforge,
The Great Furnace of Grymforge, ![]() Filro the Forgotten's journal, or speaking with Dhourn after freeing him of the Spectator's petrification or casting on his corpse.
Filro the Forgotten's journal, or speaking with Dhourn after freeing him of the Spectator's petrification or casting on his corpse.
Objectives[edit | edit source]
Objectives and journal entries may vary pending party decisions and outcomes.
Walkthrough[edit | edit source]
Discovering the forge[edit | edit source]
To learn about the Adamantine Forge, there are three drow wizards who each hold a unique piece of information about the forge. Each of them have met a terrible fate in the Underdark.
Dhourn[edit | edit source]
Dhourn is one of many petrified drow west of the Selûnite Outpost. An easy way to get to Dhourn is by entering the Outpost near the statue of Selûne and moving to the broken window X: 141 Y: -240. It is necessary to walk through it and climb down the knotted roots. If moving west past the droves of petrified drow, then a cutscene triggers where a Spectator appears and attacks the party. Upon its first turn, it unpetrifies the drow, typically starting with Dhourn. Dhourn and any other drow the Spectator unpetrifies are charmed and fight against the party until the Spectator is defeated. Then they will become neutral.
If keeping Dhourn alive, he'll talk to the party, otherwise his corpse can be spoken to with . He reveals that he has a ![]() Memory Shard with information on the Adamantine Forge. Dhourn explains that he had two other rivals seeking the forge but, after realising how long he was petrified, he is the sole person left to claim the glory for discovering the Forge. After this, he and any unpetrified drow attack the party, as he sees them as possible rivals.
Memory Shard with information on the Adamantine Forge. Dhourn explains that he had two other rivals seeking the forge but, after realising how long he was petrified, he is the sole person left to claim the glory for discovering the Forge. After this, he and any unpetrified drow attack the party, as he sees them as possible rivals.
An Arcana check (DC 10) is needed to probe the thoughts within the shard. If successful, it shows images of the Adamantine Forge and hints to its location beyond an ancient stronghold.
Filro the Forgotten[edit | edit source]
Filro the Forgotten X: -50 Y: -163 has a camp south of the Sussur Tree Waypoint. He has gone mad during his time in the Underdark and becomes hostile when the party approaches him, alongside several Hook Horrors. Once he has been defeated, his ![]() Scribbled Notes can be looted from his corpse. If reading the notes, passing an automatic Investigation check (DC 15) reveals that the forge guardian is weak to magma and a 'hot hammer.'
Scribbled Notes can be looted from his corpse. If reading the notes, passing an automatic Investigation check (DC 15) reveals that the forge guardian is weak to magma and a 'hot hammer.'
Xargrim[edit | edit source]
Xargrim's corpse can be found beyond the Guardian Gate X: 55 Y: -88 in Ebonlake Grotto. The gate is to the north of where Sovereign Spaw is located. In order to access Xargrim's corpse, it is neccessary to complete Defeat the Duergar Intruders. After that the myconid Sovereign will open the gate. It is also possible to open the gate by force, by attacking it; then the myconids of the grotto will become hostile.
Once inside, a book, ![]() Flumph Mating Rituals can be looted from Xargrim's corpse. Reading the book to discover its secrets gives the following options:
Flumph Mating Rituals can be looted from Xargrim's corpse. Reading the book to discover its secrets gives the following options:
- [INVESTIGATION] Examine the book closely. (DC 15)
- [NATURE] Recall what you know of this title. (DC 15)
- [WIZARD] [NATURE] Recall what you know of this title. (DC 15
 )
)
Succeeding any of the checks, the book reveals itself to be disguised. Its true name is ![]() The Great Furnace of Grymforge. The book contains exact instructions for how to operate the Adamantine Forge once it is located.
The Great Furnace of Grymforge. The book contains exact instructions for how to operate the Adamantine Forge once it is located.
Reaching the forge[edit | edit source]
One way to access the Adamantine Forge is by completing Get Past the Rubble. Once the rubble is clear, the party must follow the pathway until an Iron Ladder X: -648 Y: 409 allows them to climb down. There is a metal platform that connects to a walkway - it is moveable through a set of levers. The levers can be used to descend another two sets of metal platforms, but this isn't necessary. Instead, the party can walk further south on the first walkway until they come across a broken statue. The statue remains can be jumped across to move to the second platform X: -624 Y: 344. It is necessary to send one party member over to the next platform using this method, then the party member must move south to find a set of two levers. Operating the levers to move the party members on the other side, then having the party members jump down to the new area, should instantly activate the Ancient Forge Waypoint. The whole party can now be teleported to the waypoint.
Another way to skip most of the journey to the Forge is using , or (requires sufficient strength) with one party member, near the platform east of the cave-in X: -607 Y: 314 to bypass the rubble entirely and activate the Ancient Forge Waypoint to move the rest of the party up to the Forge.
Forging an item[edit | edit source]
In order to forge an item, the party needs mithral ore and a mould.
Finding the moulds[edit | edit source]
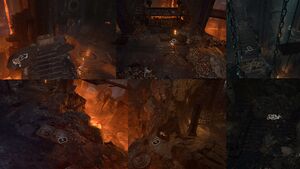
The moulds can be located around the Forge area:
 Longsword Mould - On the metal scaffolding X: -625 Y: 404
 Mace Mould - On the table south of the Ancient Forge Waypoint X: 613 Y: 284
 Scale Mail Mould - On the ground southwest of the Ancient Forge Waypoint X: -616 Y: 264
 Scimitar Mould - Looted from a skeleton near some levers X: -604 Y: 323
 Shield Mould - Looted from a skeleton behind a locked door (DC 12) at the top of the stairs X: -558 Y: 409
 Splint Mould - East of the Ancient Forge Waypoint near a skeleton X: -594 Y: 310
Finding the mithral[edit | edit source]
There are two Mithral Veins:
- Southwest of the Ancient Forge Waypoint. It causes several Animated Armours to become hostile. After defeating them, the party must walk to the rocks southwest and follow the path to a lava-filled area. After jumping across the rocks the vein can be found at X: -645 Y: 255.
- On the steps leading down to the Forge, the party must follow the rocks east. A group of Magma Mephits ambushes the party at X: -556 Y: 277.
Only one ore is needed to resolve the quest. Attacking the vein with force damage (i.e. spells like or smokepowder bombs) will gain access to the ![]() Mithral Ore.
Mithral Ore.
Combining the materials[edit | edit source]
- Placing the mithral ore into the Crucible at the centre of the Forge
- Placing the desired mould in the Mould Chamber
- Using the Forge Lever on the southern side of the platform to lower it down to the lava
- Once the platform is lowered, using the Lava Valve to fill the area with lava
- Using the Forge Lever to cause the Forge's hammer to hit the mould, shaping the item
- Picking up the completed item at the mould chamber
To make a second item, it is necessary to use the Mould Ejection Lever to replace the mould. Then repeating the steps will result in creating another item.
The first time the Lava Valve is used, Grym appears to defend the Forge.
Quest rewards[edit | edit source]
The quest rewards experience several times while progressing the quest:
- Reaching the forge: 30 xp
- Completing the quest: 120 xp
By successfully acquiring all mithral ores and using the furnace twice, two of the following items can be created. It is possible to forge two of the same item, but no more than two items in total — because there are only two ![]() Mithral Ore in the game:
Mithral Ore in the game:
 Adamantine Longsword
 Adamantine Mace
 Adamantine Scale Mail
 Adamantine Scimitar
 Adamantine Shield
 Adamantine Splint Armour
Achievements[edit | edit source]


