Ad placeholder
Get Orin's Netherstone
Get Orin's Netherstone is a Quest in Act Three of Baldur's Gate 3. It is started automatically after entering Wyrm's Rock Fortress and long resting, or by entering the sewers for the first time.
Objectives
Walkthrough
Orin's Kidnapping
Orin the Red kidnaps a party member under various circumstances. One event trigger is long resting after arriving in the Lower City. Orin shapeshifts as the party member she abducts and speaks to the party. Orin only abducts characters who are at camp and not in the current party. If there are no eligible companions at camp (for example if only three party members were recruited at all, or by using a party limit extender mod), Yenna is kidnapped instead. If Orin's kidnapping has not been triggered through a long rest, it can also be triggered in the Lower City Sewers. In this case, the event is mostly the same for each person - Orin, disguised as the kidnapping victim, appears grievously injured and begs the party to run away, explaining how they were brutally tortured by Orin. Then, Orin reveals herself and the kidnapping plot.
After Orin reveals she has a hostage, she states her demands. Enver Gortash bound her blade when the Chosen Three initially came together, making her unable to harm him. For this reason, she needs the party to step in and kill him. After this, she intends to face the party in a battle to the death - winner takes the Netherstones. As long as the party takes him down, she will not harm her captive. This initiates .
If pursuing Gortash first and and managing to complete , Orin sends a blood to letter to camp titled "Congratulations on the Murder of Gortash." She tells the party, that they must now face the Murder Tribunal and become an unholy assassin of Bhaal, before they can face her. She gives the party a location - Candulhallow's Tombstones and a password - 'Sicarius.' This starts .
If not pursuing Gortash first, then (or ) must be completed. Finishing the quest also reveals the location and password for the tribunal.
Candulhallow's Tombstones
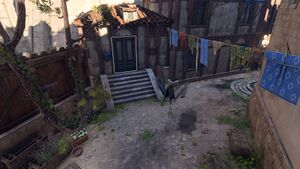
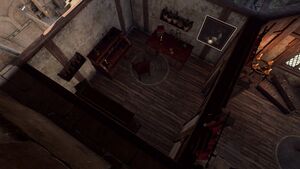
Candulhallow's Tombstones is northeast of Elfsong Tavern X: 74 Y: 25. Its entrance can either be lockpicked, or opened by a key if the party successfully stopped the serial killings. The party mus move into the back office room and remove the Butterfly on Skull painting X: 87 Y: 15 to find a button. Pressing the button reveals a secret door. The only way to get past this door is to know the passphrase, Sicarius.
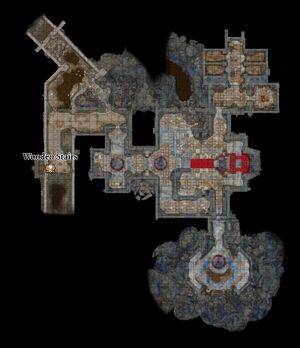
Within the basement, there is a sign that says "Flaming Fists this Way." This area is heavily trapped with grease barrels that alight if entering that way. Instead, the party can remain on the brick path on the right and enter the door to the Murder Tribunal's antechamber X: -1302 Y: 519
Infiltrate the Murder Tribunal
The party mus enter the Murder Tribunal Antechamber and speak to That Which Guards. This entity provides a riddle, "Present me well from gifts thine own, or I shall rend thy flesh from bone." Choose "I killed to be here - and took the victim's hand as proof" to proceed forward. The party can use the hand bag from Dolor, the hands taken from any victims they chose to kill, or the hand of Gortash to gain entry. Choosing any other option results in a fight with the guards, and the Murder Tribunal becomes hostile as well. However, avoiding dialogue and directly attacking the guards does not make the Tribunal hostile.
If the party chose not to pursue the serial killer Dolor, then he is at the Tribunal arguing with That Which Guards. That Which Guards states that only one murderer can go forth into the Tribunal. The party can tell Dolor to either go ahead, persuade him to fight against the Tribunal, or fight him to the death.
If not fighting their way through, Sarevok Anchev is encountered, along with the Echo of Amelyssan, Echo of Illasera, and Echo of Sendai. The party can ask Sarevok various questions about how he is still alive, his ties to Orin, and about what the Murder Tribunal is.
Sarevok states that there is no better mirror, in which to see the true nature of a killer than his victim. Thus, he summons the image of one of the murder victims. The spectre cannot speak, as the murderer stole its voice. Thus, the party must speak for it. Sarevok asks how the pitiful creature was slain:
- First, I ended its sorry existence. Then, I cut the hand from its corpse.
- The deed is done - the details don't matter.
- In combat. Honourably.
- [DECEPTION] First, I ended its sorry existence. Then I cut the hand from its corpse. (DC 20)
- [DECEPTION] Slowly and painfully. I savoured every scream. (DC 20)
- [DECEPTION] With a smile on my face, and pleasure in my heart. (DC 20)
(The DC is 10 instead of 20 for Dark Urge characters, or removed if the party actually killed the victim)
If the soul was actually slain by the party, then no deception checks are needed. Choosing the first two options or the last option or failing the Deception checks make Sarevok and the echoes hostile. Otherwise, Sarevok leads the party to the Dread Lord's Abattoir, for the next challenge. Inside the abattoir is the hollyphant investigator, Valeria. Sarevok demands Valeria to be killed in order to be baptized as an Unholy Assassin of Bhaal. However the party can turn on Sarevok and attack him and free Valeria.
An additional scene plays if either Minsc or Jaheira (or both) are in the party during the tribunal. Sarevok instantly recognizes them and accuses them of meddling in his father's affairs. The party can respond by stating they are sacrifices offered up to Bhaal and kill them or side with Jaheira / Minsc and attack the Tribunal or go through an or check to force Jaheira / Minsc to kneel before the Tribunal. Doing the latter satisfies Sarevok enough to allow the Tribunal to continue. Killing Jaheira / Minsc will more than satisfy the Tribunal so the questioning about the murdered victims is skipped entirely and Sarevok starts walking to the abattoir.
The ![]() Map to Bhaal Temple and the
Map to Bhaal Temple and the ![]() Amulet of Bhaal, which are needed to enter the Temple of Bhaal, can be acquired either as a reward from becoming an Unholy Assassin of Bhaal or looted from Sarevok Anchev.
Amulet of Bhaal, which are needed to enter the Temple of Bhaal, can be acquired either as a reward from becoming an Unholy Assassin of Bhaal or looted from Sarevok Anchev.
A Wooden Desk at X: -1239 Y: 531 contains ![]() A page from Sarevok's book, which if reveals, that Sarevok fathered Orin with his daughter Helena. This adds dialogue options, when talking with Orin and her mother in the Temple of Bhaal.
A page from Sarevok's book, which if reveals, that Sarevok fathered Orin with his daughter Helena. This adds dialogue options, when talking with Orin and her mother in the Temple of Bhaal.
The Temple of Bhaal
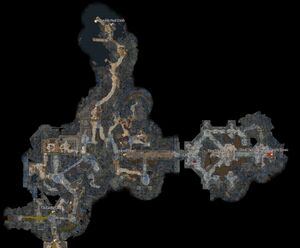
The entrance to the Temple of Bhaal is at the Undercity Ruins waypoint. Using a ranged attack on one of the two corpses hanging from the ceiling in the center of the room at X: -142 Y: 934 causes the doorway the temple to open.
There is a long, winding path east to get to the Temple proper. Close to the entrance, an ambush of several unholy assassins occurs, detectable through a check.
Once the door to the Temple is reached X: 2 Y: 1006, the Amulet of Bhaal is necessary. The party must place the amulet against the door to gain entry. Orin can be found deep into the Temple.
The Chosen’s Room
The Chosen's Room X: 96 Y: 991 is down the stairs behind Orin (opposite the Temple’s entrance). It can be reached through a tunnel on the northern path or stealth means such as invisibility.
The room contains the corpse of Orin’s mother Helena Anchev. If is used on Helena's corpse, additional dialogue check options can be made available when confronting Orin at the altar. To accomplish this, either of theWho - questions must be asked, followed by Why did you try to kill your own daughter and then Did Orin know that Sarevok ordered you to kill her?. Passing these new checks causes a conflict in Orin, resulting in her Slayer transformation being forced on her by Bhaal instead of her choosing to activate it.
Confronting Orin
Orin's victim is shackled to an altar, which Orin holds the key to. Orin welcomes the party, while she knows if the player character became an unholy assassin or not. She also holds a dagger to the victim, threatening to kill them.
- Like the salvation your mother offered? She attacked you on Sarevok's orders. Your father's orders... (if spoken to Helena)
- You're pathetic. No wonder he tricked you so easily.
- [DECEPTION] Sarevok told me the truth himself. He was laughing at you. (DC 25)
- [PERSUASION] Sarevok's your father, Orin. He abused your mother. He abused you. (DC 25)
- [RELIGION] Bhaal rejoices in such cruel betrayals. You really believed you were the exception? (DC 25)
- I'm not the one who needs saving.
- [DECEPTION] Gortash is dead. I left him rotting on the roof of his fortress. (DC 25)
- [INTIMIDATION] Anything you do to him/her, I will inflict on you a hundredfold. (DC 25)
- [CLERIC OF BHAAL] [PERSUASION] You said Bhaal wanted us to fight. He will reject this offering. (DC 25)
- [PERSUASION] I did what you asked. I killed Gortash, so let him/her go. (DC 25
 ) (if Gortash defeated)
 - Their fate is of no interest to me.
If any check is failed or a non-check option is chosen, Orin kills the victim on the altar and then transforms into her Slayer form (a level 12 monstrosity) and initiates combat.
If any check is passed, Orin still transforms and initiates combat, but ignores the living victim and faces the party. The altar can be lockpicked during combat with a ![]() DC 25 Sleight of Hand check, freeing the victim and allowing them to fight alongside the party. Otherwise, the victim can be freed by looting the
DC 25 Sleight of Hand check, freeing the victim and allowing them to fight alongside the party. Otherwise, the victim can be freed by looting the ![]() Altar Key from Orin's remains; after which they thank the party and return to camp.
Altar Key from Orin's remains; after which they thank the party and return to camp.
A Dark Urge character does not have to pass a check to save the kidnapped victim. However, the Dark Urge is expected to duel Orin one-on-one, without involving the rest of the party or Orin's allies.
Once the battle is completed, Orin is reduced to a lootable ‘gore pile’ and a cutscene shows the player character retrieving her dagger with the ![]() Orin's Netherstone in it.
Orin's Netherstone in it.
Quest Rewards
 Crimson Mischief
 Mutilated Carapace
 Netherstone-Pommelled Bloodthirst – separates on pick-up into:
 Ring of Murderous Opportunity
Achievements
Notes
- This quest is not time sensitive, so long as the party does not attempt to infiltrate the Temple of Bhaal. Orin is happy to wait for the party to murder Gortash in the meantime.
- If an origin other than the Dark Urge is chosen, then the body of the Dark Urge can be found in Orin's bedroom.
- The line added by speaking with Helena reads “Like your mother's punishment?” if Gortash has been defeated, and “Your father’s orders…” is only added to the end of it if the note in the Murder Tribunal was read.
