Quests: Difference between revisions
Jump to navigation
Jump to search


No edit summary |
|||
| Line 76: | Line 76: | ||
=== [[Druid Grove]] === | === [[Druid Grove]] === | ||
< | <center> | ||
Idol of Silvanus Location.jpg| | {{ImageQuest|Idol of Silvanus Location.jpg|Save the Refugees|}} | ||
Investigate Kagha Quest.jpg| | {{ImageQuest|Investigate Kagha Quest.jpg|Investigate Kagha|}} | ||
Kill Kagha Quest.jpg| | {{ImageQuest|Kill Kagha Quest.jpg|Kill Kagha|}} | ||
Defeat the Goblins Kagha Quest.jpg| | {{ImageQuest|Defeat the Goblins Kagha Quest.jpg|Defeat the Goblins|}} | ||
Raid the Grove Quest.jpg| | {{ImageQuest|Raid the Grove Quest.jpg|Raid the Grove|}} | ||
Save the First Druid Quest.jpg| | {{ImageQuest|Save the First Druid Quest.jpg|Save the First Druid|}} | ||
Sazza Goblin Cage Quest.jpg| | {{ImageQuest|Sazza Goblin Cage Quest.jpg|Save the Goblin Sazza|}} | ||
Mattis Find Your Belongings Quest.jpg| | {{ImageQuest|Mattis Find Your Belongings Quest.jpg|Find Your Belongings|}} | ||
Return the Locket Quest.jpg| | {{ImageQuest|Return the Locket Quest.jpg|Return the Locket|}} | ||
Investigate the Beach Quest.jpg| | {{ImageQuest|Investigate the Beach Quest.jpg|Investigate the Beach|}} | ||
Save Arabella.png| | {{ImageQuest|Save Arabella.png|Save Arabella|}} | ||
Mol Steal the Idol Quest.jpg| | {{ImageQuest|Mol Steal the Idol Quest.jpg|Steal the Sacred Idol|}} | ||
Find Doni Quest.jpg| | {{ImageQuest|Find Doni Quest.jpg|Find Doni|}} | ||
Healer_Nettie_Quest.jpg| | {{ImageQuest|Healer_Nettie_Quest.jpg|Get Help from Healer Nettie|}} | ||
</ | </center> | ||
=== [[Blighted Village]] === | === [[Blighted Village]] === | ||
< | <center> | ||
Barcus on Windmill Quest.jpg| | {{ImageQuest|Barcus on Windmill Quest.jpg|Rescue the Gnome|}} | ||
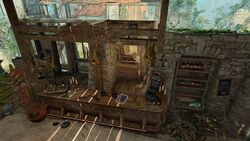
Apothecary House Quest.jpg| | {{ImageQuest|Apothecary House Quest.jpg|Search the Cellar|}} | ||
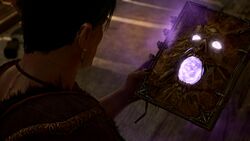
Thay Book Unlocked Quest.jpg| | {{ImageQuest|Thay Book Unlocked Quest.jpg|Unlock the Ancient Tome|}} | ||
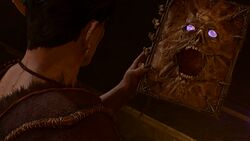
Search the Cellar Book Quest.jpg| | {{ImageQuest|Search the Cellar Book Quest.jpg|Destroy the Ancient Tome|}} | ||
Dread Hollow.jpg| | {{ImageQuest|Dread Hollow.jpg|Finish the Masterwork Weapon|}} | ||
</ | </center> | ||
=== [[Sunlit Wetlands]] === | === [[Sunlit Wetlands]] === | ||
< | <center> | ||
Save Mayrina Quest.jpg| | {{ImageQuest|Save Mayrina Quest.jpg|Save Mayrina|}} | ||
Ethel Help Quest.jpg| | {{ImageQuest|Ethel Help Quest.jpg|Get Help from Auntie Ethel|}} | ||
</ | </center> | ||
=== [[The Risen Road]] === | === [[The Risen Road]] === | ||
< | <center> | ||
Hunt the Devil Quest.jpg| | {{ImageQuest|Hunt the Devil Quest.jpg|Hunt the Devil|}} | ||
Flaming Fist Waukeen Quest.jpg| | {{ImageQuest|Flaming Fist Waukeen Quest.jpg|Rescue the Grand Duke|}} | ||
Benryn Waukeen Quest.jpg| | {{ImageQuest|Benryn Waukeen Quest.jpg|Rescue the Trapped Man|}} | ||
Find the Missing Shipment Rugan Quest.jpg| | {{ImageQuest|Find the Missing Shipment Rugan Quest.jpg|Find the Missing Shipment|}} | ||
Free the Artist Quest.jpg| | {{ImageQuest|Free the Artist Quest.jpg|Free the Artist|}} | ||
</ | </center> | ||
=== [[Goblin Camp]]/[[Shattered Sanctum]] === | === [[Goblin Camp]]/[[Shattered Sanctum]] === | ||
< | <center> | ||
Rescue Volo Quest.jpg| | {{ImageQuest|Rescue Volo Quest.jpg|Rescue Volo|}} | ||
Ask the Goblin Priestess for Help Quest.jpg| | {{ImageQuest|Ask the Goblin Priestess for Help Quest.jpg|Ask the Goblin Priestess for Help|}} | ||
Save the First Druid Quest.jpg| | {{ImageQuest|Save the First Druid Quest.jpg|Rescue the Druid Halsin|}} | ||
</ | </center> | ||
=== [[Underdark]] === | === [[Underdark]] === | ||
< | <center> | ||
Enter the Underdark Quest.jpg| | {{ImageQuest|Enter the Underdark Quest.jpg|Travel through the Underdark|}} | ||
Omeluum Quest.jpg| | {{ImageQuest|Omeluum Quest.jpg|Help Omeluum Investigate the Parasite|}} | ||
Thulla Poisoned Quest.jpg| | {{ImageQuest|Thulla Poisoned Quest.jpg|Cure the Poisoned Gnome|}} | ||
Coal Missing Boots Quest.jpg| | {{ImageQuest|Coal Missing Boots Quest.jpg|Find the Missing Boots|}} | ||
Baelen Bibberbang Quest.jpg| | {{ImageQuest|Baelen Bibberbang Quest.jpg|Find the Mushroom Picker|}} | ||
Defeat the Duergar Quest.jpg| | {{ImageQuest|Defeat the Duergar Quest.jpg|Defeat the Duergar Intruders|}} | ||
Gluts Circle Quest.jpg| | {{ImageQuest|Gluts Circle Quest.jpg|Avenge Glut's Circle|}} | ||
Deliver Neres Head Quest.jpg| | {{ImageQuest|Deliver Neres Head Quest.jpg|Deliver Nere's Head|}} | ||
</ | </center> | ||
=== [[Grymforge]] === | === [[Grymforge]] === | ||
< | <center> | ||
Nere Freed Quest.jpg| | {{ImageQuest|Nere Freed Quest.jpg|Free True Soul Nere|}} | ||
Philomeen Runepowder Explosives Quest.jpg| | {{ImageQuest|Philomeen Runepowder Explosives Quest.jpg|Find Explosives|}} | ||
Blind the Absolute Quest.jpg| | {{ImageQuest|Blind the Absolute Quest.jpg|Blind the Absolute|}} | ||
Save the Grymforge Gnomes Quest.jpg| | {{ImageQuest|Save the Grymforge Gnomes Quest.jpg|Save the Grymforge Gnomes|}} | ||
Grym Adamantine Forge Quest.jpg| | {{ImageQuest|Grym Adamantine Forge Quest.jpg|The Adamantine Forge (Quest)|}} | ||
Clear Rubble Rothe Quest.jpg| | {{ImageQuest|Clear Rubble Rothe Quest.jpg|Get Past the Rubble|}} | ||
Help the Cursed Monk Quest.jpg| | {{ImageQuest|Help the Cursed Monk Quest.jpg|Help the Cursed Monk|}} | ||
</ | </center> | ||
=== [[Mountain Pass]] === | === [[Mountain Pass]] === | ||
<center> | <center> | ||
| Line 151: | Line 151: | ||
{{SpoilerWarning|nograd=1|act=2}} | {{SpoilerWarning|nograd=1|act=2}} | ||
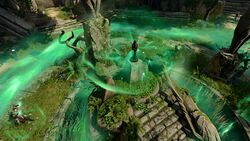
=== [[Shadow-Cursed Lands]] === | === [[Shadow-Cursed Lands]] === | ||
< | <center> | ||
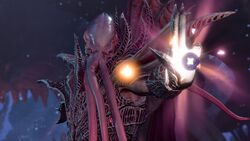
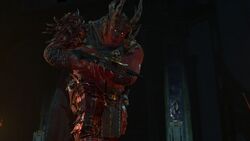
He Who Was.webp| | {{ImageQuest|He Who Was.webp|Punish the Wicked|}} | ||
Selunite Resistance Quest.jpg| | {{ImageQuest|Selunite Resistance Quest.jpg|Investigate the Selûnite Resistance|}} | ||
Find Arabellas Parents Quest.jpg| | {{ImageQuest|Find Arabellas Parents Quest.jpg|Find Arabella's Parents|}} | ||
Save Rolan Quest.jpg| | {{ImageQuest|Save Rolan Quest.jpg|Find Rolan in the Shadows|}} | ||
Wake Art Cullagh Quest.jpg| | {{ImageQuest|Wake Art Cullagh Quest.jpg|Wake Art Cullagh|}} | ||
Oliver Confronted Quest.jpg| | {{ImageQuest|Oliver Confronted Quest.jpg|Lift the Shadow Curse|}} | ||
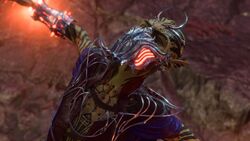
Yurgir Enemy Quest.jpg| | {{ImageQuest|Yurgir Enemy Quest.jpg|Kill Raphael's Old Enemy|}} | ||
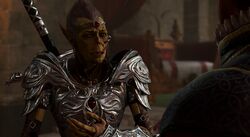
Lyrthindor Transformed Quest.jpg| | {{ImageQuest|Lyrthindor Transformed Quest.jpg|Break Yurgir's Contract|}} | ||
</ | </center> | ||
=== [[Moonrise Towers]] === | === [[Moonrise Towers]] === | ||
< | <center> | ||
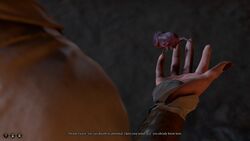
Decide Minthara's Fate.png| | {{ImageQuest|Decide Minthara's Fate.png|Decide Minthara's Fate|}} | ||
Tiefling Prisoners Quest.jpg| | {{ImageQuest|Tiefling Prisoners Quest.jpg|Rescue the Tieflings|}} | ||
Rescue Wulbren Quest.jpg| | {{ImageQuest|Rescue Wulbren Quest.jpg|Rescue Wulbren|}} | ||
Zevlor Pod Quest.jpg| | {{ImageQuest|Zevlor Pod Quest.jpg|Find Zevlor|}} | ||
Mol Kidnapped Quest.jpg| | {{ImageQuest|Mol Kidnapped Quest.jpg|Find Mol|}} | ||
Infiltrate Moonrise Towers Quest.jpg| | {{ImageQuest|Infiltrate Moonrise Towers Quest.jpg|Infiltrate Moonrise Towers|}} | ||
Shadow Curse Quest.jpg| | {{ImageQuest|Shadow Curse Quest.jpg|Seek Protection from the Shadow Curse|}} | ||
Follow the Convoy Quest.jpg| | {{ImageQuest|Follow the Convoy Quest.jpg|Follow the Convoy|}} | ||
Marcus Successful Quest.jpg| | {{ImageQuest|Marcus Successful Quest.jpg|Capture Isobel the Selûnite Cleric|}} | ||
Isobel Moonlight Prayer Quest.jpg| | {{ImageQuest|Isobel Moonlight Prayer Quest.jpg|Resolve the Abduction|}} | ||
Balthazar Relic Quest.jpg| | {{ImageQuest|Balthazar Relic Quest.jpg|Find Ketheric Thorm's Relic|}} | ||
Defeat Ketty Thorm Quest.jpg| | {{ImageQuest|Defeat Ketty Thorm Quest.jpg|Defeat Ketheric Thorm|}} | ||
</ | </center> | ||
== [[Act Three]] == | == [[Act Three]] == | ||
Revision as of 11:05, 29 October 2023
Template:Up to date Quests are tasks that can be undertaken by the player and their adventuring party in Baldur's Gate 3, some of which provide a reward or a choice between multiple rewards. Quests are recorded in the Journal.
Prologue
Escape the Nautiloid
We've been abducted by mind flayers and infected with some kind of parasite. We need to find a way off this ship.
We've been abducted by mind flayers and infected with some kind of parasite. We need to find a way off this ship.
Rescue the Illithid's Captive
We encountered a survivor, trapped inside one of the pods aboard the nautiloid. Perhaps we can find a way to free her.
We encountered a survivor, trapped inside one of the pods aboard the nautiloid. Perhaps we can find a way to free her.
Multi-Act Quests
Travel to Moonrise Towers
Main quest. It is divided into two subquests, reflective of the two paths to the Shadow-Cursed Lands:
Main quest. It is divided into two subquests, reflective of the two paths to the Shadow-Cursed Lands:
Travel through the Mountain Pass
Find the Nightsong
A wizard will pay anyone to track down an ancient relic, the Nightsong and bring it to him. The Nightsong is in some kind of temple.
A wizard will pay anyone to track down an ancient relic, the Nightsong and bring it to him. The Nightsong is in some kind of temple.
Companions
The Blade of Frontiers
We recruited Wyll, a monster hunter known as the Blade of Frontiers. He is on a mission to kill Karlach, a powerful devil who is a danger to the entire Sword Coast.
We recruited Wyll, a monster hunter known as the Blade of Frontiers. He is on a mission to kill Karlach, a powerful devil who is a danger to the entire Sword Coast.
The Grand Duke
A group of Flaming Fist mercenaries believe Grand Duke Ravengard of Baldur's Gate is trapped inside, and are trying to break inside.
A group of Flaming Fist mercenaries believe Grand Duke Ravengard of Baldur's Gate is trapped inside, and are trying to break inside.
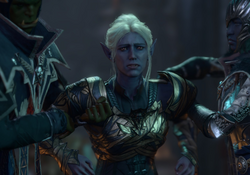
Daughter of Darkness
We recruited a half-elf named Shadowheart. She was also infected aboard the nautiloid and was playing with a strange object when we met her.
Subquests: The Chosen of Shar
A Familiar Face
We recruited a half-elf named Shadowheart. She was also infected aboard the nautiloid and was playing with a strange object when we met her.
Subquests: The Chosen of Shar
A Familiar Face
The Chosen of Shar
Shadowheart has shown interest in finding the lair of the Dark Justiciar - an elite force dedicated to the goddess Shar.
Shadowheart has shown interest in finding the lair of the Dark Justiciar - an elite force dedicated to the goddess Shar.
A Familiar Face
We have entered the Lower City - Shadowheart's old stomping grounds. Perhaps the friend she remembered due to the Noblestalk can still be found with the rest of the Sharrans.
We have entered the Lower City - Shadowheart's old stomping grounds. Perhaps the friend she remembered due to the Noblestalk can still be found with the rest of the Sharrans.
The Githyanki Warrior
Lae'zel promised we could be cleansed of our parasites at a Githyanki Crèche. We should be on the lookout for signs of githyanki presence during our travels.
Subquests: Vlaakith's Will
The Prince of the Comet
Lae'zel promised we could be cleansed of our parasites at a Githyanki Crèche. We should be on the lookout for signs of githyanki presence during our travels.
Subquests: Vlaakith's Will
The Prince of the Comet

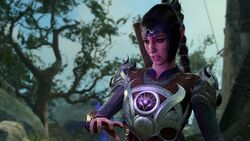
Our Fiery Friend
We met a fiery tiefling called Karlach. She said servants of the archdevil Zariel were nearby, disguised as paladins of Tyr.
Subquest: The Hellion's Heart
We met a fiery tiefling called Karlach. She said servants of the archdevil Zariel were nearby, disguised as paladins of Tyr.
Subquest: The Hellion's Heart
The Hellion's Heart
Karlach needs an infernal mechanic to tune up the engine she has for a heart. There might be one nearby.
Karlach needs an infernal mechanic to tune up the engine she has for a heart. There might be one nearby.
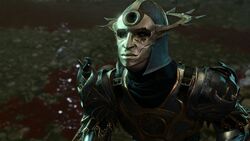
The Pale Elf
We met a strange elf who had also been infected with a parasite. He was hostile at first, but agreed to join us when he learned we were infected too.
We met a strange elf who had also been infected with a parasite. He was hostile at first, but agreed to join us when he learned we were infected too.
The Wizard of Waterdeep
A wizard named Gale joined the party. He claims to have been on the nautiloid - which means he's infected too.
A wizard named Gale joined the party. He claims to have been on the nautiloid - which means he's infected too.
In Case of Death...
Gale died, activating a magical projection of himself which insisted that he be resurrected with the utmost urgency.
Gale died, activating a magical projection of himself which insisted that he be resurrected with the utmost urgency.
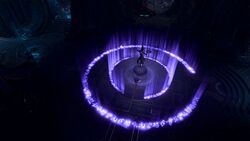
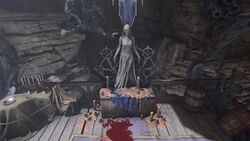
Balthazar's Experiment
We found a strange ritual circle hidden in a secret workshop within Balthazar's chambers. Gale was able to understand the strange sigils used to cast it, and says it was used to create the Moonlanterns that protect their wielders from the shadow curse.
We found a strange ritual circle hidden in a secret workshop within Balthazar's chambers. Gale was able to understand the strange sigils used to cast it, and says it was used to create the Moonlanterns that protect their wielders from the shadow curse.
The High Harper
Jaheira asked us to go to Danthelon's Dancing Axe in Wyrm's Crossing, where her Harper contacts are waiting to report.
Jaheira asked us to go to Danthelon's Dancing Axe in Wyrm's Crossing, where her Harper contacts are waiting to report.
Personal Quest
The Urge
The Dark Urge Origin Quest. These vile things you do... Don't you wonder why you're doing them? You want to know, don't you?
Subquest: Open Your Scars
The Dark Urge Origin Quest. These vile things you do... Don't you wonder why you're doing them? You want to know, don't you?
Subquest: Open Your Scars
Servant of None
Karlach Origin Quest. This is it. I've been trapped in the Hells for a decade - and this nautiloid is my ticket out.
Subquest: Forging a Heart
Karlach Origin Quest. This is it. I've been trapped in the Hells for a decade - and this nautiloid is my ticket out.
Subquest: Forging a Heart
Forging a Heart
Dammon, an infernal mechanic, told me to find some infernal iron. He might be able to repair my heart.
Dammon, an infernal mechanic, told me to find some infernal iron. He might be able to repair my heart.
Call of the Blood
Astarion Origin Quest. I'm... alive? But it won't be long before my old master realises I'm missing, so I had better find out what in the hells is going on and quickly.
Astarion Origin Quest. I'm... alive? But it won't be long before my old master realises I'm missing, so I had better find out what in the hells is going on and quickly.
Discover the history of Prince Orpheus
There may be a way to decipher these books. We should keep an eye out for something that might aid us.
There may be a way to decipher these books. We should keep an eye out for something that might aid us.
Discover the Artefact's Secrets
Shadowheart carries a strange artefact. It seemed to protect us from a horrible voice. She stubbornly avoids the subject. We should find out more about it.
Shadowheart carries a strange artefact. It seemed to protect us from a horrible voice. She stubbornly avoids the subject. We should find out more about it.
Free Orpheus
We found out that the Astral Prism is a prison for the githyanki prince Orpheus. The mind flayer has been using Orpheus' powers to suppress the influence of the Absolute. We should find out if there's a way to free Orpheus from his chains.
We found out that the Astral Prism is a prison for the githyanki prince Orpheus. The mind flayer has been using Orpheus' powers to suppress the influence of the Absolute. We should find out if there's a way to free Orpheus from his chains.
Help Kith'rak Voss
Kith'rak Voss visited our camp and asked us to help him free someone held prisoner within the Astral Prism. We agreed to bring the Prism to Baldur's Gate and meet him there.
Kith'rak Voss visited our camp and asked us to help him free someone held prisoner within the Astral Prism. We agreed to bring the Prism to Baldur's Gate and meet him there.
Help Your Protector
During the night, we were awoken by the voice of the Absolute. A githyanki contingent ambushed us. We heard the voice of the Dream Visitor, desperately seeking our help.
During the night, we were awoken by the voice of the Absolute. A githyanki contingent ambushed us. We heard the voice of the Dream Visitor, desperately seeking our help.
Embrace Your Potential
We were visited in our dreams by a mysterious figure, who told us that our illithid parasites are special and the source of great potential.
We were visited in our dreams by a mysterious figure, who told us that our illithid parasites are special and the source of great potential.
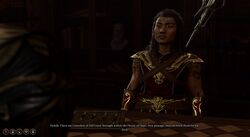
Deal with the Devil
We spoke with Mamzell Amira on the ground floor of Sharess' Caress, and she mentioned that the devil Raphael has taken a room on the top floor. What's he doing here? We should pay Raphael a visit and find out.
We spoke with Mamzell Amira on the ground floor of Sharess' Caress, and she mentioned that the devil Raphael has taken a room on the top floor. What's he doing here? We should pay Raphael a visit and find out.
Fulfill the Deal
According to the terms of our deal with Raphael, we must give him the Crown of Karsus after we've defeated the Absolute threat. But first we must get hold of the relic.
According to the terms of our deal with Raphael, we must give him the Crown of Karsus after we've defeated the Absolute threat. But first we must get hold of the relic.
Escape the Deal
We signed Raphael's deal but are having second thoughts about giving the ultra-powerful Crown of Karsus to a devil. Raphael is smart, but perhaps he can be outsmarted.
We signed Raphael's deal but are having second thoughts about giving the ultra-powerful Crown of Karsus to a devil. Raphael is smart, but perhaps he can be outsmarted.
Act One
Spoiler warning: The following content contains unhidden spoilers for Act 1. |
Ravaged Beach
Explore the Ruins
We met some bandits near some ruins. They've been trying to break into a crypt - with no success. Whatever they're after is probably still inside.
We met some bandits near some ruins. They've been trying to break into a crypt - with no success. Whatever they're after is probably still inside.
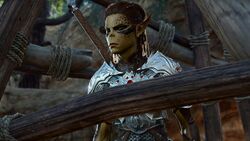
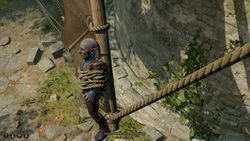
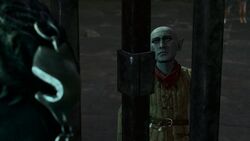
Free Lae'zel
We found Lae'zel, the githyanki from the nautiloid, trapped in a hanging cage. Two tieflings are deciding what to do with her.
We found Lae'zel, the githyanki from the nautiloid, trapped in a hanging cage. Two tieflings are deciding what to do with her.
Druid Grove

Blighted Village
Sunlit Wetlands


The Risen Road


Goblin Camp/Shattered Sanctum


Underdark


Grymforge


Mountain Pass
Travel through the Mountain Pass
We decided to take the mountain pass. This road should lead us to Moonrise Towers.
We decided to take the mountain pass. This road should lead us to Moonrise Towers.
Find the Githyanki Crèche
Lae'zel told us that the githyanki should be able to cure us, if we can find one of their crèches.
Lae'zel told us that the githyanki should be able to cure us, if we can find one of their crèches.
Find the Blood of Lathander
We learned that a powerful holy relic, the Blood of Lathander, could be somewhere nearby. We should keep an eye out for it as we explore the monastery.
We learned that a powerful holy relic, the Blood of Lathander, could be somewhere nearby. We should keep an eye out for it as we explore the monastery.
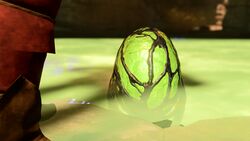
Steal a Githyanki Egg
Lady Esther has asked that we steal an egg from the githyanki. The Society of Brilliance want to incubate it, raise it, and soothe its so-called violent nature.
Lady Esther has asked that we steal an egg from the githyanki. The Society of Brilliance want to incubate it, raise it, and soothe its so-called violent nature.
Act Two
Spoiler warning: The following content contains unhidden spoilers for Act 2. |
Shadow-Cursed Lands


Moonrise Towers


Act Three
Spoiler warning: The following content contains unhidden spoilers for Act 3. |
Rivington
- Deal with the Gnomes
- Help the Devilish Ox
- Find a way into Wyrm's Rock fortress
- Find the Missing Letters
- Find the 'Stern Librarian' Ffion
- Feed the Mind Flayer
- Free Counselor Florrick
- Investigate the Suspicious Toys
- Solve the Open Hand Temple Murders
Circus of the Last Days
Baldur's Gate
- Aid the Underduke
- Avenge the Drowned
- Avenge the Ironhands
- Save the Gondians
- Find Mystic Carrion's Servant
- Help the Hag Survivors
- Avenge the Hag Survivors
- Investigate the House of Grief
- Investigate Cazador's Palace
- Rescue the Grand Duke
- Retrieve Omeluum
- Return Rakath's Gold
- Roveer's Storehouse
- Save Vanra
- Stop the Presses
- Visit the Emperor's Old Hideout
House of Hope
Acquire the Gauntlets for Helsik
Helsik the diabolist said she will help us reach the House of Hope if we steal a powerful artefact for her while we're there: Gauntlets of Hill Giant Strength.
Helsik the diabolist said she will help us reach the House of Hope if we steal a powerful artefact for her while we're there: Gauntlets of Hill Giant Strength.
Save Hope
We met a strange spirit imprisoned in Raphael's home - named Hope, oddly enough. She mentioned an important hammer before disappearing abruptly.
We met a strange spirit imprisoned in Raphael's home - named Hope, oddly enough. She mentioned an important hammer before disappearing abruptly.