Ad placeholder
Ruined Battlefield
| Shadow-Cursed Lands | ||||
| Grymforge | ||||
| ↑ | ||||
| Last Light Inn | ← | Ruined Battlefield | → | Rosymorn Monastery Trail |
| ↓ | ||||
| Reithwin Town | ||||

“A great battle was fought here - I can practically hear the din of blade against blade, axe against shield.„
Overview and access[edit | edit source]
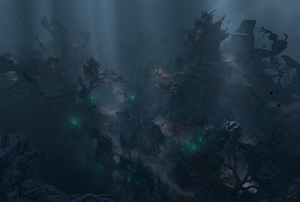
The Ruined Battlefield occupies approximately a half of the Shadow-Cursed Lands, covering its eastern part and ending on the shore of the side stream running into the local course of the River Chionthar. To the north-west, it is adjacent to the Last Light Inn, a protected island of safety and currently a base of operations for the Harpers. Further to the west across the streambed lies the Reithwin Town, another large part of the cursed area. To the south-west, at the shore of the major river, stands the main landmark of the whole cursed area: the Moonrise Towers stronghold, the destination point of the party's adventures in Act Two.
The Ruined Battlefield contains both possible points where the Shadow-Cursed Lands can be entered:
- The elevator from Grymforge opens into a small antechamber adorned in the same style as the whole subterranean fortress. In its far end the gate leads to the cursed area, opening at X: 121 Y: 229.
- The path from the Rosymorn Monastery Trail comes out to a small clearing at X: 167 Y: -28. From it, a path leads to a makeshift camp of the forces of the Absolute, where the cultists (and their possible captives, if any) await to be escorted to the Moonrise Towers.
Upon entering the Shadow-Cursed lands from whatever point the Travel to Moonrise Towers is considered complete.
The actual area where the Shadow Curse has its impact starts a bit further, at X: 112 Y: 193 and X: 139 Y: -33 respectively, and can be clearly seen as a line of greenish-black emanations rising from ground. If any party member crosses the line without any means of defense from the curse,[1]
Turn-based mode is turned on automatically, and all unprotected party members receive increasingly potent 2d4Necrotic damage, doubling each turn until they succumb to its potent effects. If a party member loses all their hitpoints while cursed, they gain the Umbral Influx status and, if they are not helped, are resurrected as an undead creature and attack the party. The party member can be saved by defeating them and then resurrecting them again.
Enduring two turns of the Shadow-Curse impact earns the Embracing the Environment inspiration for characters with the Outlander background.
The party also have unique layout for their Campsite if they choose to go to the camp from the Ruined Battlefield. Despite the outside area's design, the campsite is considered to be out of the influence of the Shadow Curse. Long resting within the area grants the inspiration Sleeping in the Dark to party members with the Outlander background.
Encounters in the Darkness[edit | edit source]
Exploring the Ruined Battlefield offers the party numerous encounters with various characters who also traverse the shadowed area for their own purposes and needs, or creatures already warped by the curse and patiently waiting in the darkness to assault their unwelcome guests. Surviving three combat encounters within the cursed territory earns the Bumps in the Dark inspiration for characters with the Outlander background.
Meeting the Harpers[edit | edit source]

When entering the Shadow-Cursed Lands from Grymforge, at X: 74 Y: 152 the party can meet a group of Harper scouts led by Lassandra. They notice the player character first, and a cutscene starts, where Lassandra demands of player character to show themselves. Apart from introducing themselves straightaway, the set of possible response options depends on the feats of the character in question.
- Lower your weapon first.
- A nightmare in the dark. +1 +1
- Someone who will snap both you and your weapons in two unless you lower them. +1 +1
- I find the best introductions are made while sitting around a fire, perhaps with drinks? -1 +1 +1 +1
- I am but a faithful adherent - I do not wish to fight you.[2]
- An escaped lunatic. Be careful, or the madman will take over... +1 +1
- Peace - I am a druid. This land and its festering shadows - what do you know of it? -1 +1 +1 +1
- Warrior-at-arms. I mean you no harm. -1 +1 +1 +1
- I am but a simple monk - I am no threat. +1 +1 +1
- One who has sworn an oath to do no harm. Lower your weapons, please. +1 +1 +1
- I'm [Player Character Name], Knight of the Crown, right hand of the law.
- A paladin - one who will only take you down if you're foolish enough to strike first. +1 +1
- A ranger who knows the marks of a hunting party - what are you tracking?
- Try to slink back into the shadows.
- I'm a sorcerer, so kindly lower your weapons or things might get ugly. Very ugly. +1 +1
- I'm a sorcerer, so kindly lower your weapons - or who knows what my magic might do. +1 +1
- An expert in magic. Perhaps I can aid you in traversing this darkness. What do you know of it? -1 +1 +1 +1
While they are speaking, one of the Harpers, Yonas, falls prey to the Shadows. After that, a battle with six Shadows is commenced, where the newly-warped Yonas sides with them and must be killed. If all other Harpers survive the fight,[3] characters with Folk Hero are granted the Not Another Soul inspiration. The player character also has options to run away from the fight or to stay neutral to both sides.
The same cutscene plays out if the party approach the encounter point from the other direction. If the party watch the squad from afar, all four Harpers can be seen wandering in the darkness, then the three of them (except Yonas) run towards the Last Light Inn. In this case, Yonas's corpse is nowhere to be found later.
Meeting the Absolute followers[edit | edit source]
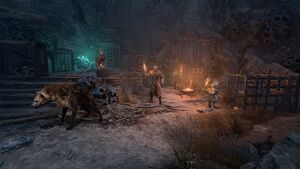
When entering the Shadow-Cursed lands from the Rosymorn Monastery Trail, a dialogue with a Goblin Brawler starts automatically. She is patrolling the entrance and gives the party short instructions on safety measures within the curse.
The temporary camp, acting as a relay point for the cultists of the Absolute, is at X: 87 Y: -49. When approaching it, a cutscene starts where Warrior Gronag baits a Hyena to fetch a bone, throwing it in the shadowed bushes. If he is not stopped, the hyena obeys and is consumed. Otherwise, the party can not only spare the hyena, but order the goblin to do the same (with an identical outcome). For the Dark Urge, doing this grants the inspiration Forcing Responsibility. If the hyena is spared, she may be spoken with via Speak with Animals afterwards. She tells the player character about being too cowardly to leave the goblins, but can be inspired through several ability checks. In the latter case, she runs away, only to be affected by the curse.[4]
The followers of the Cult of the Absolute: two half-orcs Bedi and Kansif, accompanied by three goblins (including Gronag), are waiting for the guide who will provide them a safe path through the shadows. The guide can be called upon using a Spider's Lyre, taken from either Nere or Minthara. After playing it a drider by the name Kar'niss appears nearby, holding an operational Moonlantern. Calling him grants the inspiration Plucking the Lyre's Web for characters with Entertainer background.
The drider leads the convoy through the darkness,[5] from time to time urging them to keep close. When they reach the point of the Harpers' ambush (see below), the dialogue starts automatically, and the player character must pick a side in the upcoming battle. Unlike ambushing the convoy with the Harpers, in this case there is no chance to evade the fight and obtain the Moonlantern peacefully.
If the party chose to side with the cultists, they continue the way after the fight is resolved. After reaching Moonrise Towers, Kar'niss climbs up the castle wall and disappears together with the Moonlantern. It is then no longer possible to attack, kill, and loot him without making all other guards hostile. Successfully finishing the route earns the inspiration Odd Entourage for characters with the Noble background.
In the far end of the cultists's camp at X: 117 Y: -52 a skeleton lies with two sets of Thieves' Tools on it.
Harpers' Ambush[edit | edit source]
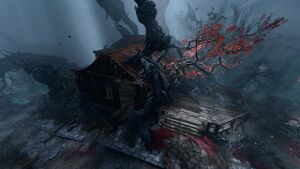
This plot episode is important for the further walkthrough, and can be triggered in various circumstances depending on how the party are exploring the Shadow-Cursed Lands (see the previous sections).
- If the party have visited the Last Light Inn and agreed to participate in the ambush as part of Seek Protection from the Shadow Curse quest.
- If the party met Kar'niss and his convoy first and agreed to travel with them to Moonrise Towers as part of Follow the Convoy quest.
Either way, the encounter inevitably happens near an old, dilapidated house at X: 10 Y: -20. When the convoy led by the drider comes closer, a cutscene starts, where the party must pick a side regardless of which one they took initially. Afterwards, in most cases, a battle begins. It is also possible to get to the encounter point with any one of the rivaling parties and betray them throughout the dialogue, siding with the others.
If the party sided with the Harpers initially, they can through several Deception and / or Intimidation ability checks convince the drider to surrender the Moonlantern peacefully and walk away without it. In this case, Kar'niss and the rest of his convoy can be encountered again in cursed form in the middle of Reithwin Town.
After Kar'niss is dealt with, the party can obtain a working Moonlantern. Once acquired, another cutscene starts, where they meet a pixie named Dolly Thrice. She is trapped within the lantern, forced to painfully shed off her shining fairy dust to provide protection from the curse for those around the lantern. The party may choose to free her, torture her, or ignore her pleas and keep the lantern. If freed and not angered in the process, Dolly can be persuaded to grant the whole party a Pixie Blessing - a permanent buff which gives protection even from deeper shadows and is passed on even to currently non-active party members once they join the party. She also gives the party the Filigreed Feywild Bell, which allows to call upon her to restore the buff if it is dispelled.
The encounter with the Harpers and the drider may grant the following inspirations, depending on its outcome:
- Centennial Rivalries inspiration for characters with the Soldier background - for successfully ambushing the convoy with the Harpers.
- Shiny Trinkets and Baubles inspiration for characters with the Criminal background - for obtaining the Moonlantern.
- Trust and a Little Pixie Dust inspiration for characters with the Guild Artisan background - for finding out how the Moonlantern works.
Dark Urge characters have a unique option to kill Dolly. Doing this naturally prevents them from obtaining her blessing, but earns the Fly-Swatter inspiration.
Ignoring Dolly's pleas is considered an oathbreaking action for Ancients' Paladins. Turning the mechanism of the lantern and thus torturing her breaks the oath of Paladins of the Crown and Ancients' Paladins, while killing her breaks the oath of Paladins of any Oath subclass.
After the encounter is resolved, the party can loot the Hammergrim Mist Amulet from a locked chest at X: -12 Y: -7 (requires DC 10 Sleight of Hand check to lockpick; otherwise, the key to it lies near the skeleton on the hut's roof). Also, if the convoy was eliminated, the Thermoarcanic Gloves can be looted from Kansif, and the Cruel Sting from Kar'niss.
He Who Was[edit | edit source]
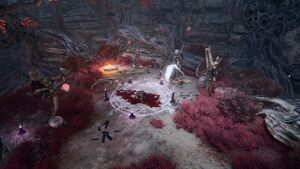
At X: 129 Y: 106 a small ground with a ritual circle on it is located. The mysterious man He Who Was is accompanied by a white Raven; he is performing a Speak with Dead spell on the body of Madeline. When approaching, dialogue with him starts automatically.[6] He asks the party to bring him a ledger of Madeline's records, hidden somewhere in the Waning Moon distillery. If they agree, the quest Punish the Wicked is added to the journal.
After retrieving the ledger, He Who Was asks the party to judge Madeline's crimes. To that end, he performs another ritual, and his body for the time being is possessed by Madeline's spirit. The player character can interrogate Madeline about her actions, and have several options to either pass judgement or let her go. Depending on their choice, He Who Was may be pleased and reward them with Raven Gloves, or become hostile. All possible outcomes are described on his page, and in the quest description as well.
Choosing a proper judgement for Madeline is a tricky question for Paladin characters, because most choices are considered an oathbreaking action, depending on their Oath subclass. Apart from this, choosing the in-dialogue option to attack He Who Was instead of judging Madeline breaks the oath of Vengeance Paladins.
The player character's judgement grants any of two mutually exclusive inspirations for those with the Acolyte background:
- Let Sleeping Dogs Lie - for preventing He Who Was from fulfilling his task.
- No Rest for the Wicked - for helping He Who Was in his endeavour.
Throughout the regular dialogue (when he is not channelling the spirit) He Who Was may act as a merchant via the "Trade" button in the lower-left corner, selling valuables, scrolls and rare alchemical ingredients like Divine Bone Shard or Xorn Scales.
A side path starting near his camp at X: 112 Y: 81 leads to a chasm which can be jumped over only via means of spatial movement, or by a character with at least 15 Strength. Although a small pocket of blighted area there is lighted with sunshine from without, there is no way to leave the cursed lands. One of skeletons lying on the ground carries a diary which describes how they chose to wander into the shadowed territory deliberately.
House in Deep Shadows[edit | edit source]
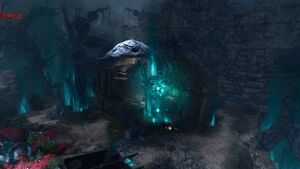
This place at X: 68 Y: 36 is a crucial location for completing the Lift the Shadow Curse quest. It becomes marked on the map after reading the Grey Scout's Journal, or after the party have helped Halsin to rescue Thaniel from the Shadowfell and discussed it with the druid.
The dilapidated hut does not differ much from several others in the area, save for bright and fresh flowers growing around it, seemingly unaffected by the Shadow Curse. Upon approaching the building, the party can hear a child's complaints about people who were too boring to play with them. However, there are no kids around. Instead, there are two dead githyanki, one near and the other inside the house. Teth'ka - the one lying at X: 75 Y: 43 can be spoken with via Speak with Dead.
Inside the house a locked wooden chest contains a Ring of Mental Inhibition. The locked wooden desk across it contains the diary of the house's only inhabitant - a strange boy named Oliver. Both containers require DC 10 Sleight of Hand check to lockpick.
When the party come inside the house, Oliver pops up in the middle and offers to play "hide-and-seek" with him. The game consists of two rounds; in the first Oliver turns Invisible, while in the second he also summons three Wraiths: Mummy, Daddy, and Doggy, who search for the party while they search for Oliver. If the shadows notice any party members, a battle with them commences. Thus, it is recommended to either choose a single party member with good ability to hide and move stealthily for interacting with Oliver, or use some means of concealment/invisibility. Using Turn-based mode is helpful as well (at the start of the second round, it is turned on automatically, and the whole party hides).
If the player character refuses to play with Oliver, he still summons all three wraiths, and a battle starts.
If the party participate in both rounds of the game (result does not matter), Oliver rewards them with the Ring of Shadows. However, regardless of the game outcome, Oliver accuses the party of cheating and teleports away, leaving an open portal behind. To complete the quest, the party must follow him.
![]() Oliver's portal leads into the middle of the Reithwin Town, to the area with deeper Shadow Curse impact than in the Ruined Battlefield. Isobel's blessing or plain sources of fire are not helpful there.
Oliver's portal leads into the middle of the Reithwin Town, to the area with deeper Shadow Curse impact than in the Ruined Battlefield. Isobel's blessing or plain sources of fire are not helpful there.
Participating in Oliver's game may grant following inspirations:
- Child at Heart inspiration for characters with the Urchin background - for playing both rounds against him.
- Child's Play inspiration for characters with the Outlander background - for winning the second round without alerting the wraiths.
Mansion across the Last Light[edit | edit source]
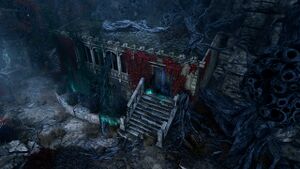
A side path starting from the protected territory of the Last Light Inn at X: -10 Y: 166. A signpost with a warning is stationed at its start: the mansion's interior is the only part of the Ruined Battlefield which is wrapped in the shadow curse with stronger impact; even Isobel's blessing is not enough inside, let alone plain sources of light.
The relatively extant building has two entrances: at the facade and on the far side. Near the latter at X: 26 Y: 170 a buried treasure can be detected with a DC 10 Survival check. Inside the larger room is a Rustic Chest with minor loot. In the lesser room two skeletons lie on the bed embracing each other. Each can be looted for a Gold Ring. From the locked Opulent Chest nearby Penumbral Armour can be taken (requires DC 16 Sleight of Hand check to lockpick).
A breach in the floor entangled with roots in the large room can be used to get access to the cellar of the Last Light Inn.
Potter's Workshop[edit | edit source]
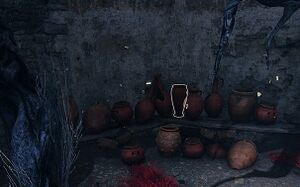
At X: -43 Y: 8 is a ruined pottery. Upon approaching it from any point, a passive DC 18 Perception check can help the party to detect an ambush. A pack of four Meazels waits in the abandoned house and become hostile on sight.
After defeating the Meazels the party can loot the Potter's Chest standing on the wall at X: -52 Y: 11. Lockpicking it requires Sleight of hand check, but a successful DC 10 Perception check near X: -33 Y: 18 reveals a moveable brick in the wall concealing the key to the chest. It contains an Idol of Selûne, Luminous Gloves and a Note.
Upon reading the note, the Investigate the Selûnite Resistance quest is started, if it has not been added to the journal yet.
If passing through the house and to the south, along the riverbank, the party can find a round building with the entrance crossed by an armed Tripwire. Inside, under the shelf with pottery, is a locked Traveller's Chest with a Ring of Twilight inside. The key to this chest is in the conic vase on the shelf above it. Otherwise, it requires DC 10 Sleight of Hand check to lockpick. A makeshift desk in the middle keeps remains of a hurried interrogation performed by Harpers.
Saving Rolan[edit | edit source]
This encounter can only happen if Rolan and his siblings were convinced to stay in the Emerald Grove in Act One, and survived the goblins' raid if it occured. In this case, when the party arrive at the Last Light Inn, Rolan can be found there drowning his sorrows in wine because Cal and Lia have been captured by the Cult of the Absolute. After the party take a long rest or fast travel, he disappears from the inn. After he is gone, if the party speak with the tiefling children who served Rolan wine, the Find Rolan in the Shadows quest is started, although having this quest in the journal is not necessary for the encounter to take place.
At X: -35 Y: -95 on a path descending to the rivershore, several remains of incinerated shadow creatures can be seen. Following this trace, the party can see Rolan fighting the rest (of which only two Shadows remain). Upon approaching, the party members are automatically engaged in the fight. If Rolan survives, he returns to the Last Light Inn humbled, and asks the party to save his family. Saving Rolan grants the inspiration Saving the Prodigious to characters with the Folk Hero background.
Past the point of encounter, on the wooden pier, two Traveller's Chests stand. Both require a DC 10 Sleight of Hand check to lockpick. The lesser contains random minor loot, while in the bigger lies the Gloomstrand Shield.
Up on the hill at X: -32 Y: -96 a buried treasure can be detected with a DC 18 Survival check, containing gold and random alchemical ingredients.
The skeleton of Inquisitor Verzen Wranlock sits leaning on a tree at X: -30 Y: -88. It carries Investigation Notes; reading the book can start or progress the Investigate the Selûnite Resistance quest. A Dark Justiciar Mask lies aside the skeleton.
Shadow creatures' ambushes[edit | edit source]
This location contains multiple ambushes by Shadow-Cursed flora and fauna.
- X: 42 Y: 58: Six Shadow-Cursed Needle Blights, two Shadow-Cursed Vine Blights, two Shadow-Cursed Harpers, and a Shadow-Cursed Shambling Mound. The ambush can be spotted by passing a DC 30 Perception check. The corpse of Shadow-Cursed Shambling Mound can be looted afterwards for the Ironwood Club.
- X: 67 Y: 107: Six Shadow-Cursed Needle Blights and one Shadow-Cursed Vine Blight. The ambush can be spotted by passing a DC 30 Perception check. The creatures guard a locked wooden chest ( DC 10 Sleight of Hand check) filled with minor random loot.
- X: 88 Y: -95: Three Shadow-Cursed Needle Blights and three Shadow-Cursed Vine Blights. The bait is a gilded chest with the Frost Prince and random alchemical ingredients inside it.
- X: -39 Y: 37: Three Shadow Mastiffs and a Shadow Mastiff Alpha. The area behind a low fence is lighted with several torches; a DC 14 Arcana check allows to recognize a "Continual Flame" spell cast on them. The dead True Soul Korliss can be spoken to via Speak with Dead. If all torches are destroyed, the pack of mastiffs appears, and a fight starts. The corpse of Shadow Mastiff Alpha can be looted afterwards for the Shadow-Cloaked Ring. The lost backpack near one of fence entrances contains Potion of Greater Healing and Korliss's diary.
Other Points of interest[edit | edit source]
Tieflings from the Emerald Grove[edit | edit source]
If the party completed the Save the Refugees quest in the Act One siding with Zevlor's subordinates, some of tieflings who survived there can be found dead on the clearing at X: -11 Y: 59. Successful DC 14 Investigation check tells the party that the tieflings tried to put up a fight, but to no avail. None of these corpses can be spoken to via Speak with Dead.
Old Battlefield[edit | edit source]
Although the whole eastern part of the Shadow-Cursed Lands is marked as the "Ruined Battlefield" on the map, the actual signs of the fiercest battle can be found only closer to the riverbank: ruined ballistas and catapults, as well as dozens of skeletons, heaps of rusted weapons and armour. Some of skeletons can be looted for plain weapons, others are interactable objects which prompt Narrator's comments on them belonging to one of rival factions: the druids of the Emerald Enclave or Ketheric Thorm's Dark Justiciars.
Party members also comment on the intensity of the bloodshed, and (after a successful DC 14 History check approximately at X: 11 Y: -42) on the huge pieces of siege warfare left to rot after the battle, when the curse was unleashed.[7]
Victims of the Shadow Curse[edit | edit source]
Characters[edit | edit source]
- Dead Druid
Shortly after entering the Shadow-Cursed Lands from the Grymforge, aside from the main path at X: 109 Y: 183 the party can find a small clearing with remains of a camp in the middle. A heavy chest in the cart contains gold and alchemical ingredients. A skeleton leaning to the cart keeps the Dead Druid's Journal, which sheds some light on the curse effects. A passive DC 18 Nature check can help to understand the druid's notes. Reading the journal (regardless of the roll result) grants the Corrupted Beyond Recognition inspiration for characters with the Sage background. At the far end of the clearing a wooden chest is buried.
- Graverobber
At X: 73 Y: 151 a skeleton lies under a tree. The unsent letter he is carrying adds the "Camp in Shadow-Cursed Lands" marker to the map. Near this camp is a grave with the name "Ellie May" on the tombstone. Two subsequent DC 10 Perception checks lead to a small rocky ledge with an animal burrow, from where a Family Ring can be taken.
- Dal Lightspark
If the party climb on a rock protruding from the ground at X: Y: , they find three Harpers' corpses on its top: Dal Lightspark and two unnamed ones. Lightspark's body can be spoken to via Speak with Dead.[8] The Harper Journal he carries adds a "House in Deep Shadows" marker to the map. This location is important for progressing the Lift the Shadow Curse quest.
- Bagida
Her skeleton lies at X: 91 Y: 82. It can be looted for Bagida's Diary and a Key (Bagida), which opens the wooden chest guarded by ambushing shadow flora at X: 67 Y: 104 (see above). Otherwise, this chest can be lockpicked with DC 10 Sleight of Hand check.
- The Grey Scout
On the top of another protruding rock at X: 19 Y: 17, a dead Duergar can be found carrying the Grey Scout's Journal. According to it, the duergar was sent to find a safe way to the Moonrise Towers for True Soul Nere. A buried treasure can be found with a DC 10 Survival check nearby, containing gold and a random arrow.
- Githyanki scout
Almost at the rivershore, near the bridge to the Reithwin town the corpse of dead githyanki lies at X: -54 Y: -80. She carries an inscribed githyanki slate. If the party have not been yet to the Crèche Y'llek, this slate provides them with a route to find it and progresses the Find the Githyanki Crèche quest. The githyanki cannot be spoken to via Speak with Dead.
- Treasure hunter
On the second floor of a ruined building at X: 28 Y: 53 a skeleton carries a Ragged Diary. A key mentioned in it lies nearby. It opens the wooden chest on the platform across, with the Ring of Self Immolation inside.
- Unknown child
The only mention of this victim is a note left by them in a burlap sack at X: 84 Y: -71. The note states that the child and his mother apparently lost each other in the cursed darkness.[9] In a large bird's nest nearby lies the Severed Head, which can be used to unlock the necromancer's secret lab in Moonrise Towers.
Animals and Creatures[edit | edit source]
- A dead boar X: 97 Y: 155 lies in the end of a side path close to the entrance to the Shadow-Cursed lands from Grymforge. Unlike raven, it does not summon any hostile copies. Party members comment on its carcass as a clear example of the curse impact on living creatures.
- A dead raven oozing cursed vapors is found at X: 30 Y: 114. Passing an DC 15 Arcana check ominously warns away from interacting with the corpse. Interacting with the dead bird or attacking it provokes a fight with twelve Shadow-Cursed Ravens. Winning the battle and searching the original raven rewards the party with the HELP! note. The ramshackle building nearby has two Traveller's Chests; the one on the ground contains nothing of interest, while the one on the roof is locked (requires the Key (Raven Ambush) to open or a DC 10 Sleight of Hand check to lockpick) and contains random minor loot.
- A fallen ox can be found at X: 126 Y: -11, on a side path close to the entrance from the Mountain Pass. A passive DC 6 Investigation check is made to ascertain the circumstances of its death. A bit farther corpse of Elegis, one of refugees from the Emerald Grove, can be found, and a DC 10 Medicine check and the Refugee's Journal nearby shed light on what has happened. Some Camp Supplies, still unspoiled by the curse, fill the Wicker Basket in the cart nearby. A note with instructions on the path to the city is in the backpack at X: 101 Y: -21.
Regional waypoints[edit | edit source]
This location contains the following waypoint:
Related locations[edit | edit source]
Related quests[edit | edit source]
Characters and Creatures[edit | edit source]
Cult of the Absolute[edit | edit source]
Harpers[edit | edit source]
Other[edit | edit source]
- He Who Was
- Hyena
- Oliver
- Raven
- Rolan - conditional
Creatures[edit | edit source]
Loot[edit | edit source]
Notable items[edit | edit source]
Chests in plain sight[edit | edit source]
This list does not include chests which are placed as a bait at the points of encounters with ambushing shadow flora or are already mentioned in subsections above.
- Heavy chest at X: -41 Y: -54, behind ruined building on the riverbank, not locked.
- Heavy chest at X: -1 Y: -41, behind a destroyed trebuchet (requires DC 10 Sleight of Hand check to lockpick). Otherwise, the key to it is hidden in a burlap sack at X: -30 Y: -35.
- Heavy chest at X: 27 Y: 71, not locked.
- Heavy chest at X: 112 Y: -39 (requires DC 6 Sleight of Hand check to lockpick).
- Heavy chest at X: 112 Y: -39, on a wooden platform (requires DC 10 Sleight of Hand check to lockpick).
- Wooden chest at X: 73 Y: 142 (requires DC 10 Sleight of Hand check to lockpick). Nearby, a Potion of Healing and a club lie near a skeleton.
- Wooden chest at X: 106 Y: 85. The key to it is hidden in a burlap sack at X: 78 Y: 85 (requires DC 10 Sleight of Hand check to lockpick the chest, and DC 10 Perception check to notice the sack).
- Wooden chest at X: 32 Y: -6, not locked.
Hidden treasure[edit | edit source]
Alchemical ingredients[edit | edit source]
Ruined Battlefield (and the Shadow-Cursed Lands as a whole) allows the player character to collect several unique alchemical ingredients which allow to uncover new recipes. Also, some ingredients are introduced in this area, to be also found and / or traded in Act Three as well.
On the contrary, most common alchemical ingredients (notably herbs) available to pick up freely in Act One, in this area can be obtained only by looting containers or by trade.
Related Literature[edit | edit source]
This list contains only items which cannot be found or purchased elsewhere except locations of the Act Two.
Notes[edit | edit source]
- ↑ Within the Ruined Battlefield, this can be any source of light: a torch, a weapon issuing light by itself or imbued with Daylight spell, or, later in Act Two, a working Moonlantern, as well as buffs like Blessing of Selûne from Isobel or Pixie Blessing from Dolly Thrice. Also, Shadowheart, as long as she remains a follower of Shar, does not feel the effect of the Shadow Curse while she is within the area of its lesser impact, which is the whole Ruined Battlefield, except the small mansion across the Last Light Inn.
- ↑ The Cleric characters may use this line or unique one, which depends on their chosen deity. As of Patch 8, the dialogue file provides options for all deities available for this character Class.
- ↑ Of the whole squad, Harper Karrow must be watched most carefully, as he is armed with a crossbow and tends to walk far from the targets to gain advantage. This often makes him step deeper in the shadows, and increases his likelihood of being consumed by the curse as well; if this happens, Karrow immediately sides with the Shadows.
- ↑ Disposing of both the Gronag and the hyena can be helpful if the battle with the other Absolutists is commenced. While the hyena flees, Gronag can be later found wandering at X: 82 Y: -70 in a cursed form.
- ↑ The party can also instigate a fight with the convoy before calling Kar'niss. In this case, they must convince him afterwards of their noncomplicity, and of that they are a True Soul due to reach Moonrise Towers.
- ↑ In the beginning of the conversation, Bard characters roll a passive DC 10 History check with advantage. If they succeed, they recognize the man as a Shadar-Kai.
- ↑ Of all possible companions at this point, only Halsin remembers the actual events. If he is in the party, he utters a comment without any check rolled, and his comment has the priority to appear.
- ↑ Talking to Dal's corpse provide the party with the first mentions about Isobel and about the cultists' caravan, if they do not know about any of these yet.
- ↑ The note also contains one of the references to the Discworld book series within the game.
- ↑ There are several Night Orchids to be found within the Ruined Battlefield: at X: -89 Y: 104, at X: -55 Y: 179 and at X: 40 Y: 37. However, instead of preparing an extract, one of these can be given to Shadowheart in order to earn a Nightsong Point.