Find Ketheric Thorm's Relic
Find Ketheric Thorm's Relic is a sub-quest of Infiltrate Moonrise Towers in Act Two of Baldur's Gate 3. It can be started by speaking with Thisobald Thorm in The Waning Moon, by speaking to Disciple Z'rell in Moonrise Towers, or by reading Balthazar's diary in his chambers in Moonrise Towers.
Spoiler warning: The following content contains unhidden spoilers. Read at your own risk. |
Objectives
Objectives and journal entries may vary pending player decisions and outcomes.
- Minthara told us that the necromancer Balthazar might know more about Ketheric's invulnerability. She suspects the answers we seek lie in Balthazar's chambers on the upper floor.
- Disciple Z'rell instructed us to assist General Thorm's advisor, Balthazar, in recovering a powerful relic from the Thorm's family mausoleum.
- The Brewer revealed that 'her cage' is located in the Thorm Mausoleum. It's unclear who this woman is, but Ketheric must have caged her for a reason.
- We found Balthazar's diary and learned that he went to the Thorm Mausoleum to find a relic called the 'Nightsong'. It seems to be the key to Ketheric's invulnerability.
- A mysterious voice in the Mausoleum warned us to leave. If we wish to find Balthazar, we should press on.
- We uncovered a secret passage in the Thorm Mausoleum. The relic must be further inside.
- We uncovered a secret passage in the Thorm Mausoleum. Balthazar must be inside.
- We encountered a group of patrolling skeletons who likely serve Balthazar. They mentioned the temple's shadowy defenders.
- We encountered Balthazar's undead servants. They have barricaded themselves in a room as they prepare to defend their master.
- We defeated the temple's shadowy defenders and found the missing Balthazar.
- We found Balthazar. He's asked us to clear the path to the relic - by any means necessary.
- We encountered Balthazar - General Ketheric Thorm's advisor. He's been tasked with finding a powerful relic. He asked us to clear the path - by any means necessary.
- We defeated Balthazar, but the relic is still at large. We should search for it.
- To enter the temple's Inner Sanctum, we must complete the Gauntlet of Shar - trials made for her elite soldiers, the Dark Justiciars.
- We found an Umbral Gem. More are needed to unlock the temple's Inner Sanctum.
- We acquired another Umbral Gem from one of Shar's trials.
- We acquired a new Umbral Gem from Shar's trials.
- We acquired an Umbral gem from the lair of the orthon.
- We inserted an Umbral Gem into the altar. This activated a platform that will allow us to travel deeper into the temple.
- We found an altar in front of a locked door. There are three slots for Umbral Gems. We'll need to find more if we want to enter the temple's Inner Sanctum.
- We have enough Umbral Gems. We should insert them into the altar.
- We've collected enough Umbral Gems. Now to gain access to the Inner Sanctum.
- We inserted an Umbral Gem into the altar. This activated a platform that will allow us to travel deeper into the temple.
- The path to the Inner Sanctum is open. The relic lies just ahead.
- Balthazar followed us into the Shadowfell. He intends to claim the relic. We should hurry after him.
- We entered the Shadowfell, the heart of the relic.
- We found the 'relic' - a woman named Nightsong. Balthazar wanted to bring her to Ketheric. We turned on the necromancer instead.
- The relic is a woman called Nightsong who was trapped in the Shadowfell by Ketheric and Balthazar. Her fate is in our hands.
- We helped Balthazar capture the Nightsong. He was pleased. We should return to Moonrise.
- We helped Balthazar return Nightsong to Moonrise Towers. Disciple Z'rell would be happy to hear this.
- Disciple Z'rell was pleased we assisted Balthazar and brought Nightsong to Moonrise.
- We helped Balthazar return Nightsong to Moonrise Towers. Ketheric Thorm would be happy to hear this.
- After capturing the Nightsong alongside Balthazar, we reported our success to Ketheric Thorm.
- We killed Nightsong, making Ketheric Thorm vulnerable.
- We freed Nightsong and she flew across the shadow-cursed lands to Moonrise Towers, where she intends to face Ketheric Thorm.
Walkthrough
Moonrise Towers
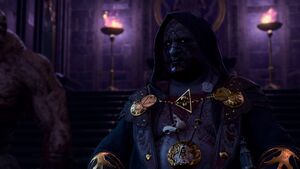
After entering Moonrise Towers, the party is urged to go to the audience chamber. Enter it, and Ketheric is on a throne while one of his minions, Disciple Z'rell, is interrogating some goblins. Fezzerk is one of the goblins from the Goblin Camp and he pleads for his life. The party can attempt to plead their case with Ketheric, but he refuses to believe they have any worth and orders the new True Souls to handle it. He leaves for his quarters and Z'rell tells the party to do whatever they want with them. The goblins can be killed, or set free. The party also has the option to try attacking Thorm, but he simply walks away and tells Z'rell to deal with it, and the whole area becomes hostile.
After dealing with the goblins, Z'rell must be reported to. She's up the stairs behind the throne in the audience chamber. Speak to her, and she telepathically connects with the party to see how the goblins died. Next, she tries to figure out if the party is loyal to the Absolute. The player can attempt to distract her with romantic thoughts of their love interest (Persuasion DC 14), fill their mind with fake love for the Absolute (Deception DC 14), distract her with their hunger for power, or use a special dialogue for Monks, Rogues, or Fighters.
If successful, Z'rell gives the party a new task - track down Balthazar, a servant of Thorm's who the cult has lost contact with. He was last seen at the Thorm Mausoleum. Z'rell gives the party a key to his room and instructs them to take a Moonlantern and touch nothing else. However, the party can access a secret area in his room in order to start Balthazar's Experiment.
Alternative Ways to Acquire the Quest
There are two other ways to start the quest beyond speaking to Z'rell. The party can either pickpocket the key to Balthazar's room or loot it from Z'rell's corpse. Entering his room, Balthazar's Diary reveals his activities. If Minthara is alive, she also encourages the party to search Balthazar's room to find answers on the relic.
If the party drinks with Thisobald Thorm in the Waning Moon, they can learn a little bit more about Thorm's secrets. After drinking three times with him, Thisobald starts ranting. "I - I know you. I knew, I know, I am knowing. You want father's personal mysterious - (secret) - secret. No, not, never! Father said, ordered, commanded. Don't say it, don't say it! The cage. Her cage. Talk and... perish, die, buried. Buried in Thorm tomb. Father told me." This grants a hint as to Thorm's relic.
The Relic
Pursuing Balthazar leads the party to Grand Mausoleum. The Grand Mausoleum is north of the House of Healing. Enter the Mausoleum after being accosted by Raphael and there is a small puzzle to proceed forward. There are three paintings with buttons underneath them, press them in the following order to open the way: Moonrise Towers, Grief, General. Move north using the traversal gem to enter the Gauntlet of Shar.
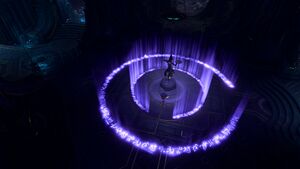
Once inside, Shar speaks to the party, inviting them to take on her trials and prove themselves worthy. The first task is to access an Umbral Gem at a statue. To do this, the party must snuff out eight Mystic Thuribles around the room. There are two levels to the north and south of each side of the room. The rooms are protected by pressure plates, which can be disarmed (DC 10) as well as vents that activate with the plates. Hit the levers to lower the Thuribles, then interact with them to snuff out their lights. Getting too close to the statue before the Thuribles are snuffed out causes it to magically repel the party. Any Moonlanterns must also be unequipped, as they emit light. Once the room is shrouded in darkness, purple glyphs are revealed around the statue. Follow the gaps in the glyphs to touch the Umbral Gem. This opens the way north.
Follow the path forward and the party eventually encounters a group of Reconstituted Duelists. They try to warn the party away, but are interrupted by tremors. A group of undead Justiciars attack the party and Umbral Tremors appear. The Umbral Tremors can summor more Justiciars until they disappear.
The tremors persist until the party moves west and encounters more Reconstituted Duelists. The tremors begin in earnest as more Umbral Tremors and Justiciars are summoned to attack the party. Several waves appear, until finally a Justiciar Crusader appears. Defeat it and its minions and the path opens, revealing Balthazar, a servant of Ketheric Thorm who has been tasked with retrieving the Nightsong. Balthazar tells the party to go and complete the trials for him, as the Justiciars have been making it impossible for them to move forward. The party can either agree to help him or attack him outright. If the party agrees to help him, they can convince him to offer help in the form of a summoning item that summons his brother, Flesh. Otherwise, Balthazar attacks with flesh and three Ghoul Medics.
The Trials of Shar
Soft-Step Trial
After entering the room (X:-767, Y:-755), the party notices a sacrificial bowl. The party must give a blood offering to continue onto the trial. If Shadowheart is in the party, she offers to do this. Once the offering is given, the party can proceed to the trial.
The Soft-Step Trial is a stealth trial. There are two shadows patrolling a small maze, which the party must sneak past to get to the umbral gem. If the party is detected by a shadow, they are transported back to the start of the maze. Find the Soft-Step Key in the hidden room of the maze to proceed forward, lockpick the door open, or use Misty Step to bypass it entirely.
Self-Same Trial
As with the Soft-Step Trial, proceed to the offering bowl with an offering of blood to proceed.
In this trial (X:-767, Y:-727), the party faces replicas of themselves. If the party attacks a replica of a different character, they gain a debuff that lowers their ability scores. An easy way to end this trial quickly is to remove all equipment until the replicas appear, then add the equipment again, so that the replicas are weaker. Using only one party member can also help, as it avoids the debuff. Once the replica has been defeated, an Umbral Gem is dropped.
Faith-Step Trial
The Faith-Step trial can be accessed by moving north of the other two trials and then following the stairs down (X:-752, Y:-727).
To complete this trial, the party must walk along a chasm, with a barely visible pathway allowing them to move forward. After blood is offered to the trial, the room is plunged in darkness, making the path forward difficult to see (and impossible to see from the overhead camera view).
There are several ways to trivialize this trial:
- Use the spell Daylight to make the pathway extremely obvious and easy to traverse.
- Use Fly, Misty Step, or Dimension Door to bypass the pathway entirely by utilizing the patforms with the statues.
Yurgir's Umbral Gem
There is one more Umbral Gem, which is in the possession of Yurgir, the orthon that Raphael is hunting. The party can either kill him as part of Kill Raphael's Old Enemy, trick him into killing himself, or help him as part of Break Yurgir's Contract. Regardless of how the conflict is resolved, the party can take the gem, which is in front of his throne of skulls (X:-641, Y:-754).
The Silent Library
Before placing the Umbral Gems on the Pedestal of Reckoning, Shadowheart has one final request if she is in the party. She states that she needs to obtain the Spear of Night if she is to become a Dark Justiciar. The Spear is in the Silent Library.
The Silent Library is south of the Faith-Step Trial. Once inside, Silence is cast over the party. If the party is detected, a number of Justiciar Soulhunter and Justiciar Nightweaver attack. Defeating The Librarian at the centre of the room ends the Silence spell. With a successful Perception check, the party notices a button (X:-784, Y:-747) that unlocks the locked gate to the west.
To access the hidden room, the party must offer the correct book to the pedestal. The correct book is Teachings of Loss: The Nightsinger (X:-771, Y:-742) which is inside a trapped bookshelf (DC 15). Interact with the Riddle of the Night and combine it with the book to open the way. Inside is the Spear of Night, as well as Dark Justiciar Half-Plate and a Dark Justiciar Helmet. Giving the Spear to Shadowheart allows her to claim her place as a Dark Justiciar.
Return to the Pedestal of Reckoning and use the Umbral Gems to activate the moving disks. The path ends at a pool of water to The Shadowfell.
Shadowfell
WARNING: Entering Shadowfell locks the player out of many side quests, and pushes the player to the end of the act. Do NOT enter until all other business in the area has been resolved.
If Balthazar was not killed, he arrives in the Shadowfell immediately after the player, thanking them for their service in completing the trials. He floats ahead and tells the party to come with him to witness greatness. Once the party leaps to the heart of the Shadowfell, they learn the Nightsong is not an object, but an aasimar woman named Dame Aylin. She has been held captive by Thorm using the power of Balthazar to share her immortal life with him.
After this, several events can play out:
- If Balzathar is alive, the party can let him take her to Moonrise Towers
- If Shadowheart is in the party, she can kill the Nightsong and become the Dark Justiciar she always dreamed she'd be.
- Dame Aylin can be set free, resulting in a battle with Balthazar and requiring Shadowheart to be convinced to spare her.
If Shadowheart is not brought along, then she immediately confronts the party for denying her the destiny she'd always dreamed of. She leaves the party. Additionally, the Nightsong can only be killed by Shadowheart - otherwise, attempting to do so does nothing but annoy Dame Aylin.
If the Nightsong is freed, she thanks the party. If Shadowheart spared her, then she throws the Spear of Night into the abyss of the Shadowfell. However, Dame Aylin grants her a new weapon as thanks - the Moonlight Glaive. Then, Aylin flies off to face Thorm. After leaving the Shadowfell, Lady Shar subjects Shadowheart to unimaginable torment before sending her back to the mortal realm, and Shadowheart loses her favour.
If Shadowheart kills the Nightsong, she becomes the Dark Justiciar and gains the Shar's Spear of Evening. However, the party loses a valuable ally in the Nightsong.
Confronting Ketheric
The final meeting with Ketheric can go very differently depending on if the party aided him or sabotaged him. However, it always results in the subsequent quest, Defeat Ketheric Thorm. If the party released the Nightsong, they're prompted to go to Moonrise Towers and assault it, resulting in a showdown with Thorm at the top of the tower. If the party allowed Balthazar to kidnap the Nightsong, they report back to Z'rell and are either charged with a new mission, Capture Isobel the Selûnite Cleric, or sent to the top of the tower to receive judgment from the Absolute.


