Ad placeholder
Save Mayrina: Difference between revisions
(→Facing Ethel: added coords) |
|||
| Line 85: | Line 85: | ||
Once Auntie Ethel is reduced to below 20% of her life and has a turn to act, she offers the party a chance to make a series of persuasion or intimidation checks. Depending on the results of the skill checks and subsequent decisions, the party can either free Mayrina; let Ethel keep Mayrina in exchange for the {{SmRarityItem|Auntie Ethel's Hair}}, a special single use item that can increase any [[Ability Score]] of any character by 1 permanently; or free Mayrina and keep the Hag's Hair both. If a deal is struck with Ethel, she disappears, but all her thralls remain hostile. If Ethel is killed, the thralls are freed, although all but the Mask of Regret are too far gone to truly be saved. Note that the cutscene to trigger Ethel's deal can be missed if she is killed too quickly - when intending to obtain her hair it's necessary to skip turns to give her a chance to speak once she is brought to low HP. Additionally, Ethel will initiate conversation with whoever is closest to her so it may be beneficial to shuffle party members around in preparation for any ability checks the party may want to make in the conversation. | Once Auntie Ethel is reduced to below 20% of her life and has a turn to act, she offers the party a chance to make a series of persuasion or intimidation checks. Depending on the results of the skill checks and subsequent decisions, the party can either free Mayrina; let Ethel keep Mayrina in exchange for the {{SmRarityItem|Auntie Ethel's Hair}}, a special single use item that can increase any [[Ability Score]] of any character by 1 permanently; or free Mayrina and keep the Hag's Hair both. If a deal is struck with Ethel, she disappears, but all her thralls remain hostile. If Ethel is killed, the thralls are freed, although all but the Mask of Regret are too far gone to truly be saved. Note that the cutscene to trigger Ethel's deal can be missed if she is killed too quickly - when intending to obtain her hair it's necessary to skip turns to give her a chance to speak once she is brought to low HP. Additionally, Ethel will initiate conversation with whoever is closest to her so it may be beneficial to shuffle party members around in preparation for any ability checks the party may want to make in the conversation. | ||
The Acrid Workshop area here has some treasure, some writings that provide more context and background information, and a Mushroom Circle that teleports the party back outside, to the back of the house. Behind the teahouse is the body of Mayrina's husband, {{CharLink|Connor Vinderblad}} {{Coords|-69|224}}. The wand {{SmRarityItem|Bitter Divorce}}, found in the Workshop, can be used to raise Connor as a zombie. The party can then choose whether to give the wand to Mayrina to take her ex-husband with her, or keep it for themselves. If kept, it changes to {{SmRarityItem|Second Marriage}} and can be used at any time to summon Connor as a zombie follower. | The Acrid Workshop area here has some treasure, some writings that provide more context and background information, and a Mushroom Circle that teleports the party back outside, to the back of the house. Behind the teahouse is the body of Mayrina's husband, {{CharLink|Connor Vinderblad}} at {{Coords|-69|224}}. The wand {{SmRarityItem|Bitter Divorce}}, found in the Workshop, can be used to raise Connor as a zombie. The party can then choose whether to give the wand to Mayrina to take her ex-husband with her, or keep it for themselves. If kept, it changes to {{SmRarityItem|Second Marriage}} and can be used at any time to summon Connor as a zombie follower. | ||
== Quest rewards == | == Quest rewards == | ||
Revision as of 19:36, 29 August 2024
Save Mayrina is a Quest in Act One of Baldur's Gate 3. The quest is acquired by running into an argument between Auntie Ethel and Mayrina's brothers - Johl and Demir, south of the Blighted Village.
Objectives
Objectives and journal entries may vary pending story decisions and outcomes.
Walkthrough
Meeting Ethel
Auntie Ethel can be found in two places. She can first be encountered in The Hollow within the Druid Grove at X: 192 Y: 544. She runs a small shop selling lotions and potions. Ethel notices that the party looks ill, and they can reveal that they were infected with a mindflayer tadpole. Ethel states that she can help, but that she doesn't have the supplies at the Grove. She invites the party to visit her at her house in the wetlands.
Ethel can also be encountered southwest of the Blighted Village at X: 45 Y: 313, just after entering the Sunlit Wetlands . Here, Ethel is confronted by two men, Johl and Demir, who accuse her of kidnapping their sister, Mayrina. In the initial confrontation with Auntie Ethel and the brothers, the party can choose to side with Auntie Ethel, with the brothers, or refuse to get involved. If the party sides with the brothers, Ethel reveals her true nature and departs for her teahouse. If the party sides with Ethel, the brothers attack immediately. If the party does not fight with the brothers, they walk off to their deaths in the wetlands, where the party can later discover their bodies. If the party refuses to get involved in the situation, Auntie Ethel tells them they were supposed to rush to her defense, kills the two men with a poison spell, then departs for her teahouse. In both the cases where the party sides with the brothers or refuses to get involved, Auntie Ethel warns them that if they come to her teahouse, they'd best come bearing an apology. If the party sided with Auntie Ethel, she asks the party to come to her teahouse so she can thank them properly.
Ethel's teahouse
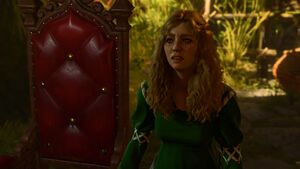
Auntie Ethel's house is at X: -47 Y: 266 in the southwestern area of the Sunlit Wetlands/Putrid Bog. She greets the party and, regardless of if she was told or not, states she's well aware of the tadpole in their heads. In the teahouse, Auntie Ethel is berating a young woman, revealed to be Mayrina, for not finishing her pie. If Ethel isn't yet hostile, the party has the opportunity to Get Help from Auntie Ethel. Regardless of the conversation choices, Ethel eventually transports Mayrina further into her lair, done with her complaints about being full.
Most actions after this point lead to Ethel revealing her true form and retreating into her hearth. The party can pursue her through the Overgrown Tunnel. If Ethel has not become hostile, moving close to the hearth starts an Investigation check and succeeding reveals there is an illusory passage. Walk through it to proceed through the tunnels. After the tunnel is entered, if the illusion hasn't been broken already, the Sunlit Wetlands reveals its true form as the Putrid Bog. While pursuing Ethel through her lair, the party will be unable to return to camp, However, the party will be able to short rest.
If Ethel has not already become hostile, she appears within the first part of the tunnel to warn the party off. Regardless of the response, she disappears. The first hurdle is a door of vines. Attempting to use it causes it to telepathically share its story with the party to warn them from proceeding further. An Arcana check reveals that the door is an illusion and can simply be walked through. Otherwise, persuading the door (DC 10) causes it to share its secrets.
Through the door are four servants of Ethel's - Mask of Regret (Overgrown Tunnel), Mask of Servitude (Overgrown Tunnel), Mask of Terror (Overgrown Tunnel), and Mask of Vengeance (Overgrown Tunnel). They become hostile upon detecting the party. They cannot be spared except by avoiding them entirely before defeating Ethel - non-lethal attacks result in them never becoming conscious again.
On the table next to the door are ![]() Whispering Masks. If a party member wears it, they must make a
Whispering Masks. If a party member wears it, they must make a ![]() Wisdom saving throw every turn. If failed, they become a Hag's Pawn (controlled by Auntie Ethel) and will attack the party; if all party members equip the mask, the Game Over screen appears. The negative effects of this mask can be prevented by casting before equipping the mask. Only one party member needs to successfully wear a mask to let the full party pass through the door. The masks also prevent the hag servants from becoming hostile, but only towards the masked character(s). Any others need to sneak past to avoid confrontation.
Wisdom saving throw every turn. If failed, they become a Hag's Pawn (controlled by Auntie Ethel) and will attack the party; if all party members equip the mask, the Game Over screen appears. The negative effects of this mask can be prevented by casting before equipping the mask. Only one party member needs to successfully wear a mask to let the full party pass through the door. The masks also prevent the hag servants from becoming hostile, but only towards the masked character(s). Any others need to sneak past to avoid confrontation.
Past the Hag Servants is a waterfall and a winding path filled with noxious fumes and explosive traps. The vents can be covered with any item - including the Whispering Masks on the table. Another option is to simply jump over the fumes - and are immensely helpful. Once the party has gotten to the bottom of the path, they'll see Mayrina in a cage, and Ethel. However, it is possible to avoid the fight by staying on the path to the right. The party can enter the last chamber and even leave via the Mushroom Circle (and take a Long Rest outside). After that the party can return, and run up to the cage to trigger the fight with Ethel.
Facing Ethel
After making their way through the Overgrown Tunnel, the party will find Mayrina in a burning wooden cage suspended over a pit. If the cage is destroyed by fire or other means, Mayrina will die. The spell or a thrown container of water can put out the fire, as well as a simple cantrip or ![]() Arrow of Ice. Ethel will start at full health, regardless of how much damage was done to her upstairs, and will summon illusory copies of herself that have all of her regular spells and abilities, but are destroyed after taking any damage. The real Ethel keeps her place in the initiative order, and may be distinguishable by that. Ethel will also summon the masked victims from the Overgrown Tunnel and set them on the party if they are still alive and conscious.
Arrow of Ice. Ethel will start at full health, regardless of how much damage was done to her upstairs, and will summon illusory copies of herself that have all of her regular spells and abilities, but are destroyed after taking any damage. The real Ethel keeps her place in the initiative order, and may be distinguishable by that. Ethel will also summon the masked victims from the Overgrown Tunnel and set them on the party if they are still alive and conscious.
Ethel may teleport Mayrina out of the cage, then assume her form, attempting to trick the party into killing Mayrina, as there are now two seemingly identical copies. The Mayrina in the previous position of Ethel CAN be the real Mayrina, so use caution. Generally, the most obvious way to determine if the target is Mayrina is by seeing if the character model is visibly pregnant - the real Mayrina has a belly; Ethel's clones do not. Examining the stat blocks also reveals the truth, as Mayrina remains Level 1, while the clone is Level 5 like Ethel herself. The spell also doesn't affect Initiative, so Ethel and Mayrina will retain their positions in the turn queue.
Once Auntie Ethel is reduced to below 20% of her life and has a turn to act, she offers the party a chance to make a series of persuasion or intimidation checks. Depending on the results of the skill checks and subsequent decisions, the party can either free Mayrina; let Ethel keep Mayrina in exchange for the ![]() Auntie Ethel's Hair, a special single use item that can increase any Ability Score of any character by 1 permanently; or free Mayrina and keep the Hag's Hair both. If a deal is struck with Ethel, she disappears, but all her thralls remain hostile. If Ethel is killed, the thralls are freed, although all but the Mask of Regret are too far gone to truly be saved. Note that the cutscene to trigger Ethel's deal can be missed if she is killed too quickly - when intending to obtain her hair it's necessary to skip turns to give her a chance to speak once she is brought to low HP. Additionally, Ethel will initiate conversation with whoever is closest to her so it may be beneficial to shuffle party members around in preparation for any ability checks the party may want to make in the conversation.
Auntie Ethel's Hair, a special single use item that can increase any Ability Score of any character by 1 permanently; or free Mayrina and keep the Hag's Hair both. If a deal is struck with Ethel, she disappears, but all her thralls remain hostile. If Ethel is killed, the thralls are freed, although all but the Mask of Regret are too far gone to truly be saved. Note that the cutscene to trigger Ethel's deal can be missed if she is killed too quickly - when intending to obtain her hair it's necessary to skip turns to give her a chance to speak once she is brought to low HP. Additionally, Ethel will initiate conversation with whoever is closest to her so it may be beneficial to shuffle party members around in preparation for any ability checks the party may want to make in the conversation.
The Acrid Workshop area here has some treasure, some writings that provide more context and background information, and a Mushroom Circle that teleports the party back outside, to the back of the house. Behind the teahouse is the body of Mayrina's husband, Connor Vinderblad at X: -69 Y: 224. The wand ![]() Bitter Divorce, found in the Workshop, can be used to raise Connor as a zombie. The party can then choose whether to give the wand to Mayrina to take her ex-husband with her, or keep it for themselves. If kept, it changes to
Bitter Divorce, found in the Workshop, can be used to raise Connor as a zombie. The party can then choose whether to give the wand to Mayrina to take her ex-husband with her, or keep it for themselves. If kept, it changes to ![]() Second Marriage and can be used at any time to summon Connor as a zombie follower.
Second Marriage and can be used at any time to summon Connor as a zombie follower.
Quest rewards
 Auntie Ethel's Hair if a deal is made with Ethel.
 Second Marriage if choose to keep the wand.
 Staff of Crones
Companion approval
On meeting Auntie Ethel and Mayrina's brothers for the first time, on the outskirts of the swamp:
- Refuse to aid Mayrina's brothers - "You're on your own. I have enough problems."
 -1
-1  +1
+1  +1
+1  +5
+5 - Agree to find Mayrina - "Let me - I'll bring Mayrina home."
 -1
-1  -1
-1  +1
+1  +1
+1  +1
+1 - [WIZARD, RANGER, or SORCERER] Warn the brothers about the hags, then agree to help find Mayrina - "Trust a more experienced soul. I'll find your sister."
 -1
-1  +1
+1  +1
+1  +5
+5 - Give Mayrina the Wand. (After using
 Bitter Divorce to raise Connor from the dead.)
  +1
+1  +1
+1
Notes
- Mayrina's brothers can technically be saved by knocking them out with non-lethal attacks. However, this is somewhat glitchy and part of the dialogue states that the brothers are dead.
- Using non-lethal damage on the Hag's Pawns will knock them out in order to save one of them. Returning to them after Ethel is dead and they've regained consciousness will reveal that Mask of Regret (Overgrown Tunnel) has regained her sanity even though the others have not. She can later show up as part of Help the Hag Survivors in Act 3.
- Using non-lethal damage on the Hag will not trigger her surrender cutscene, and will instead knock her out, ending the fight.
- Using the wand Bitter Divorce to resurrect Connor will cause the Oath of the Ancients Paladin to become an Oath Breaker.
- When the fight with the Hag begins, Auntie Ethel will summon the masked pawn enemies if they weren't previously killed or knocked unconscious.
- It is possible to spawn the Hag without entering combat immediately by or to the orb, using the orb to lower the cage and releasing Mayrina, and then talking to Mayrina to make the Hag spawn.


