Ad placeholder
Investigate Kagha: Difference between revisions
(Remove up-to-date template.) |
(→Notes) |
||
| (24 intermediate revisions by 8 users not shown) | |||
| Line 5: | Line 5: | ||
|description=Investigate Kagha is a sub-quest of the Druid Grove's main quest Save the Refugees. It can be initiated by reading The Rite of Thorns in the Emerald Grove or finding another clue hinting towards Kagha's scheme. | |description=Investigate Kagha is a sub-quest of the Druid Grove's main quest Save the Refugees. It can be initiated by reading The Rite of Thorns in the Emerald Grove or finding another clue hinting towards Kagha's scheme. | ||
}} | }} | ||
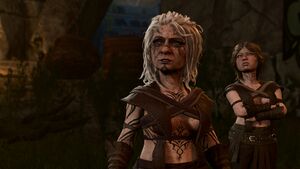
[[File:Investigate Kagha Quest.jpg|thumb|A conspiracy is afoot in the Grove.]] | [[File:Investigate Kagha Quest.jpg|thumb|{{noexcerpt|A conspiracy is afoot in the Grove.}}]] | ||
'''Investigate Kagha''' is a [[quest|sub-quest]] of the [[Emerald Grove|Emerald Grove's]] main quest | '''Investigate Kagha''' is a [[quest|sub-quest]] of the [[Emerald Grove|Emerald Grove's]] main quest, {{Quest|Save the Refugees}}. It can be initiated by reading [[The Rite of Thorns]], found in the Emerald Grove, or finding another clue hinting towards {{CharLink|Kagha|Kagha's}} scheme. | ||
== Objectives == | |||
''Objectives and journal entries may vary pending story decisions and outcomes.'' | |||
==Objectives== | |||
''Objectives and journal entries may vary pending | |||
{{Quest objective|Search the Emerald Grove.| | {{Quest objective|Search the Emerald Grove.| | ||
* The Rite of Thorns is dangerous magic. Why is Kagha so determined to do this? We should investigate. | * The Rite of Thorns is dangerous magic. Why is Kagha so determined to do this? We should investigate. | ||
| Line 41: | Line 39: | ||
== Walkthrough == | == Walkthrough == | ||
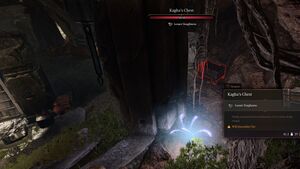
[[File:Kagha Chest.jpg|thumb|Location of Kagha's chest. ]] | [[File:Kagha Chest.jpg|thumb|Location of Kagha's chest. ]] | ||
This | This multi-staged quest can have several different outcomes, though it roughly follows the same path. Upon receiving this quest, the party is implored to search the Emerald Grove to investigate Kagha. | ||
=== The first clue === | === The first clue === | ||
The vital clue required to progress this quest lies in the | The vital clue required to progress this quest lies in the {{SmRarityItem|Half-Torn Note}} in Kagha's chest at {{Coords|-484|-7}} in the [[Druid Grove#Emerald Grove|Emerald Grove]]. Interacting with the chest is considered a crime, meaning the party must engage with it while out of sight, if they wish to avoid attitude lost. This can be done by hiding and entering turn-based mode, as the chest is tucked away in a dark corner behind a bookcase. The chest is locked and requires a {{Ability check|Sleight of Hand|10}} to open. If the party cannot pass the [[Skill Check]], they can alternatively destroy the chest. | ||
=== Following the clue === | === Following the clue === | ||
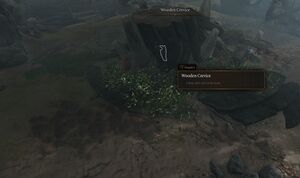
[[File:Wooden Crevice.jpg|thumb|The wooden crevice containing the Letter to Kagha. ]] | [[File:Wooden Crevice.jpg|thumb|The wooden crevice containing the Letter to Kagha.]] | ||
Reading the note reveals that Kagha | Reading the note reveals that Kagha is corresponding with someone named {{CharLink|Olodan}}, who asked her to meet alone at the "swamp". The "swamp" is located in the [[Putrid Bog]] at {{Coords|97|224}}, in the southern part of the Overworld map. | ||
The swamp is guarded by 2 [[Wood Woad| | The swamp is guarded by 2 [[Wood Woad|wood woads]] and 4 [[Ancient Mud Mephit|ancient mud mephits]] who are hostile on sight. The wood woads can regenerate 10 [[Hit Points]] per turn, but are vulnerable to fire damage which breaks their regeneration. The ancient mud mephits are fragile, but will endlessly summon [[Young Mud Mephit|young mud mephits]] until they are killed. Furthermore, mud and tangling weeds predominate the battlefield, creating [[Difficult Terrain]]. On higher difficulty levels, achieving [[Initiative#Surprised|Surprise]] with invisibility or other means can buy enough time to whittle away the enemies before they respond. | ||
Once the enemies | Once the enemies are defeated, a successful {{Ability check|Perception|5}} at the large tree in the center of the island at {{Coords|86|220}} reveals a wooden crevice that hides a {{SmRarityItem|Letter to Kagha}}. The letter reveals that Kagha has been scheming with the Shadow Druids to take over the Emerald Grove and install herself as First Druid. | ||
=== Confronting the Shadow Druids === | === Confronting the Shadow Druids === | ||
With Kagha's secret | With Kagha's secret revealed, all that is required to finish this quest is to confront her. Confronting Kagha forces the Shadow Druids {{CharLink|Olodan}}, {{CharLink|Wren}}, and {{CharLink|Pinta}} — who were {{SAI|Wild Shape|Wild Shaped}} as rats — to reveal themselves. | ||
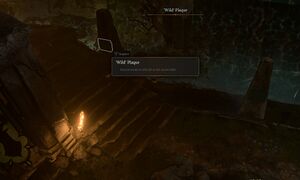
[[File:Plaques.jpg|alt=Picture showcasing two plaques hanging on pillars.|thumb|The Wild and Wellspring plaques in the Emerald Grove.]] | [[File:Plaques.jpg|alt=Picture showcasing two plaques hanging on pillars.|thumb|The Wild and Wellspring plaques in the Emerald Grove.]] | ||
The party can try to persuade Kagha to repent and break her alliance with the Shadow Druids before the fight, turning her into an ally in the upcoming confrontation. To do so, they must pass a {{Ability Check|Persuasion|15}} (10 for a druid) to stop her from immediately entering combat. | |||
The party must also succeed on another {{Ability Check|Persuasion, Religion|10}} to convince her to join their side. If the party read the plaques in the Emerald Grove and learned of the Grove's history, they have an additional option to succeed on a {{Ability Check|History|5}} (Automatic success for a druid) to convince Kagha. Some races (e.g. wood elves) or classes (e.g. rangers) have an auto-success option. | |||
Alternatively, if the party use {{SAI|Detect Thoughts}} at the start instead of the {{Skill|Persuasion}} check, they only need to pass a single {{Ability Check|Intelligence|13}} to convince Kagha. | |||
After the | After that, a fight breaks out against the three Shadow Druids, with Kagha either joining them or the party depending on the dialogue choices. The other occupants of the Emerald Grove, such as Rath and Silver, also join the party against the Shadow Druids. | ||
After the battle, if Kagha survives and the player character is a [[Druid|druid]], she bestows upon them the title of Faithwarden and awards them with the staff, {{SmRarityItem|Pale Oak}}. If Kagha perished during the battle, the party can loot the magical amulet {{SmRarityItem|Broodmother's Revenge}} off her body. | |||
== Quest rewards == | |||
*{{MdRarityItem|Broodmother's Revenge}}, looted from Kagha's body | *{{MdRarityItem|Broodmother's Revenge}}, looted from Kagha's body | ||
*{{MdRarityItem|Hellrider's Pride}}, awarded by Zevlor | |||
*{{MdRarityItem|Pale Oak}}, awarded to the player if they are a druid | *{{MdRarityItem|Pale Oak}}, awarded to the player if they are a druid | ||
* 15 Exp for confronting Kagha | * 15 Exp for confronting Kagha | ||
== Related quests == | == Related quests == | ||
* | * {{Quest|Kill Kagha}} | ||
== Companion approval == | == Companion approval == | ||
| Line 86: | Line 81: | ||
== Notes == | == Notes == | ||
{{notebegin}} | {{notebegin}} | ||
* The letter to Kagha in the [[Putrid Bog]] is there even if the | * The letter to Kagha in the [[Putrid Bog]] is there even if the party haven't started this quest. With meta knowledge or thorough exploration of the Sunlit Wetlands, it is possible to "skip ahead" by finding it unprompted. The quest begins and the party can confront Kagha. | ||
* The fight with the | * The fight with the Shadow Druids can be avoided but may cause a bug. If shooting one of the rats just before the final conversation with Kagha, the rats will run away. The conversation with the Shadow Druids still occur, but when it is finished and if Kagha is convinced to aid the party in the fight, there will be no fight. However, the quest remains in the journal and the party cannot obtain Pale Oak if they were otherwise eligible for it. | ||
* If the goblin leaders are killed or knocked out before the party confront Kagha, the quest resolves automatically without the party needing to return to Halsin as the quest log describes. Zevlor will not reward the party. The Shadow Druids will leave and no further interaction besides Kagha is available. | |||
{{noteend}} | {{noteend}} | ||
Latest revision as of 09:37, 6 December 2024
Investigate Kagha is a sub-quest of the Emerald Grove's main quest, . It can be initiated by reading The Rite of Thorns, found in the Emerald Grove, or finding another clue hinting towards Kagha's scheme.
Objectives[edit | edit source]
Objectives and journal entries may vary pending story decisions and outcomes.
Walkthrough[edit | edit source]
This multi-staged quest can have several different outcomes, though it roughly follows the same path. Upon receiving this quest, the party is implored to search the Emerald Grove to investigate Kagha.
The first clue[edit | edit source]
The vital clue required to progress this quest lies in the ![]() Half-Torn Note in Kagha's chest at X: -484 Y: -7 in the Emerald Grove. Interacting with the chest is considered a crime, meaning the party must engage with it while out of sight, if they wish to avoid attitude lost. This can be done by hiding and entering turn-based mode, as the chest is tucked away in a dark corner behind a bookcase. The chest is locked and requires a
Half-Torn Note in Kagha's chest at X: -484 Y: -7 in the Emerald Grove. Interacting with the chest is considered a crime, meaning the party must engage with it while out of sight, if they wish to avoid attitude lost. This can be done by hiding and entering turn-based mode, as the chest is tucked away in a dark corner behind a bookcase. The chest is locked and requires a ![]() DC 10 Sleight of Hand check to open. If the party cannot pass the Skill Check, they can alternatively destroy the chest.
DC 10 Sleight of Hand check to open. If the party cannot pass the Skill Check, they can alternatively destroy the chest.
Following the clue[edit | edit source]
Reading the note reveals that Kagha is corresponding with someone named Olodan, who asked her to meet alone at the "swamp". The "swamp" is located in the Putrid Bog at X: 97 Y: 224, in the southern part of the Overworld map.
The swamp is guarded by 2 wood woads and 4 ancient mud mephits who are hostile on sight. The wood woads can regenerate 10 Hit Points per turn, but are vulnerable to fire damage which breaks their regeneration. The ancient mud mephits are fragile, but will endlessly summon young mud mephits until they are killed. Furthermore, mud and tangling weeds predominate the battlefield, creating Difficult Terrain. On higher difficulty levels, achieving Surprise with invisibility or other means can buy enough time to whittle away the enemies before they respond.
Once the enemies are defeated, a successful ![]() DC 5 Perception check at the large tree in the center of the island at X: 86 Y: 220 reveals a wooden crevice that hides a
DC 5 Perception check at the large tree in the center of the island at X: 86 Y: 220 reveals a wooden crevice that hides a ![]() Letter to Kagha. The letter reveals that Kagha has been scheming with the Shadow Druids to take over the Emerald Grove and install herself as First Druid.
Letter to Kagha. The letter reveals that Kagha has been scheming with the Shadow Druids to take over the Emerald Grove and install herself as First Druid.
Confronting the Shadow Druids[edit | edit source]
With Kagha's secret revealed, all that is required to finish this quest is to confront her. Confronting Kagha forces the Shadow Druids Olodan, Wren, and Pinta — who were as rats — to reveal themselves.
The party can try to persuade Kagha to repent and break her alliance with the Shadow Druids before the fight, turning her into an ally in the upcoming confrontation. To do so, they must pass a ![]() DC 15 Persuasion check (10 for a druid) to stop her from immediately entering combat.
DC 15 Persuasion check (10 for a druid) to stop her from immediately entering combat.
The party must also succeed on another ![]() DC 10 Persuasion, or Religion check to convince her to join their side. If the party read the plaques in the Emerald Grove and learned of the Grove's history, they have an additional option to succeed on a
DC 10 Persuasion, or Religion check to convince her to join their side. If the party read the plaques in the Emerald Grove and learned of the Grove's history, they have an additional option to succeed on a ![]() DC 5 History check (Automatic success for a druid) to convince Kagha. Some races (e.g. wood elves) or classes (e.g. rangers) have an auto-success option.
DC 5 History check (Automatic success for a druid) to convince Kagha. Some races (e.g. wood elves) or classes (e.g. rangers) have an auto-success option.
Alternatively, if the party use at the start instead of the check, they only need to pass a single ![]() DC 13 Intelligence check to convince Kagha.
DC 13 Intelligence check to convince Kagha.
After that, a fight breaks out against the three Shadow Druids, with Kagha either joining them or the party depending on the dialogue choices. The other occupants of the Emerald Grove, such as Rath and Silver, also join the party against the Shadow Druids.
After the battle, if Kagha survives and the player character is a druid, she bestows upon them the title of Faithwarden and awards them with the staff, ![]() Pale Oak. If Kagha perished during the battle, the party can loot the magical amulet
Pale Oak. If Kagha perished during the battle, the party can loot the magical amulet ![]() Broodmother's Revenge off her body.
Broodmother's Revenge off her body.
Quest rewards[edit | edit source]
 Broodmother's Revenge, looted from Kagha's body
 Hellrider's Pride, awarded by Zevlor
 Pale Oak, awarded to the player if they are a druid
- 15 Exp for confronting Kagha
Related quests[edit | edit source]
Companion approval[edit | edit source]
- If Kagha is convinced to stand down through reference to the frescoes and nature's teachings
 -1
-1  +1
+1  +1
+1  +5
+5 - If Kagha is confronted and attacked
 +1
+1  +1
+1  +1
+1
Notes[edit | edit source]
- The letter to Kagha in the Putrid Bog is there even if the party haven't started this quest. With meta knowledge or thorough exploration of the Sunlit Wetlands, it is possible to "skip ahead" by finding it unprompted. The quest begins and the party can confront Kagha.
- The fight with the Shadow Druids can be avoided but may cause a bug. If shooting one of the rats just before the final conversation with Kagha, the rats will run away. The conversation with the Shadow Druids still occur, but when it is finished and if Kagha is convinced to aid the party in the fight, there will be no fight. However, the quest remains in the journal and the party cannot obtain Pale Oak if they were otherwise eligible for it.
- If the goblin leaders are killed or knocked out before the party confront Kagha, the quest resolves automatically without the party needing to return to Halsin as the quest log describes. Zevlor will not reward the party. The Shadow Druids will leave and no further interaction besides Kagha is available.


