Ad placeholder
Escape the Nautiloid: Difference between revisions
No edit summary |
|||
| (116 intermediate revisions by 33 users not shown) | |||
| Line 1: | Line 1: | ||
{{PageSeo | |||
| description = Escape the Nautiloid is the first major quest of Baldur's Gate 3. It takes place immediately after the opening cinematic. | |||
| image = Prologue.webp | |||
}} | |||
[[File:Prologue.webp|right|400px|thumb|The Nautiloid in Avernus]] | |||
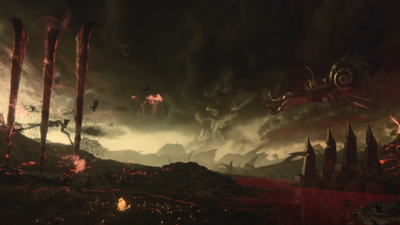
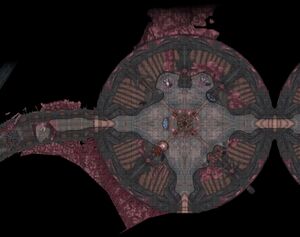
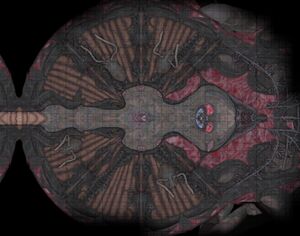
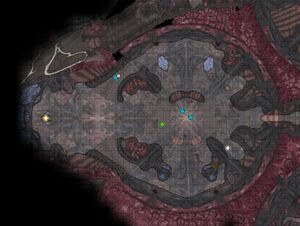
The first major [[Quest]] of ''Baldur's Gate 3'', '''Escape the Nautiloid''', takes place immediately after the opening cinematic. The player character, now infected with a [[Mind Flayer|mind flayer]] tadpole, is aboard the [[Nautiloid]] ship when it is attacked by [[Githyanki|githyanki]] warriors. While trying to escape, the Mind Flayer controlling the ship warps the Nautiloid through different planes of existence before ending in [[Avernus]], the first of the [[Nine Hells]]. The objective of the Prologue is to find a way out of the Nautiloid, ideally by not dropping down into Hell. | |||
== Objectives == | |||
{{Quest objective|Find a way off the nautiloid.| | |||
* We've been abducted by mind flayers and infected with some kind of parasite. We need to find a way off this ship.}} | |||
{{Quest objective|Reach the Helm.| | |||
* We met one of the mind flayer's minions - an intellect devourer. It wants us to go to the helm of the ship. | |||
* We met a githyanki named [[Lae'zel]]. She told us we can escape if we reach the ship's helm. | |||
}} | |||
{{Quest objective|Connect the nerves of the transponder.| | |||
* The mind flayer told us we need to connect the nerves of the transponder to escape the Hells. | |||
}} | |||
{{Quest objective| Quest Completed!| | |||
* We escaped the Hells on the nautiloid. | |||
}} | |||
== Walkthrough == | == Walkthrough == | ||
=== Nursery Room === | |||
[[File:Prologue-01.jpg|thumb|right|Nursery Room]] | |||
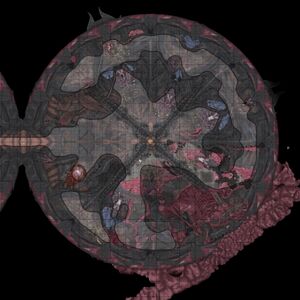
The game begins in the [[Nautiloid#Nursery|Nursery]], where the player character breaks free from a [[Mind Flayer Pod]]. Empty mind flayer pods are scattered throughout the room, indicating that there might be other survivors. | |||
A mind flayer "nursery" i.e. a pool filled with larvae can be found in the centre of the room. Passing a {{Ability check|Investigation|10}} reveals that the casing is fragile. If touching the pool, it explodes and causes damage. Health can be restored at the [[Restoration]] device on the western side of the room at {{Coords|33|-428}}. | |||
South of the nursery, the body of a mind flayer can be looted for a random [[Valuables#Gemstones|gem]] at {{Coords|43|-429}}. | |||
Farther south of the mind flayer, a raised path leads to a cartilaginous chest containing random loot at {{Coords|-43|-440}}. | |||
Toward the eastern side of the room, another raised path leads to an elevated area, which curves along the northwest side of the room. An {{SmRarityItem|Onyx}} and {{SmRarityItem|Rune Slate}} can be found on a table at {{Coords|50|-408}}. Interacting with the slate confers visions of the Nautiloid travelling through the Planes. | |||
Past this table, another cartilaginous chest with loot can be found at {{Coords|36|-409}}. | |||
To advance to the next room, enter through the door next to the restoration device on the western side of the room at {{Coords|24|-423}}. | |||
=== Surgery Room === | |||
[[File:Prologue-02.jpg|thumb|right|Surgery Room]] | |||
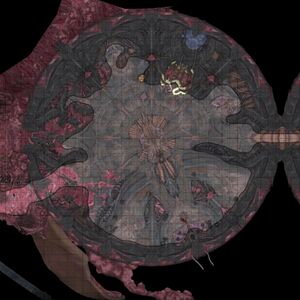
Immediately upon entering the [[Nautiloid#Surgery_room|surgery room]], a table can be found containing an {{SmRarityItem|Illithid Record}} and [[Goblin|goblin]] corpse. Interacting with the record imparts images of goblin history and culture. The corpse can be looted for a small amount of [[Gold]]. | |||
North-west of the table, three additional rune slates can be found, which provide more images of the Nautiloid and an anomalous feeling. | |||
On the far north side of the room, an {{SmRarityItem|Eldritch Tablet}} reveals images of [[Humanoid]] history. | |||
In the middle of the room, a small elevator leads to an upper level. Interacting with the Neural Apparatus raises the platform. On the upper level, a [[High Elf|high elf]] named {{CharLink|Myrnath}} can be found with a removed scalp, their exposed brain telepathically pleading for help. | |||
[[ | === The Intellect Devourer === | ||
When interacting with Myrnath, if succeeding a {{Ability check|Arcana|10}}, it is revealed that the exposed brain is an [[Intellect Devourer|intellect devourer]]. It is possible to free, abandon, or destroy the brain. If the player character frees the creature, it can be asked about its name, which is {{CharLink|Us}}. The creature tasks the player character to reach the Helm and take control of the Nautiloid. It is also possible to obtain Us as an [[Attached Follower|attached follower]]. | |||
Before freeing Us, if passing a {{Ability check|Investigation|10}}, a cerebral extraction can be done by passing a {{Ability check|Medicine|10}} with {{Advantage}}. Otherwise, a {{Ability check|Strength, Dexterity|10}} must be passed. | |||
After freeing Us, the player character can mutilate the creature by passing a {{Ability_check|Dexterity|15}}. On failure, the creature flees and all intellect devourers become hostile. On success, Us is [[lobotomised]], which permanently reduces [[Intelligence]] and [[Resources#Movement_speed|movement]]. [[The Dark Urge]] has a different unique option. | |||
=== Meeting Lae'zel === | |||
[[File:Prologue-04.jpg|thumb|right|Imp battle room]] | |||
{{ | To advance to the next room, the party must follow the south-western path that leads outside. The party encounter the [[Githyanki|githyanki]] soldier {{CharLink|Lae'zel}}, who joins the party to escape. If Lae'zel was chosen as an [[Origin|origin]] character, {{CharLink|Losiir}} joins the party instead. | ||
As Lae'zel jumps from a ledge to attack, a telepathic connection between her and the player character causes her to realise that the player character is not under mind control. She insists on taking control of the Nautiloid at the [[Nautiloid#Helm|Helm]]. To reach the Helm, the party need to defeat three [[Lesser Imp|lesser imps]]. | |||
There is a health restoring device at the northern side of the room at {{Coords|-39|-376}}. To reach the next room, the party must continue north by climbing the arterial meshes. | |||
=== Meeting Shadowheart === | |||
[[File:Prologue-07.jpg|thumb|right|Shadowheart Room]] | |||
[[File:Prologue-08.jpg|thumb|right|Ceremorphosis Chamber]] | |||
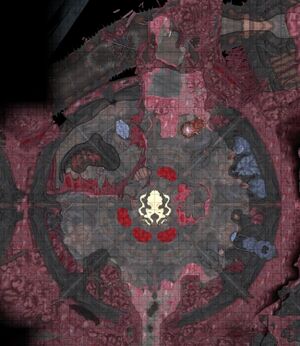
In the centre of {{CharLink|Shadowheart|Shadowheart's}} room are two unconscious victims of the mind flayers, a [[Sacrificed Cultist (High Elf)|high elf]] and [[Sacrificed Cultist (Human)|human]]. The control panel adjacent to them has three sigils and buttons. The left panel is "Unleash", the middle is "Aggression", and the right is "Annihilate". "Unleash" causes psionic energy to radiate from the cultists while "Aggression" causes them to become hostile, initiating combat. "Annihilate" kills both instantly. Selecting "Aggression" and defeating both enemies rewards 10 XP. | |||
[[ | Toward the north-east side of the room, Shadowheart is trapped in a Mind Flayer pod. Interacting with Shadowheart initiates the quest {{Quest|Rescue the Illithids' Captive|Rescue the Illithid's Captive}}. If Shadowheart was selected as an origin character, this pod is empty. [[Warlock|Warlocks]], [[Wizard|wizards]], and [[Sorcerer|sorcerers]] can free her by passing {{Ability check|Arcana|7}} on her pod. [[Barbarian|Barbarians]] can free her through passing a [[Strength]] check. Otherwise, the party must head east to the [[Nautiloid#Ceremorphosis_chambers|Ceremorphosis Chamber]] to obtain an {{SmRarityItem|Eldritch Rune}} from a corpse on the far east side at {{Coords|62|-355}}. After opening the pod, the party can recruit Shadowheart or ignore her. | ||
If the player character fails the {{Ability_check|Wisdom|2}} check to open the pod using the Eldritch Rune, they can try again using Lae'zel (or Losiir, if he is present). If both characters fail the check, Shadowheart remains trapped in the pod but can be found after the Prologue. | |||
The locked {{SmRarityItem|Elaborate Reliquary}} at {{Coords|7|-361}} can be opened with a {{SmRarityItem|Gold Key}} carried by the dead thrall at {{Coords|31|-355}}. Alternatively, the reliquary can be opened with a [[Sleight of Hand]] check. If the party is attempting to retrieve the {{SmRarityItem|Everburn Blade}} in the next room without defeating its wielder (described in the next section), it is mandatory that at least one party member prepares {{SAI|Command}}. Enemy reinforcements can be blocked from entering the room by placing several cartilaginous chests in the hallway right before entering the Helm near {{Coords|-12|-389}}. | |||
=== The Helm === | |||
[[File:Prologue-09.jpg|thumb|right|The Helm]] | |||
When the party enter the Helm, their goal is to reach the transponder on the far west side of the room. A pair of lesser imps and a [[Lesser Hellsboar|lesser hellsboar]] block the path. A mind flayer fights against {{CharLink|Zhalk|Commander Zhalk}}, a powerful [[Cambion|cambion]] wielding an {{SmRarityItem|Everburn Blade}}. The mind flayer is not initially hostile to the party because it believes them to be thralls; Zhalk, although technically hostile, generally ignores the party to focus on the mind flayer. | |||
The mind flayer corpses scattered throughout the room yield random gems. Other corpses can be looted for equipment and armour. Dotted around the room, including in the upper area, are 3 {{SmRarityItem|Caustic Bulb|Caustic Bulbs}}, 4 {{SmRarityItem|Void Bulb|Void Bulbs}}, and several {{SmRarityItem|Mucoid Shell|Mucoid Shells}} and a {{SmRarityItem|Sodalite Shell}}. | |||
Although the cutscenes and dialogue encourage the party to ignore Zhalk to reach the transponder, it is possible to kill him. Defeating Zhalk gives the party a large XP boost and the Everburn Blade. It is also possible to obtain the Everburn Blade by casting {{SAI|Command}} with Shadowheart or another character, forcing Zhalk to drop the weapon. Zhalk will continue to fight using unarmed attacks. | |||
After several combat rounds, two cambion soldiers enter the room through the east entrance. They are almost as powerful as Zhalk. To delay their arrival, it is possible to stack three cartilaginous chests in the narrow passageway just before the door to the Helm. This delays the cambions from joining the fight as they are forced to attack the chests to clear a path. If the chests are stacked at the start of this corridor (as far away from the actual door as possible), it is even possible that the cambions do not act at all if they have no direct path and no line of sight to anyone, effectively removing them from the fight. However, the cambions may fly to circumvent the chests if possible. | |||
If Zhalk and all minor minions in the room are defeated before the two cambions arrive, the mind flayer attacks the party. If the cambions arrive while the mind flayer is hostile to the party, the mind flayer redirects its attention to the cambions. If the cambions defeat the mind flayer, the party gain XP as if they killed the mind flayer themselves. If the mind flayer does not become hostile toward the party but is defeated, no XP is awarded. This is true if the cambions or any other enemy lands the killing blow; however if the party kill the mind flayer using explosives, for example, the party is rewarded with the experience as if it was hostile. | |||
When a party member (excluding Us) nears the console, two lesser imps and a lesser hellsboar appear and attack. If a character interacts with the console, the Prologue ends, regardless of any remaining enemies. | |||
=== The Crash === | |||
Shortly before a party member connects the transponder, a [[Red Dragon|red dragon]] latches onto the ship and breathes fire onto the console. The character at the console connects the transponder and causes the ship to warp out of Avernus into the Prime Material Plane. As the ship appears in the sky, {{CharLink|Nadira}} watches from behind a telescope with concern. {{CharLink|Dror Ragzlin}} and {{CharLink|Minthara}} also observe the ship's descent. They order a group of [[Goblin|goblins]] to march out. | |||
As the | As the Nautiloid falls, the player character tries to hold onto the ship, but is struck by debris and sent flying. As the player character is about to plummet to the ground, they are suddenly held mid-air by a magical force. They land softly but lose consciousness until the next day. | ||
== Achievements == | |||
{{Achievement|Descent From Avernus}} | |||
{{Achievement|Devil's in the Details}} | |||
<br> | |||
{{NavQuests|state_zero=expanded}} | |||
[[Category:Quests]] | |||
Latest revision as of 22:07, 12 December 2024
The first major Quest of Baldur's Gate 3, Escape the Nautiloid, takes place immediately after the opening cinematic. The player character, now infected with a mind flayer tadpole, is aboard the Nautiloid ship when it is attacked by githyanki warriors. While trying to escape, the Mind Flayer controlling the ship warps the Nautiloid through different planes of existence before ending in Avernus, the first of the Nine Hells. The objective of the Prologue is to find a way out of the Nautiloid, ideally by not dropping down into Hell.
Objectives[edit | edit source]
Walkthrough[edit | edit source]
Nursery Room[edit | edit source]
The game begins in the Nursery, where the player character breaks free from a Mind Flayer Pod. Empty mind flayer pods are scattered throughout the room, indicating that there might be other survivors.
A mind flayer "nursery" i.e. a pool filled with larvae can be found in the centre of the room. Passing a ![]() DC 10 Investigation check reveals that the casing is fragile. If touching the pool, it explodes and causes damage. Health can be restored at the Restoration device on the western side of the room at X: 33 Y: -428.
DC 10 Investigation check reveals that the casing is fragile. If touching the pool, it explodes and causes damage. Health can be restored at the Restoration device on the western side of the room at X: 33 Y: -428.
South of the nursery, the body of a mind flayer can be looted for a random gem at X: 43 Y: -429.
Farther south of the mind flayer, a raised path leads to a cartilaginous chest containing random loot at X: -43 Y: -440.
Toward the eastern side of the room, another raised path leads to an elevated area, which curves along the northwest side of the room. An ![]() Onyx and
Onyx and ![]() Rune Slate can be found on a table at X: 50 Y: -408. Interacting with the slate confers visions of the Nautiloid travelling through the Planes.
Rune Slate can be found on a table at X: 50 Y: -408. Interacting with the slate confers visions of the Nautiloid travelling through the Planes.
Past this table, another cartilaginous chest with loot can be found at X: 36 Y: -409.
To advance to the next room, enter through the door next to the restoration device on the western side of the room at X: 24 Y: -423.
Surgery Room[edit | edit source]
Immediately upon entering the surgery room, a table can be found containing an ![]() Illithid Record and goblin corpse. Interacting with the record imparts images of goblin history and culture. The corpse can be looted for a small amount of Gold.
Illithid Record and goblin corpse. Interacting with the record imparts images of goblin history and culture. The corpse can be looted for a small amount of Gold.
North-west of the table, three additional rune slates can be found, which provide more images of the Nautiloid and an anomalous feeling.
On the far north side of the room, an ![]() Eldritch Tablet reveals images of Humanoid history.
Eldritch Tablet reveals images of Humanoid history.
In the middle of the room, a small elevator leads to an upper level. Interacting with the Neural Apparatus raises the platform. On the upper level, a high elf named Myrnath can be found with a removed scalp, their exposed brain telepathically pleading for help.
The Intellect Devourer[edit | edit source]
When interacting with Myrnath, if succeeding a ![]() DC 10 Arcana check, it is revealed that the exposed brain is an intellect devourer. It is possible to free, abandon, or destroy the brain. If the player character frees the creature, it can be asked about its name, which is Us. The creature tasks the player character to reach the Helm and take control of the Nautiloid. It is also possible to obtain Us as an attached follower.
DC 10 Arcana check, it is revealed that the exposed brain is an intellect devourer. It is possible to free, abandon, or destroy the brain. If the player character frees the creature, it can be asked about its name, which is Us. The creature tasks the player character to reach the Helm and take control of the Nautiloid. It is also possible to obtain Us as an attached follower.
Before freeing Us, if passing a ![]() DC 10 Investigation check, a cerebral extraction can be done by passing a
DC 10 Investigation check, a cerebral extraction can be done by passing a ![]() DC 10 Medicine check with
DC 10 Medicine check with ![]() Advantage. Otherwise, a
Advantage. Otherwise, a ![]() DC 10 Strength, or Dexterity check must be passed.
DC 10 Strength, or Dexterity check must be passed.
After freeing Us, the player character can mutilate the creature by passing a ![]() DC 15 Dexterity check. On failure, the creature flees and all intellect devourers become hostile. On success, Us is lobotomised, which permanently reduces Intelligence and movement. The Dark Urge has a different unique option.
DC 15 Dexterity check. On failure, the creature flees and all intellect devourers become hostile. On success, Us is lobotomised, which permanently reduces Intelligence and movement. The Dark Urge has a different unique option.
Meeting Lae'zel[edit | edit source]
To advance to the next room, the party must follow the south-western path that leads outside. The party encounter the githyanki soldier Lae'zel, who joins the party to escape. If Lae'zel was chosen as an origin character, Losiir joins the party instead.
As Lae'zel jumps from a ledge to attack, a telepathic connection between her and the player character causes her to realise that the player character is not under mind control. She insists on taking control of the Nautiloid at the Helm. To reach the Helm, the party need to defeat three lesser imps.
There is a health restoring device at the northern side of the room at X: -39 Y: -376. To reach the next room, the party must continue north by climbing the arterial meshes.
Meeting Shadowheart[edit | edit source]
In the centre of Shadowheart's room are two unconscious victims of the mind flayers, a high elf and human. The control panel adjacent to them has three sigils and buttons. The left panel is "Unleash", the middle is "Aggression", and the right is "Annihilate". "Unleash" causes psionic energy to radiate from the cultists while "Aggression" causes them to become hostile, initiating combat. "Annihilate" kills both instantly. Selecting "Aggression" and defeating both enemies rewards 10 XP.
Toward the north-east side of the room, Shadowheart is trapped in a Mind Flayer pod. Interacting with Shadowheart initiates the quest . If Shadowheart was selected as an origin character, this pod is empty. Warlocks, wizards, and sorcerers can free her by passing ![]() DC 7 Arcana check on her pod. Barbarians can free her through passing a Strength check. Otherwise, the party must head east to the Ceremorphosis Chamber to obtain an
DC 7 Arcana check on her pod. Barbarians can free her through passing a Strength check. Otherwise, the party must head east to the Ceremorphosis Chamber to obtain an ![]() Eldritch Rune from a corpse on the far east side at X: 62 Y: -355. After opening the pod, the party can recruit Shadowheart or ignore her.
Eldritch Rune from a corpse on the far east side at X: 62 Y: -355. After opening the pod, the party can recruit Shadowheart or ignore her.
If the player character fails the ![]() DC 2 Wisdom check check to open the pod using the Eldritch Rune, they can try again using Lae'zel (or Losiir, if he is present). If both characters fail the check, Shadowheart remains trapped in the pod but can be found after the Prologue.
DC 2 Wisdom check check to open the pod using the Eldritch Rune, they can try again using Lae'zel (or Losiir, if he is present). If both characters fail the check, Shadowheart remains trapped in the pod but can be found after the Prologue.
The locked ![]() Elaborate Reliquary at X: 7 Y: -361 can be opened with a
Elaborate Reliquary at X: 7 Y: -361 can be opened with a ![]() Gold Key carried by the dead thrall at X: 31 Y: -355. Alternatively, the reliquary can be opened with a Sleight of Hand check. If the party is attempting to retrieve the
Gold Key carried by the dead thrall at X: 31 Y: -355. Alternatively, the reliquary can be opened with a Sleight of Hand check. If the party is attempting to retrieve the ![]() Everburn Blade in the next room without defeating its wielder (described in the next section), it is mandatory that at least one party member prepares . Enemy reinforcements can be blocked from entering the room by placing several cartilaginous chests in the hallway right before entering the Helm near X: -12 Y: -389.
Everburn Blade in the next room without defeating its wielder (described in the next section), it is mandatory that at least one party member prepares . Enemy reinforcements can be blocked from entering the room by placing several cartilaginous chests in the hallway right before entering the Helm near X: -12 Y: -389.
The Helm[edit | edit source]
When the party enter the Helm, their goal is to reach the transponder on the far west side of the room. A pair of lesser imps and a lesser hellsboar block the path. A mind flayer fights against Commander Zhalk, a powerful cambion wielding an ![]() Everburn Blade. The mind flayer is not initially hostile to the party because it believes them to be thralls; Zhalk, although technically hostile, generally ignores the party to focus on the mind flayer.
Everburn Blade. The mind flayer is not initially hostile to the party because it believes them to be thralls; Zhalk, although technically hostile, generally ignores the party to focus on the mind flayer.
The mind flayer corpses scattered throughout the room yield random gems. Other corpses can be looted for equipment and armour. Dotted around the room, including in the upper area, are 3 ![]() Caustic Bulbs, 4
Caustic Bulbs, 4 ![]() Void Bulbs, and several
Void Bulbs, and several ![]() Mucoid Shells and a
Mucoid Shells and a ![]() Sodalite Shell.
Sodalite Shell.
Although the cutscenes and dialogue encourage the party to ignore Zhalk to reach the transponder, it is possible to kill him. Defeating Zhalk gives the party a large XP boost and the Everburn Blade. It is also possible to obtain the Everburn Blade by casting with Shadowheart or another character, forcing Zhalk to drop the weapon. Zhalk will continue to fight using unarmed attacks.
After several combat rounds, two cambion soldiers enter the room through the east entrance. They are almost as powerful as Zhalk. To delay their arrival, it is possible to stack three cartilaginous chests in the narrow passageway just before the door to the Helm. This delays the cambions from joining the fight as they are forced to attack the chests to clear a path. If the chests are stacked at the start of this corridor (as far away from the actual door as possible), it is even possible that the cambions do not act at all if they have no direct path and no line of sight to anyone, effectively removing them from the fight. However, the cambions may fly to circumvent the chests if possible.
If Zhalk and all minor minions in the room are defeated before the two cambions arrive, the mind flayer attacks the party. If the cambions arrive while the mind flayer is hostile to the party, the mind flayer redirects its attention to the cambions. If the cambions defeat the mind flayer, the party gain XP as if they killed the mind flayer themselves. If the mind flayer does not become hostile toward the party but is defeated, no XP is awarded. This is true if the cambions or any other enemy lands the killing blow; however if the party kill the mind flayer using explosives, for example, the party is rewarded with the experience as if it was hostile.
When a party member (excluding Us) nears the console, two lesser imps and a lesser hellsboar appear and attack. If a character interacts with the console, the Prologue ends, regardless of any remaining enemies.
The Crash[edit | edit source]
Shortly before a party member connects the transponder, a red dragon latches onto the ship and breathes fire onto the console. The character at the console connects the transponder and causes the ship to warp out of Avernus into the Prime Material Plane. As the ship appears in the sky, Nadira watches from behind a telescope with concern. Dror Ragzlin and Minthara also observe the ship's descent. They order a group of goblins to march out.
As the Nautiloid falls, the player character tries to hold onto the ship, but is struck by debris and sent flying. As the player character is about to plummet to the ground, they are suddenly held mid-air by a magical force. They land softly but lose consciousness until the next day.
Achievements[edit | edit source]
