Rescue the Druid Halsin
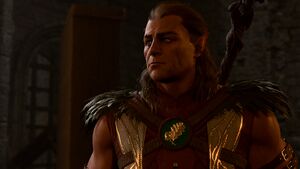
Rescue the Druid Halsin is a sub-quest of Act One's main quest, Find a Cure. It can be initiated after entering the Druid Grove by speaking with various Non-player characters about Halsin's disappearance.
Spoiler warning: The following content contains unhidden spoilers. Read at your own risk. |
Objectives[edit | edit source]
- Halsin was last seen leaving the grove with a group of adventurers.
- Halsin was actively researching the parasite - he might be one of the few people who understand our condition.
- We learned that a powerful druid named Halsin hasn't returned from an expedition into goblin territory. He might be able to help us.
- The druid Halsin was researching the parasite. He might be one of the few people who understands our condition - we need to find him.
- Halsin's research suggests that the parasite is connected to a Goblin Camp located in an old temple of Selûne.
- The adventurers were with Halsin when he disappeared. They might know what happened to him.
- We learned that Halsin transformed into a bear during the chaos of the failed expedition. He might still be in that shape.
- We learned that the goblins imprisoned the survivors deep within their camp. Halsin could be held captive there - if he survived.
- We discovered that the druid Halsin was here in the Goblin Camp and he claimed to be able to remove their parasites. If he's still alive, he might be able to help us.
- Aradin told us the druid Halsin was either killed or captured by the goblins. The only way to find out for sure is to infiltrate their camp.
- We found a group of goblins massacred by some kind of animal. Could this have been the work of the missing druid Halsin?
- We found the missing druid Halsin. He can't heal us, but if we help him defeat the goblin leaders, he may help us find answers at Moonrise Towers.
- We killed Dror Ragzlin, the goblin king.
- The drow commander Minthara is dead.
- We killed Priestess Gut, the goblin priestess.
- We defeated all three goblin leaders. We should report to Halsin.
- The goblins left to attack the grove. We should report to Halsin.
- We found the missing druid Halsin. He can't heal us, but if we help defend the grove from the goblins, he may help us find answers at Moonrise Towers.
- Halsin has left to fend off the goblins attacking the grove. If the defences hold, we can find him there afterwards.
- With the goblin leaders dead, Halsin and the grove can rest easy. We should meet him there to discuss what comes next.
- With the raiders dead, Halsin and the grove can rest easy. We should meet him there to discuss what comes next.
- Halsin has returned to the grove. He should be able to help us with our parasite now. We should speak to him.
- Halsin thanked us and assured us that Rath would reward us for rescuing him.
- We found the missing druid Halsin. He can't heal us, but we might find answers at Moonrise Towers. He'll meet us at camp to discuss our next move.
- With the goblin leaders dead, Halsin and the grove can rest easy. He'll meet us at camp to discuss our next move.
- Halsin was defeated before he could help us with the parasite. Maybe his research can be of use.
- Grateful for our help, the tieflings are celebrating our victory. Time to have some fun.
- We met the druid Halsin. He cannot cure us, but will join us as we embark for Moonrise Towers. There, we may discover more about our infection.
- With the grove's fate decided, Halsin has joined us as we embark for Moonrise Towers. There, we may discover more about our infection.
- We found a diary written by the druid Halsin. In it, he talks about the parasites originating in Moonrise Towers.
- Halsin believed that the parasites are coming from Moonrise Towers.
- The tieflings and the druids were defeated. It's unlikely Halsin will help us now.
- We left the area without seeing if the druid Halsin could help us.
Walkthrough[edit | edit source]
Information on Halsin can be found by speaking to Nettie during Get Help from Healer Nettie or by speaking to Rath. Both Rath and Nettie are in the Inner Sanctum accessed by the stone door north of the Sacred Pool. Mentioning to Rath that Kagha seems dangerous makes him lament that a snake has replaced their leader. Pressing for more information results in Rath revealing that Halsin disappeared at the goblin camp. Nettie discusses more about Halsin if the party is honest with her about their affliction and symptoms, stating that Halsin could better treat them if he was around.
Halsin can ultimately be found in the Worg Pens area (X: 393, Y: -60) of the Shattered Sanctum, in the interior area of the Goblin Camp. There, the player finds him wildshaped as a bear, being harassed by his Goblin captors, whom are unaware of the animal's true identity. The details on how to approach the Goblin Camp and freeing Halsin are elaborated on below.
This quest can also be completed successfully by completing the quest Raid the Grove - by revealing the location of the Druid Grove to Minthara, but betraying her during the siege. This effectively lures a good portion of the Goblin forces to the grove, and Halsin frees himself and returns there once the siege defense is successful.
Entering the Goblin Camp[edit | edit source]
There are various check-point encounters on the path to the proper Goblin Camp. There are multiple methods the player can use to approach these, including but not limited to:
- A full-frontal assault.
- Note, this approach may lead to turning the entire camp hostile if an alarm drum is successfully sounded.
- A mixture of diplomacy checks, such Persuasion and Deception.
- Alternatively, a player can brute force through all diplomacy checks by utilizing the dialogue Tadpole Power.
- Drow, or characters disguised as one via the Disguise Self spell, also have special dialogue options that helps you bypass diplomacy checks.
- Avoiding the check-points through stealth or finding an alternative path (i.e. approaching the camp from the North-West).
- Note, approaching from the North-Western path requires the player to figure out methods to deal with some sleeping guards (who can be woken if jumping character land near them). A Silence spell can effectively cover this.
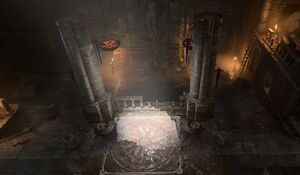
Once the player successfully bypasses the check-points and enters the camp proper, they are free to partake in the camp activities, converse with the partying Goblins, and take on various side quests (more information on the Goblin Camp page). Specifically for this quest, we must continue and venture into the interior of the temple.
The Shattered Sanctum[edit | edit source]
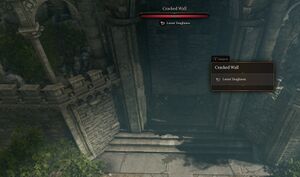
There are two entrances into the Shattered Sanctum - the main door, or through the cracked wall on the 2nd level of the camp (X:-106, Y:481).
The main entrance:
- The entrance is guarded by Warrior Trinzas, who can be persuaded through diplomacy, Tadpole Powers, or Drow special dialogue like the previous check-points.
- Violence is always a viable alternative, however, there is a risk the fighting draws the attention of other goblins in the area, leading to the alarms being sounded and the goblins turning hostile.
The cracked wall:
- The wall is an object with 22 Hit Points, Sturdy, and immunity to all damage types except piercing (resistant), and force (vulnerable).
- This makes force-damage items/spells/abilities that can clear the 10 damage threshold - like Smokepowder Bombs or Eldritch Blast - ideal for breaking this wall.
- As there are sleeping guards situation close to the wall, using the Silence spell on the explosion or the guards to cover the noise is recommended, if you wish to avoid a confrontation.
There is technically a 3rd entrance to the temple from the Selûnite Outpost in the Underdark, but that door is inaccessible externally, and requires the player to have opened it from inside of the Shattered Sanctum first.
Freeing Halsin[edit | edit source]
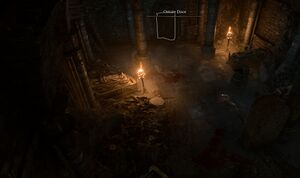
Once inside, the player must approach the ornate door at the Eastern Side of Shattered Sanctum (X:342, Y:32) to enter the Worg Pens, where Halsin is held. As long as the alarm was not raised, no one will stop you, assuming you are either a True Soul or a welcomed visitor.
Alternatively, the player can also get taken to the Worg Pens by getting themselves captured - either by offending the goblins (i.e. getting caught pick-pocketing), or through the potential events of the Ask the Goblin Priestess for Help quest (drinking Gut's potion of sleep while not being resistant to it). In this case, the player is taken to the prison at the Worg Pens, and has the option to break out and find Halsin that way.
Regardless, once in the Worg Pen, approaching the cages triggers a cutscene where the Goblins harass Halsin, who is disguised in his bear wildshape. Using the Speak with Animals spell allows the player to understand Halsin in his animal form. The player has various dialogue options to react to the scenario at hand. Regardless of what happens, in order to free Halsin, the goblins guarding the area must be fought, which includes:
At the start of the fight, the Goblin youths that were harassing Halsin try to make a break and call for assistance. If they are successful, they draw in the guards outside the doors - Sharp-eye Neem, Sharp-eye Eef, and Sharp-eye Nass.
Once freed, Halsin explains that he came here with a group of adventurers to learn more about the mind flayer tadpoles, but that he was captured. He says that the leaders of the Goblins are planning to assault the grove and offers to join up with the player's party as a temporary companion to escape.
NOTE: Accepting his offer turns the entire camp hostile. If Halsin's offer is rejected, he remains in the worg pens until the leaders are taken care of.
Priestess Gut[edit | edit source]
Priestess Gut (X:297, Y:-18) is in front of the giant throne immediately north of the front entrance. She offers to brand the party with the Brand of the Absolute, which can be accepted or rejected. Regardless of whether the brand is taken or not, Gut recognizes the party as fellow True Souls. She attempts to probe into the party's minds with her illithid powers. Allow her to do this, and she notices something is amiss. Explain that it's the result of the tadpoles and ask if she can help, commencing Ask the Goblin Priestess for Help. Gut says that the party should join her in her private chambers.
Follow her to her chambers, where she says she has a cure for the tadpole. She says that a special cleansing potion must be taken first. However, an Arcana check reveals this is a sleeping potion. If she's called out on this, or if the party member in question is resistant to sleeping potions (ie an elf or half-elf), she becomes hostile and also triggers several nearby goblins to become hostile. However, if the potion is taken, she chains up the party member and says she intends for them to become her pet squid. It's possible to either break free with an Acrobatics or Strength check, but a special scene plays if nothing is done at all. Wait, and Korrilla appears from a portal to assassinate both Gut and her Ogre guard. Then she disappears after a brief conversation, warning the party to be more careful.
Minthara[edit | edit source]
The drow Minthara (X:333, Y:42) is in the northeastern corner of the Shattered Sanctum. There is a Scrying Eye that must be dealt with before defeating her, otherwise the camp is alerted. Minthara can easily be taken out after speaking with her, as she runs across the bridge to gather the troops. While she is running on the bridge, attack the bridge's posts and she falls into the chasm below. Otherwise, once the scrying eye is dealt with, only Minthara and her minions in the room become hostile, so the other two leaders can still be dealt with stealthily.
Dror Ragzlin[edit | edit source]
Dror Ragzlin is unique in that he is the only member of the trio that cannot be killed with stealth. If the party kills Ragzlin, no matter where they are, the entire camp becomes hostile. For this reason, it's best to wrap up all business in the goblin camp and acquire the waypoint in the Selune Outpost below the Shattered Sanctum before killing him.
Dror Ragzlin is in the throne room to the north, casting Speak with Dead on an illithid corpse (X:296, Y:40). A cutscene automatically plays as the party enters the room, with Ragzlin asking if they'd like to speak to a squid.
If Ragzlin is allowed to commune with the illithid on his own, its killer is revealed to be the party after the second question. This can be avoided by taking control of Ragzlin's questions with a wisdom check (DC 10) and asking questions other than who is the killer such as "Why was the Nautiloid in Faerûn?" Asking an obvious question like "Who is the Absolute?" causes Ragzlin to be suspicious of the party. Otherwise, if the party is caught out at being the illithid's killer, they can talk Ragzlin down through a Persuasion check or by using Detect Thoughts to reveal he likes being called the Absolute's Right Hand.
A very simple way to kill Ragzlin is to shove him before her returns to his throne after the illithid conversation. However, this makes the whole room become hostile and escaping is more difficult. There is a stealthier way to kill Ragzlin by separating out one party member while the others wait in the Worg pens. Sneak up to the wooden beams above the throne and hit him with something that kills him instantly, such as a Void Bulb. Then, quickly fast travel outside of the camp and switch to the party members that are still in the Worg pens.
Back in the Worg Pens[edit | edit source]
Return to the Worg Pens and report to Halsin on the leaders' defeat. He is grateful and willing to answer many questions about his knowledge of the tadpoles as well as the strange movements of Absolutists at Moonrise Towers. He tells the party to return to the Druid Grove and he will meet them there. Return to the Sacred Pool area, where Halsin confronts Kagha about her actions. He will either demote her status to an initiate or cast her out entirely, depending on how/if Investigate Kagha was completed.
Claiming the Rewards[edit | edit source]
Speak to Rath (X:-463, Y:-30) in the Inner Sanctum and he rewards the party handsomely for their service. Head north to the room where Nettie initially was, then head northwest to the Enclave Library. There is a giant stone wolf statue in the room. There are four plaques surrounding the wolf - interact with the easternmost one. Combine the rune with the empty socket (X:-463, Y:24). Then, interact with all four runes to unlock a hidden staircase. This is a special treasure room with many helpful items.
Go to camp and a celebration commences with the tieflings. Speak to the various tieflings and companions, then speak with Zevlor to end the night. The next day, Halsin explains that there are two paths to Moonrise Towers - overland through the Shadow-Cursed Lands and through the Underdark. Regardless of the choice, Halsin agrees to travel with the party to Moonrise Towers, gaining another crucial ally.
Quest Rewards[edit | edit source]
- Sorrow
- Robe of Summer
- 2 Scrolls of Animal Friendship and 1 Scroll of Hold Person
- 3 Potions of Animal Speaking, 2 Potions of Greater Healing, Wyvern Toxin, and Elixir of Poison Resistance
- Halsin joins camp, and can become a potential companion in Act Two.
Companion approval[edit | edit source]
Notes[edit | edit source]
- Once Dror Ragzlin is killed, the entire camp, inside and out, becomes hostile.
- Traveling to Mountain Pass and back causes Halsin to die, concluding this quest. This happens even if the party avoids any long rests during the transition, either forced or voluntary.


