Ad placeholder
Help the Spirit of the Amulet

Help the Spirit of the Amulet is a Quest acquired in Act One of Baldur's Gate 3. It can be started in Grymforge, by reading the Dark Justiciar's Journal or by picking up the Sentient Amulet. It cannot be completed until Act Three of the game.
Objectives[edit section | visual editor]
Objectives and journal entries may vary pending story decisions and outcomes.
Walkthrough[edit section | visual editor]
Act One[edit section | visual editor]
The Grymforge[edit section | visual editor]
Within Grymforge, the party can find a skeleton of a Dark Justiciar at X: -654 Y: 424, which contains a Dark Justiciar's Journal. The Journal's entry mentions a cursed amulet that provided great power but also caused the wearer to laugh uncontrollably. The Justiciar wrote that he threw the amulet into the lava. Reading the journal starts the quest to track the precious magical item down.
The Adamantine Forge[edit section | visual editor]
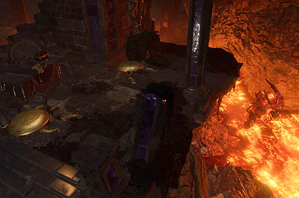
To find the amulet, the party must reach the Adamantine Forge itself. There, from the forge platform in its upper position, the party can jump to reach the side cave half-full of molten lava at X: -570 Y: 229. The lava here is unlike all other places; upon approach it is boiling and bursting, popping bubbles that leave Fire behind. Successful passive checks ( DC 10 Nature Check, DC 15 Arcana Check) allow the observer to understand the reason for this phenomena: a Lava Elemental is wandering around the cave.
The elemental itself is aggressive and attacks on sight. Defeating it makes the way to the amulet much easier because the boiling, bursting, and popping bubbles which leave Fire surfaces behind stop after its death. However, fighting it might be troublesome, because it restores full health each turn while it is standing in lava. Spells like Bone Chill may prove be useful.

In the middle of the cave is a rocky "island", where a locked Adamantine chest stands, inside which is the Sentient Amulet, along with small amount of gold, a random gem and two Uncommon elixirs (see below). The chest can be opened with the Adamantine Key found on a skeleton on the sides of the lava lake at X: -619 Y: 244 or lockpicked ( DC 20 Sleight of Hand Check).
If the Dark Justiciar's Journal was not found before, the quest is triggered by picking up the amulet.
Once the amulet is picked up, the interacting party member feels the urge to laugh, which can be resisted:
- Give in to the laughter.
- Drop the amulet.
- Fight the urge. (DC 10)
- Squash all cheer and summon memories of your ancestral enemy - the mind flayers. (DC 10 )
- Quiet your mind. Let everything be still. (DC 10 )
- Call on the power of your pact and resist the urge. (DC 10 )
- Kill the mirth. RESIST. (DC 10 )
- Grit your teeth. Summon your god's wrath. (DC 10 )
- Whisper a prayer. Quell the feeling with your devotion. (DC 10 )
- Summon your light and devotion as you push back. (DC 10 )
- Close your eyes and let your magic flow through you in all its wild and beautiful glory. (DC 10 )
- Reach for the Weave. Let it shield you from this impulse. (DC 10 )
If the player character manages to keep from laughing, the spirit of the amulet - the Monk's Manifestation - appears with a request. The Sharrans tortured him to death, and he laughed at their pathetic (but not quite futile) attempts to break his spirit. After passing over, a manic laugh became his curse. He wants to become free, and to that end wants his granddaughter Shirra Clarwen to take the curse over from him.
The spirit tells the party that Shirra lives in Wyrm's Crossing and serves at the Open Hand Temple as a cleric of Ilmater. The monk promises to bestow blessings upon the party if they agree to undertake this journey.
However, should the player character choose to succumb to the urge bestowed by the amulet, it does not bring any negative consequences or effects, and the quest can still be continued.
The dialogue with the spirit contains several Ability checks which may shed some light on the Monk's Manifestation story.
- DC 10 Investigation Check and subsequent DC 10 Religion Check will reveal that the monk worshipped Lathander - god of dawn and renewal.
- DC 10 Insight Check will tell that the spirit has no deliberate intent to harm its bearer.
If agreeing to help the spirit, the Monk's Manifestation says he will travel with the party and grant some help on their way. The Sentient Amulet can be worn by any party member, providing them with the ability to cast Shatter once per Short Rest, Ki Restoration (Lesser) and an ability Talk to the Sentient Amulet, which allows to reconsider the decision about helping the spirit at any time. Keeping the amulet in the inventory does not grant any of these.
The quest cannot be ultimately resolved until near the beginning of Act Three of the game.
Act Three[edit section | visual editor]
The Open Hand Temple[edit section | visual editor]
The Open Hand Temple where Shirra Clarwen worships is in Rivington at X: -19 Y: -5, north of the Circus of the Last Days.
Once inside the Open Hand Temple, the party can encounter its second-in-charge Sister Yannis at X: -44 Y: -6 having an argument with Investigator Valeria. They are discussing the recent murder of Father Lorgan, which Valeria is charged with investigating. After they finish their conversation, Valeria leaves, and the party can speak to Yannis about the murder. Through the dialogue, there is an option to ask the Ilmaterian where to find Shirra Clarwen; Yannis then explains that Shirra passed away last year and was buried in the temple crypt.
The Crypt[edit section | visual editor]

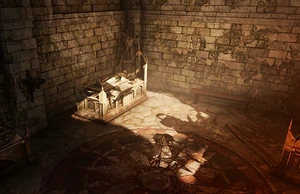
The crypt can be reached through the hatch in the kitchen at X: -62 Y: :3. The party must enter the prayer hall to the south, then take the door to the west to find the passed clerics' resting place; Shirra Clarwen is buried in the sarcophagus in the far-left corner of the room (the one bathed in sunlight). To 'find' her, the party must first read the plaque, and then open the lid of the sarcophagus.
After this, the conversation starts automatically. To trigger the cutscene, it is not necessary to have the Sentient Amulet itself present in the inventory, let alone wear it. The Monk's Manifestation possesses the withered husk of Shirra Clarwens's corpse. He laments the death of his granddaughter, as she would have been willing to bear the curse on the wishes of her god, Ilmater. As it is, the spirit now needs another volunteer to get rid of the curse.
At this point of the quest the party can decide whether to agree to bear the curse or reject the offer:
- If it will bring you peace, I will bear the madness.
- Gods, no. I don't want to inherit your curse.
Also, one of the side options here is to try and guess the truth about the spirit's affliction:
- Ponder what you know of the monk's affliction. What are the consequences of accepting it? (DC 15)
If successful, it is revealed that bearing the madness will grant the Tasha's Hideous Laughter spell, but doing so may cost Wisdom.
If refusing to bear the curse, or stopping partway through absorbing it, the Monk's Manifestation inside Shirra Clarwen's corpse becomes hostile. He raises the three other corpses in the crypt as Greater Zombies to attack the party:
Dealing with the curse[edit section | visual editor]
If choosing to bear the curse, there are three options to avoid negative consequences:
- Call on your wits and shield your mind's most vulnerable reaches. (DC 15)
- Steel yourself and guide the sensations elsewhere. (DC 15)
- Call on the parasite to absorb the strike. (DC 2)[verify]
Then, a second check must be passed as well:
- Muster your senses, clear your mind. You will take the madness, but it will not take of you. (DC 15)
- Hold firm. You will make this curse a gift. You will not surrender your wisdom. (DC 15)
- Rally the tadpole, let it take the brunt of the damage. (DC 2)
When choosing the illithid option for the first check, the parasite will need to rest and another option will need to be chosen in the second check.
Failing a check or choosing to succumb to the spell results in a permanent loss of one (1) Wisdom point. If the curse is removed, the party member who endured it (regardless of Wisdom loss) gains the ability to cast Tasha's Hideous Laughter once per Long Rest.
Rewards[edit section | visual editor]
The quest rewards experience several times while progressing the quest, for a total of 200 xp:
- Finding the lost amulet: 80 xp.
- Following the Instructions ( Guild Artisan background).
- If a party member agrees to bear the monk's curse, Tasha's Hideous Laughter is awarded as an action once per Long Rest.
- Agreeing to bear the curse removes all magical effects from the Sentient Amulet.
- Refusing to bear the curse yields a fight and an upgraded version of the Sentient Amulet, which does not require making Wisdom Saving Throws after using its powers.
Companion approval[edit section | visual editor]
- Agree to bear the monk's madness: +1 +1 -1 +1 -1 +1
- Withstand the monk's madness and earn Tasha's Hideous Laughter: +3 +3 +3 +3 +3 +3 +3 +3 +3 +3
- Refuse to inherit the curse: +1 +1 +1 +1
Quotes[edit section | visual editor]
| “ | I am sunlight on water, dew on grass |
„ |
| — Monk's Manifestation |
Notes[edit section | visual editor]
- If a party member keeps the Sentient Amulet in their inventory over the course of the game, the Monk's manifestation voices his opinion on different occasions when completing certain quests.
- Bug: The version of Tasha's Hideous Laughter rewarded by the quest resets not only on a long rest, but every time equipment is changed. It uses the cooldown setting that is supposed to be used for once per long rest items, but without an item that is on cooldown, the spell resets.


